Quite a few people have asked me how I cut and smooth gear and clock
wheel teeth. In this video I cover the how and why from start to finish.
Scroll saw blade used, blade tension, blade breakage, safety, how to cut
the pattern, sanding/filing and the particular scroll saw filing strips
I use, are all covered.
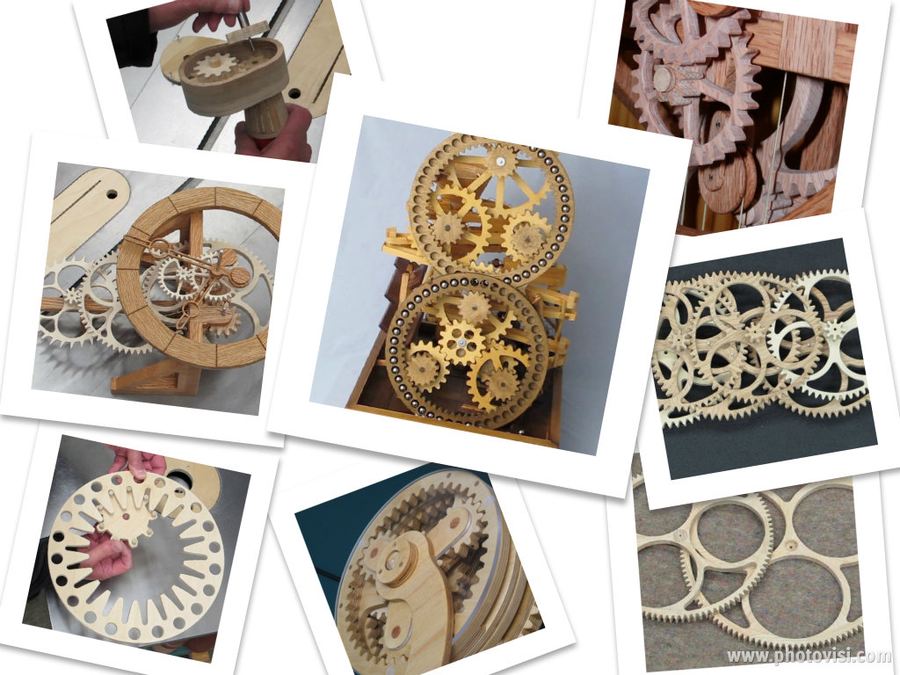
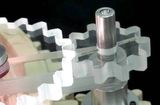
This is how I have cut and smoothed all my gears... planetary gear
drive, clock wheels, pin gear ring gear (in part), clock winder and the
marble machine.
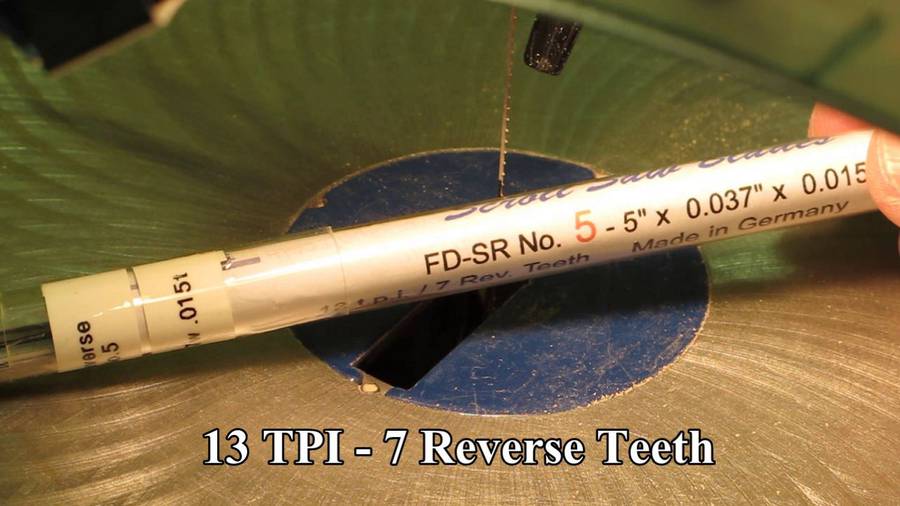
I use Flying Dutchman FD-SR No.5 - 5"long x 0.037"deep x 0.015" thick 13 TPI 7
Reverse Teeth scrollsaw blades, made in Germany
These blades are relatively thin and have performed well for me in
Baltic Birch plywood and hardwood 1/4" to 3/4" thickness. Correct blade
tension is obtained by plucking the blade like a guitar string and
listening for the correct sound. Practice (trial and error) will result
in the correct tension for each particular blade and for the material
you are cutting.
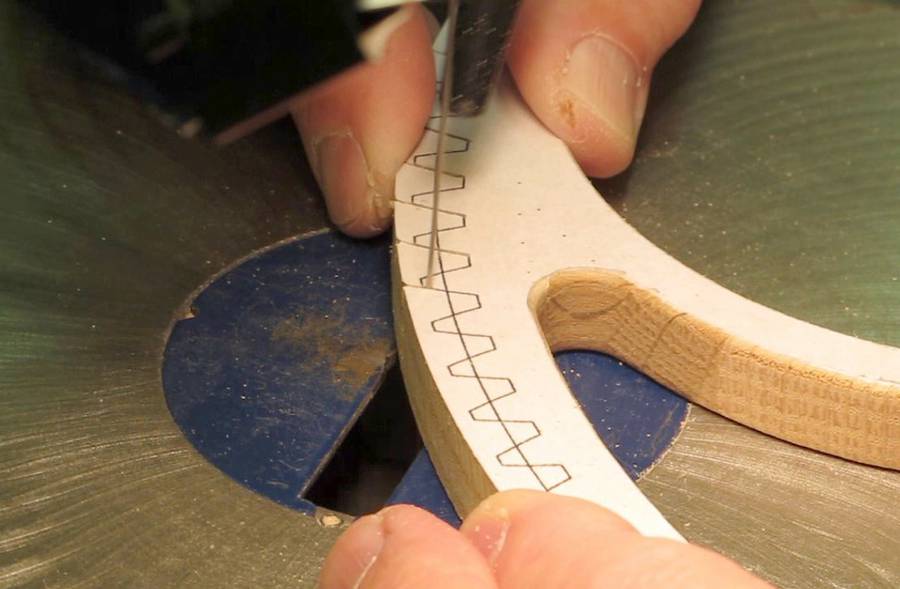
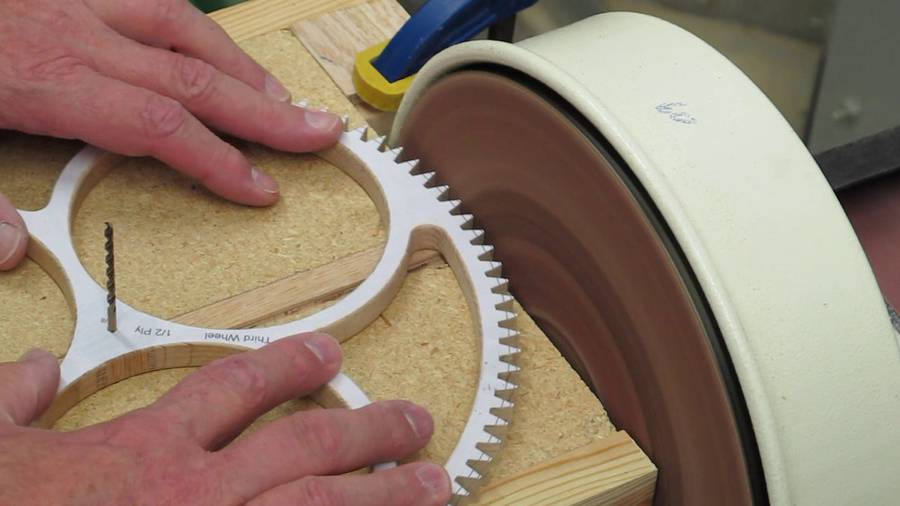
I usually make all of the cuts on one side of the teeth, all the way
around the gear. This makes them repetitive cuts and allows you to get
into somewhat of a rhythm. Take your time and let the blade teeth do the
cutting. Forcing the wood into the blade will distort the blade and
overheat it, leading to premature failure. When you notice the blade
changing color (turning blue) or when it isn't cutting as well as it was
a while ago, change the blade. It is always best to change a blade
before it breaks.
I cut right up to the pattern line with the saw blade. After
considerable practice you should be able to split the line with the saw
blade. Wood type, thickness, grain direction and other variables will
influence the direction of the cut. Always try to err on the waste
side of the pattern. You can always true it up later with the side of
the saw blade or with the files.
Always expect the blade to break. When a blade breaks it can grab onto
the wood slamming it up and down on the saw table, which may break the
workpiece. Always hold the workpiece firmly and maintain downward
pressure. Keep your fingers as far away from the blade as possible and
anticipate the blade may break at any time, even when not cutting.
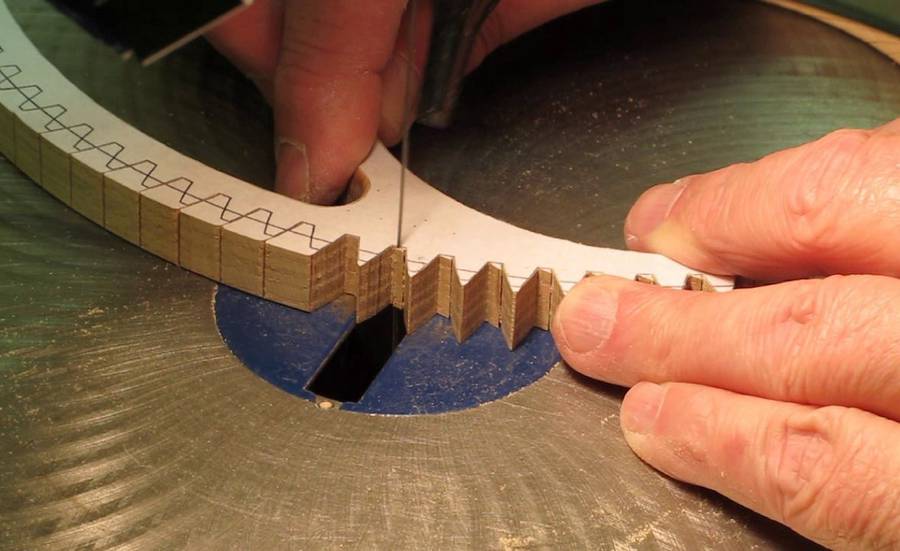
Next I make a cut on the opposite side of the teeth and cut out the root
of the tooth. Then I cut the base of the tooth and finally I use the
side of the saw blade like a file to remove any rough areas and to clean
up the base of the tooth.
I always leave the blank slightly larger in diameter than the finished
wheel or gear. This extra material gives you a place to start your cut
and zero-in on the tooth pattern line. It also helps prevent chips on
the corners of the teeth. After all teeth are cut, I sand to the pattern
outside diameter on my Circle Sanding Jig on the Disc Sander. Please see my
video on using this jig.
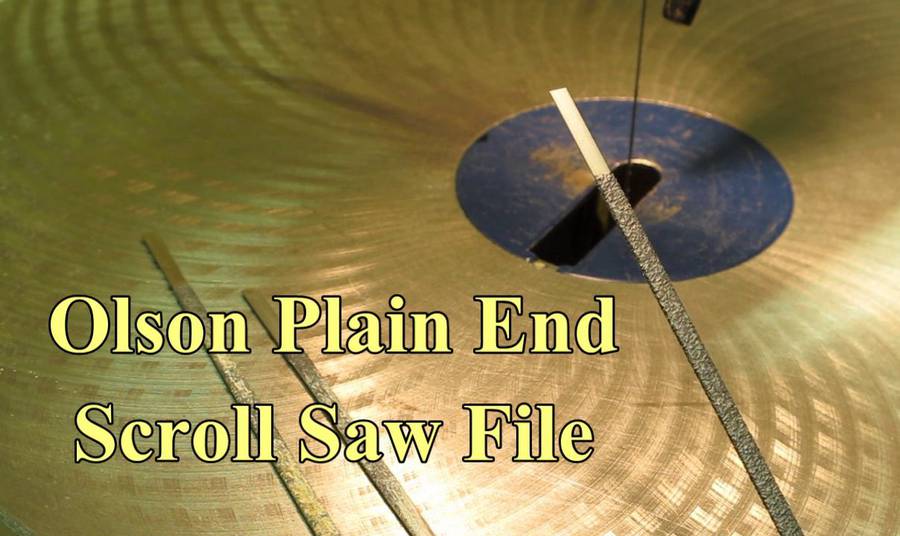
Olson Plain End Scroll Saw File No. 42100 only one grit available
The scroll saw blade produces an amazingly smooth surface, however
there may remain some unevenness or saw marks. The scroll saw files are
strips of metal with an abrasive epoxied to the surface. I use the files
to polish the tooth surface and remove any imperfections and saw marks.
By the time the tooth surface looks good, the remainder of the pattern
line should be gone. You can rotate the files and flip them end for end
to take advantage of all cutting surfaces. I tend to use them down to
the very end.
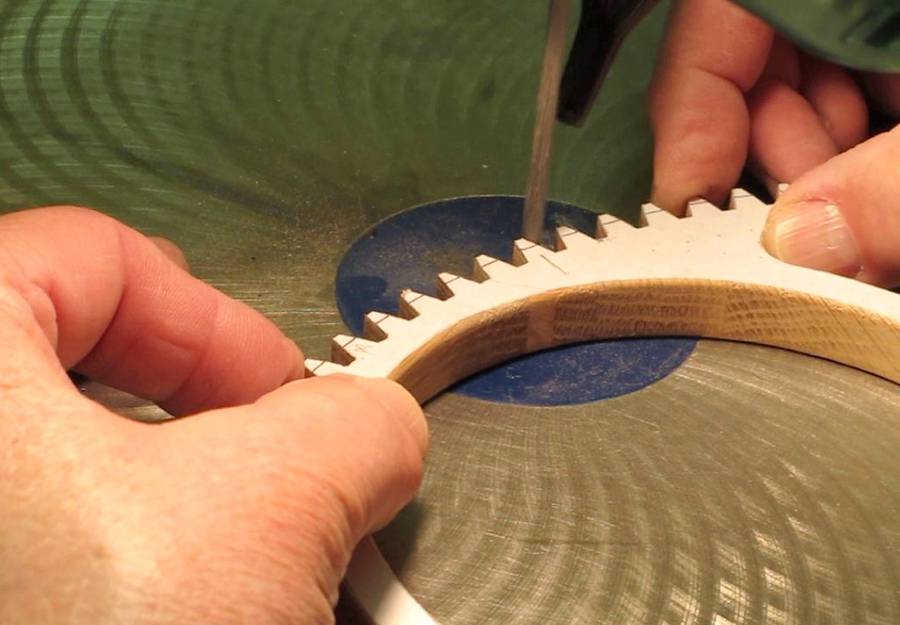
Excessive pressure on the surface of the file will cause wear and can
heat up the epoxy causing it to fail prematurely. Slow and easy, let the
abrasive do the work. Keep the file moving constantly back and forth and
avoid touching the base of the tooth with the edge of the file, as it
will leave grooves in the base. Polish both tooth faces first and then
clean up the base of the tooth form using the edge of the file.
Practice... practice... practice intertwined with patience... patience...
patience.
Matthias comments:
Now I know why Ron's gears always come out so nice -- very different
from my approach of cutting them as fast as possible.
I asked Ron how long it takes to cut one of those gears:
The particular wheels in this video are for the
Clayton Boyer "Solaris clock".
They are the largest I have made at 12" to 14" diameter with 100 to 120 teeth
each. I have considerable time invested just in the segmented blanks
before starting to cut out the teeth. You don't want to be tired or
distracted while cutting the teeth. If my back isn't bothering me too
much I would expect to cut the teeth out for one wheel in a day, spread
out over 2 or 3 episodes. Or, I may spread it out over two days. The
filing would probably take another day. I use a large magnifying glass
with a work light to have a good view of the saw blade and pattern. A
mechanical gear doesn't always need to be so smooth but a clock wheel
really needs to be a perfect as you can make it.
 Quite a few people have asked me how I cut and smooth gear and clock
wheel teeth. In this video I cover the how and why from start to finish.
Scroll saw blade used, blade tension, blade breakage, safety, how to cut
the pattern, sanding/filing and the particular scroll saw filing strips
I use, are all covered.
Quite a few people have asked me how I cut and smooth gear and clock
wheel teeth. In this video I cover the how and why from start to finish.
Scroll saw blade used, blade tension, blade breakage, safety, how to cut
the pattern, sanding/filing and the particular scroll saw filing strips
I use, are all covered.
 Dust extraction
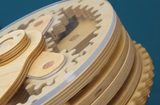 Planetary gear drive
 Bandsaw vs. CNC which is faster