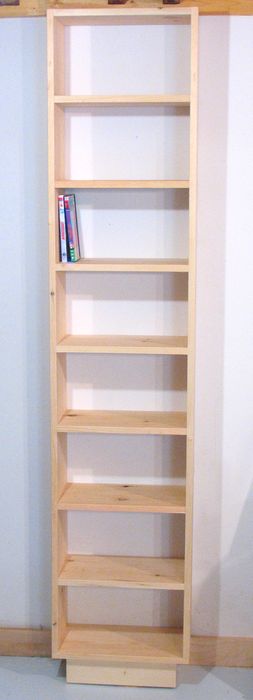
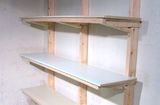
 A friend had the a spot in her basement where she wanted a bookcase for her DVD collection
of very specific dimensions.
A friend had the a spot in her basement where she wanted a bookcase for her DVD collection
of very specific dimensions.
A friend had the a spot in her basement where she wanted a bookcase for her DVD collection
of very specific dimensions.
I started with some boards of "pine shelving". This lumber is fairly clear of knots, and planed smoother than construction lumber would be.
I started by cutting the pieces for the bookcase's shelves to length. The next step was to plane one edge of every shelf on the jointer. That way, I was sure that one side of the shelves was a straight edge, and free of any nicks. I planed a stack of four of these at a time on the jointer.
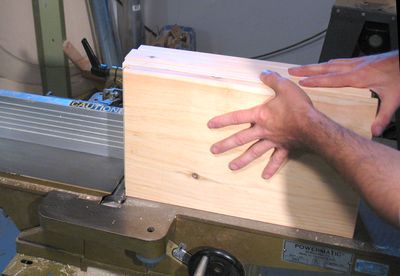
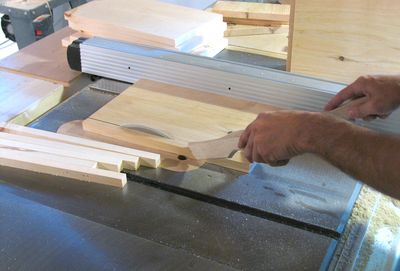
After planing one edge, I ripped the shelves to the desired width. Its easier and more precise doing this with the shorter pieces.
I also planed and ripped the edges of the upright sides, though these were much longer pieces, of course.
 After cutting all the shelves, I put them side by side, just to check that they were indeed
exactly the same width. The next step was to mark the position for the dowel holes with
a marking gauge. I put for dowels in each end of each shelf. I used two marking gauges for this, and
marked in from either side, so that I could just leave the marking gauges set and locked
in their settings for marking the uprights later.
After cutting all the shelves, I put them side by side, just to check that they were indeed
exactly the same width. The next step was to mark the position for the dowel holes with
a marking gauge. I put for dowels in each end of each shelf. I used two marking gauges for this, and
marked in from either side, so that I could just leave the marking gauges set and locked
in their settings for marking the uprights later.
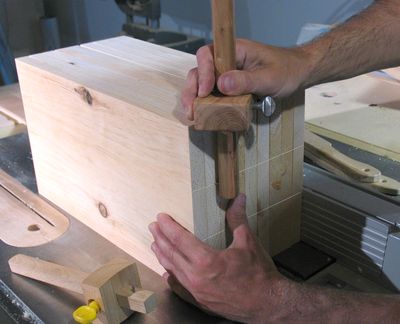
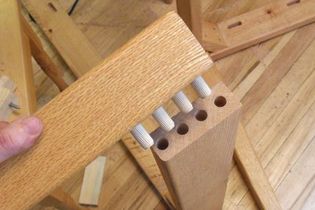
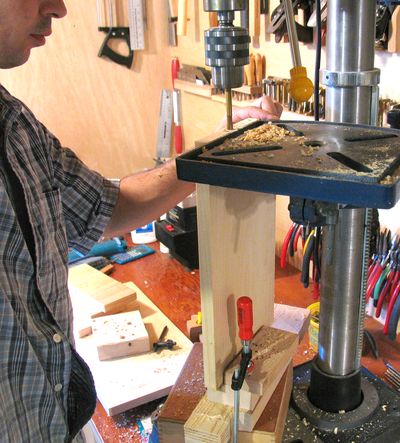 The next step was to drill the holes for the dowels in the ends of the boards.
I jigged up the drill press a little to make this easier.
The table served as a side-stop, while the stack of scrap lumber on the base
serves as the support for the piece. That way, I only needed to worry about aligning to the lines
I had scored in the ends of the boards, and could use the depth stop on the drill to get all
the holes the same depth. With 8 shelves, and 4 holes on each end, that's 64 holes to be drilled,
so it was worth jigging up. (this was before I built my
horizontal boring machine).
The next step was to drill the holes for the dowels in the ends of the boards.
I jigged up the drill press a little to make this easier.
The table served as a side-stop, while the stack of scrap lumber on the base
serves as the support for the piece. That way, I only needed to worry about aligning to the lines
I had scored in the ends of the boards, and could use the depth stop on the drill to get all
the holes the same depth. With 8 shelves, and 4 holes on each end, that's 64 holes to be drilled,
so it was worth jigging up. (this was before I built my
horizontal boring machine).
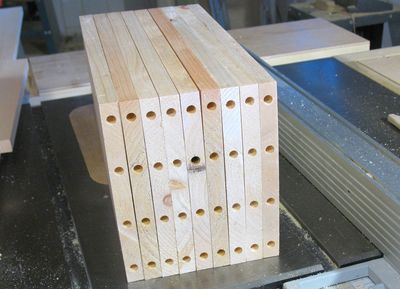 Once I had the holes all drilled in the shelf boards, I put them side by side
to see if I might have drilled any of the holes a little off. With them side by side,
that sort of thing would be easy to spot. Fortunately, there weren't any mistakes.
Once I had the holes all drilled in the shelf boards, I put them side by side
to see if I might have drilled any of the holes a little off. With them side by side,
that sort of thing would be easy to spot. Fortunately, there weren't any mistakes.
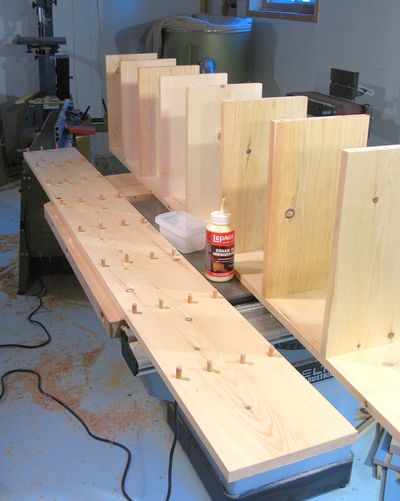
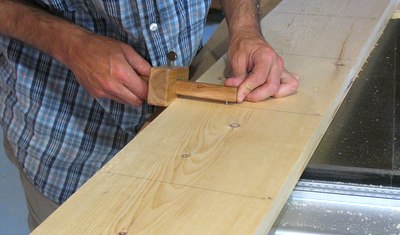 To mark the hole positions for the shelves, I strung a tape measure along the boards to form
the bookcase's upright, and put a tick mark at all the heights where the dowel lines would be.
To mark the hole positions for the shelves, I strung a tape measure along the boards to form
the bookcase's upright, and put a tick mark at all the heights where the dowel lines would be.
Next I draw lines across the board with a square, and then used the marking gauges to mark a tick for the position of every hole.
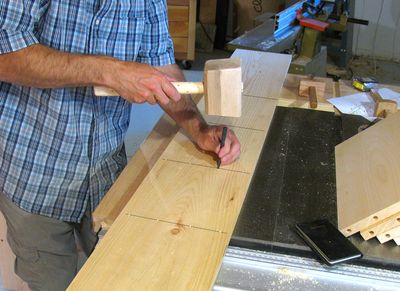 After marking the positions, I used a center punch to mark the hole positions a little deeper.
This made it it easier to get the drill in the right position on the drill press.
After marking the positions, I used a center punch to mark the hole positions a little deeper.
This made it it easier to get the drill in the right position on the drill press.
 I center punched all the holes because it helps to align the holes with the board
on the drill press, which was not so easy when balancing the big board on the small drill press table.
I center punched all the holes because it helps to align the holes with the board
on the drill press, which was not so easy when balancing the big board on the small drill press table.
I have since come up with my doweling T-square to help with this type of drilling.
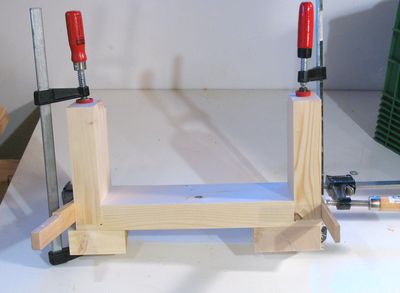
 The next step was to glue all the shelves to one of the uprights...
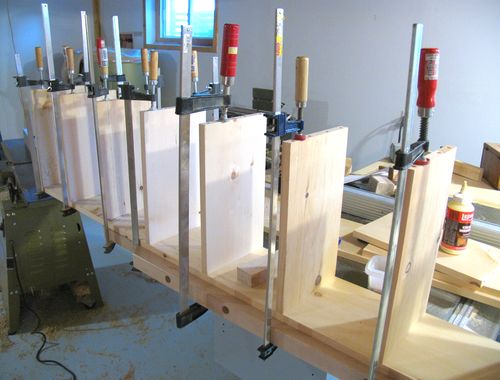 And clamp them. Being sure to check each shelf with a square to make sure its perpendicular
to the upright.
And clamp them. Being sure to check each shelf with a square to make sure its perpendicular
to the upright.
I also cleaned up the glue squeezeout from each joint once I had clamped it.
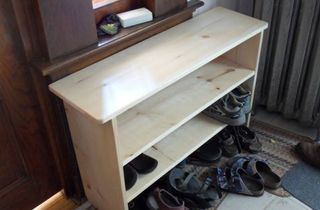
You really do need lots of clamps when putting one of these together. I later built a shoe rack using similar types of joinery at my sister's. Without enough clamps, it was very frustrating to put together.
 After giving the glue a few hours to dry, it was time to glue the other upright to the shelves.
This is where it got a little bit tricky.
After giving the glue a few hours to dry, it was time to glue the other upright to the shelves.
This is where it got a little bit tricky.
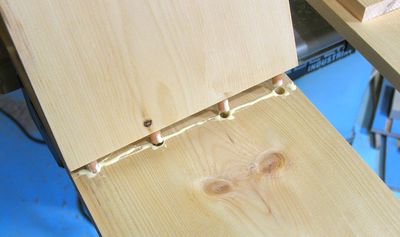
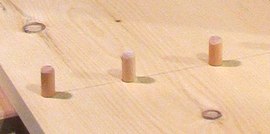 I sanded each dowel to have a bevel on the top end (to form a bit of a cone), to make it easier to align
the shelves to them. I then glued them into the board that goes upright. Next was to put glue into the holes
on the shelves, plus a line of glue across the end of the boards. I also put a drop of glue on the tip
of each dowel for good measure.
I sanded each dowel to have a bevel on the top end (to form a bit of a cone), to make it easier to align
the shelves to them. I then glued them into the board that goes upright. Next was to put glue into the holes
on the shelves, plus a line of glue across the end of the boards. I also put a drop of glue on the tip
of each dowel for good measure.
After that, it was time to mate the parts of the bookcase. I picked up the part with the shelves attached, and placed it over the board which already had the dowels glued in. I started by making sure the dowels on one end went in, and clamped it loosely. Then I worked towards the other end, shelf by shelf, making sure the dowels are in. Once I got the dowels all in their respective holes. I put a clamp at every shelf to make sure everything was pressed together nice and good.
With the glue starting to dry while I did this, this has to proceed quickly, and so I didn't have time to take photos of this step, unfortunately.
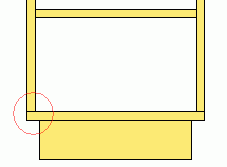 I just nailed the bottom shelf on from below. I wanted it to go across the bottom of the
uprights instead of between the uprights like the other shelves, because it has to support
the weight of the whole bookcase. With it being attached to the bottom, the nails heads aren't
visible from a usual vantage point, so I just nailed it to the bottom.
I just nailed the bottom shelf on from below. I wanted it to go across the bottom of the
uprights instead of between the uprights like the other shelves, because it has to support
the weight of the whole bookcase. With it being attached to the bottom, the nails heads aren't
visible from a usual vantage point, so I just nailed it to the bottom.
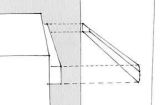
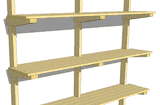
And finally, to make the base, I glued three pieces of 2x4 that I planed down a little. The base is open to the back, and the sides are rabbeted into the front.
The purpose of the base is to raise the main part of the bookcase above the baseboards, so that it can be slid fully against a wall.
I then glued this base to the bottom of the shelf, though I also nailed it diagonally from the back, just to be on the safe side.
 Same shelf, but built with
  Building a bookcase for the basement
 Garage shelves
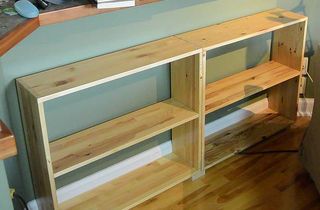 Stackable book
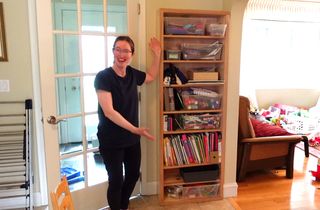 Building a bookcase with Rachel