Soldering a faucet hookup
Sometimes when replacing a faucet, you need to do some soldering.
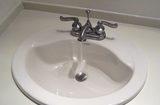
 The sink that was there didn't use the usual shutoff valve
arrangement. Instead, whoever installed the old sink and faucet
used inline faucets for 1/2" copper piping, followed by a 1/2" to 3/8"
reducing piece, and then soldered the pipes from the cheap faucet
straight in.
The sink that was there didn't use the usual shutoff valve
arrangement. Instead, whoever installed the old sink and faucet
used inline faucets for 1/2" copper piping, followed by a 1/2" to 3/8"
reducing piece, and then soldered the pipes from the cheap faucet
straight in.
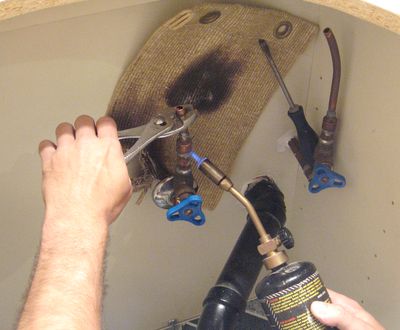
I cut the pipes off, but I needed the 1/2" pipe to solder the reducer to. Normally, I would have just cut off the 1/2" pipe and soldered the reducing piece to the end, but on this sink, the pipe stems were too short to cut off and then solder to the end, so I ended up desoldering the reducing pieces off the end of the pipe to avoid shortening the pipe some more.
It helps to drain the water out of the plumbing before soldering. With the pipe facing up like this, you'd have to boil the water out of the end of the pipe before you could solder. You can get it out by just twisting some paper towel and sticking it into the end of the pipe to absorb it. But with the pipe at the top being just 3/8", this would have been very awkward. So instead, we closed the main shutoff valve for the house, then opened the cold water valve on the sink, and one of the cold water valves downstairs to get the water sucked out above the valve. Then the same for the hot water, and then close both of the shutoff valves.
Also notice the mat I placed behind the plumbing. Its a heat proof
mat for this type of job. Its fairly heat resistant, and is used to
avoid scorching the wall behind while
doing soldering. It will still scorch if you put the heat on it
for too long. It helps to wet this mat before using it. The black
marks on the mat are actually from other uses of the mat. This application
wasn't that critical, and didn't result in any new scorched spots on the mat.
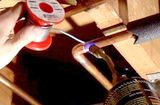
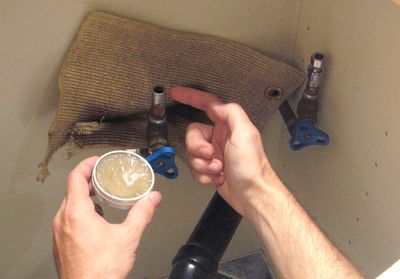 Normally, one prepares the pipe for soldering by sanding it down
to bare copper again, and then applying some flux. But these pipe
ends already had tin on them from the desoldering. But to be safe,
I decided to put a bit of flux on the end all the same, even though it had
tin on it still from the soldering. I also applied flux to the thread
adapters that I soldered onto the pipe.
Normally, one prepares the pipe for soldering by sanding it down
to bare copper again, and then applying some flux. But these pipe
ends already had tin on them from the desoldering. But to be safe,
I decided to put a bit of flux on the end all the same, even though it had
tin on it still from the soldering. I also applied flux to the thread
adapters that I soldered onto the pipe.
The flux is very important when soldering. The tin needs to stick
to bare copper, but heating up the pipe tends to oxidize it, and
the tin won't stick to the oxidized surface. So by applying some
grease to the surfaces, it prevents oxidization while heating.
The tin solder has a higher affinity to the copper than the grease, so
it will displace the grease as it flows in.
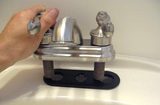
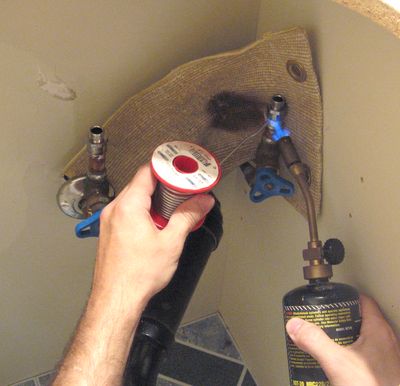 Next its time to solder the new thread adapter. Its important to
get both parts hot enough, but not too hot, as this would just
cause all the flux to boil off.
Next its time to solder the new thread adapter. Its important to
get both parts hot enough, but not too hot, as this would just
cause all the flux to boil off.
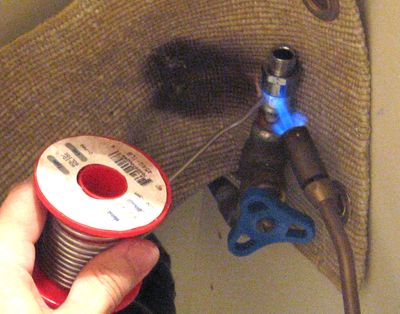 The tin should melt on the pipe. Ideally, you'd put the solder
on in a way that its just melted from the pipe, though space was a
little tight so I couldn't do that. The tin should pull itself into
the joint just from surface tension. Though I had a bit of trouble
with this solder joint
The tin should melt on the pipe. Ideally, you'd put the solder
on in a way that its just melted from the pipe, though space was a
little tight so I couldn't do that. The tin should pull itself into
the joint just from surface tension. Though I had a bit of trouble
with this solder joint
 Because my faith in the solder joints was not 100%, I decided to do
a bit of a test. I just hooked the hose to the faucet, which I closed,
and opened the shut off valve. It didn't leak, so I proceeded
to install the sink and faucet.
Because my faith in the solder joints was not 100%, I decided to do
a bit of a test. I just hooked the hose to the faucet, which I closed,
and opened the shut off valve. It didn't leak, so I proceeded
to install the sink and faucet.
Newer houses tend to use plastic plumbing instead of copper plumbing. Its much easier to install, and with the high price of copper, also much cheaper. But then, in a newer house, there's less of a need to replace sinks and faucets, so it makes more sense to write about copper plumbing instead.
See also:

Back to my Woodworking website.
More home improvement projects
![]()