 I used hard maple for the fretboard.
I used hard maple for the fretboard.
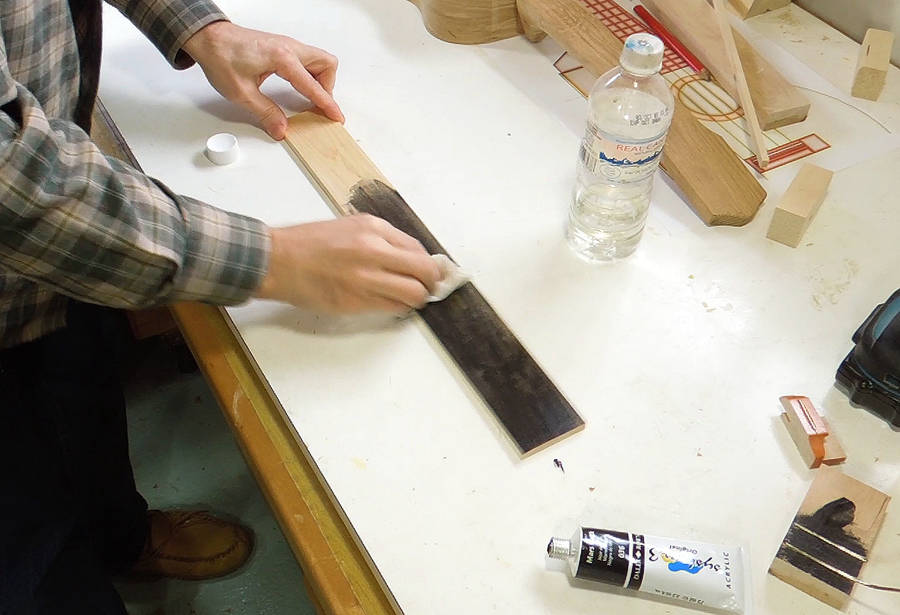
Traditionally, these are made from dark exotic woods, so I figured a dark fretboard would look much better. So I used some black acrylic artist paint to stain the board black.
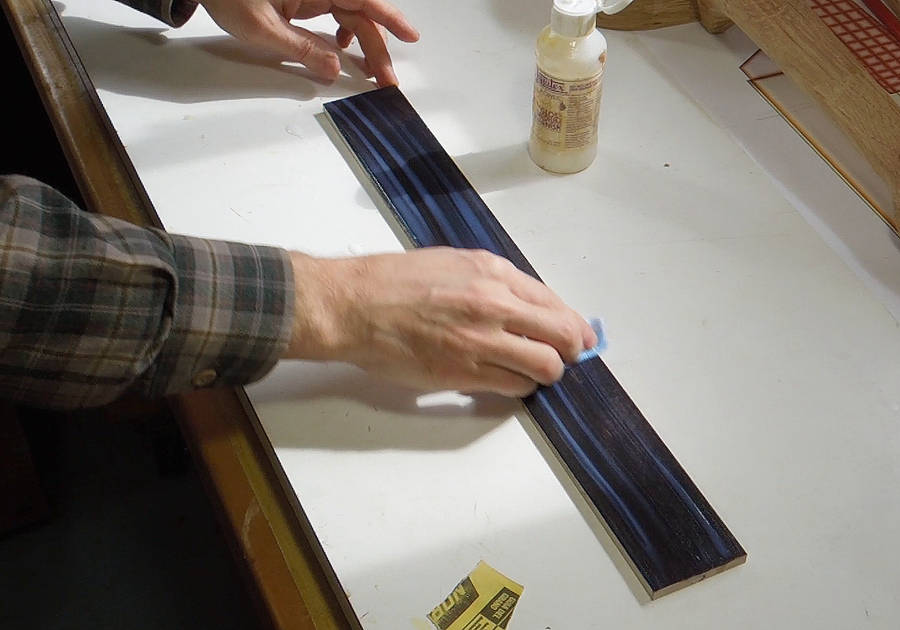 I put a coat of varnish on top of the paint right away to keep me from
scratching the paint in the next steps.
I put a coat of varnish on top of the paint right away to keep me from
scratching the paint in the next steps.
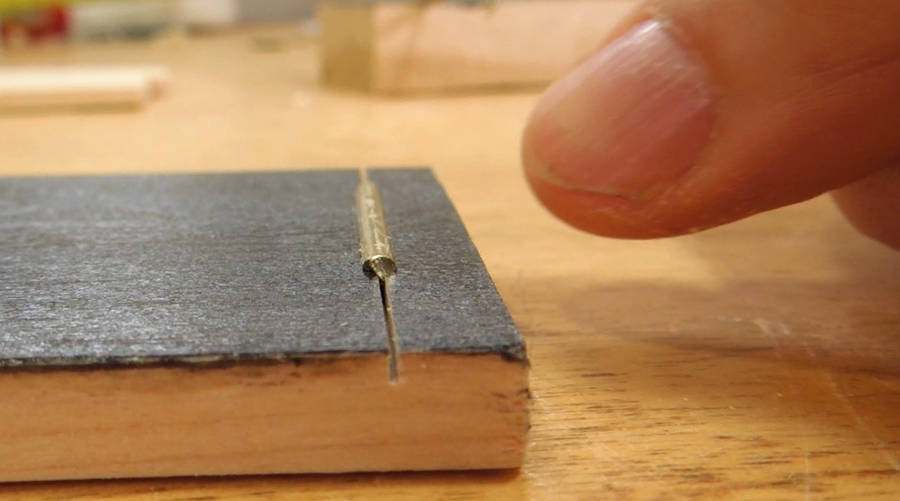
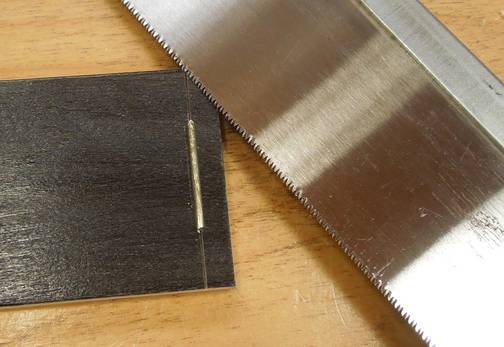 I tried my Japanese dozuki saw to see if it was suitable for cutting fret slots.
I was able to press some scraps of fret into the slot, so I figured the
kerf from that saw was wide enough.
I tried my Japanese dozuki saw to see if it was suitable for cutting fret slots.
I was able to press some scraps of fret into the slot, so I figured the
kerf from that saw was wide enough.
 There are various tools on the web to help you calculate the layout for the
frets for guitars or ukuleles. But it's so easy to work these
out with a pocket calculator that it's hardly worth the time to learn how
to use one of these tools.
There are various tools on the web to help you calculate the layout for the
frets for guitars or ukuleles. But it's so easy to work these
out with a pocket calculator that it's hardly worth the time to learn how
to use one of these tools.
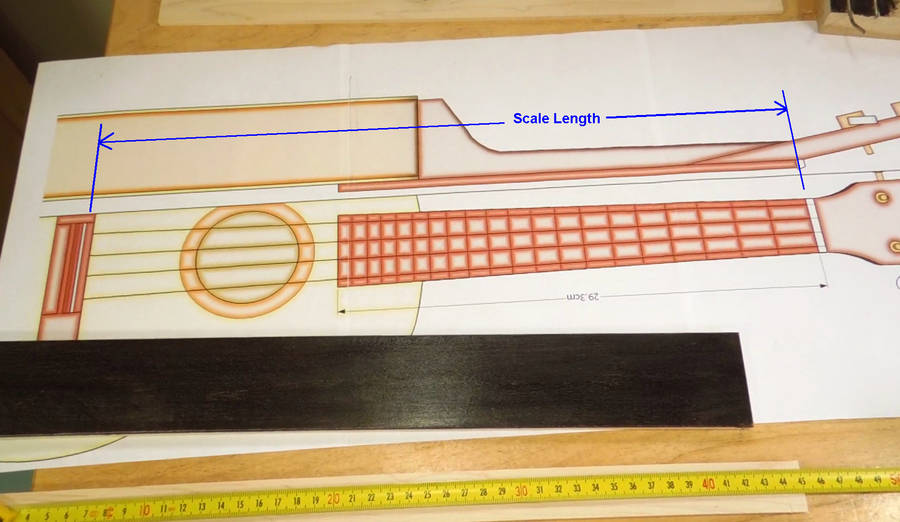
I start by determining the "scale length" of my ukulele. The scale length is the length of free string between the bridge and the "nut" at the head of the ukulele.
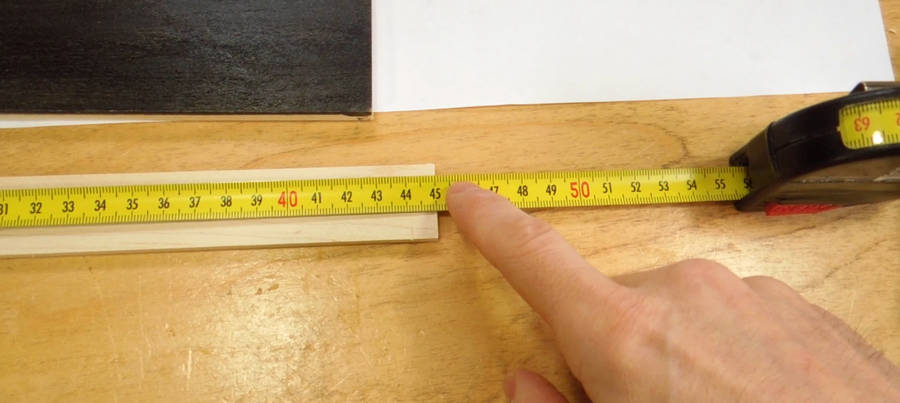 For my instrument, the scale length came to 45 cm. The math for working out
the frets is easy as long as you measure everything from the bridge, not the nut.
So I placed my tape measure so that it starts at the bridge position.
With my scale length of 45 cm, I put the end of the fretboard
(where the "nut" will go) at 45 cm.
For my instrument, the scale length came to 45 cm. The math for working out
the frets is easy as long as you measure everything from the bridge, not the nut.
So I placed my tape measure so that it starts at the bridge position.
With my scale length of 45 cm, I put the end of the fretboard
(where the "nut" will go) at 45 cm.
 Starting with the nut, the free string length for each successively higher toned
fret is the twelfth root of one half as much. That is, if the nut is at 45 cm,
we multiply 45 cm by 0.5 raised to 1/12. So 0.5 raised to one twelfth is 0.94387
Starting with the nut, the free string length for each successively higher toned
fret is the twelfth root of one half as much. That is, if the nut is at 45 cm,
we multiply 45 cm by 0.5 raised to 1/12. So 0.5 raised to one twelfth is 0.94387
I use a calculator with the "constant calculation" feature. Most five function calculators have this feature, but most scientific calculators do not, although this one does. "constant calculation" means that the calculator will repeat the previous operation when you push "=" again.
So start by multiplying the 0.94387 times itself. Then enter "1" and push "=". If the display now goes to 0.94387, you are good to go.
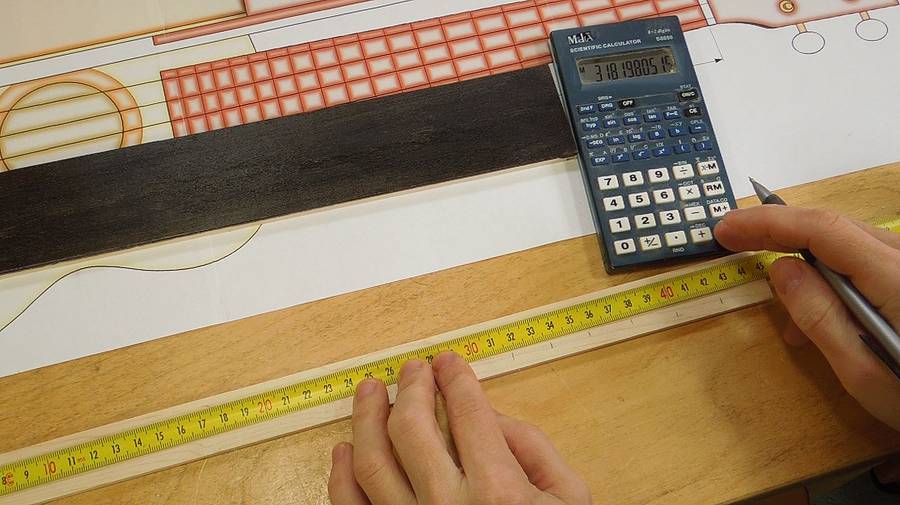 Now enter the scale length on your calculator and push "=". This should give you the
position of the first fret, as measured from the bridge. Mark this position, then push
"=" again, and you have the next fret position. Each time you push "=", you get
the next fret position.
Now enter the scale length on your calculator and push "=". This should give you the
position of the first fret, as measured from the bridge. Mark this position, then push
"=" again, and you have the next fret position. Each time you push "=", you get
the next fret position.
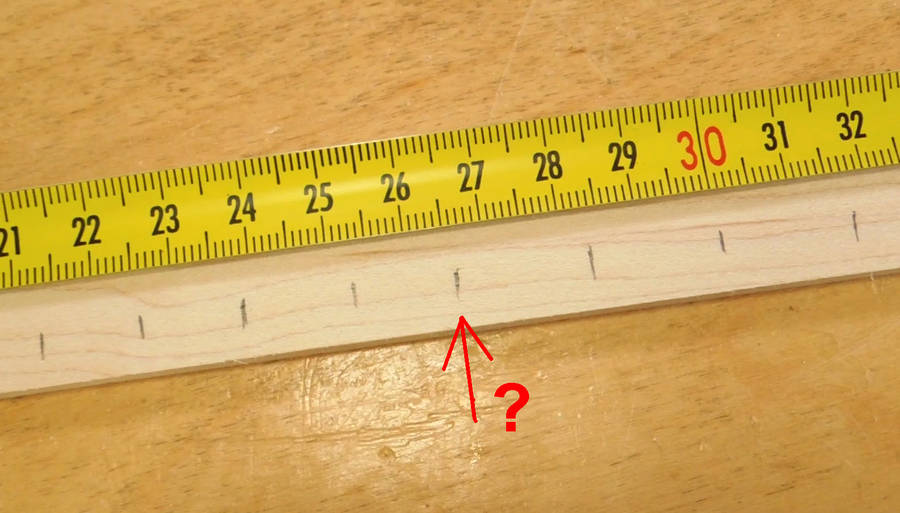 I marked all the fret positions on a strip of wood. On close inspection, one of the tick-marks
looked slightly out of place, so I re-entered the scale length in the calculator and kept pushing
"=" again until I got to this position. I had erred by 1.5 mm when I marked this
position.
I marked all the fret positions on a strip of wood. On close inspection, one of the tick-marks
looked slightly out of place, so I re-entered the scale length in the calculator and kept pushing
"=" again until I got to this position. I had erred by 1.5 mm when I marked this
position.
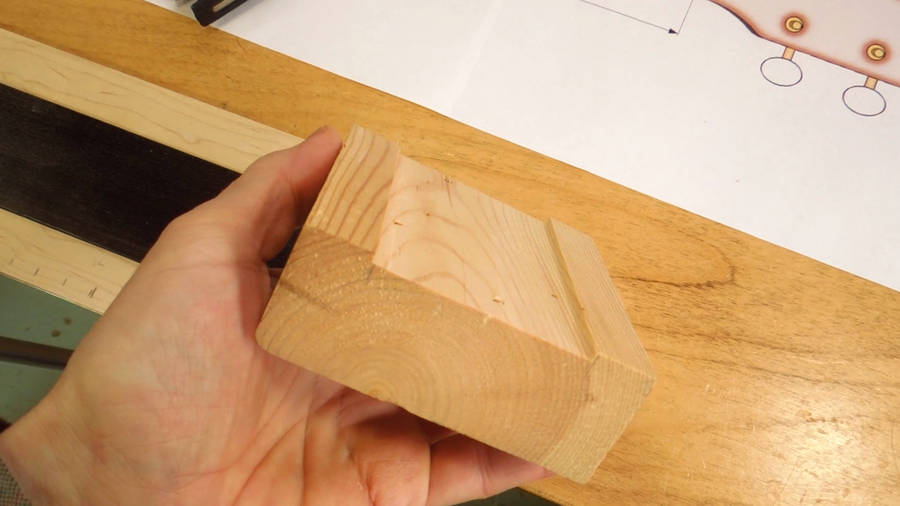 Next I made a block of wood with a shallow slot the same width as the fretboard.
I cut that slot with a 3/4" router bit on my router table.
Next I made a block of wood with a shallow slot the same width as the fretboard.
I cut that slot with a 3/4" router bit on my router table.
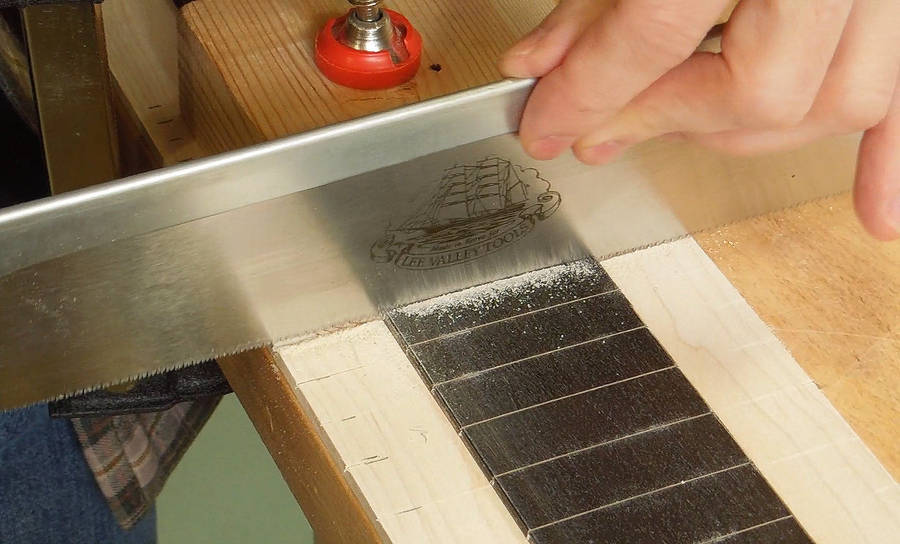
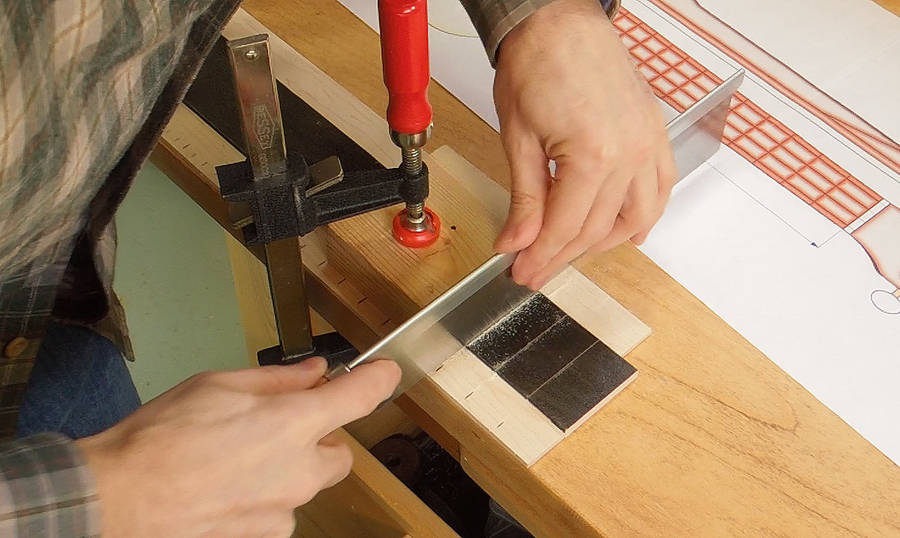 I clamped this block onto my fretboard. By pushing the saw up against it, I was able
to use it as a cutting guide as I cut the fret slots with my dozuki saw. The saw isn't any
special saw, just a saw with a very fine kerf.
I clamped this block onto my fretboard. By pushing the saw up against it, I was able
to use it as a cutting guide as I cut the fret slots with my dozuki saw. The saw isn't any
special saw, just a saw with a very fine kerf.
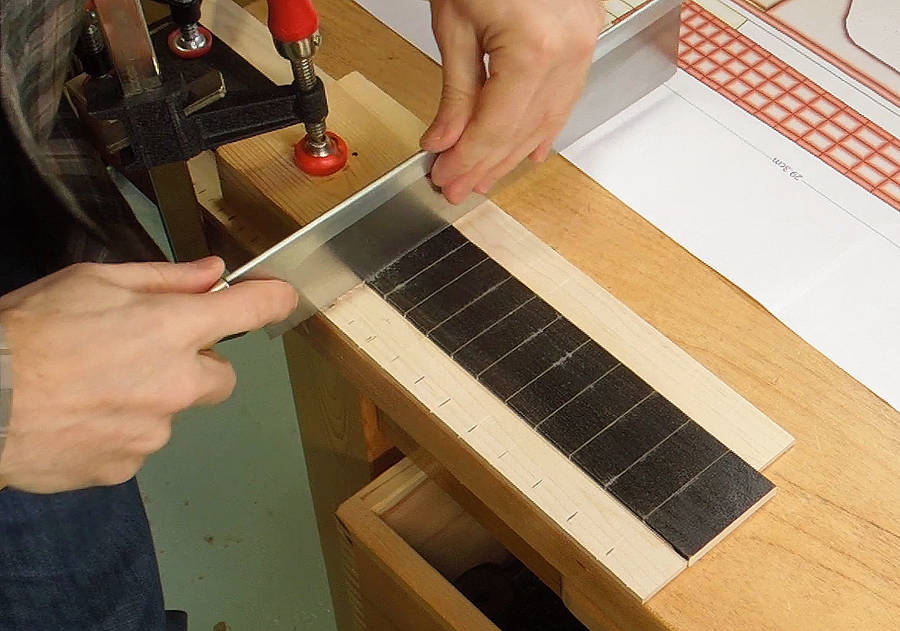
 I had a strip of wood on either side of the fretboard that I was cutting, and I cut each slot
until the saw cut into the strip on either side. That way, I could be sure
that I cut deep enough, but not too deep.
I had a strip of wood on either side of the fretboard that I was cutting, and I cut each slot
until the saw cut into the strip on either side. That way, I could be sure
that I cut deep enough, but not too deep.
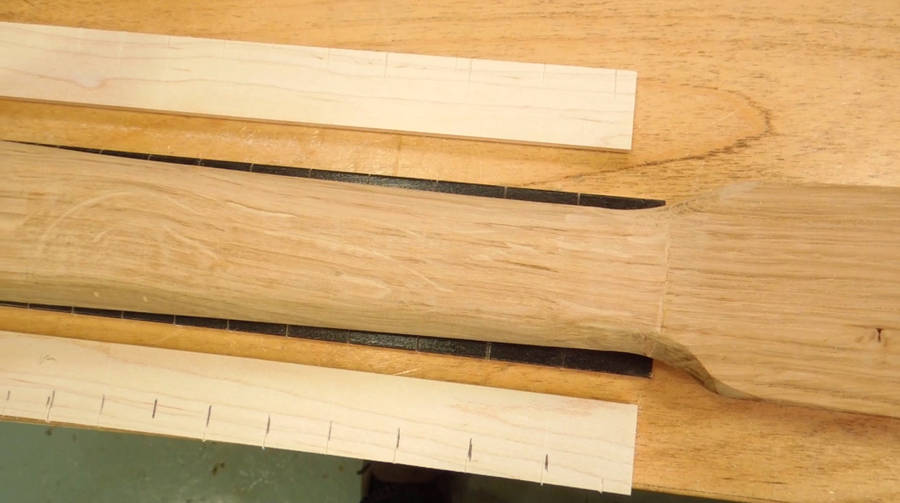 The neck of my ukulele is slightly tapered, narrower towards the head. I initially
cut the fretboard straight, as it was easier to cut the fret slots that way.
The neck of my ukulele is slightly tapered, narrower towards the head. I initially
cut the fretboard straight, as it was easier to cut the fret slots that way.
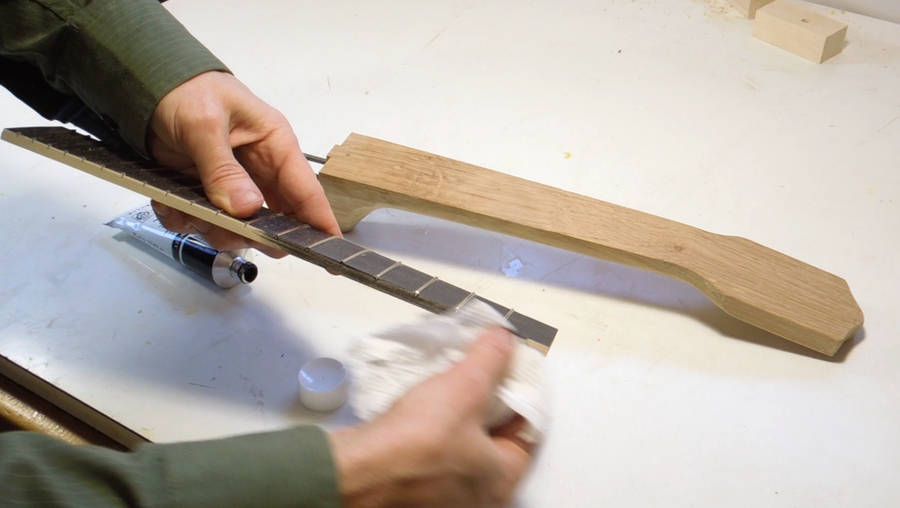
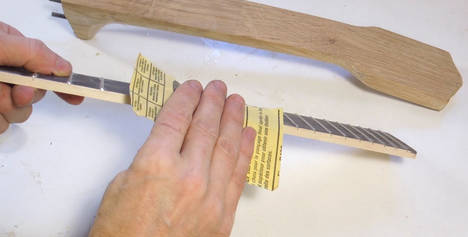
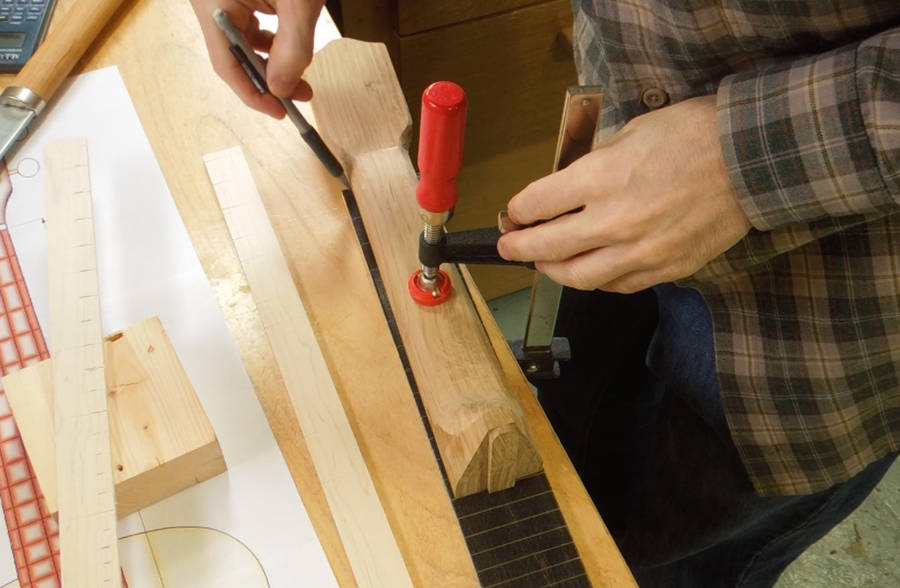 So here I am marking the taper of the neck onto the fretboard
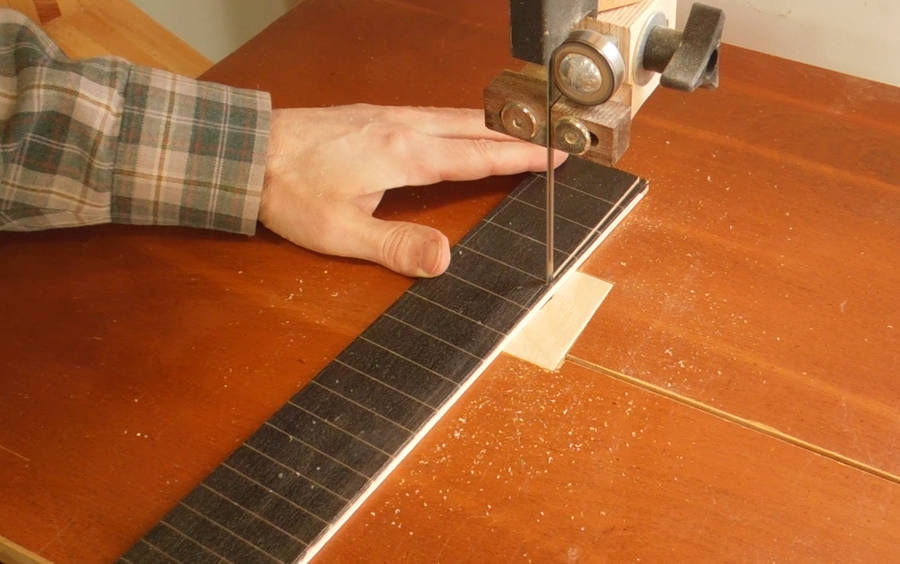 I then cut it out roughly on the bandsaw...
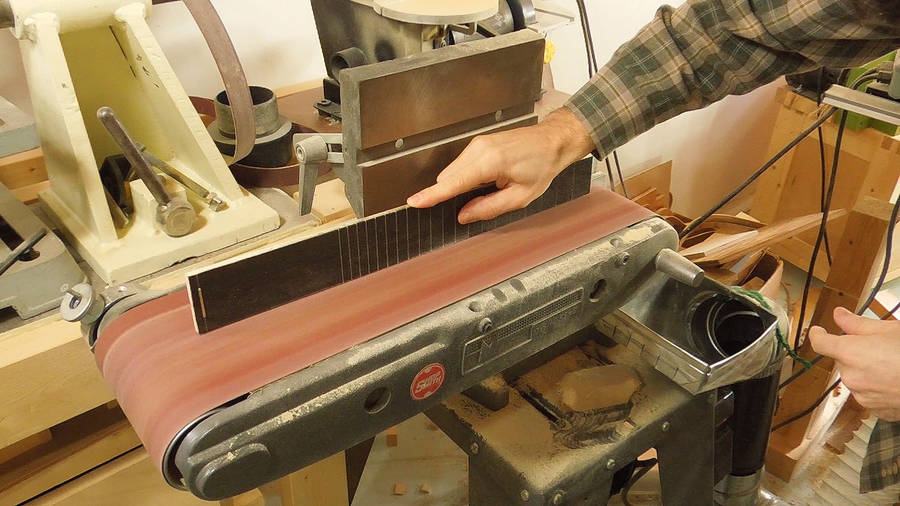 ... then sanded it to the line on the belt sander.
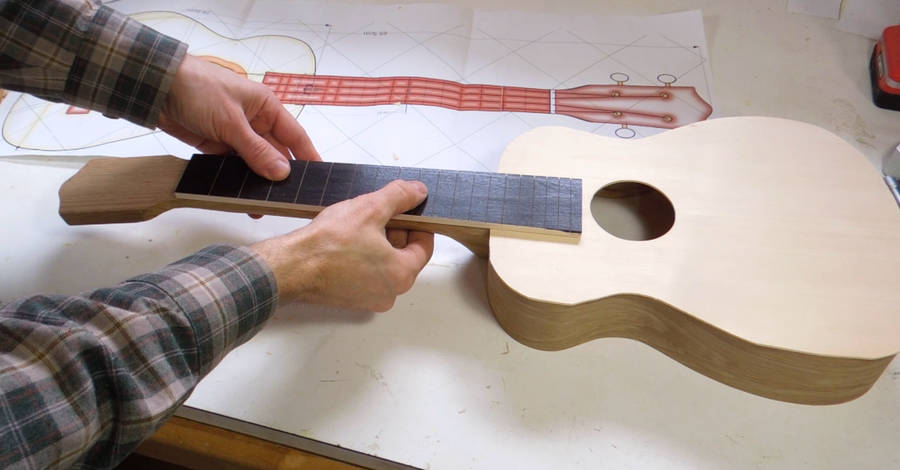 A quick check to see how it will look on the ukulele.
but before I install it, I want to install the frets.
A quick check to see how it will look on the ukulele.
but before I install it, I want to install the frets.
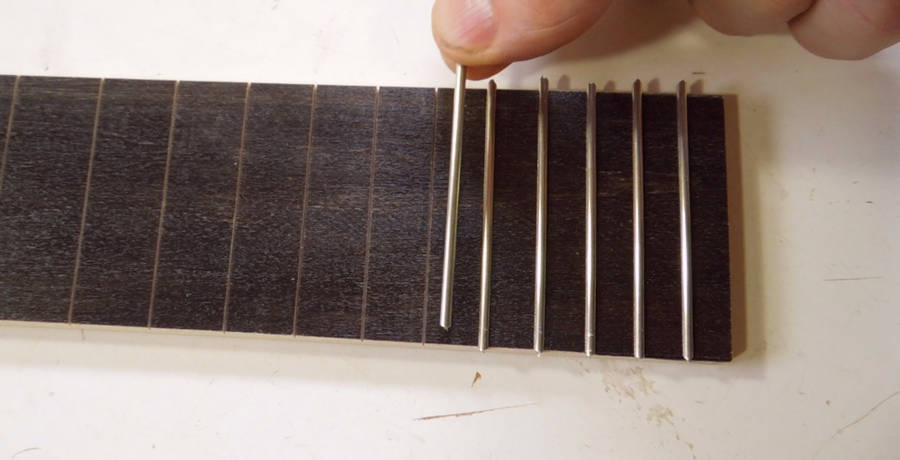 I ordered the fret wire, along with tuning heads and strings from
Stewart MacDonald. The fret "wire" comes
in 2' (60 cm) lengths, and is cut to length as it's used.
I ordered the fret wire, along with tuning heads and strings from
Stewart MacDonald. The fret "wire" comes
in 2' (60 cm) lengths, and is cut to length as it's used.
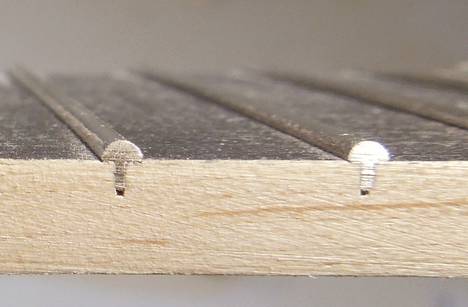
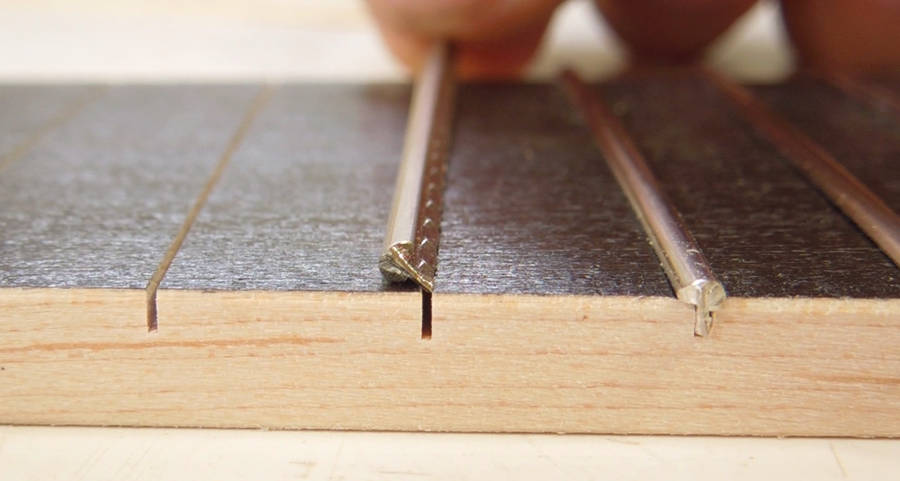 "wire" is really a bit of a misnomer for the frets. It's more of a mushroom shaped
T-profile, with a tang that fits into the fret slots.
"wire" is really a bit of a misnomer for the frets. It's more of a mushroom shaped
T-profile, with a tang that fits into the fret slots.
It took some experimentation to find a reliable method of getting those frets in. If you just try to push it in straight, it usually tips over left or right before it actually goes in the slot, or at least that was the case with the narrow slots I cut with my dozuki saw.
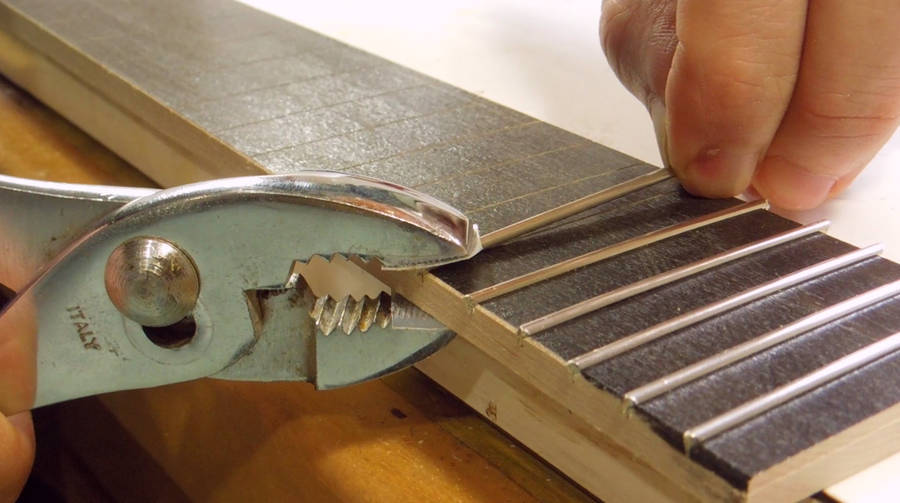
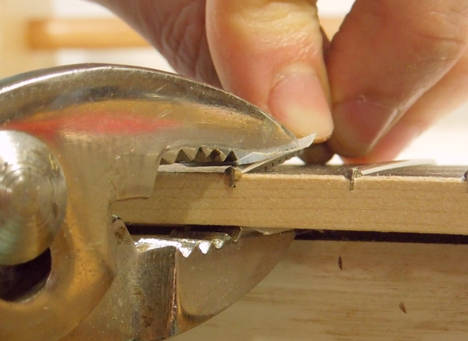 The method I ended up using was to hold one end of the fret, and squish the
other end of it into the slot with pliers. By only squeezing it in at the end,
I still had good control of it with my fingers.
The method I ended up using was to hold one end of the fret, and squish the
other end of it into the slot with pliers. By only squeezing it in at the end,
I still had good control of it with my fingers.
I put some pieces of UHMW tape on the jaws of my pliers to keep them from marking up the frets or the wood.
 Once one end of the fret is secure in the slot, it's relatively easy to work
across the fretboard to press the rest of it in.
Once one end of the fret is secure in the slot, it's relatively easy to work
across the fretboard to press the rest of it in.
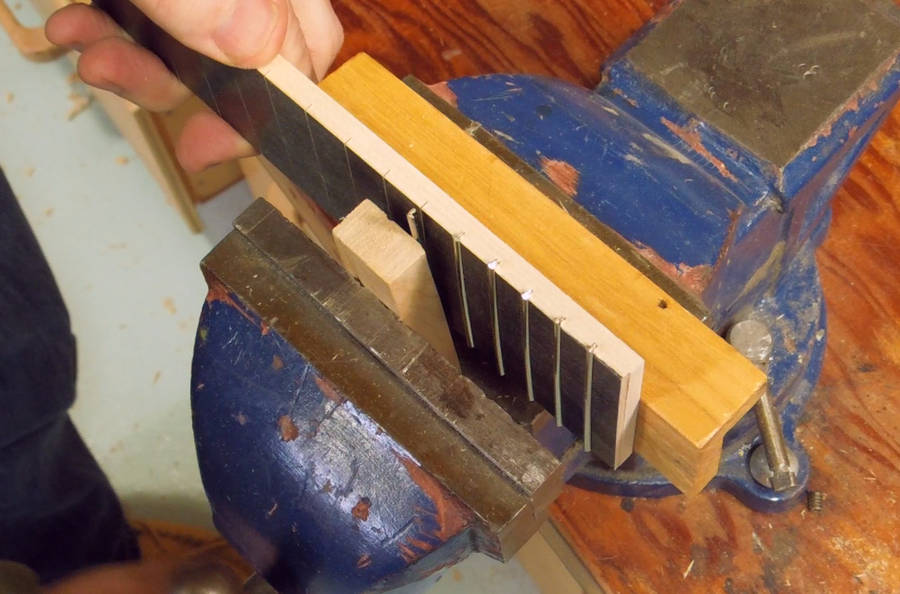
I could have worked it part-way across with the pliers, but that would have caused some sharp bends in the frets. So instead, I used a block of wood in my vise.
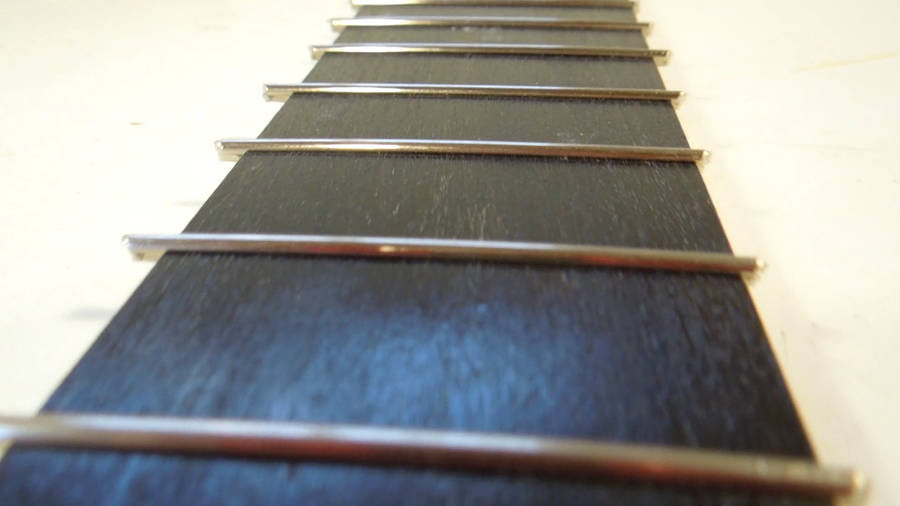 Frets pushed in.
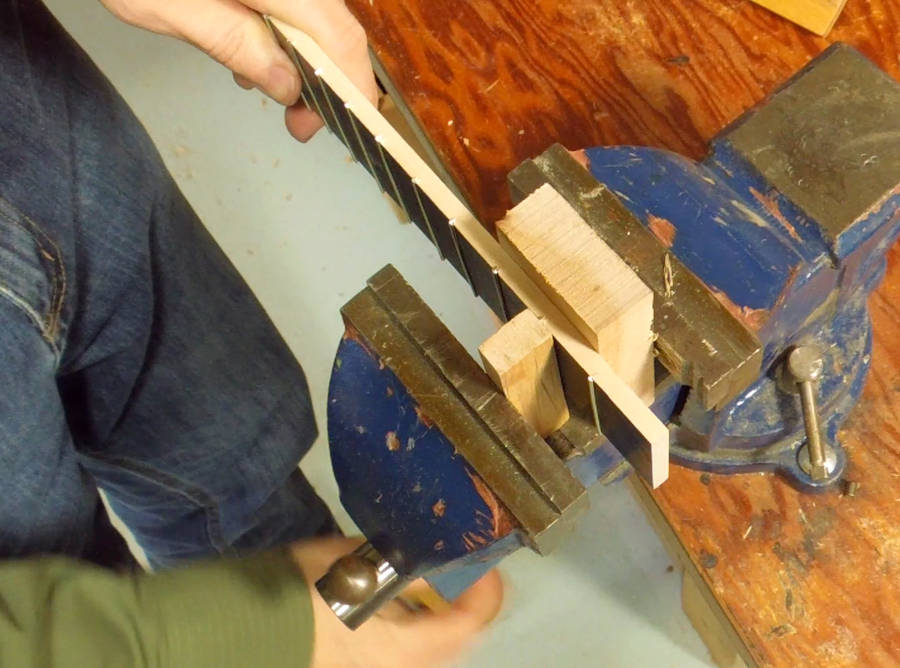 I gave all the frets one more working over in the vise. I figured if I squished
them all in as far as they would go, I wouldn't have to level them later.
I gave all the frets one more working over in the vise. I figured if I squished
them all in as far as they would go, I wouldn't have to level them later.
I think the slot from the dozuki may have been on the narrow side, so the frets were quite hard to get in. But by working the fret wire in like this, I didn't end up with any kinks, so I think this method is better than hammering them in.
 I may have overdone the squeezing. The frets got pushed part-way
into my maple push block, and the push block itself left some marks on the fretboard.
I may have overdone the squeezing. The frets got pushed part-way
into my maple push block, and the push block itself left some marks on the fretboard.
I should have used a harder piece of exotic wood to squish the frets in with.
I also noticed a little bit of damage on the fretboard on the side I started all my frets on. So it might be a good idea to taper the fretboard after inserting the frets so that slight damage on the edge gets cut off.
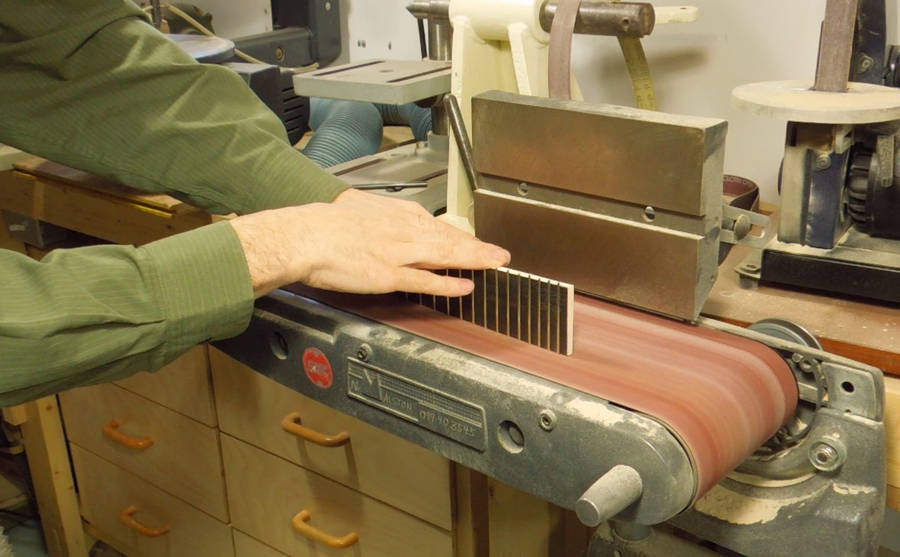
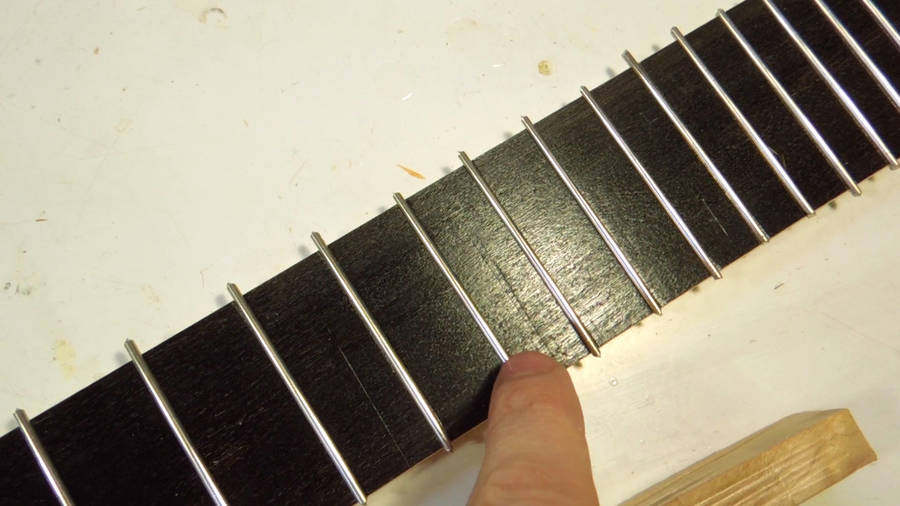
 Next I trimmed the frets flush with the edge on my belt sander. After I got
them flush, I tipped the fretboard towards the fret to bevel the ends of
the frets in by about 30 degrees.
Next I trimmed the frets flush with the edge on my belt sander. After I got
them flush, I tipped the fretboard towards the fret to bevel the ends of
the frets in by about 30 degrees.
 I also hand-sanded the edges to help round the ends of the frets and the edge
of the fretboard between the frets. The edge of the fretboard needs to feel
comfortable to reach around.
I also hand-sanded the edges to help round the ends of the frets and the edge
of the fretboard between the frets. The edge of the fretboard needs to feel
comfortable to reach around.
I then stained the edges of the fretboard to make it look like it was all one black piece of material.
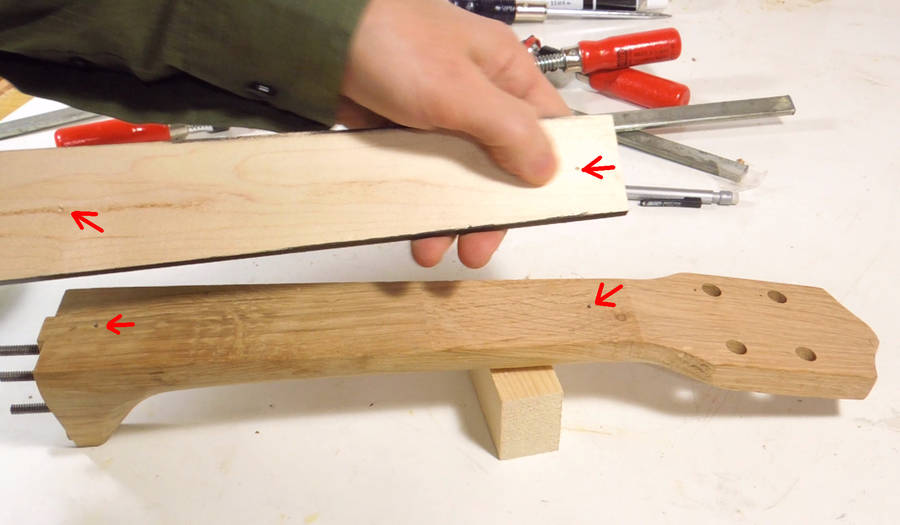 Glue is a lubricant, and when gluing two flat surfaces together, it often
causes the pieces to slide out of alignment. So I drove two finishing nails
into the neck and cut them off to stick out about 1.5 mm from the surface.
Glue is a lubricant, and when gluing two flat surfaces together, it often
causes the pieces to slide out of alignment. So I drove two finishing nails
into the neck and cut them off to stick out about 1.5 mm from the surface.
I then lined up the fretboard and pressed it onto the nails. This resulted in two small divots in the back of the fretboard to keep it aligned during gluing.
See also: Pat making the fretboard
Next: Finishing the assembly
![]()