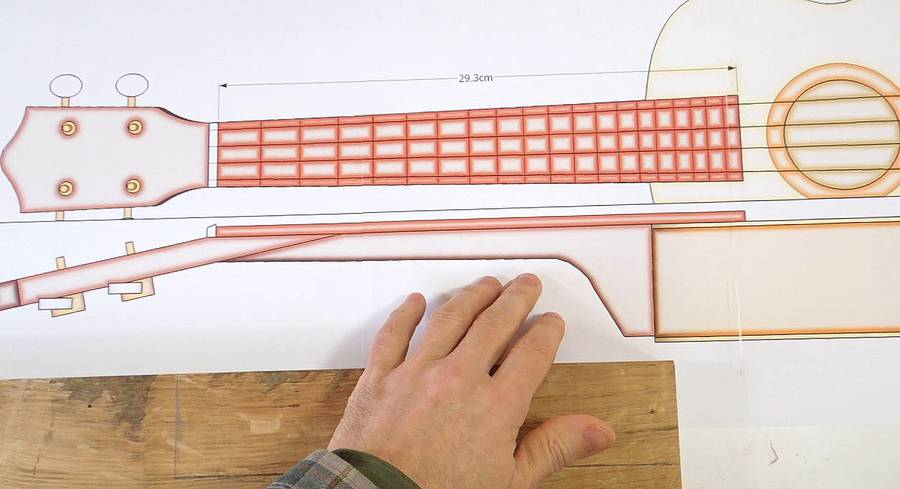
 The next step in my build was to make the neck.
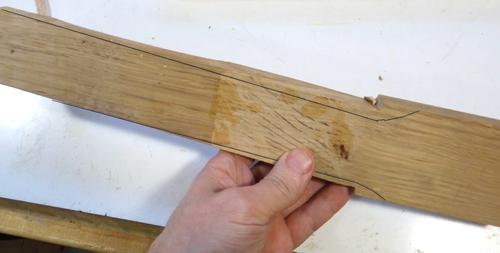
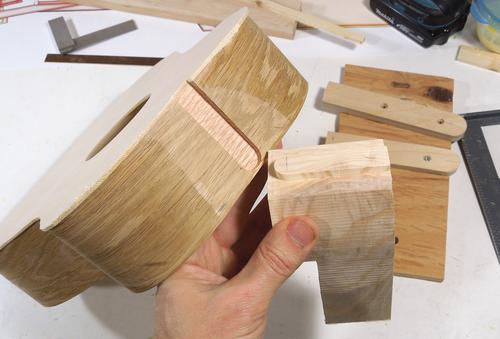
The head of a guitar or ukulele is usually attached to the neck with a scarf joint.
People usually make this scarf joint on the head side, of the bend, but because I
wasn't going to veneer the head, I made the joint on the neck side where it would be
hidden by the fretboard.
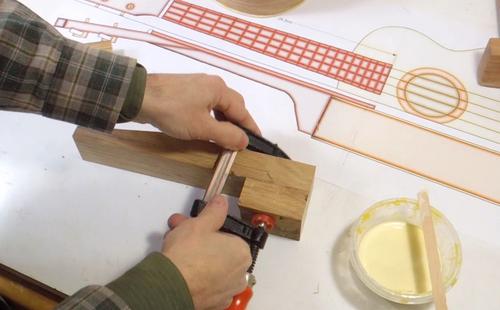
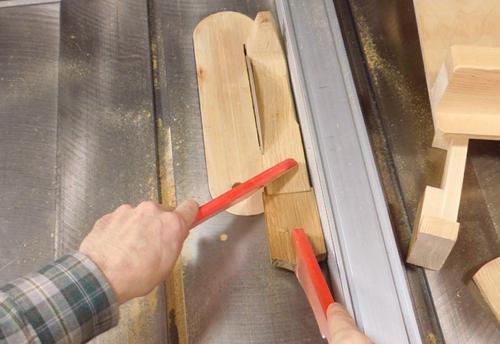
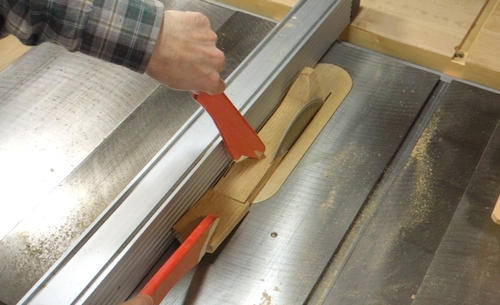
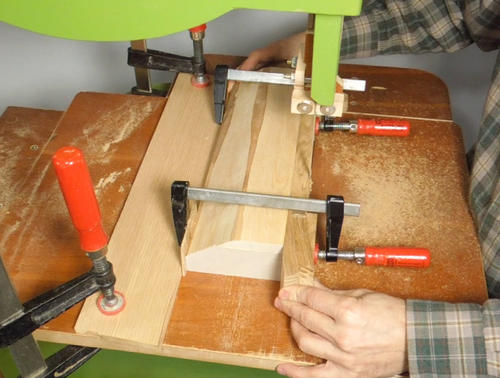
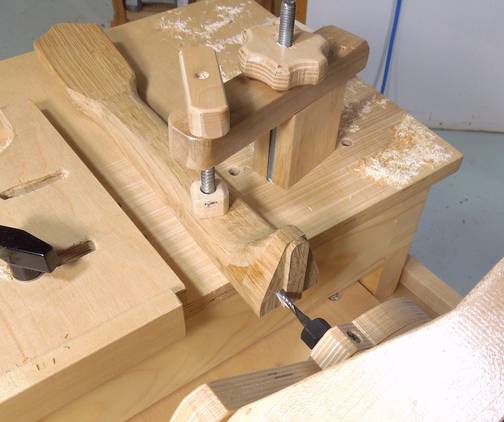
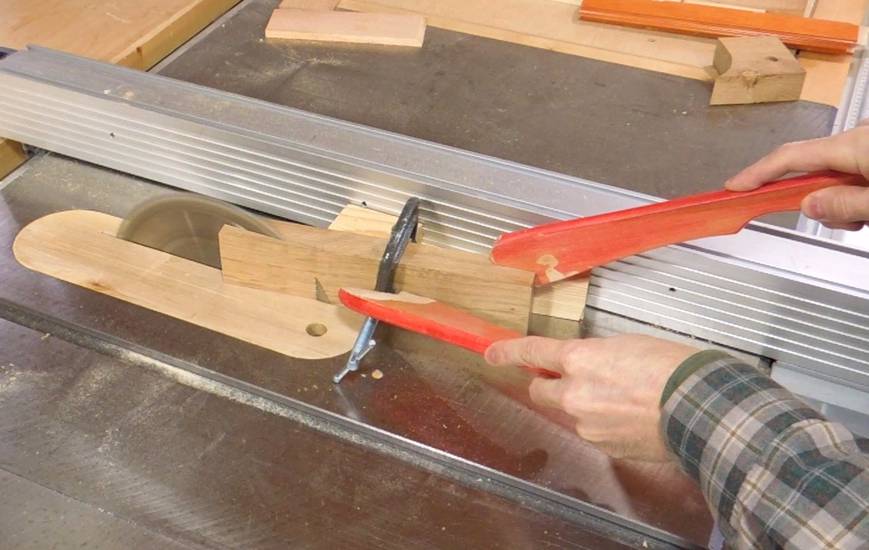
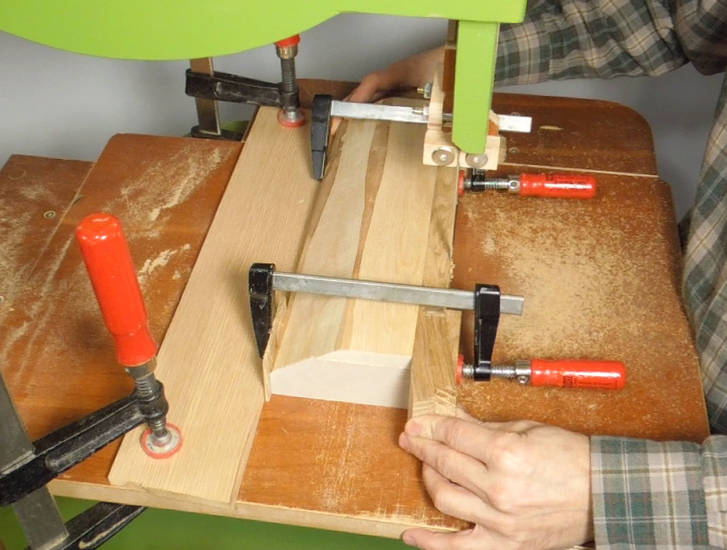
 Guitar makers typically have a jig for cutting the scarf joint on the table saw.
I'm not a guitar maker, and for one-time use, it wasn't worth building a jig. So
I just clamped the workpiece to a wedge and cut it like that.
Guitar makers typically have a jig for cutting the scarf joint on the table saw.
I'm not a guitar maker, and for one-time use, it wasn't worth building a jig. So
I just clamped the workpiece to a wedge and cut it like that.
I was initially going to have my workpiece facing the other way, but then I realized that the
wedge that I'm cutting off might jam itself between the saw blade and my support, so I changed
the orientation so that couldn't happen.
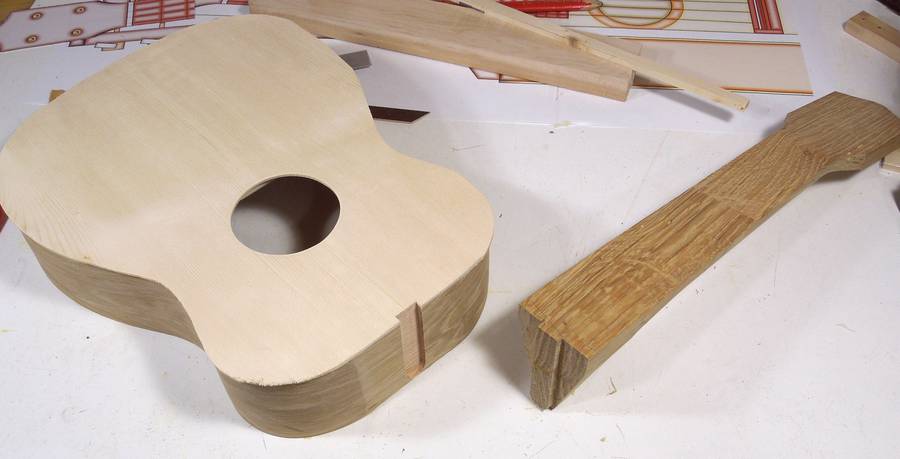
 Next, gluing the "heel block" onto the neck for where it attaches to the ukulele.
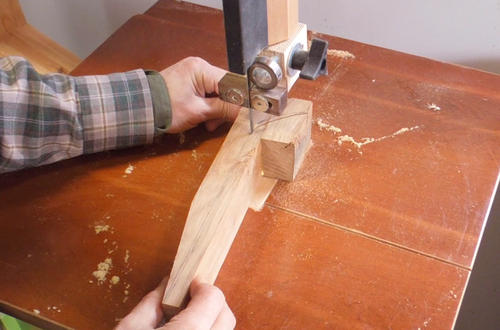 Once that glue dried, I cut some of the profile of the neck.
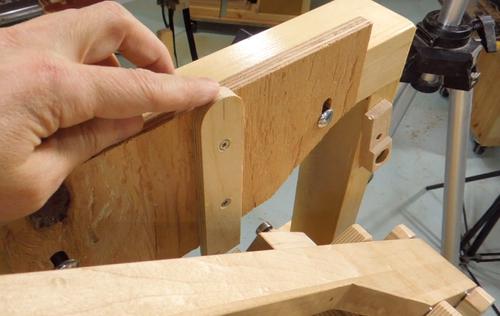
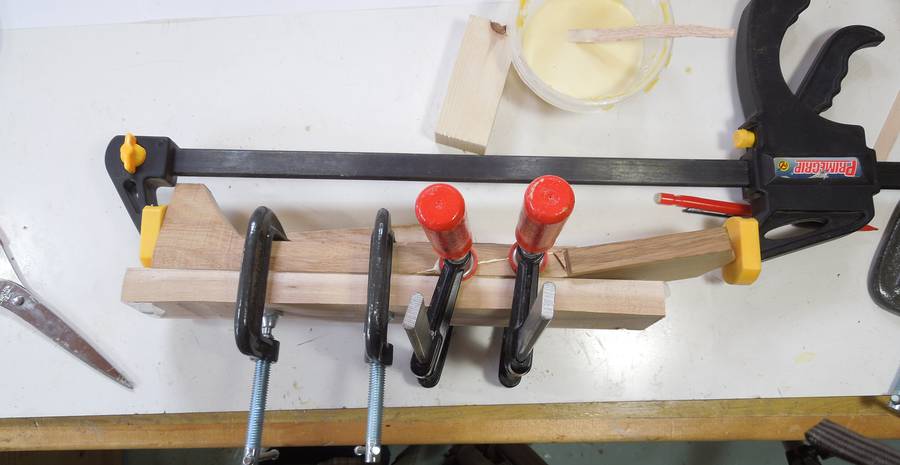
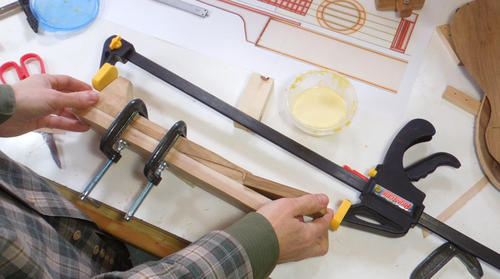 Then I glued the head onto the neck.
I clamped it by wedging it between the neck part and another piece of wood. I put a layer of packing
tape onto the other piece to prevent glue squeeze-out from gluing the extra piece of wood onto the neck.
 I added two small clamps between the neck and the head to keep the neck and head aligned.
 Ready to start sculpting the shape of the neck.
In retrospect, it would have been easier to cut and fit the neck mortise first, before
sculpting the neck. This is especially true if you don't have a Pantorouter.
 I first cut the taper of the neck on the table saw. With the head slightly wider than
the neck already, this conveniently put it at the right angle on the saw.
I first cut the taper of the neck on the table saw. With the head slightly wider than
the neck already, this conveniently put it at the right angle on the saw.
But, if you build one, I recommend making the neck as wide as the head initially, as that will make
aligning things much easier when you cut the neck mortise.
 I moved the fence to the other side of the blade to cut the taper on the other side.
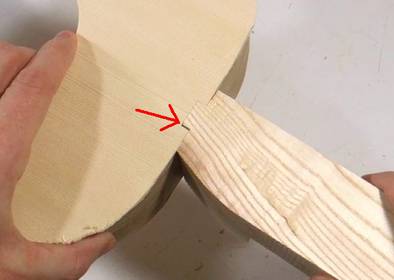
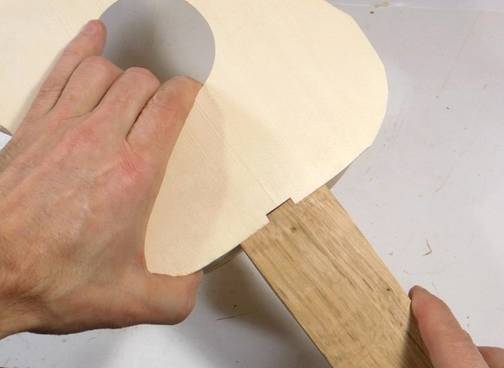
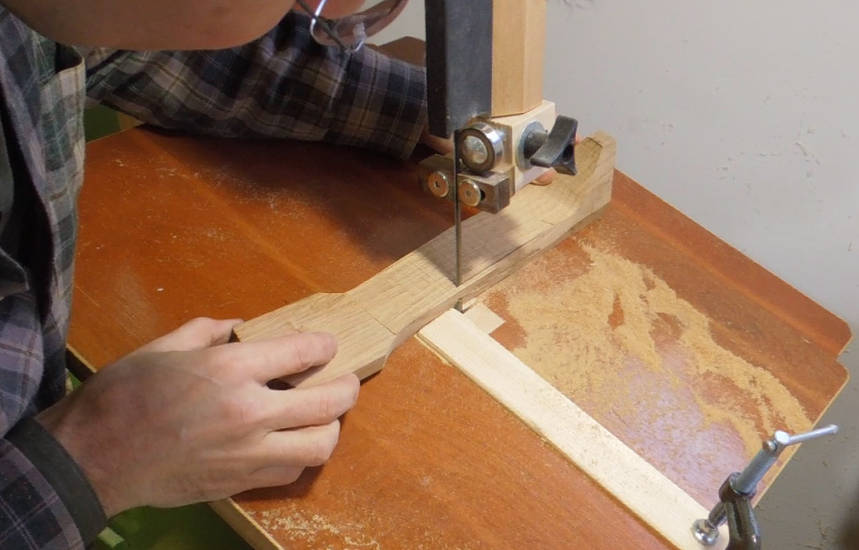
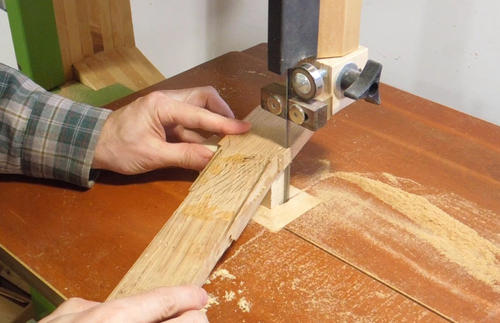 Now cutting the transition from the head to the neck on the bandsaw. I put a block of wood under
the neck to support it. It would have been easier to cut this front-side-down, but I marked
the shape of the cut on the front.
Now cutting the transition from the head to the neck on the bandsaw. I put a block of wood under
the neck to support it. It would have been easier to cut this front-side-down, but I marked
the shape of the cut on the front.
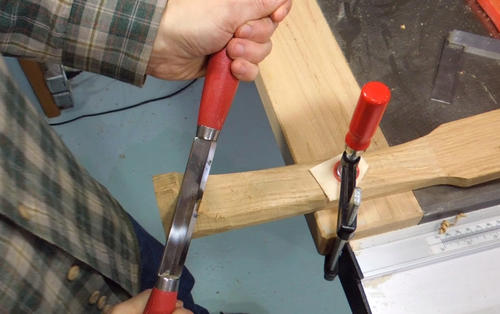
 I wanted to taper the neck to be slightly thinner towards the head.
So I clamped it against a large piece of wood. I clamped a small block of wood
to the left side of the large block to put it at a slight angle,
then cut the back of the neck with my old 18" bandsaw.
 Finally, cutting a chamfer along the edges of the neck. I clamped a strip of wood
to the table to act as a guide for the cut.
Finally, cutting a chamfer along the edges of the neck. I clamped a strip of wood
to the table to act as a guide for the cut.
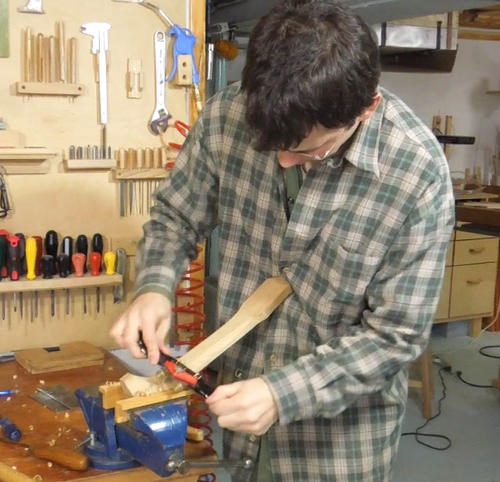
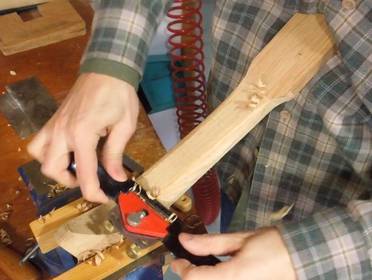 After that, I rounded the edges with a spokeshave...
 ... and a drawknife at the base of the neck.
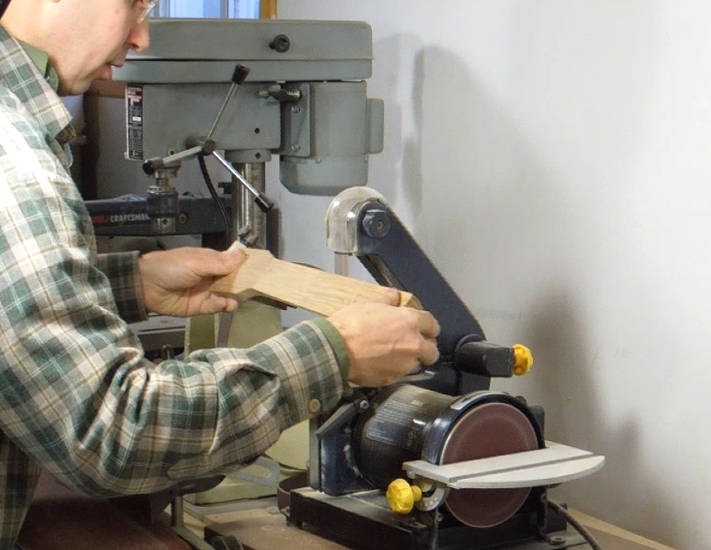
 Then I used my strip sander to smooth it all. I used the part of the belt that
does not have a hard support behind it.
Then I used my strip sander to smooth it all. I used the part of the belt that
does not have a hard support behind it.
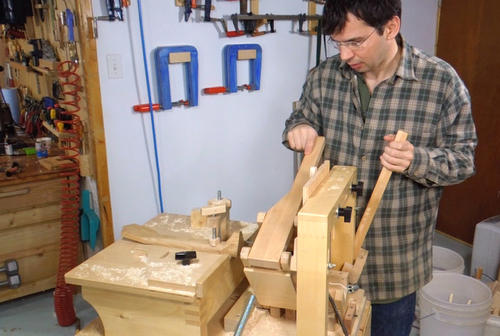
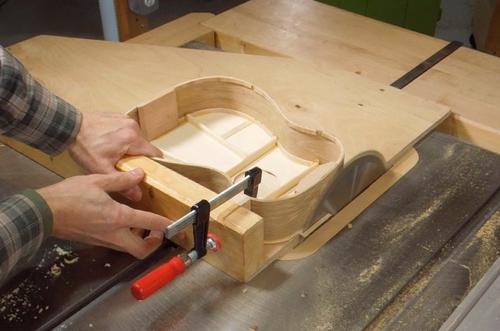 I cut a flat spot in the ukulele body where the neck mounts.
I should have been more careful when I did this. I ended up cutting away a little bit too much.
A disk sander would have been a better tool to do this with.
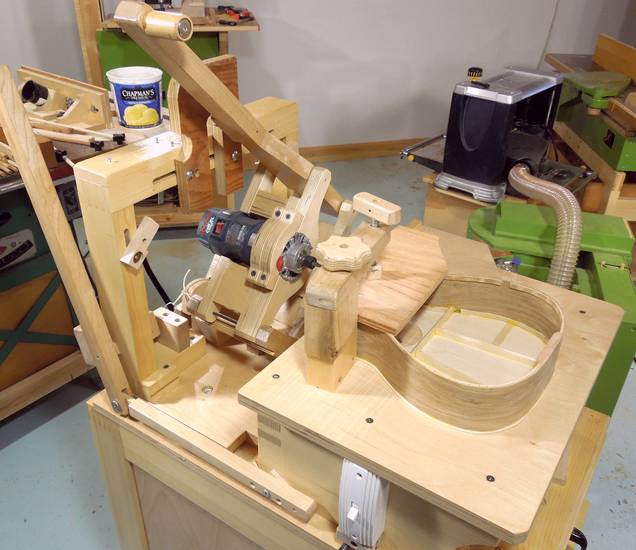
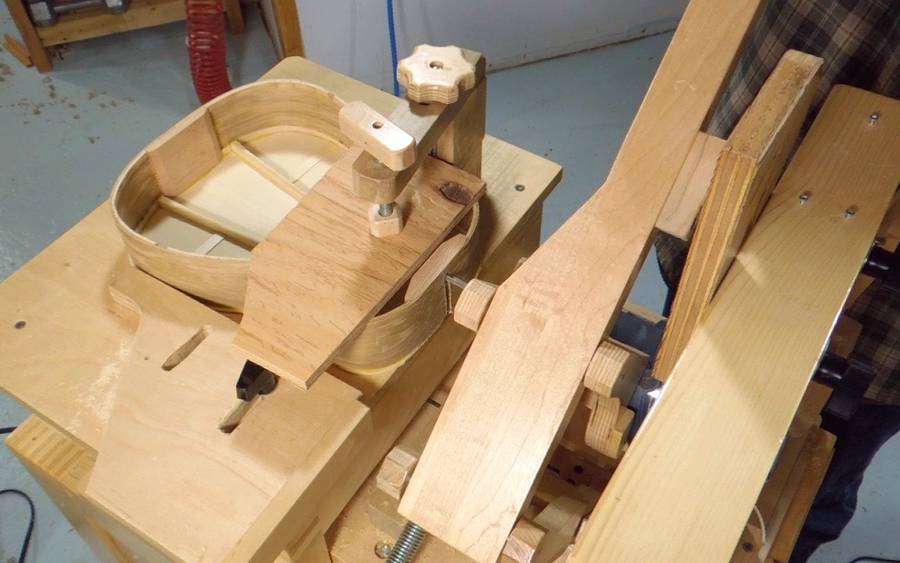
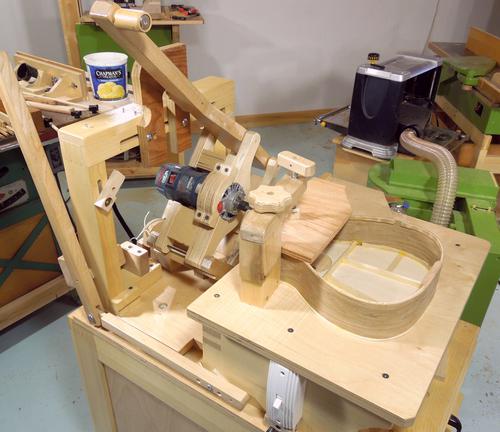 Next, clamping the body of my ukulele onto my pantorouter
for cutting the neck mortise.
Next, clamping the body of my ukulele onto my pantorouter
for cutting the neck mortise.
I made a mortise template from a scrap of plywood and mounted it above the router on
my pantorouter.
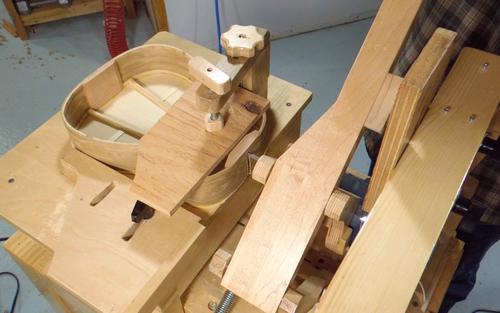
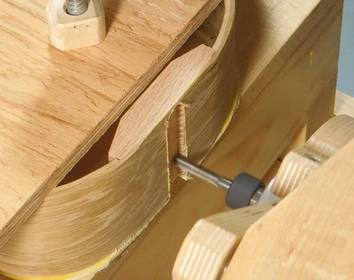 Cutting the neck mortise.
 Next I switched to a template for a neck tenon.
 I wasn't sure if I would get a perfect fit, so I first used the template to cut
a test tenon into a scrap of wood. As it turned out, the neck mortise was about
0.75 mm (.030") too narrow. So I made a wider neck mortise template.
I wasn't sure if I would get a perfect fit, so I first used the template to cut
a test tenon into a scrap of wood. As it turned out, the neck mortise was about
0.75 mm (.030") too narrow. So I made a wider neck mortise template.
 I was confident that the wider template would make for a good fit, so proceeded to cut the tenon
in the end of the neck.
I was confident that the wider template would make for a good fit, so proceeded to cut the tenon
in the end of the neck.

 A perfect fit.
 It was tempting to mount the neck with just a few drywall screws from
the outside, but it would have been tricky to drill the holes and countersink
holes cleanly in the neck that I had already sculpted. So I used hanger bolts,
like many guitar makers do.
It was tempting to mount the neck with just a few drywall screws from
the outside, but it would have been tricky to drill the holes and countersink
holes cleanly in the neck that I had already sculpted. So I used hanger bolts,
like many guitar makers do.
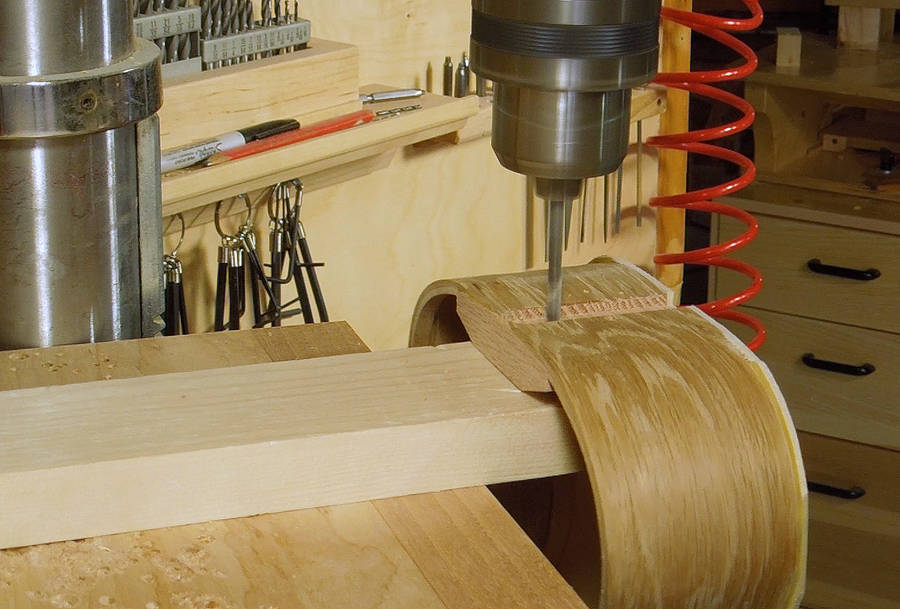
Here's drilling the holes for the hanger bolts in the neck block.
 I then transferred the hole locations onto the neck by placing a drill
in the hole and tapping it into the neck with a hammer.
I then transferred the hole locations onto the neck by placing a drill
in the hole and tapping it into the neck with a hammer.
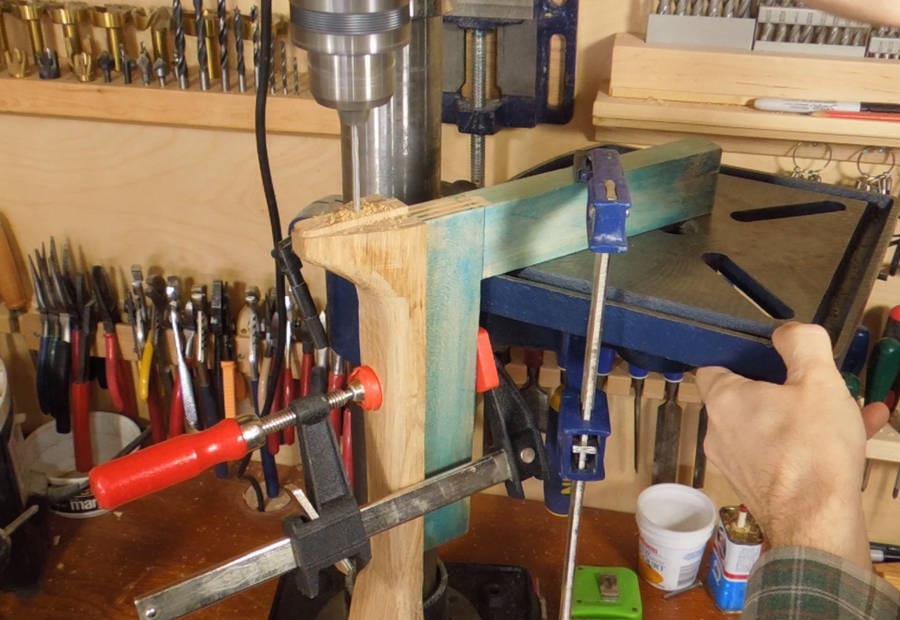 A complicated jig-up to drill the holes in the neck. A hand drill would have
been simpler, but adds the risk of drilling crooked.
A complicated jig-up to drill the holes in the neck. A hand drill would have
been simpler, but adds the risk of drilling crooked.
This would have been the prefect job for a horizontal boring machine, but I wanted to focus on building this without a lot of special equipment. (except for the pantorouter, but everyone should have one of those :) )
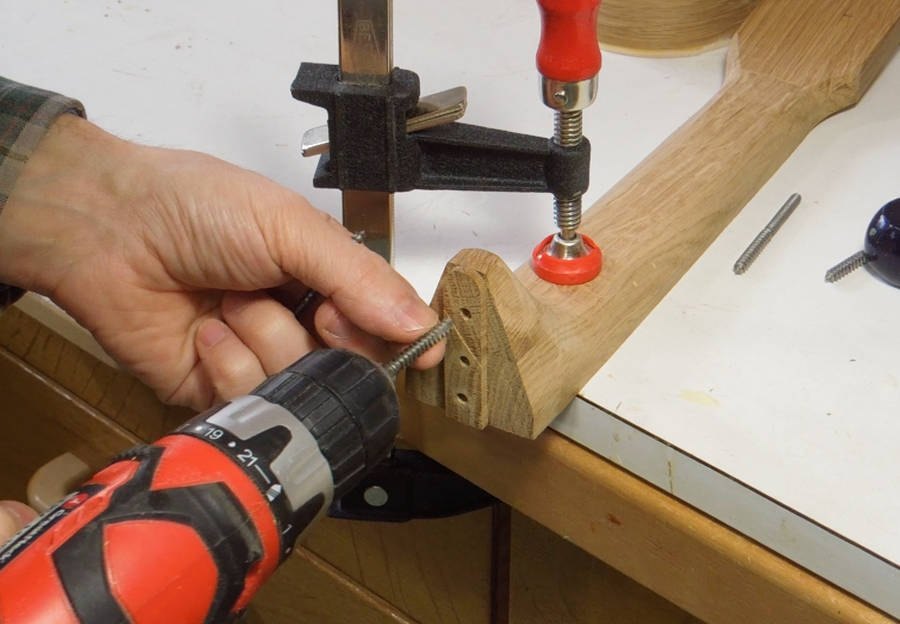
 I drilled relatively small pilot holes for the screw ends of the hanger bolts.
To avoid splitting the neck with the hanger bolts, I made a sort of wood screw
tap from an extra hanger bolt.
I drilled relatively small pilot holes for the screw ends of the hanger bolts.
To avoid splitting the neck with the hanger bolts, I made a sort of wood screw
tap from an extra hanger bolt.
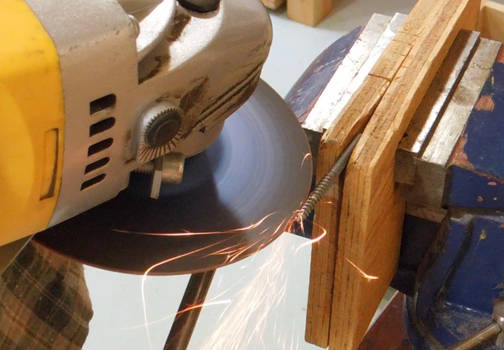
I made that by grinding a notch out of the threads on two sides with an angle grinder.
I then mounted the tap in a small drill and used it to cut threads in the holes.
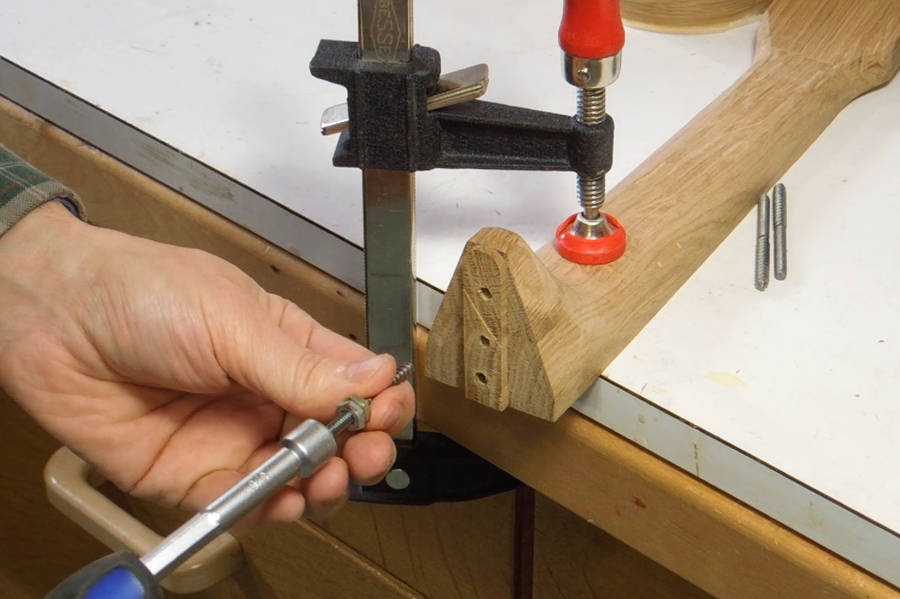 After that, installing the hanger bolts. I jammed two nuts against each other on
the machine screw end of it, then turned those with a nut driver.
After that, installing the hanger bolts. I jammed two nuts against each other on
the machine screw end of it, then turned those with a nut driver.
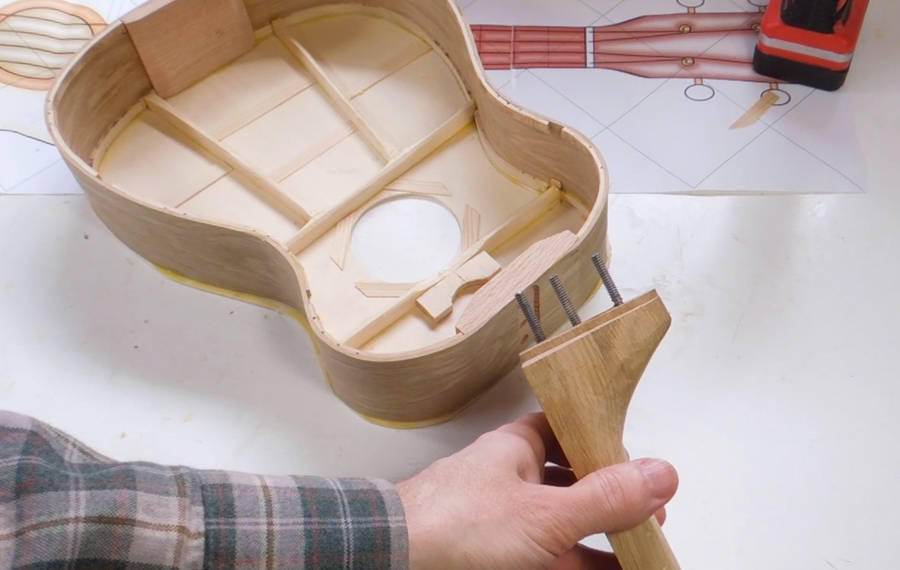 Three hanger bolts mounted. Maybe three bolts is overkill, but I don't really know what
I am doing, so better safe than sorry.
Three hanger bolts mounted. Maybe three bolts is overkill, but I don't really know what
I am doing, so better safe than sorry.
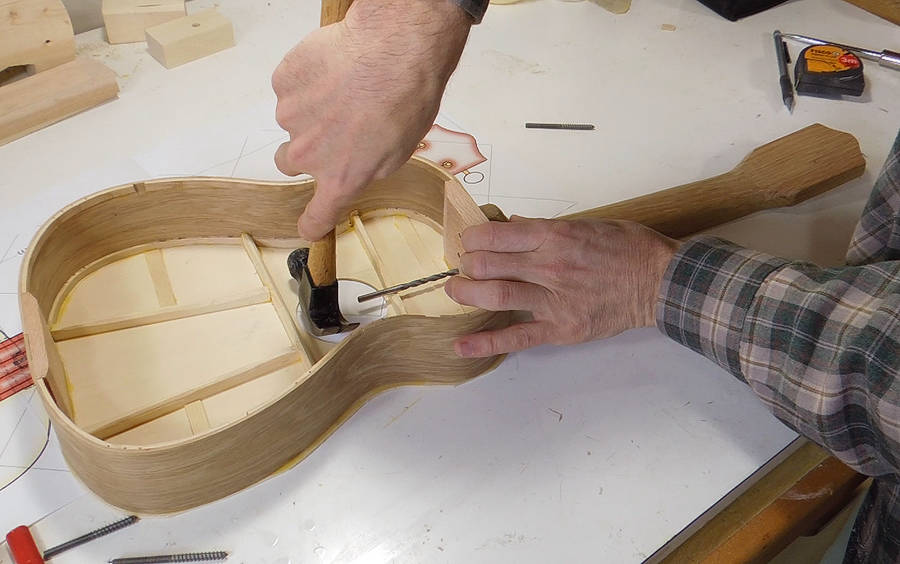
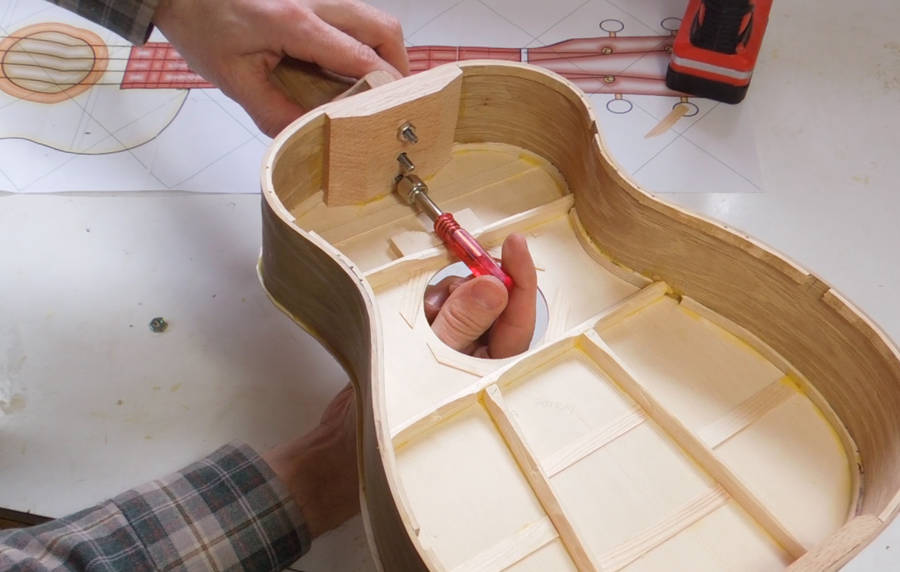 Getting the nuts on the hanger bolts will be tricky once the back of the ukulele
is glued on. Fortunately, I have a small nut driver that I can insert through the
hole. If you don't have a small nut driver, you can use a socket set socket, plus
an extension piece as a handle.
Getting the nuts on the hanger bolts will be tricky once the back of the ukulele
is glued on. Fortunately, I have a small nut driver that I can insert through the
hole. If you don't have a small nut driver, you can use a socket set socket, plus
an extension piece as a handle.
See also: Pat making a ukulele neck
Next : Making the fretboard
![]()