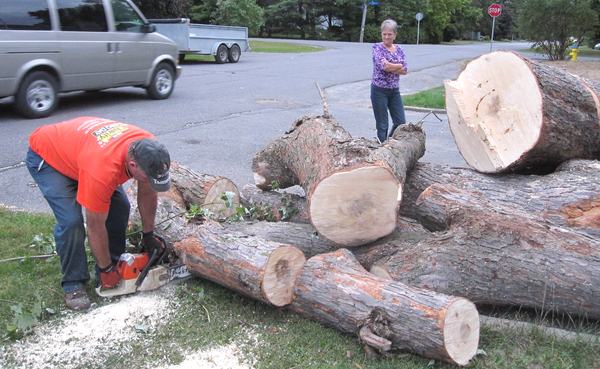
 I had the opportunity
to scavenge two short sections of log from a silver maple tree that
was cut down in my neighbourhood, which I milled in my back yard.
I had the opportunity
to scavenge two short sections of log from a silver maple tree that
was cut down in my neighbourhood, which I milled in my back yard.
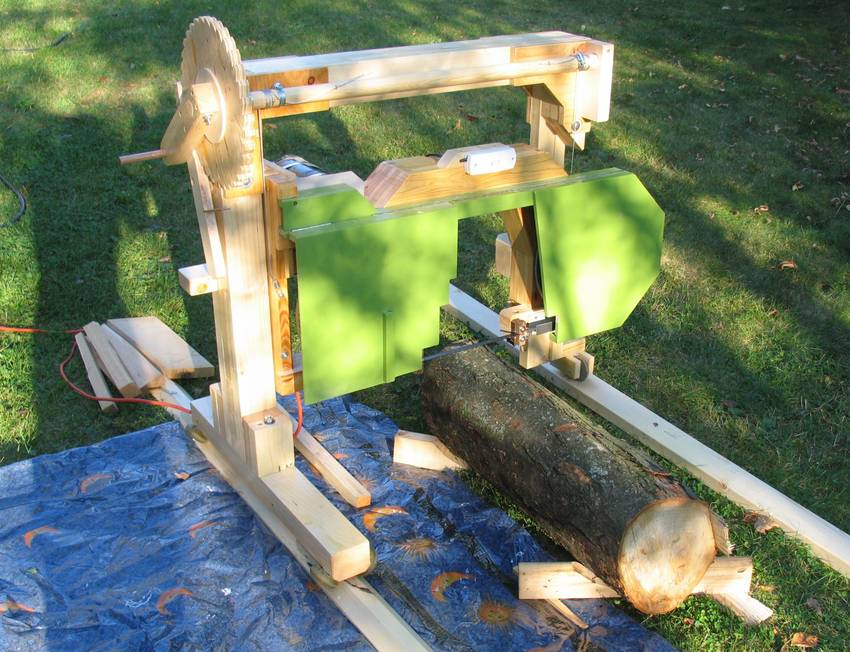
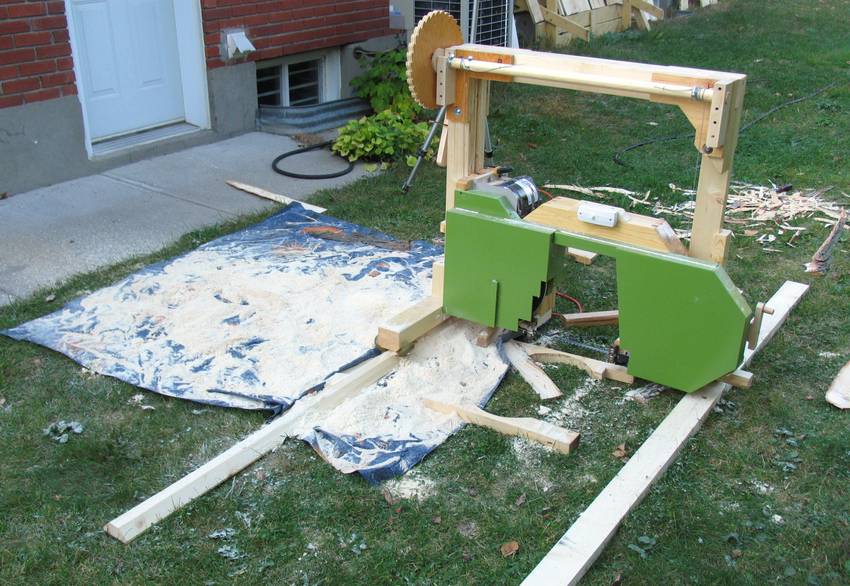
The log in this picture is a bit smaller than the previous one I cut, so I put my log cradles at an angle to grip the log a bit better. It's a bit of a wobbly arrangement, but I didn't think it was worth making new cradles for just one log.
 I waited for the 3/4" wide 2 TPI blades , which I had ordered
to arrive before milling this one.
Even though my saw uses a standard 93.5" blade length,
it really makes no sense to use a blade like that in ordinary 14" saws,
so I had to get this blade custom made from
R&D Bandsaws. Really costs no more
than buying locally, I just have to wait for it to get here in the mail.
I waited for the 3/4" wide 2 TPI blades , which I had ordered
to arrive before milling this one.
Even though my saw uses a standard 93.5" blade length,
it really makes no sense to use a blade like that in ordinary 14" saws,
so I had to get this blade custom made from
R&D Bandsaws. Really costs no more
than buying locally, I just have to wait for it to get here in the mail.
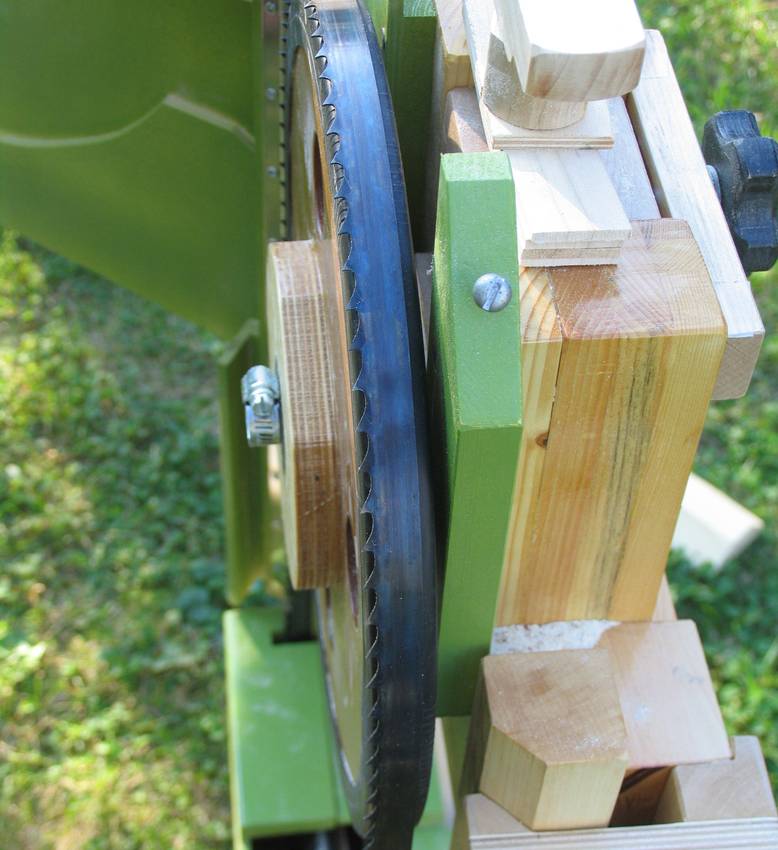
The blade overhangs the tire a little bit. I knew this would happen, but based on the sawdust tracks on the wheels, I know the blade only makes contact with maybe a 5 mm wide ridge at the center of the wheel anyway, so having the blade overhang the edge of the wheel doesn't make a difference.
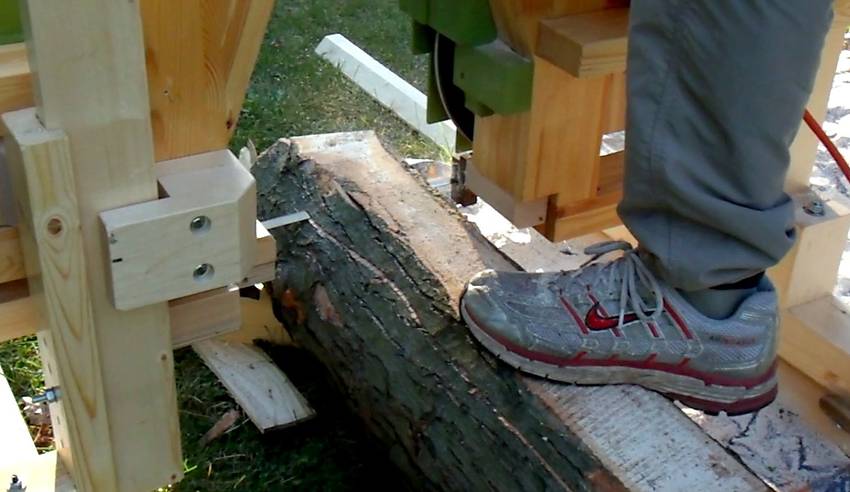 Because my sawmill is kind of wimpy as sawmills go, gravity for the most part is
enough to hold the log in place. With a small log, putting my foot on it helped
steady it.
Because my sawmill is kind of wimpy as sawmills go, gravity for the most part is
enough to hold the log in place. With a small log, putting my foot on it helped
steady it.
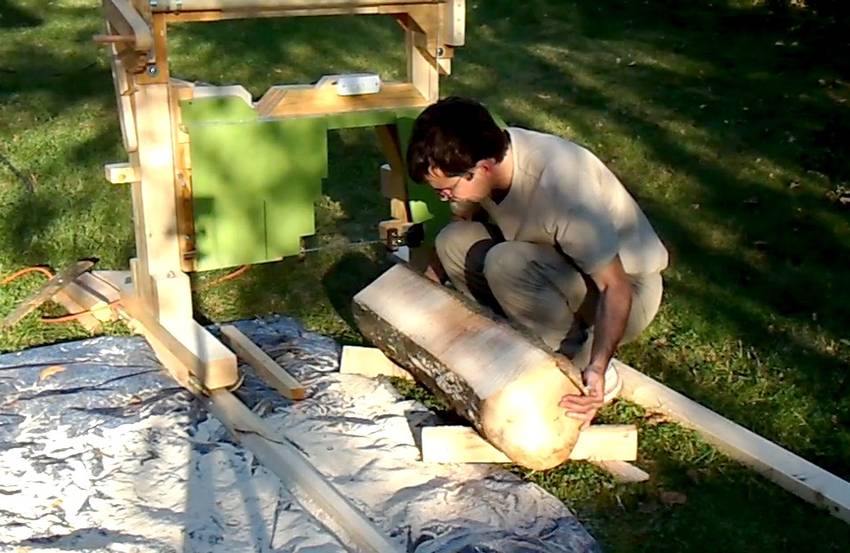 A plus side of small logs is that they are easier to turn and manipulate.
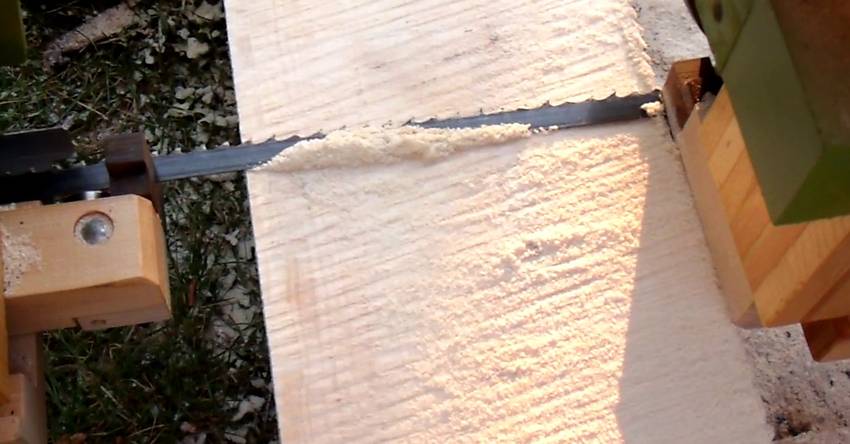
 The 3 TPI blade I was using for this log cut in a wavy sort of fashion. I'm
guessing it's from blade oscillations. I'm probably near a resonant frequency.
Running the saw a lot faster would probably help, but with just a 1 HP motor
on the end of an extension cord, I really don't have the power for that.
The 3 TPI blade I was using for this log cut in a wavy sort of fashion. I'm
guessing it's from blade oscillations. I'm probably near a resonant frequency.
Running the saw a lot faster would probably help, but with just a 1 HP motor
on the end of an extension cord, I really don't have the power for that.
 The 1/2" 3 TPI blade that I used for the previous log produced a
much smoother cut than this blade.
But it also cut slower and needed sharpening more often.
The 1/2" 3 TPI blade that I used for the previous log produced a
much smoother cut than this blade.
But it also cut slower and needed sharpening more often.
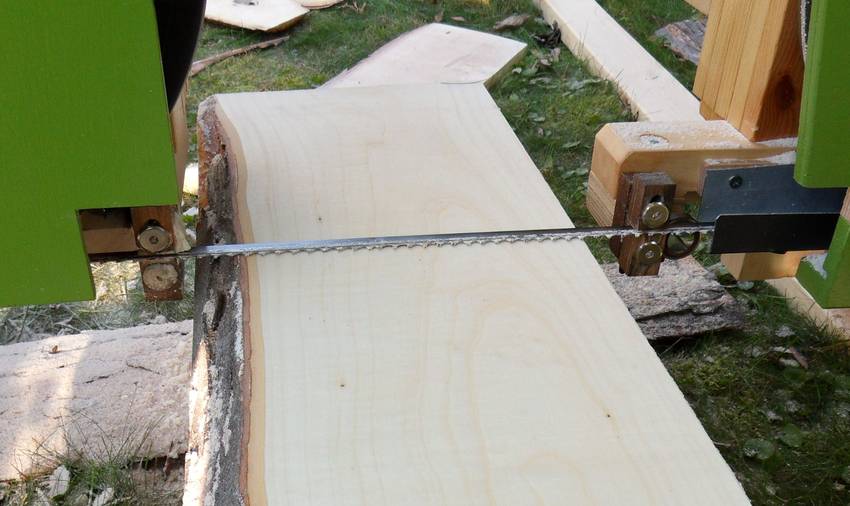
 It's always nice to see the blade just grazing the surface on the return
stroke. If there was any blade drift during the cut, the return
stroke makes it obvious.
It's always nice to see the blade just grazing the surface on the return
stroke. If there was any blade drift during the cut, the return
stroke makes it obvious.
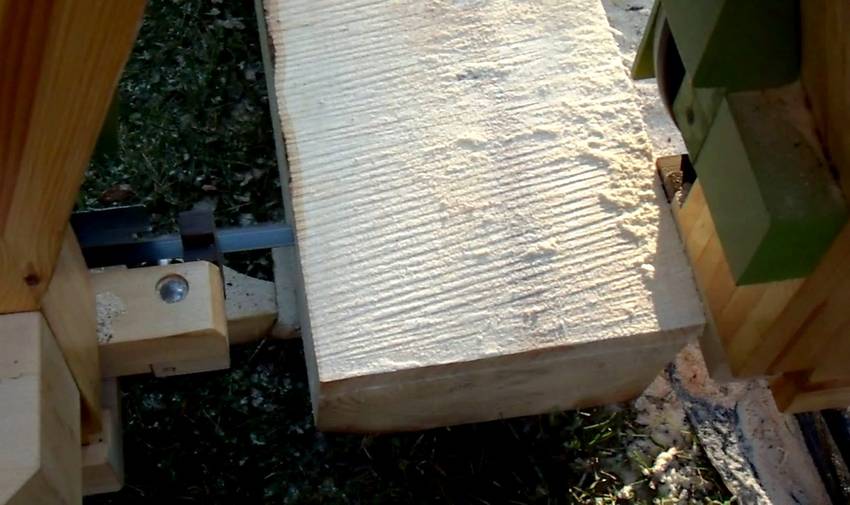
Also note how the log is right up against the right side blade guide. Having it run up against the blade guide helps keep what's left of it in place, and really cuts down on vibrations.
 I still haven't done anything to elevate the rails. For the last few cuts, where
the bandsaw is further down, it just throws all the sawdust up against
the rail, and I have to brush it off the rail after every cut.
I still haven't done anything to elevate the rails. For the last few cuts, where
the bandsaw is further down, it just throws all the sawdust up against
the rail, and I have to brush it off the rail after every cut.
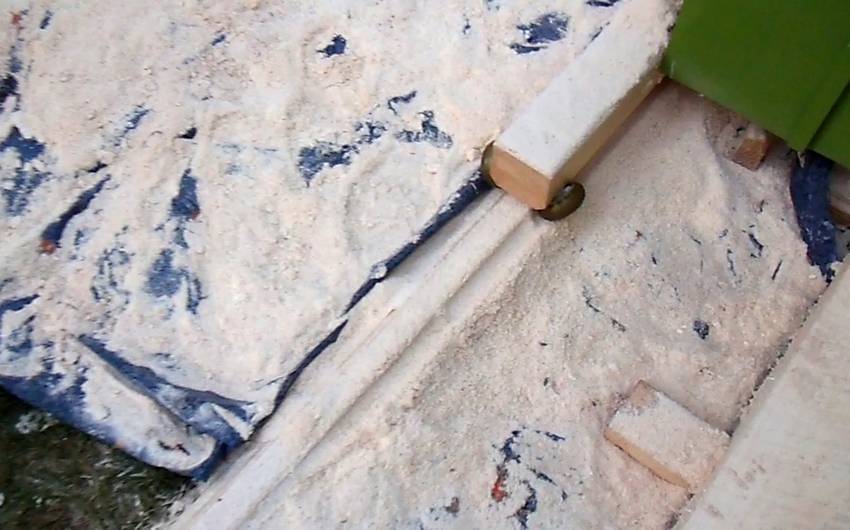
 I put a sheet of plastic down to catch the sawdust. I didn't do this
on the previous log that I cut, and it was a challenge trying to get the
sawdust out of the grass.
I put a sheet of plastic down to catch the sawdust. I didn't do this
on the previous log that I cut, and it was a challenge trying to get the
sawdust out of the grass.
 Cleaning up the sawdust was just a matter of folding the plastic in half and
dumping it into a bucket. I nearly filled a 10 liter bucket from the one
log.
Cleaning up the sawdust was just a matter of folding the plastic in half and
dumping it into a bucket. I nearly filled a 10 liter bucket from the one
log.
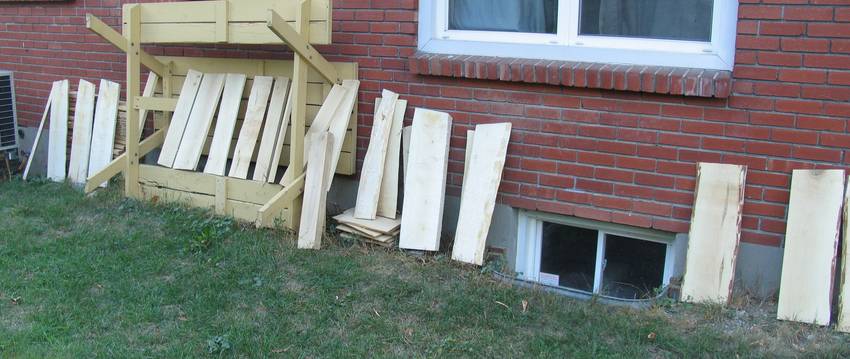 I will sticker up the lumber eventually, but I figure for the time being,
leaning it up against the side of the house will give it more sun and wind
exposure and hopefully faster drying for now.
I will sticker up the lumber eventually, but I figure for the time being,
leaning it up against the side of the house will give it more sun and wind
exposure and hopefully faster drying for now.
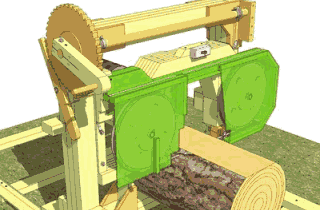
A big difference between upright bandsaws and horizontal bandmills is that horizontal bandmills use much more power (often tens of HP), wider blades with far fewer teeth, and a lot more feed pressure. This allows sawmills to operate with blades that have far less of a sharp edge than upright bandsaws require, but also means rougher thicker cuts.
My experience is that once I fill the sawdust drawer on one of my upright bandsaws, the blade is ready for sharpening too. But milling logs means very large cut areas, and producing an equivalent amount of sawdust takes hardly any time.
Fortunately, sharpening the blade in place on a horizontal mill doesn't take much time. I just back the mill up from the log and raise the head all the way. Then, sitting on the log, I touch the side (not the edge) of a Dremel cut-off disk to the tip of each tooth just briefly, similar to this technique (but skip the stoning!). With a 2 TPI blade, it takes less than five minutes.
 Another difference between this and a real bandsaw sawmill is that
bandmills usually have some means of continually wetting the blade
with some detergent solution. This helps to keep it from gumming up
with sap and also lubricates it in the log.
For fresh hardwood logs, there's enough moisture in the log that this
is unnecessary. For softwoods (evergreens),
the blades also get gummed up with sap unless detergent is used.
I find even resawing 2x6 lumber on my
upright bandsaws, sometimes I have to scrape the gunk off the sides of
the blade. I do this by pressing a screwdriver to the side of it while it's running.
Another difference between this and a real bandsaw sawmill is that
bandmills usually have some means of continually wetting the blade
with some detergent solution. This helps to keep it from gumming up
with sap and also lubricates it in the log.
For fresh hardwood logs, there's enough moisture in the log that this
is unnecessary. For softwoods (evergreens),
the blades also get gummed up with sap unless detergent is used.
I find even resawing 2x6 lumber on my
upright bandsaws, sometimes I have to scrape the gunk off the sides of
the blade. I do this by pressing a screwdriver to the side of it while it's running.
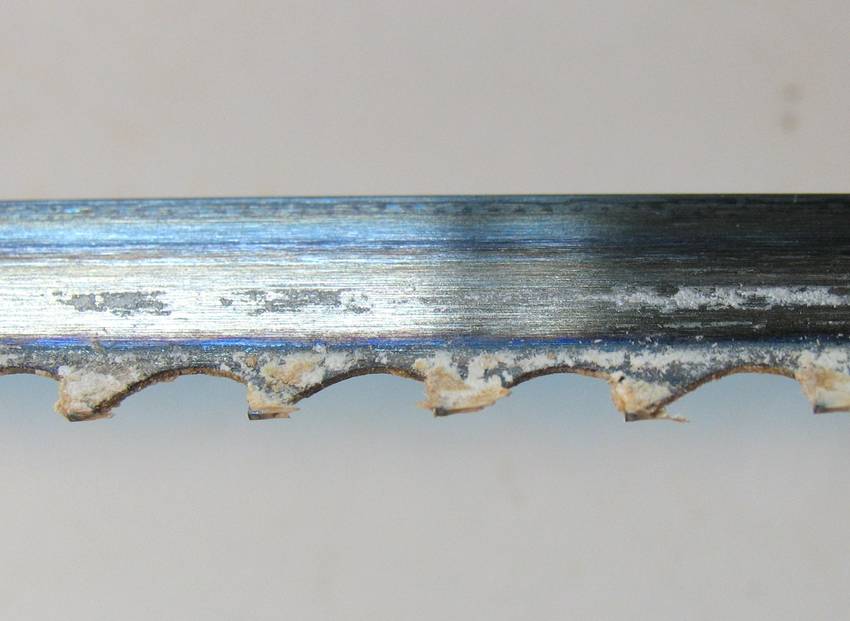
The silver maple I was cutting also had it's caveat - it's a very stringy fibery sort of wood, and fibers were starting to get hooked on the teeth.
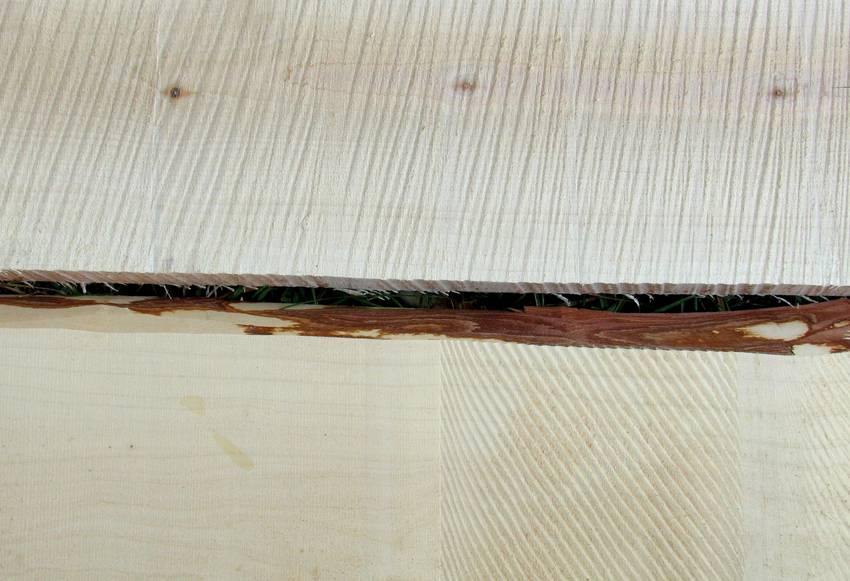 The top board in the image at left was cut with the 2 TPI blade, which gives
me a bit of a rough cut. The board below was cut with a 3 TPI blade. That blade
requires frequent resharpening, and I hit a point where it got too dull on the right
half of that board. Once it's too dull, it just refuses to go further. I backed
it out of the log, sharpened it in place, then finished the cut (left half of that board).
With a sharp blade, the cut is so smooth I could get it to finish
smoothness with just a scraper and sandpaper.
The top board in the image at left was cut with the 2 TPI blade, which gives
me a bit of a rough cut. The board below was cut with a 3 TPI blade. That blade
requires frequent resharpening, and I hit a point where it got too dull on the right
half of that board. Once it's too dull, it just refuses to go further. I backed
it out of the log, sharpened it in place, then finished the cut (left half of that board).
With a sharp blade, the cut is so smooth I could get it to finish
smoothness with just a scraper and sandpaper.
 Here's the 1 HP pool pump motor on my saw, next to a 2 HP motor that should
just barely fit. I may mount that motor on it eventually
A caveat with that is that I need 240 volts for the 2 HP motor. I might make
a long cord that plugs into a 240 volt dryer plug.
It's important to be able to plug the saw in at other people's houses —
after all, the idea of such a wimpy sawmill is that I can take to the tree,
even if it means carrying it into somebody's backyard.
Here's the 1 HP pool pump motor on my saw, next to a 2 HP motor that should
just barely fit. I may mount that motor on it eventually
A caveat with that is that I need 240 volts for the 2 HP motor. I might make
a long cord that plugs into a 240 volt dryer plug.
It's important to be able to plug the saw in at other people's houses —
after all, the idea of such a wimpy sawmill is that I can take to the tree,
even if it means carrying it into somebody's backyard.
Update 2012: I did use that motor.
 More bandsaw sawmill
 The mill in bandsaw
 Chainsaw milling
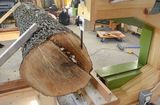 Bandsaw-on-a-dolly sawmill
 My dad's old sawmill