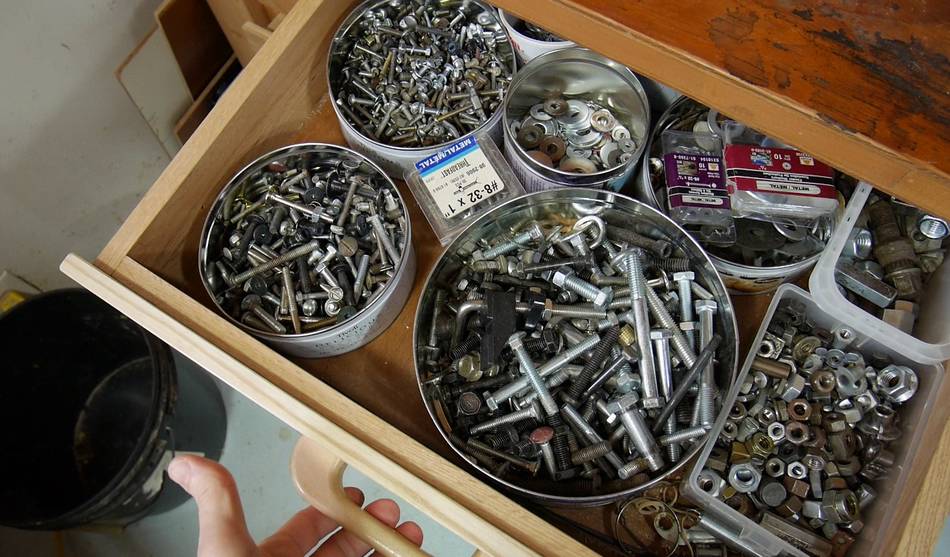
 I keep machine screws in round tin cans in this drawer. But the cans were
getting too full. Rectangular containers would waste less space,
but I don't have any rectangular tins that would be suitable.
So I figured I'd make some wooden boxes.
I keep machine screws in round tin cans in this drawer. But the cans were
getting too full. Rectangular containers would waste less space,
but I don't have any rectangular tins that would be suitable.
So I figured I'd make some wooden boxes.
I keep machine screws in round tin cans in this drawer. But the cans were
getting too full. Rectangular containers would waste less space,
but I don't have any rectangular tins that would be suitable.
So I figured I'd make some wooden boxes.
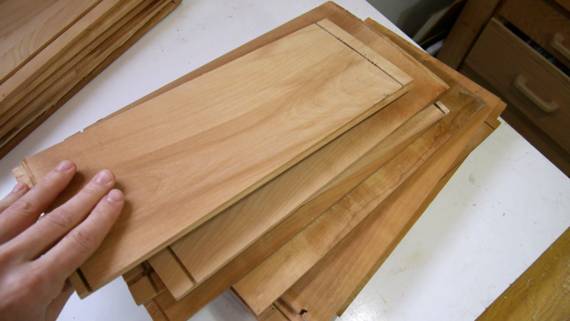
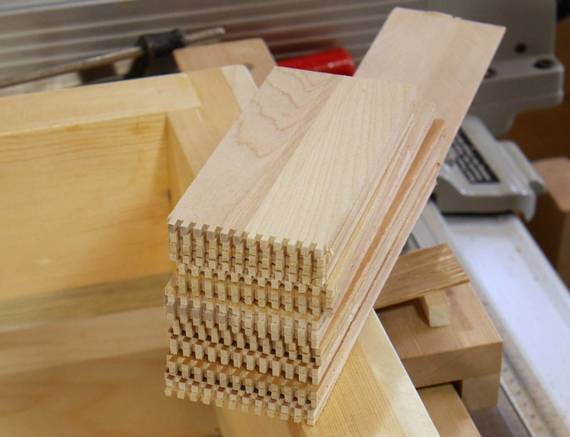
I started with some thin (about 7 mm) pieces of wood that came from the sides of some cheap dresser drawers from the curb.
 Not wanting to waste space in the drawers, I resawed the thin wood down the
middle to make even thinner sides for my boxes, just under 3mm (1/8") thick.
Not wanting to waste space in the drawers, I resawed the thin wood down the
middle to make even thinner sides for my boxes, just under 3mm (1/8") thick.
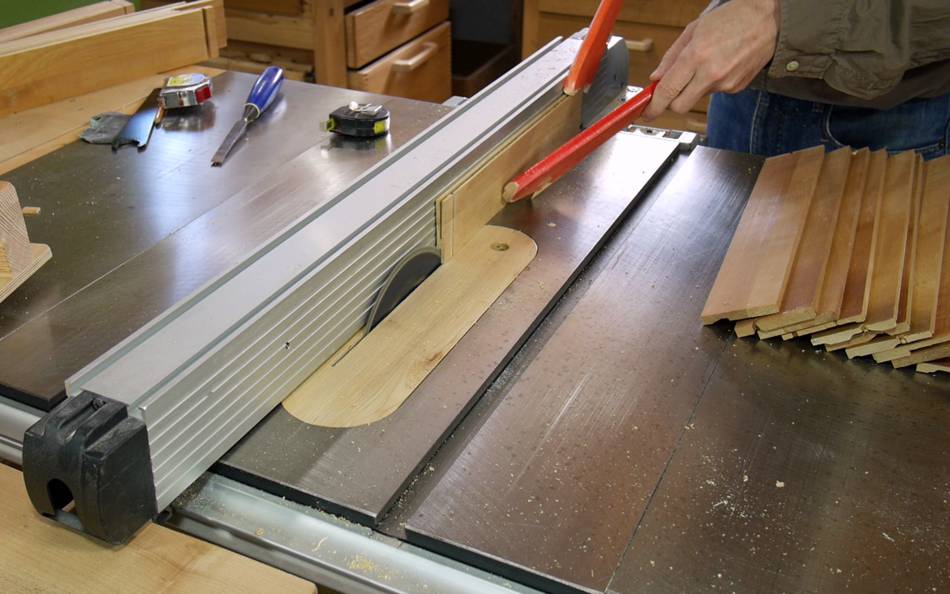
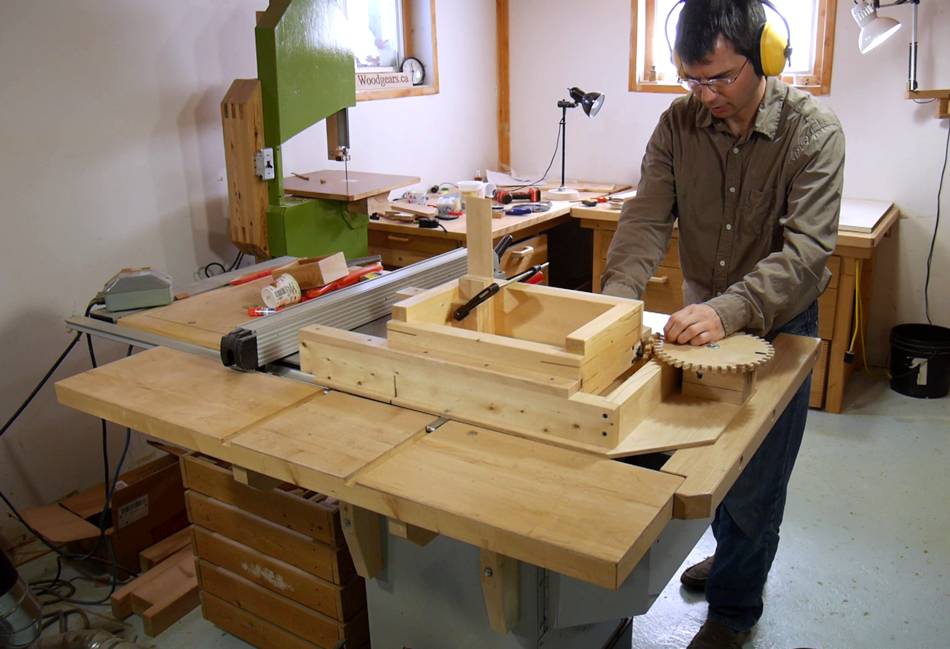
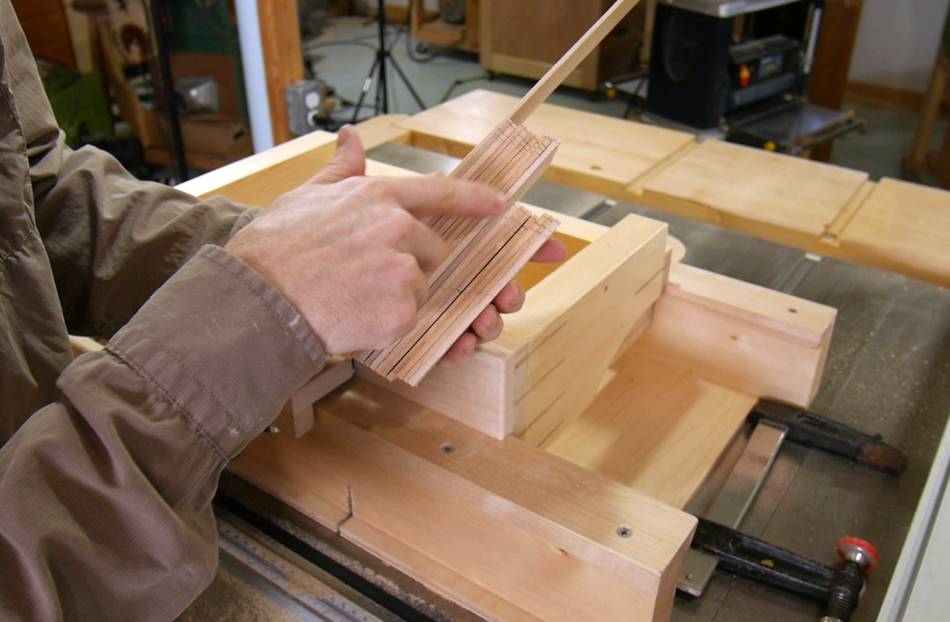
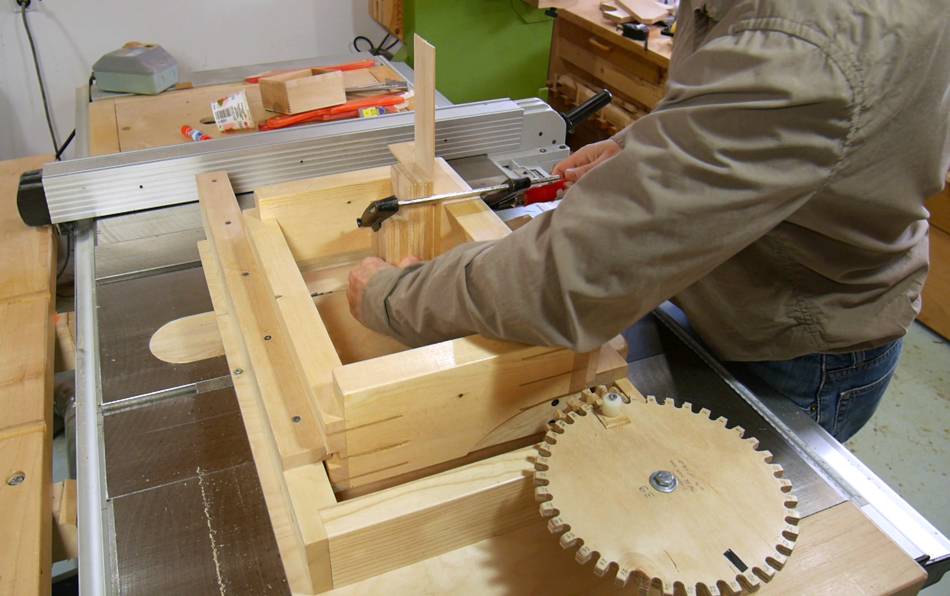 Material this thin needs very fine box joints. This is where
my screw advance box joint jig is ideal.
It can make small increments accurately, and do it with a whole stack of
workpieces at once.
Material this thin needs very fine box joints. This is where
my screw advance box joint jig is ideal.
It can make small increments accurately, and do it with a whole stack of
workpieces at once.
 I have to make sure all the pieces are pushed up against the right side of the jig to
get the fingers all properly aligned.
I have to make sure all the pieces are pushed up against the right side of the jig to
get the fingers all properly aligned.
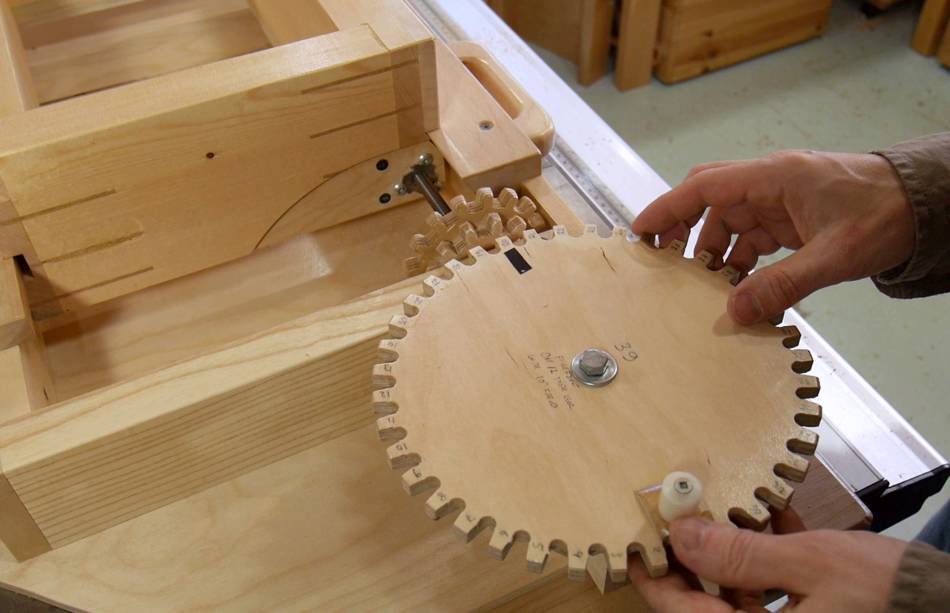
 I set up the jig using a 39-tooth gear meshing with the 12-tooth gear on the advance
screw. With a 16 turns per inch on the advance screw, that gives me 39/12 * 1/16
inches per turn, which is 0.203 inches or 5.16 mm. The blade cuts a kerf of
just over 2.5 mm (half the increment) so that makes for joints that fit quite tight.
I set up the jig using a 39-tooth gear meshing with the 12-tooth gear on the advance
screw. With a 16 turns per inch on the advance screw, that gives me 39/12 * 1/16
inches per turn, which is 0.203 inches or 5.16 mm. The blade cuts a kerf of
just over 2.5 mm (half the increment) so that makes for joints that fit quite tight.
The cool thing is, I established this 39 to 12 tooth ratio as the right increment to use with that saw blade years ago. I no longer need to experiment to get the right spacing with this setup.
 Having cut the joints on one end of each piece, I need to offset the cuts
for the mating joints by half an increment. So I disengage the crank gear, turn it half
a turn and re-engage it.
Having cut the joints on one end of each piece, I need to offset the cuts
for the mating joints by half an increment. So I disengage the crank gear, turn it half
a turn and re-engage it.
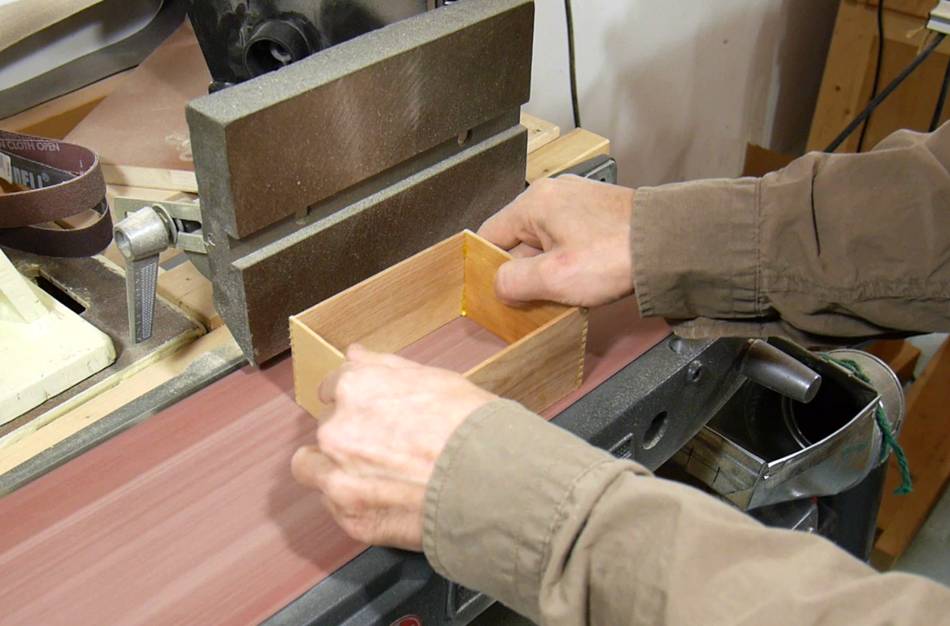
 With fingers that fine, it's all too easy to get the orientations mixed up when assembling
the boxes, so after making the first series of cuts, I put a pencil mark on the fence
side of the jig of all the joints.
With fingers that fine, it's all too easy to get the orientations mixed up when assembling
the boxes, so after making the first series of cuts, I put a pencil mark on the fence
side of the jig of all the joints.
When assembling, I know I need to mate a marked end with an unmarked end to get proper alignment, and I need to keep the marks all on the same side of the box.
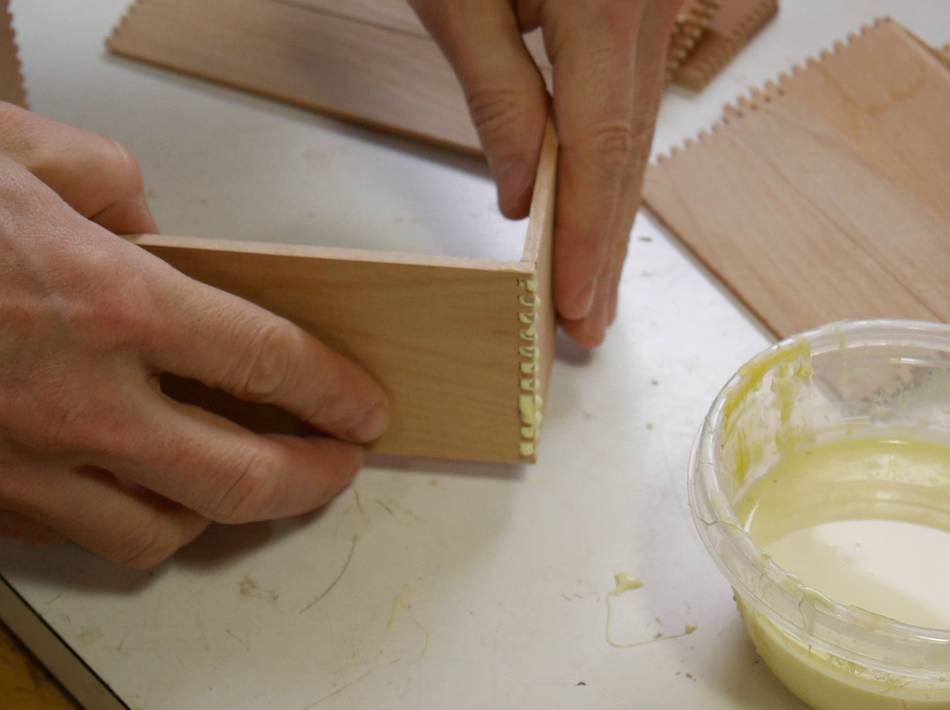
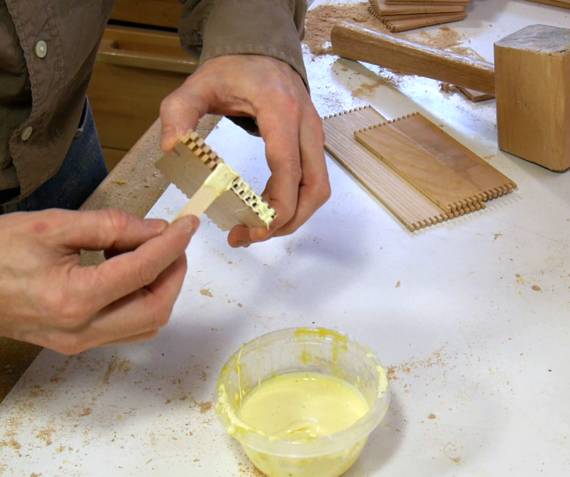
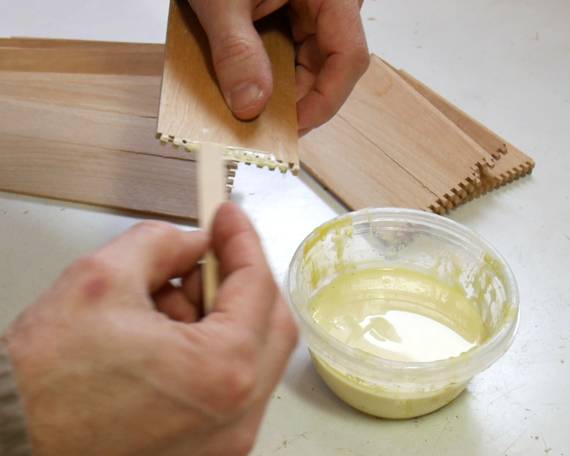 Gluing the joints together. I first tried applying the glue just by dipping
the joint in the glue, but the thick glue would stick just to the
ends of the fingers. Using a splint of wood to smear glue along the fingers
instead gets it in between much better.
Gluing the joints together. I first tried applying the glue just by dipping
the joint in the glue, but the thick glue would stick just to the
ends of the fingers. Using a splint of wood to smear glue along the fingers
instead gets it in between much better.
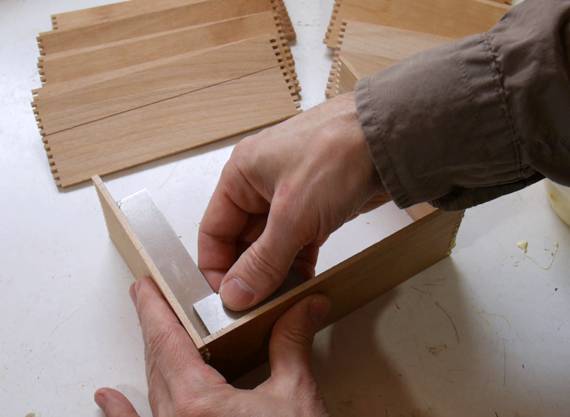 I need to make sure the joints are square. With tight joints, the glue can
set quickly.
I need to make sure the joints are square. With tight joints, the glue can
set quickly.
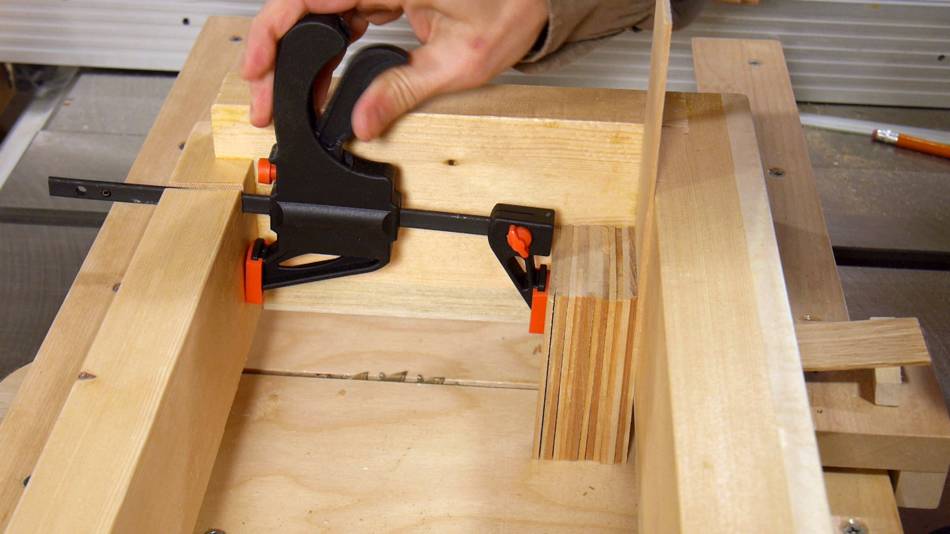
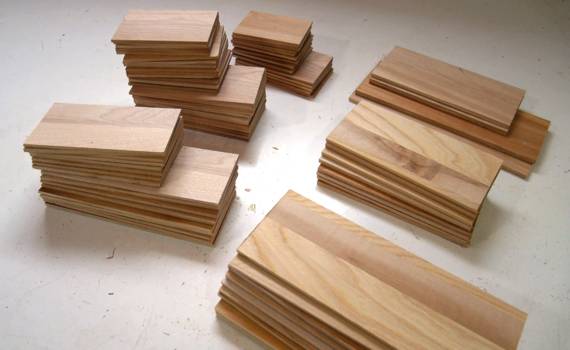
 For another set of boxes, slightly smaller, I couldn't adequately
reach the workpieces with a regular clamp.
For another set of boxes, slightly smaller, I couldn't adequately
reach the workpieces with a regular clamp.
I used a small quick-grip style clamp configured as a spreader clamp to hold the pieces into the box. I cut a slot into the back of the jig to let me get the clamp further down. It seemed an elegant solution.
 But it turned out, the clamp didn't have enough clamping force.
Especially when cutting fast, the work pieces would slip a little bit,
making for inaccurate box joints.
But it turned out, the clamp didn't have enough clamping force.
Especially when cutting fast, the work pieces would slip a little bit,
making for inaccurate box joints.
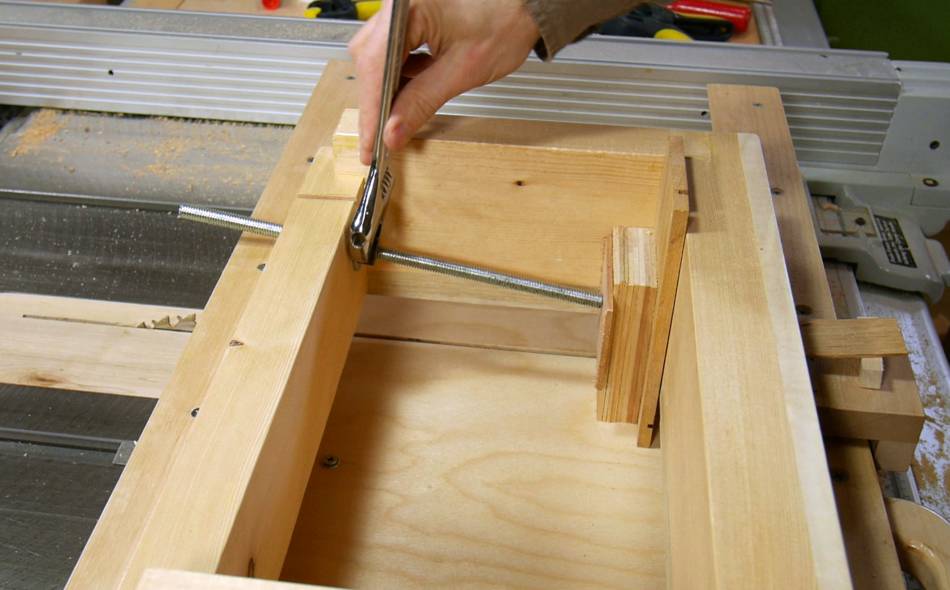
So I drilled a hole in the back of the jig and used a threaded rod with a nut to push the work pieces against the jig. Tightening the nut with a wrench, I was able to get enough clamping force that nothing moved.
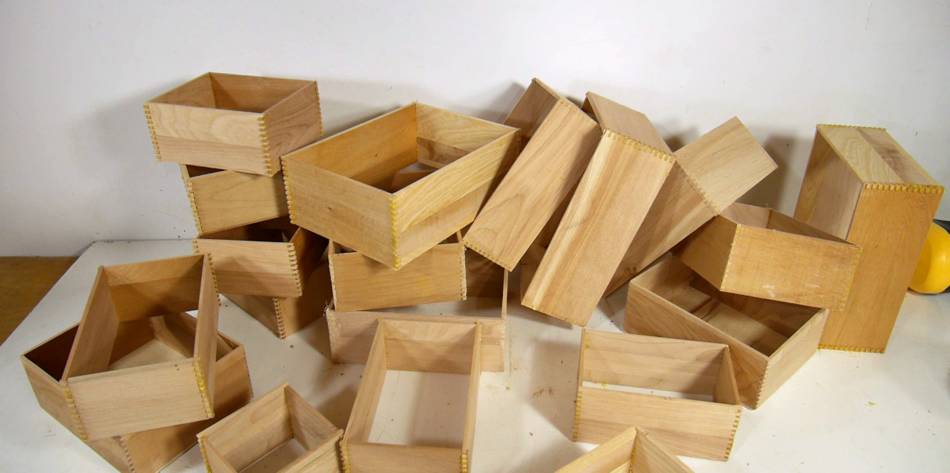
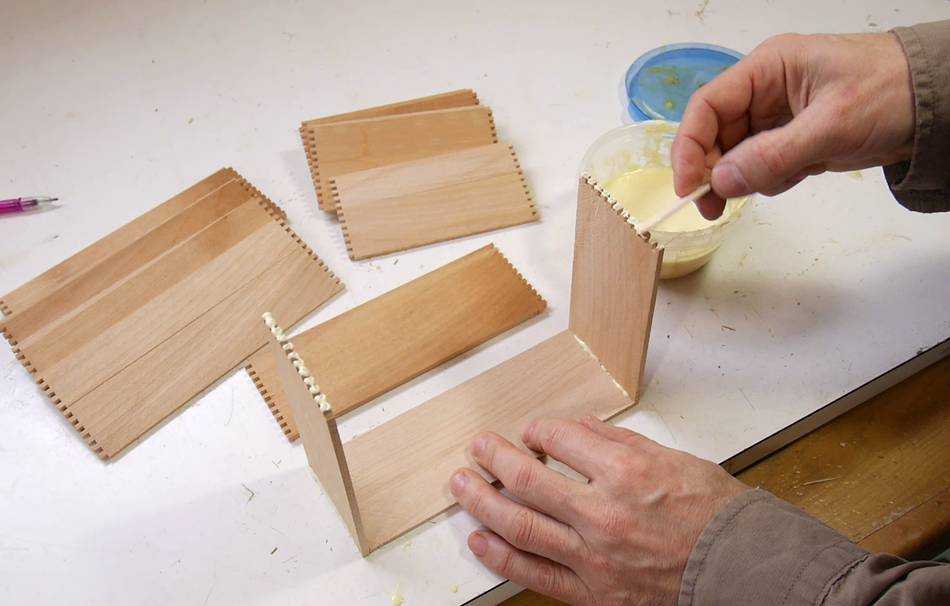
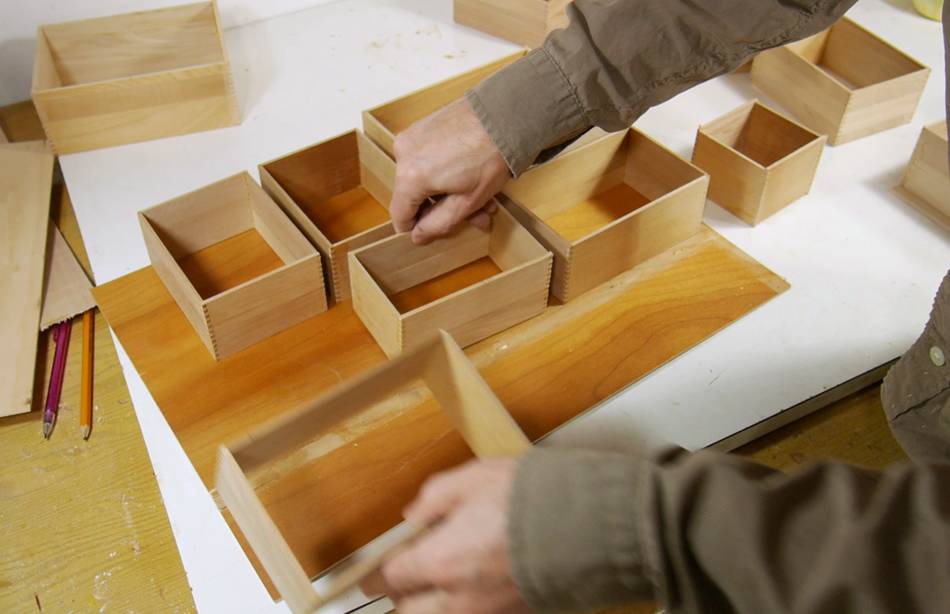
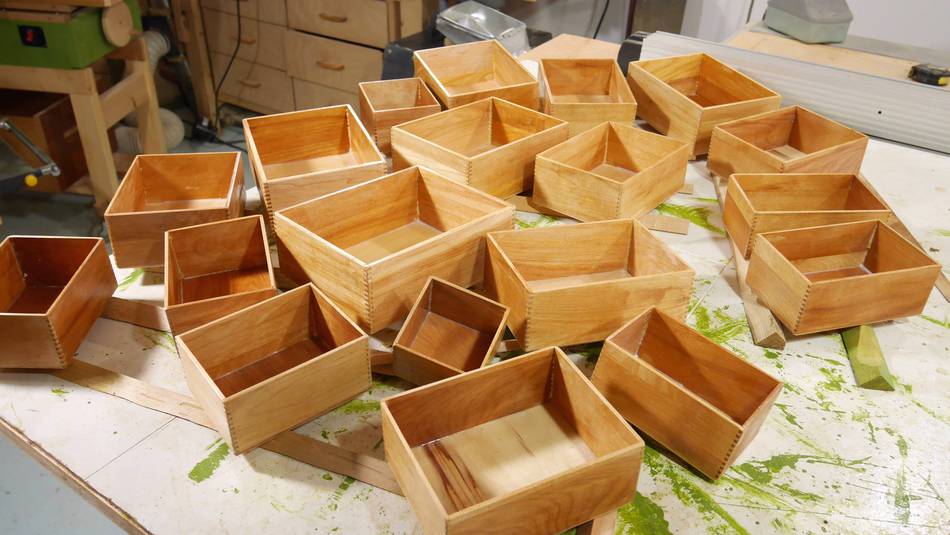
 Lots of boxes glued up. The more I glued up, the faster I got at it. For the first
two joints of a box, I can hold the mating pieces together and smear glue
into both sides at the same time.
Lots of boxes glued up. The more I glued up, the faster I got at it. For the first
two joints of a box, I can hold the mating pieces together and smear glue
into both sides at the same time.
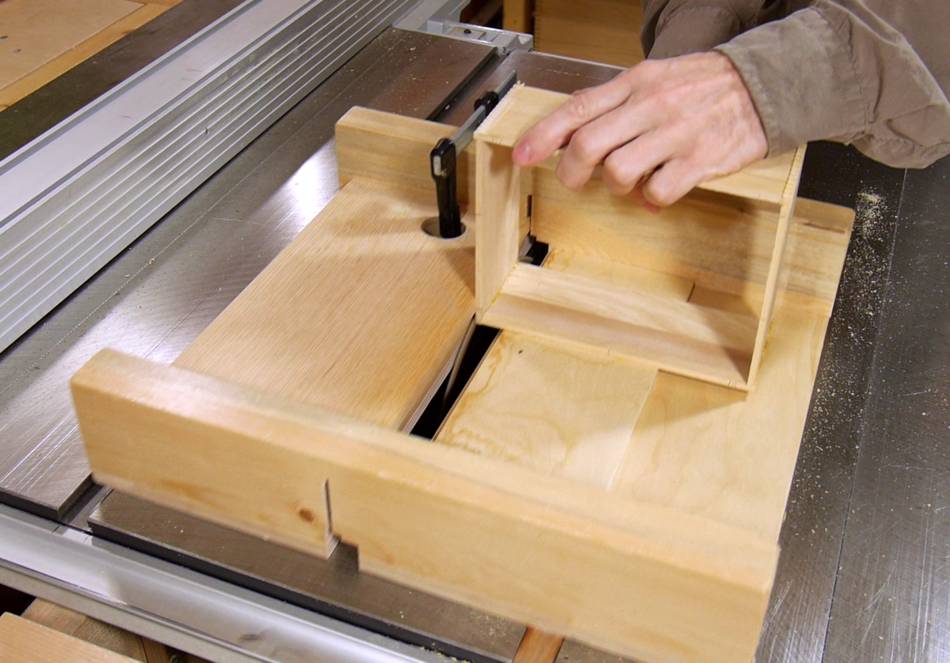
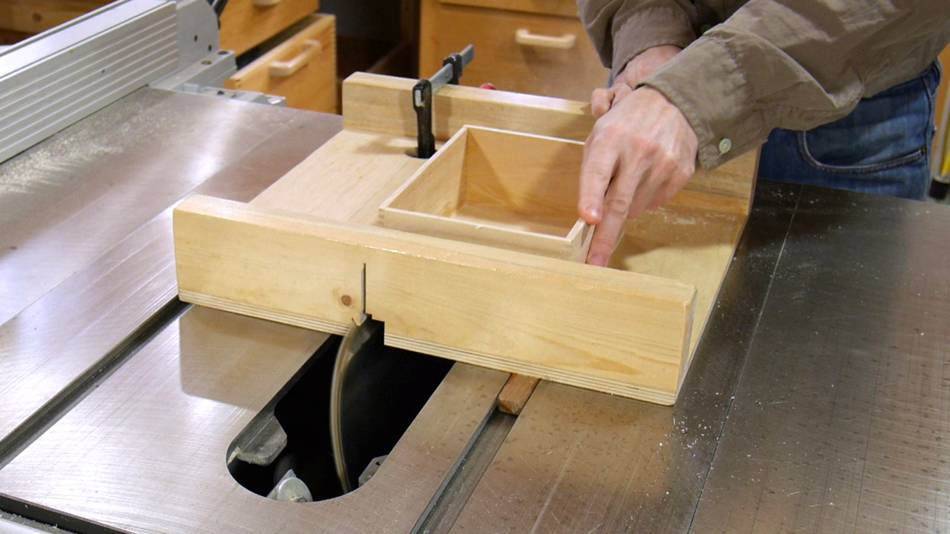
 I deliberately cut the fingers of the joints slightly too long. If I was making just
a few boxes, I would have sanded them flush, but with 19 boxes, it was worth
setting up the table saw for this.
I deliberately cut the fingers of the joints slightly too long. If I was making just
a few boxes, I would have sanded them flush, but with 19 boxes, it was worth
setting up the table saw for this.
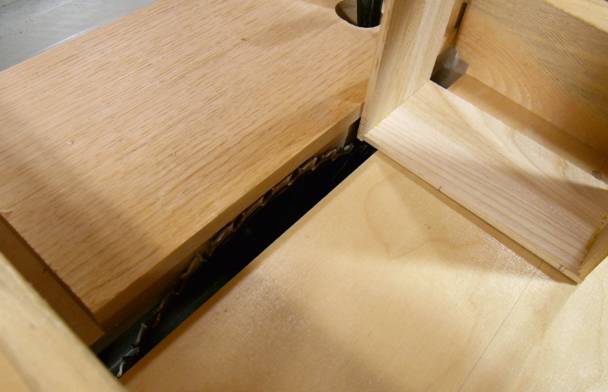
I'm using my old small table saw sled, which has a wide slot in the bottom from having cut dadoes with it. I clamped a board on the right side to act as a stop just above the blade. Pushing the box against the stop positions it so the blade flush trims the corner.
 I used some very thin (2 mm thick) scraps of plywood for the bottoms. Here I'm checking
how many bottoms I can cut out of this scrap, being careful to avoid the damaged
areas.
I used some very thin (2 mm thick) scraps of plywood for the bottoms. Here I'm checking
how many bottoms I can cut out of this scrap, being careful to avoid the damaged
areas.
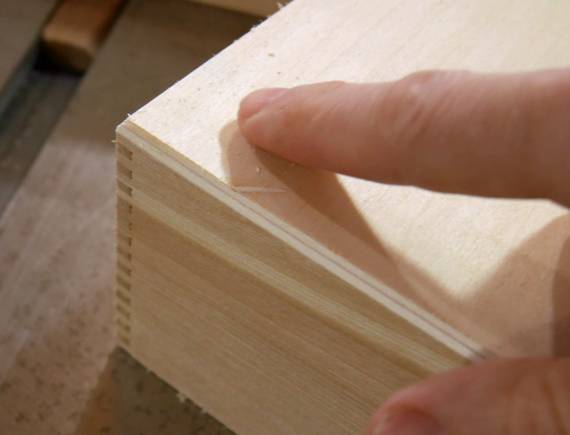
 I sanded the bottom edges of the boxes to make sure the pieces were perfectly
flush with each other for gluing.
I sanded the bottom edges of the boxes to make sure the pieces were perfectly
flush with each other for gluing.

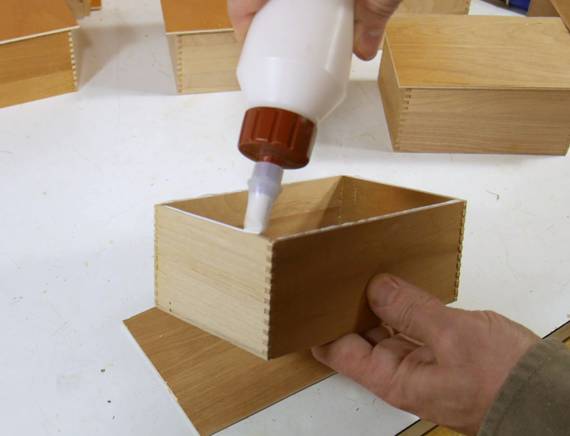 A glue bottle worked best for putting a thin bead of glue along the narrow bottom edges.
Then I glued the bottom on, and weighed it down. I stacked two boxes under each
weight because I only have so many weights. I ended up using various power tools as
weights as well.
A glue bottle worked best for putting a thin bead of glue along the narrow bottom edges.
Then I glued the bottom on, and weighed it down. I stacked two boxes under each
weight because I only have so many weights. I ended up using various power tools as
weights as well.
 I made the bottoms a bit larger than the boxes so I wouldn't have to be so careful lining
them up for gluing.
I used the same flush trimming set-up that I used for the fingers to flush trim the bottoms,
but this time I tilted the blade by 30 degrees to also put a bevel on the bottoms.
I made the bottoms a bit larger than the boxes so I wouldn't have to be so careful lining
them up for gluing.
I used the same flush trimming set-up that I used for the fingers to flush trim the bottoms,
but this time I tilted the blade by 30 degrees to also put a bevel on the bottoms.
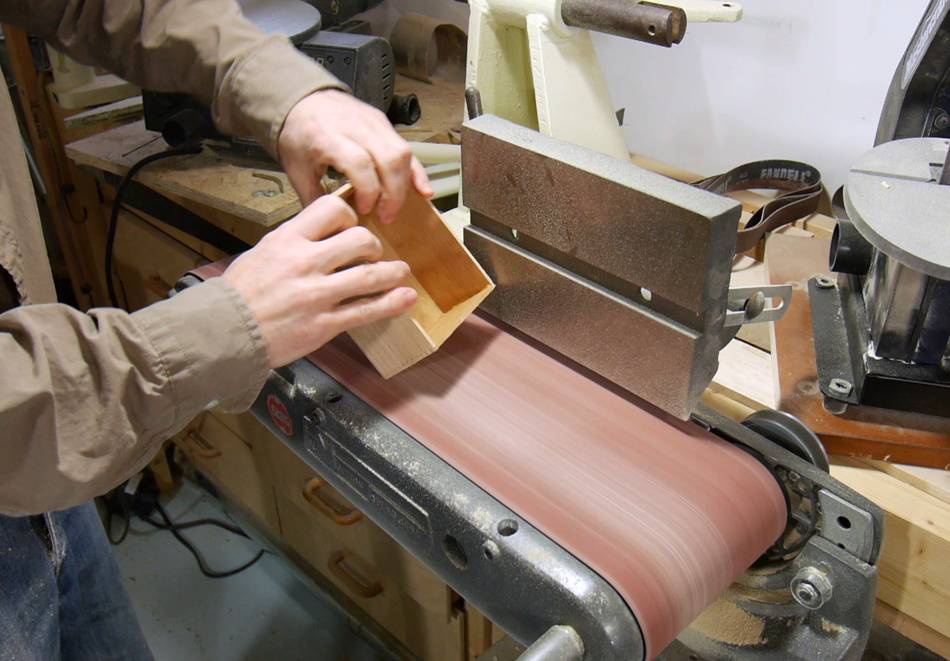 After that, I sanded all the box joints, bottom edges and corners to smooth and
round the boxes a bit.
After that, I sanded all the box joints, bottom edges and corners to smooth and
round the boxes a bit.
 For organizing screws and such in drawers, varnish is strictly unnecessary.
But I don't like how raw wood looks when it gets stained from greasy fingers.
So I gave the boxes one coat of varnish all around, plus another on the
outside and top edges.
For organizing screws and such in drawers, varnish is strictly unnecessary.
But I don't like how raw wood looks when it gets stained from greasy fingers.
So I gave the boxes one coat of varnish all around, plus another on the
outside and top edges.
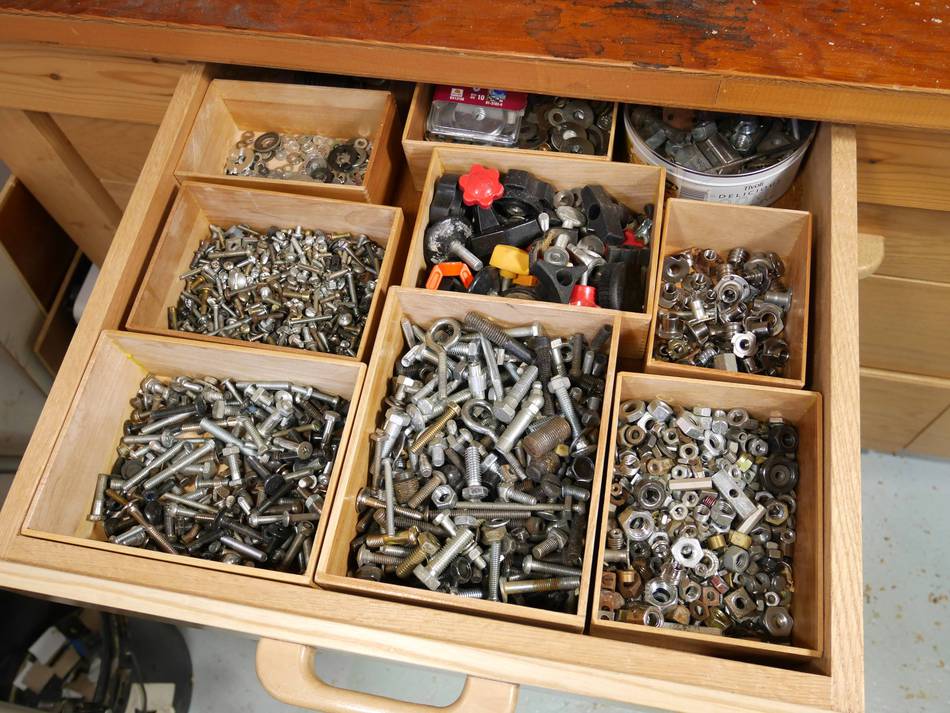 Some of the boxes now in my screw drawer. The use of space is much improved!
I only made enough boxes for a few drawers, but you could take it to extreme, like Marius Hornberger's drawer boxes. This did give me the idea for those.
But for small parts, I prefer to make trays from plastic food cups or These plastic bins
 More about Box joints
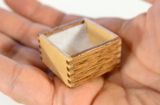 Tiny little box
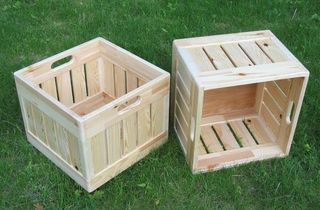 Milk crate style wooden boxes
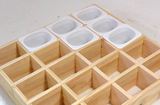 Parts sorting tray from yoghurt cups
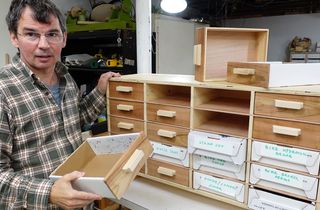 Cubbies for cardboard boxes and drawers
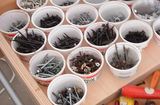 More parts trays from food cups
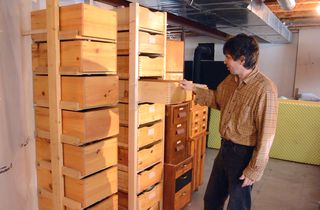 Rack of storage boxes
 Kitchen cabinet organizer boxes
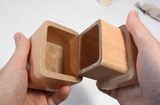 Small keepsake box with the pantorouter
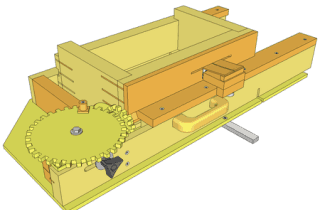 Plans for the screw
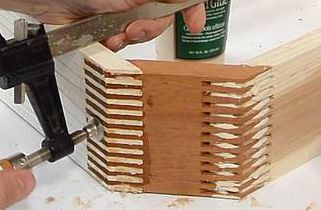 Octagonal box joined box