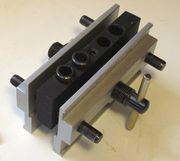
 I bought one of those "self centering dowel jigs" at
Lee Valley Tools. It seems to be the same jig
that is available everywhere, and it's reasonably priced.
I bought one of those "self centering dowel jigs" at
Lee Valley Tools. It seems to be the same jig
that is available everywhere, and it's reasonably priced.
I bought one of those "self centering dowel jigs" at
Lee Valley Tools. It seems to be the same jig
that is available everywhere, and it's reasonably priced.
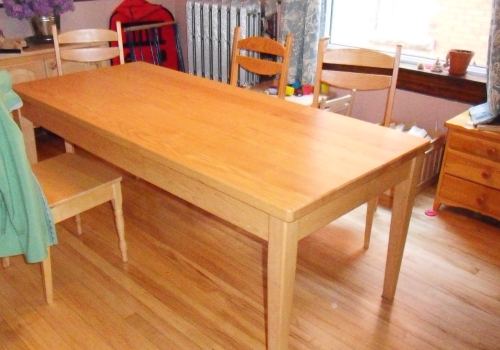 My goal was to modify this table that my dad had built. As a result of a misunderstanding,
my dad put the legs on the very corners of this table. It was
originally built for my brother, but he didn't actually want a table like that. My sister
ended up getting it, but she always felt she ended up with a "reject" piece of furniture.
My goal was to change the proportions of the table to make it look a bit more like a
normal table.
My goal was to modify this table that my dad had built. As a result of a misunderstanding,
my dad put the legs on the very corners of this table. It was
originally built for my brother, but he didn't actually want a table like that. My sister
ended up getting it, but she always felt she ended up with a "reject" piece of furniture.
My goal was to change the proportions of the table to make it look a bit more like a
normal table.
My sister lives quite a distance from where I live, so I always take a flight when I go to visit. That limited my ability to bring along tools. So this was a perfect opportunity to try using a doweling jig.
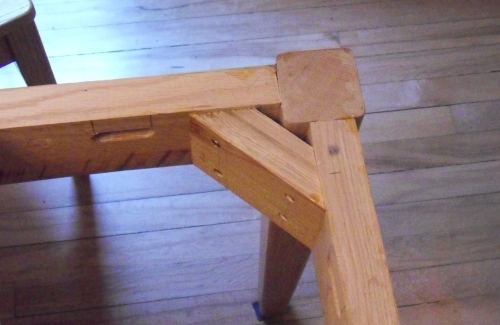 The table is very well built, with the apron rails mortised into the legs, and
another diagonal piece joining the two apron pieces. I wanted to shorten
the apron rails to bring the legs in further from the corners.
The table is very well built, with the apron rails mortised into the legs, and
another diagonal piece joining the two apron pieces. I wanted to shorten
the apron rails to bring the legs in further from the corners.
The diagonal block was just butt joined, glued, and screwed into the corner. Once I took the screws out, I inserted a chisel between the apron rail and the diagonal block and a few hefty blows with a hammer popped it out.
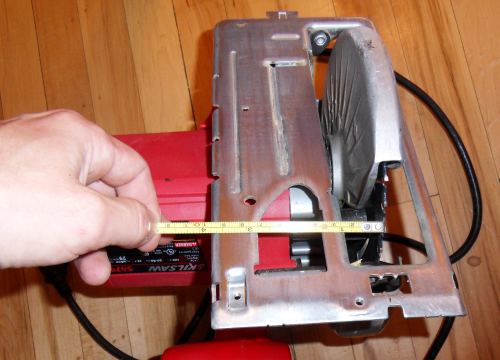 I used a hand held circular saw to cut the apron rails. I started by measuring
the distance between the edge of the blade and the edge of the shoe.
I used a hand held circular saw to cut the apron rails. I started by measuring
the distance between the edge of the blade and the edge of the shoe.
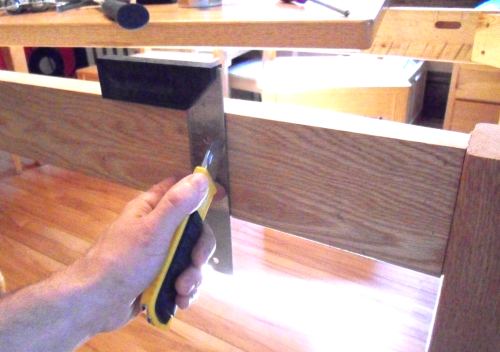 Before making the cut, I cut a score line with a utility knife on the "keeper"
side of the cut to avoid tearout.
Before making the cut, I cut a score line with a utility knife on the "keeper"
side of the cut to avoid tearout.
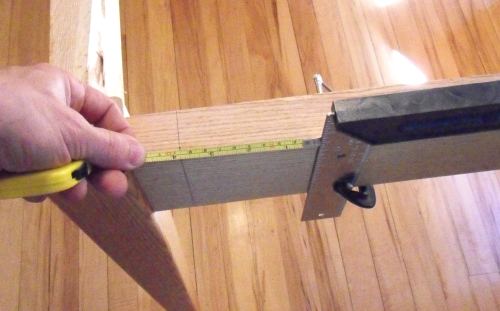 I then attached a square to the rail, offset from where I wanted to cut
by what I had measured on the saw.
I then attached a square to the rail, offset from where I wanted to cut
by what I had measured on the saw.
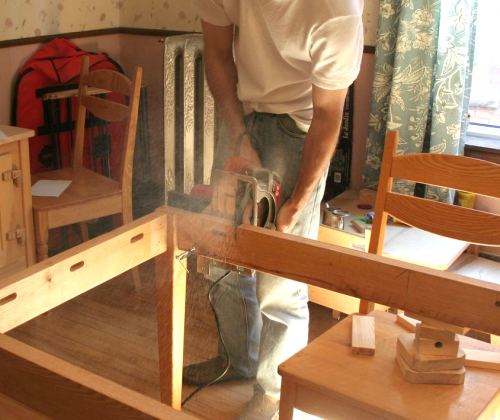 Here's making the cuts. I supported the rails with some
toy blocks to make sure things wouldn't fall to the floor when I cut
through the piece.
Here's making the cuts. I supported the rails with some
toy blocks to make sure things wouldn't fall to the floor when I cut
through the piece.
I cut off the apron near the legs for two legs diagonally opposite to each other.
After making those cuts, I then cut the apron rails again right next to the legs.
 I was left with about a millimeter of rail on the legs. I removed the rest by cutting
it flush with a chisel.
I was left with about a millimeter of rail on the legs. I removed the rest by cutting
it flush with a chisel.
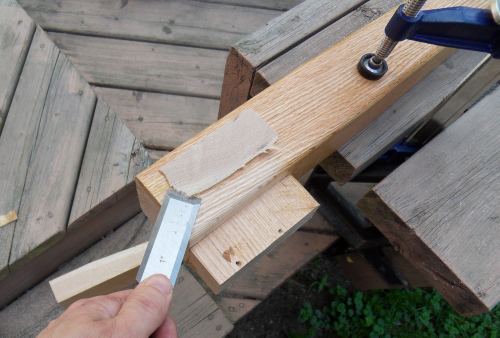
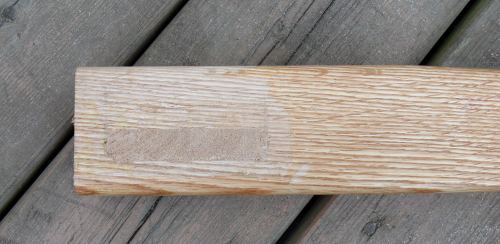 After chiseling, I was left with just the end of the tenon still in the leg.
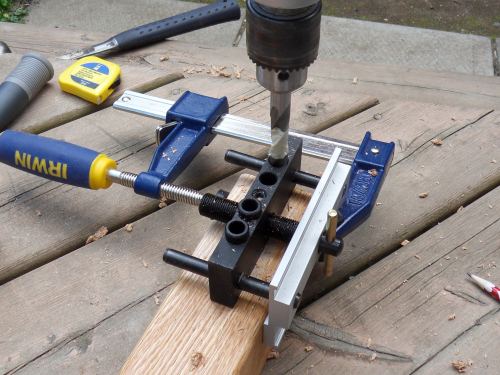 Next it was time to use the dowel jig. The dowel jig has just one hole for a 1/2" drill.
The jig doesn't actually open up far enough to clamp it around the leg.
But I also needed to drill the holes off center.
So I removed one side of the jig and clamped the rest of the jig to the leg with a bar clamp.
Next it was time to use the dowel jig. The dowel jig has just one hole for a 1/2" drill.
The jig doesn't actually open up far enough to clamp it around the leg.
But I also needed to drill the holes off center.
So I removed one side of the jig and clamped the rest of the jig to the leg with a bar clamp.
The jig clamped this way wasn't an entirely rigid arrangement. It would have been better if I had stuck a piece of wood between the black center and the aluminium side and tightened the jig against that, but I didn't have an appropriately sized piece of wood handy. Still, the jig worked pretty well, even though my holes were partway in the leg and partway in the old tenon.
 Drilling the holes into the end of the apron rails. This is using the jig very much as
it was intended, and it was satisfactorily rigid in this configuration.
Drilling the holes into the end of the apron rails. This is using the jig very much as
it was intended, and it was satisfactorily rigid in this configuration.
With only one half-inch guide hole in the jig, I had to reposition the jig for each hole. But positioning a jig accurately is much easier than trying to start a hole in the right position freehand, so I managed to position my holes precisely enough.
I did miss-position it for one hole but, surprisingly, the jig was rigid enough to allow me to drill another hole partly overlapping an existing hole without a problem.
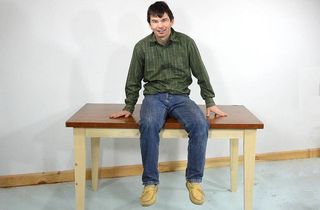
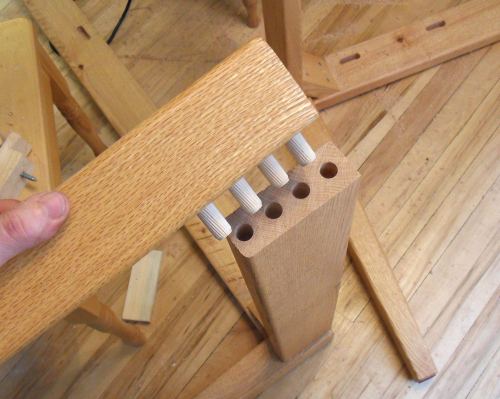 Here's one of the new joints. Four 1/2" dowels, 2" long. The new joint won't be as
strong as the original mortise and tenon joint, but it will be strong enough, and still
stronger than commercial tables where the legs are only held on with just one diagonal screw.
Here's one of the new joints. Four 1/2" dowels, 2" long. The new joint won't be as
strong as the original mortise and tenon joint, but it will be strong enough, and still
stronger than commercial tables where the legs are only held on with just one diagonal screw.
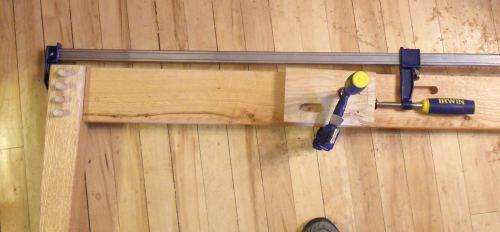 I clamped a block of wood to the side of the apron rail to push the long rail
against the leg. Otherwise, I would have needed a super long bar clamp,
and I don't even know where such a clamp could be bought.
I clamped a block of wood to the side of the apron rail to push the long rail
against the leg. Otherwise, I would have needed a super long bar clamp,
and I don't even know where such a clamp could be bought.
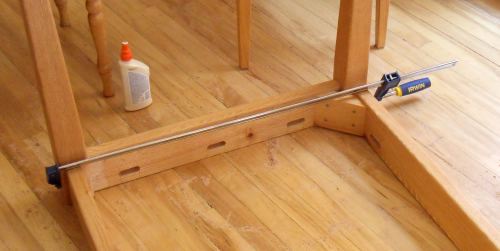 For the shorter apron rail, I could just span the whole length with the long bar clamp.
I didn't bother to replace the diagonal pieces in the corners that I had taken apart.
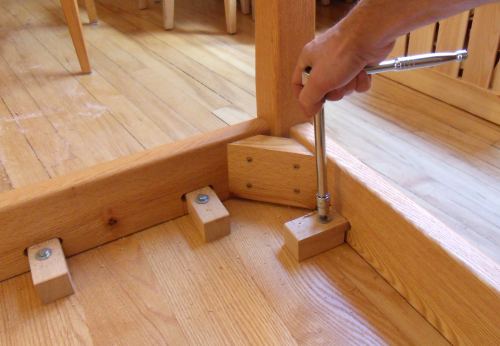 Finally, bolting the top of the table back on. I had to drill new screw holes for the
mounting blocks.
Finally, bolting the top of the table back on. I had to drill new screw holes for the
mounting blocks.
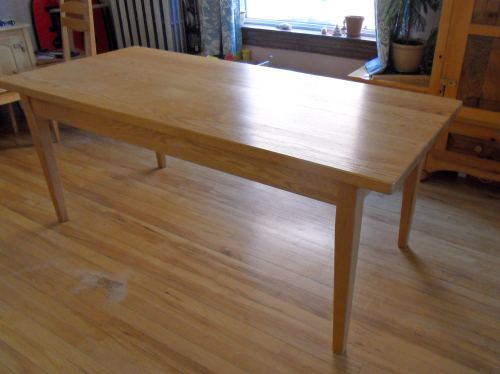 And here's the table modified. Looks much like before, but with the legs a little
further in from the edges. I was questioning whether it was worth the effort, but my
sister is happy with how the table looks now.
And here's the table modified. Looks much like before, but with the legs a little
further in from the edges. I was questioning whether it was worth the effort, but my
sister is happy with how the table looks now.
It's pretty cool how this little dowel jig enabled me to put the table back together. Really, if I had just started with pieces of wood of the right size, I could have done all the joinery to build a new table with about the same amount of effort as it took to modify this table. (Update, I did build a table with the doweling jig)
If I was doing that work in my workshop, I'd use my horizontal boring machine instead. But for a simple little jig to use outside the workshop, and with some patience, it's a pretty useful jig.
More about building wooden tables
 Building a simple table
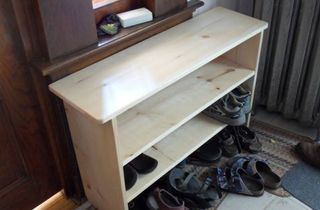 Building a shoe rack
 More about this
 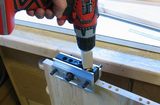 Doweling together a cabinet