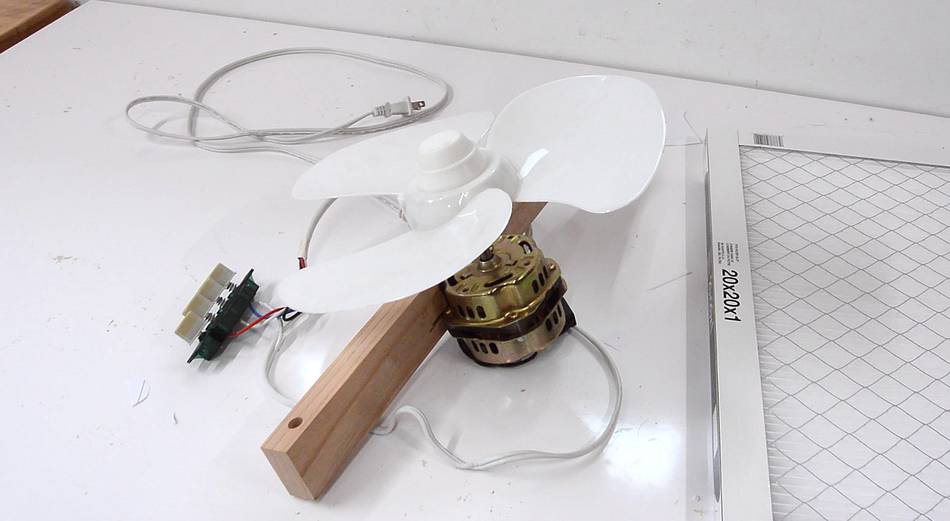
A few years ago, I experimented with making a mount for an oscillating
fan motor that mounted the motor by same post that it pivots on when
part of the fan. I cut a thread into the post that sticks
out of the motor, then used a nut to pull it against a wooden
bracket that I shaped to fit around the motor.
On an oscillating fan, the blade is quite a distance from the motor.
But I didn't want to make the box too deep, so I wanted to move
the blade closer.
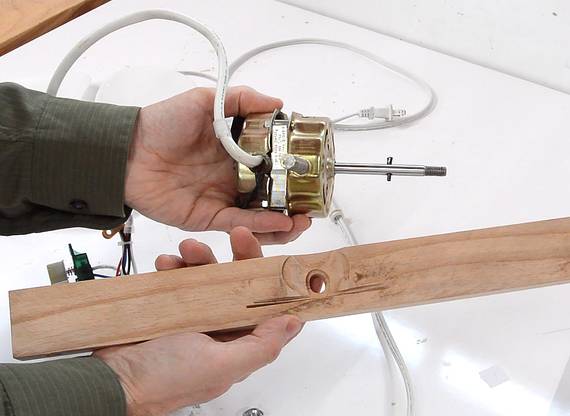
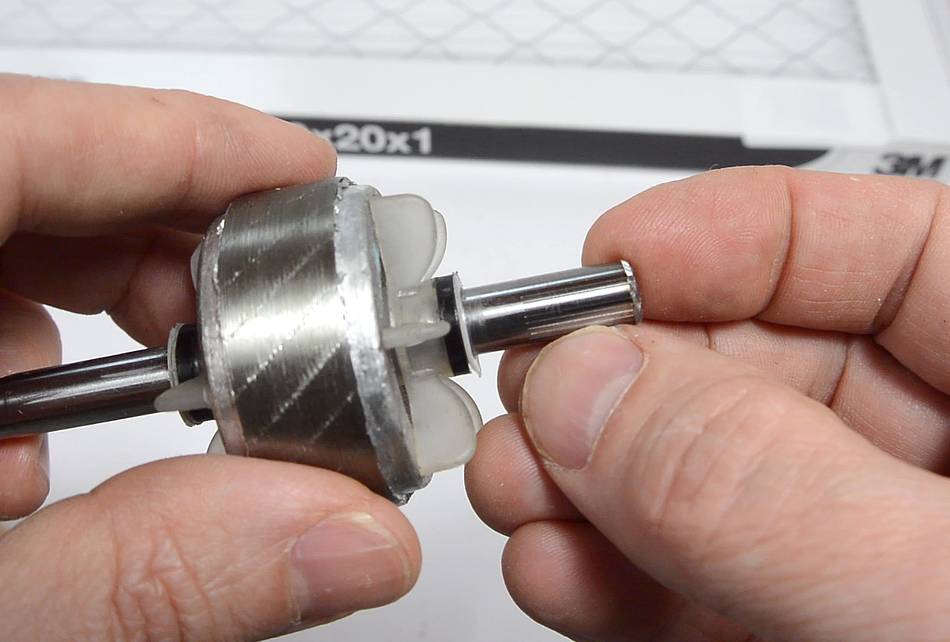
Having recently taken
apart another fan, I realized the fan's rotor is only attached to
the shaft with a press fit, so by taking the rotor out and pounding on
one end of the shaft, I could move it back. That was much simpler
than what I did last time.
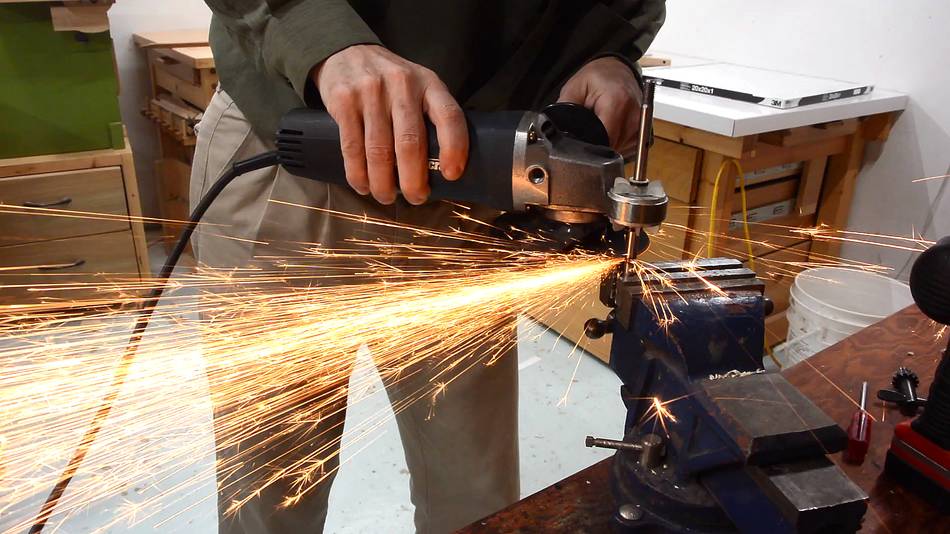
Then cutting off the part I didn't need from the other end with an
angle grinder.
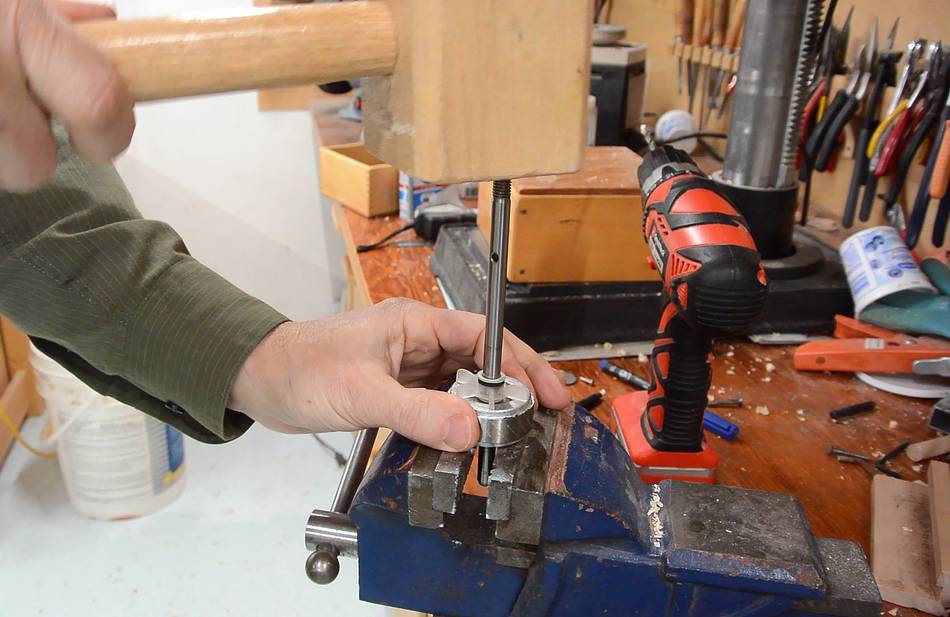
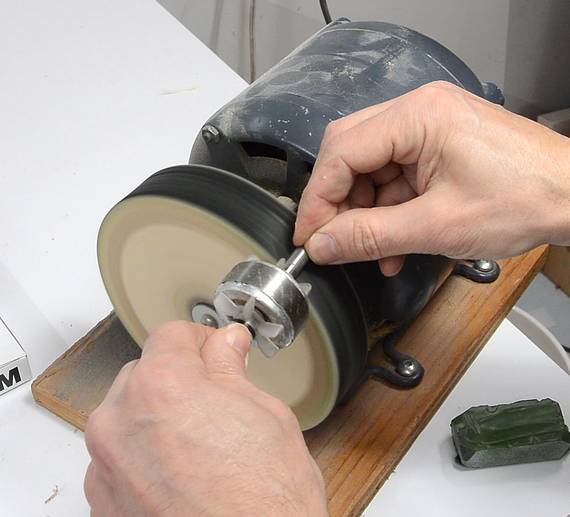
Unfortunately, I discovered there were some lines punched into the shaft
where the rotor was, probably to give it a better grip. I polished
these out on the buffing wheel as well as I could.
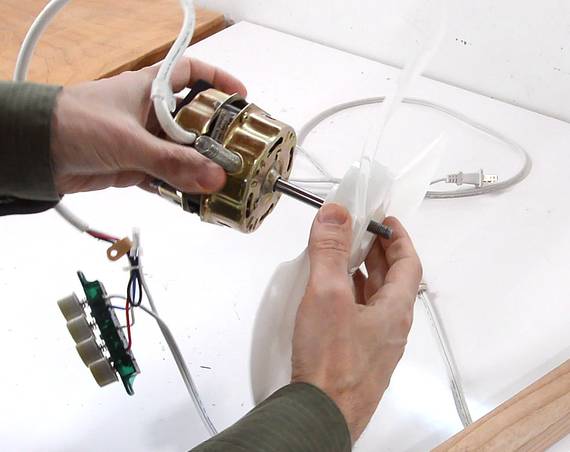
When putting one of these motors back together, even with fresh oil,
it's often hard to turn. The self aligning bearings don't align
that easily. But tapping the motor in a few places with a mallet is
often enough to get the bearings to move into alignment.
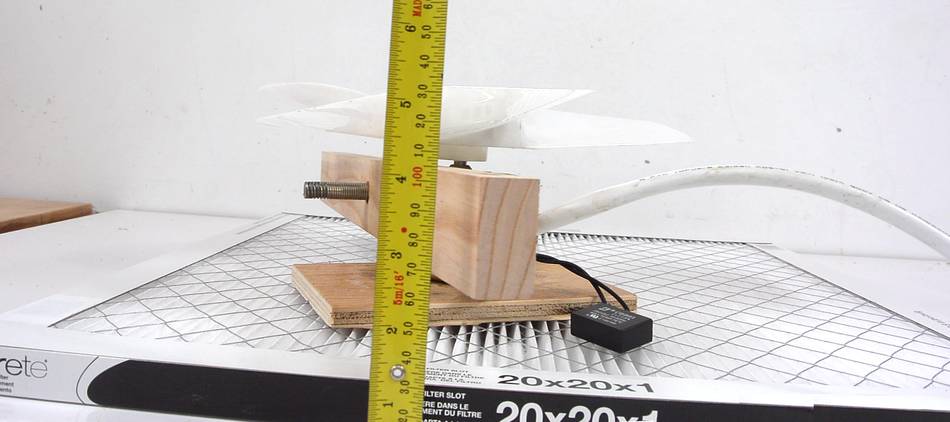
Placing the fan motor and blade on top of the filter (with a spacer for
distance) I determined the total thickness I needed was just 15 cm.
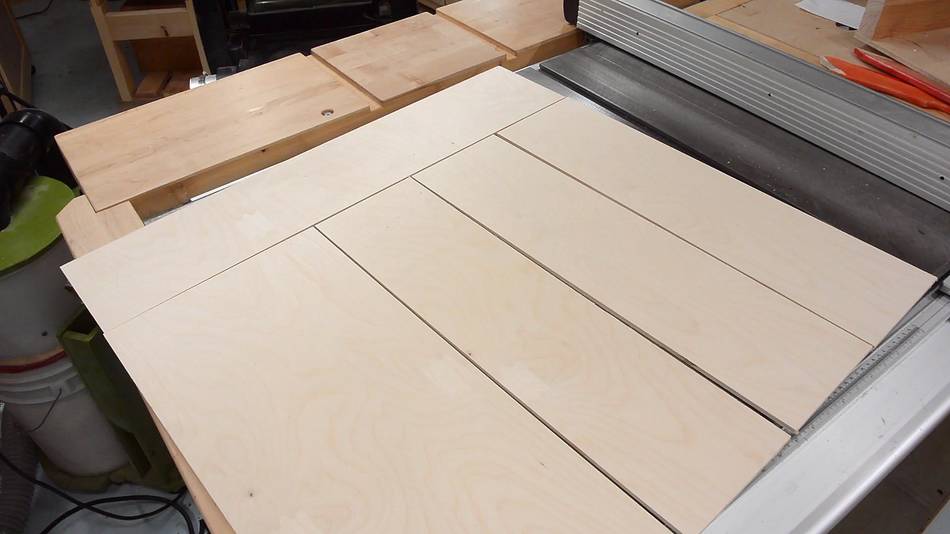
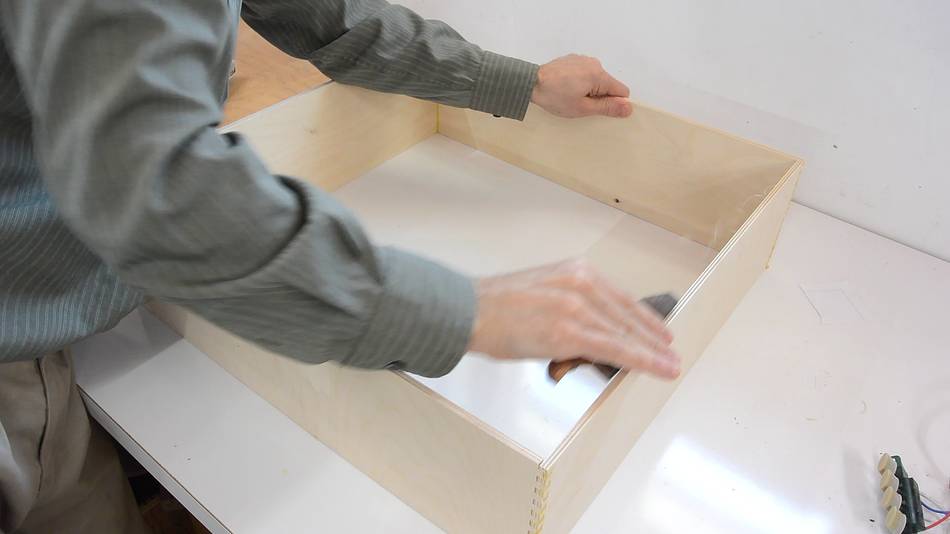
I cut the pieces out of a 75x75 cm piece of Baltic birch plywood,
cutting one piece off the end before ripping the other three
pieces. That way, the remaining piece of scrap is a more usable shape.
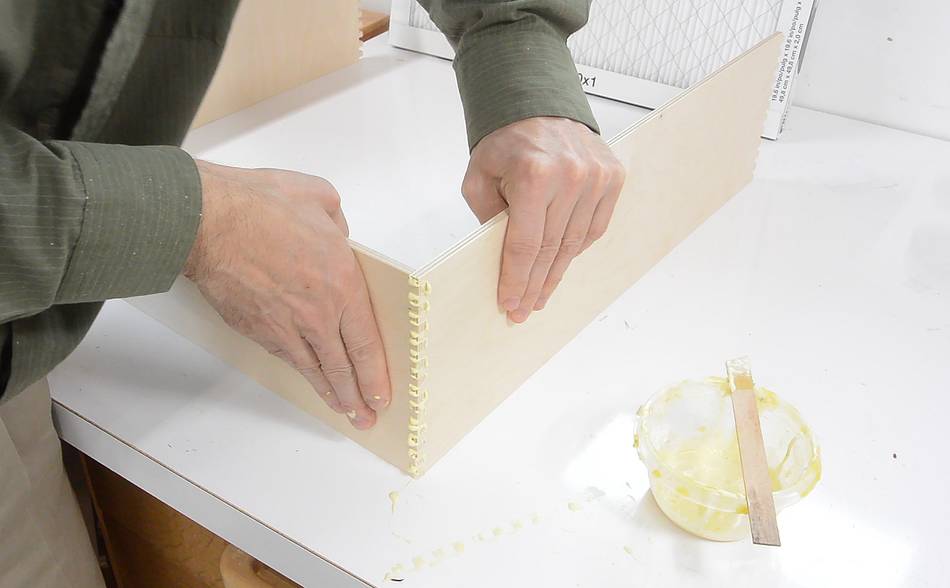
Then cutting 1/4" (6 mm) box joints on the ends of the pieces,
using my box joint jig.
And gluing the box together.
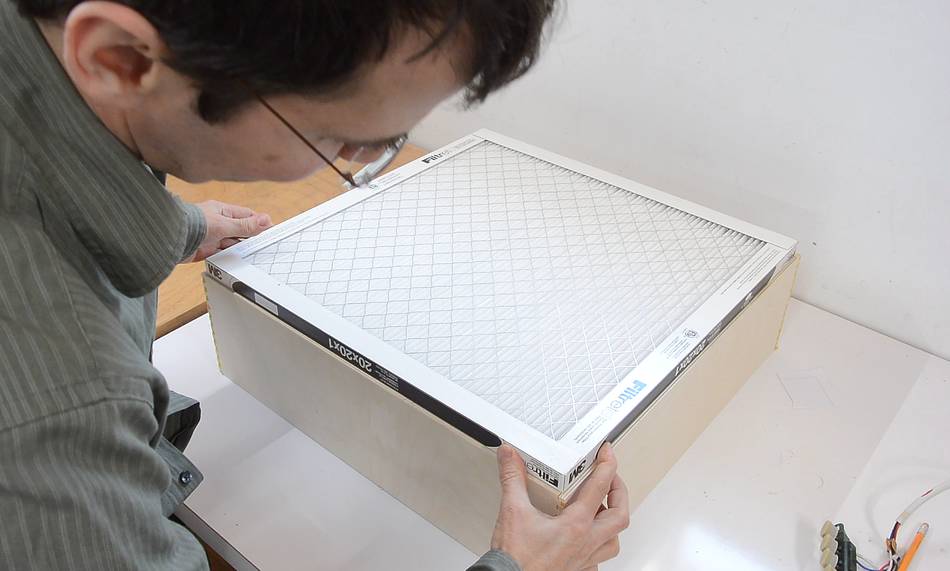
I made the fit too tight. In fact, the filter is more of an "interference
fit" in the box, it's 1-2 mm larger than the box opening.
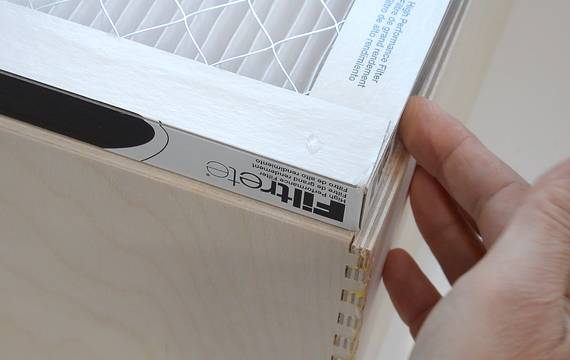
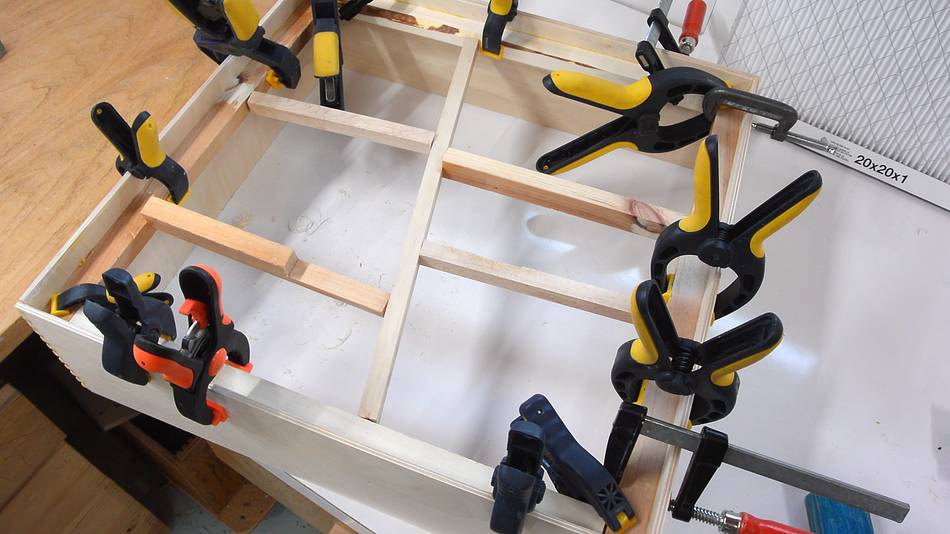
Then gluing a strip of wood near the edges to fix how far into
the box the filter can be pushed.
I noticed the sides of the box had a tendency to bow inwards slightly,
which didn't help in getting the filter in. So while the glue
dried, I braced the sides outwards. The pieces I glued in plus the box
itself form a sort of composite member, so once the glue dries, it will
retain some of that shape.
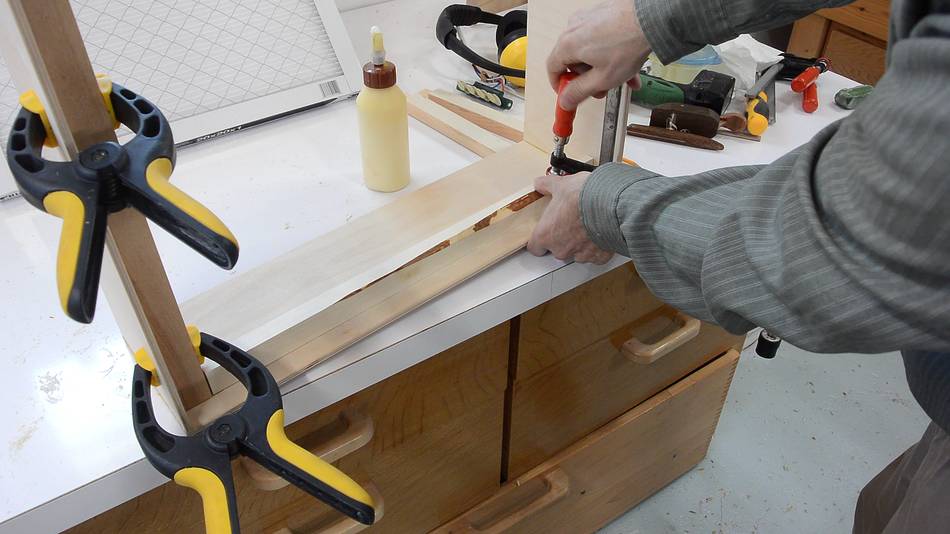
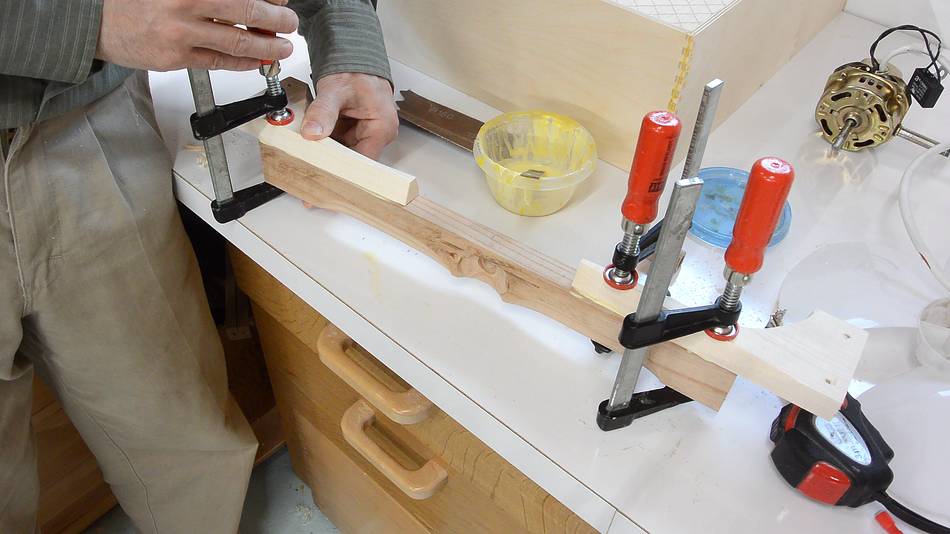
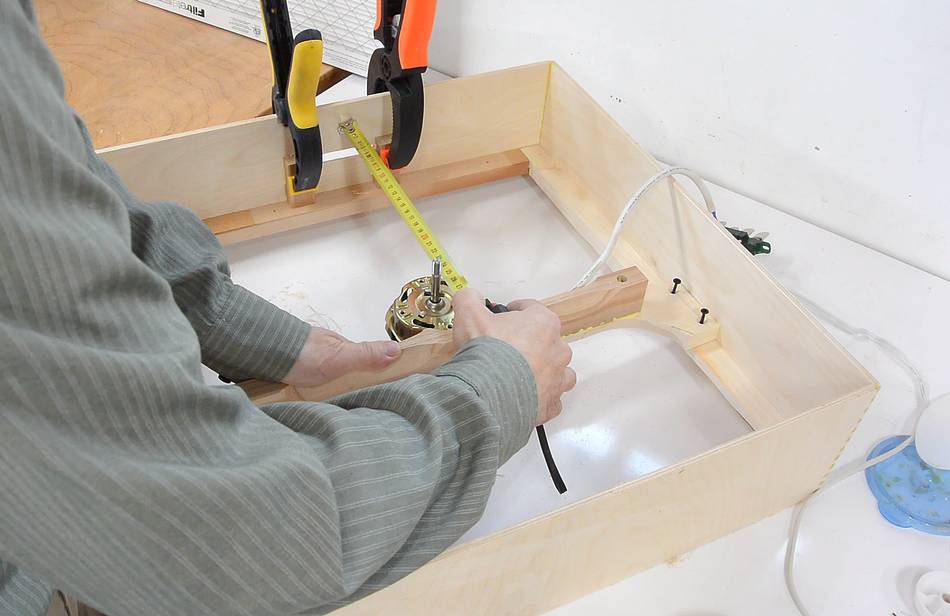
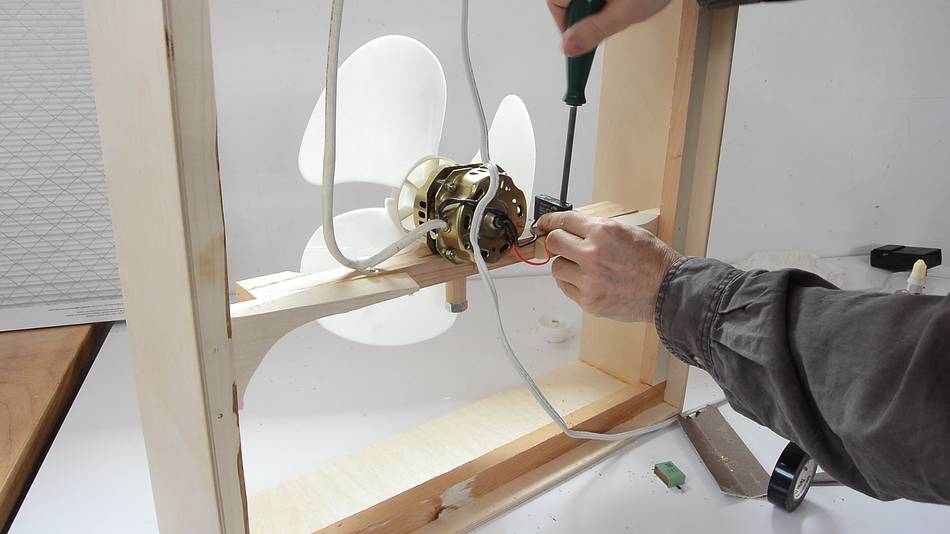
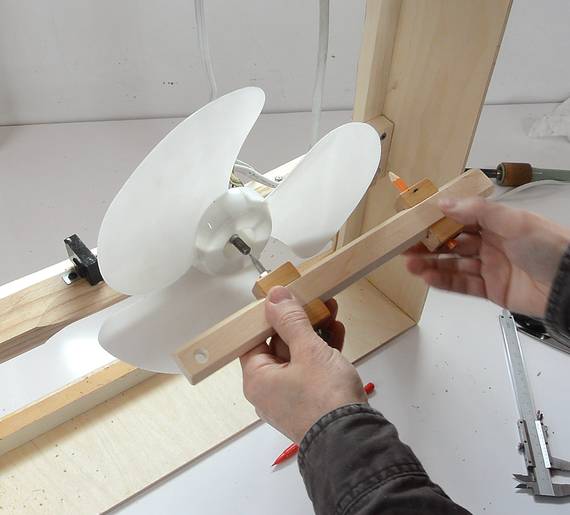
The motor mount I made years ago turned out to be slightly too short,
so I made two pieces to glue to the ends of it to make it reach
across the box.
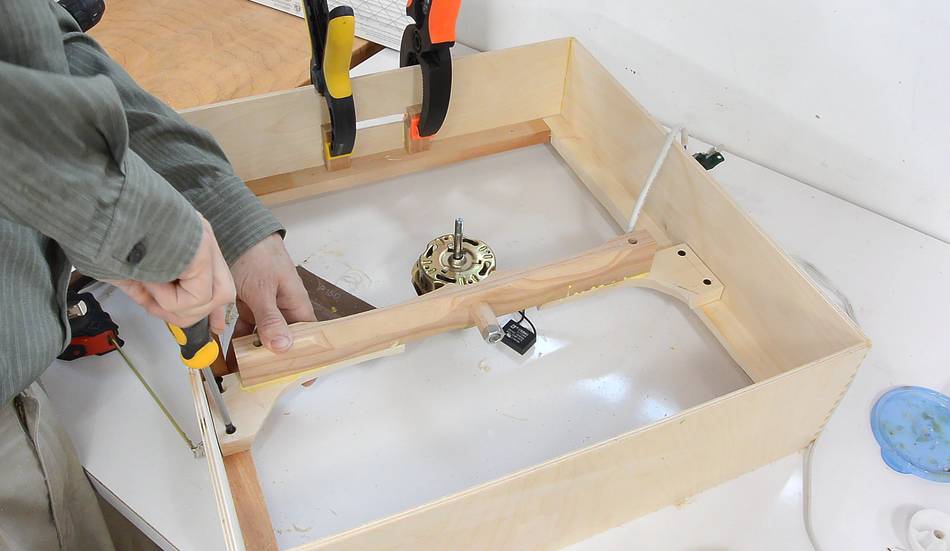
After letting the glue dry, I measured where I need to place the motor,
then tapped the screws with a hammer to mark where they need to go.
I then drilled pilot holes where the divots from tapping the screws were.
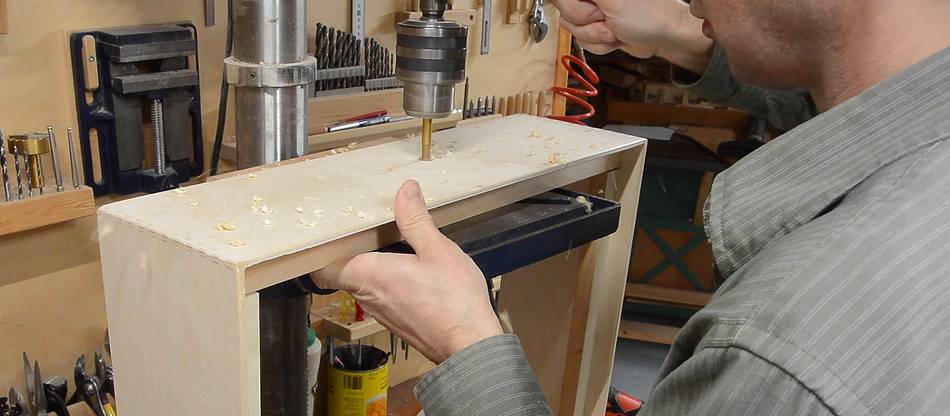
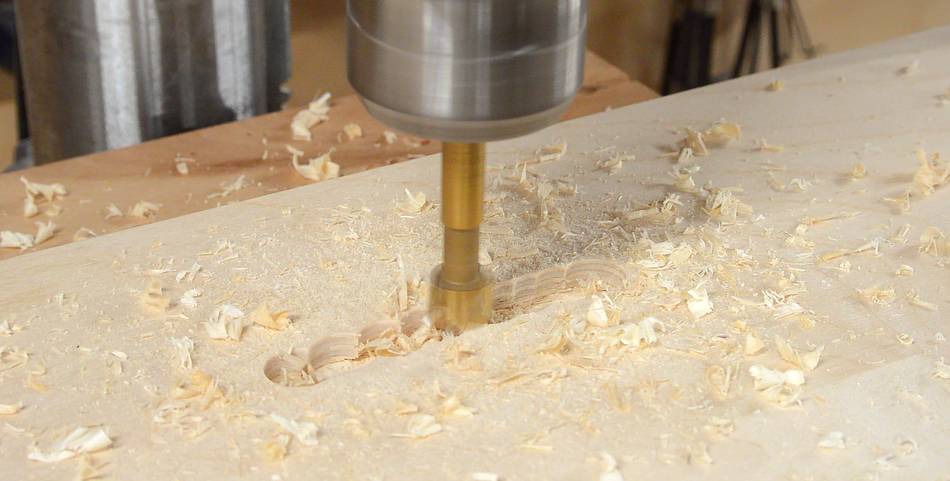
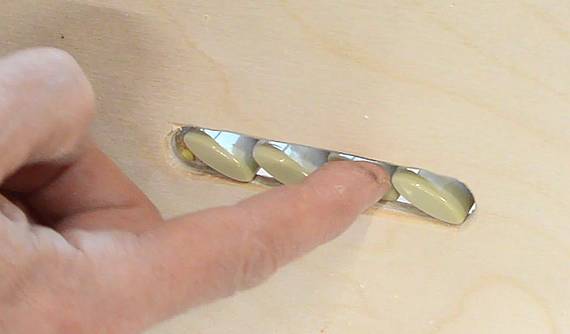
The buttons from the fan can fit in a slot about 1/2" wide.
My first thought was to make this slot with my slot mortiser.
But instead I drilled a series of overlapping holes with a Forstner
bit to hog out most of the slot. I love how you can do that with a
Forstner bit.
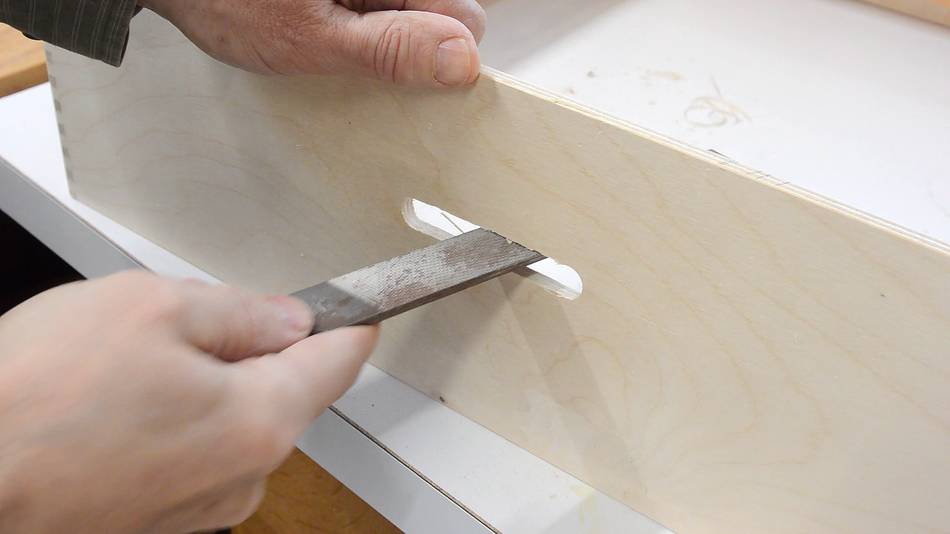
I straightened the sides of the slot with a rasp.
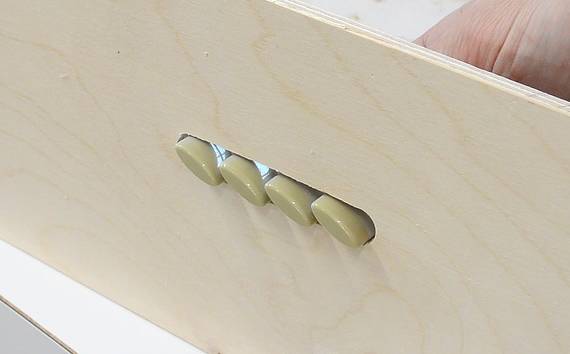
The buttons fit nicely, but I didn't want them sticking out the side.
So I glued some blocks to the inside to move the button
unit just far enough in to make the buttons flush with the outside.
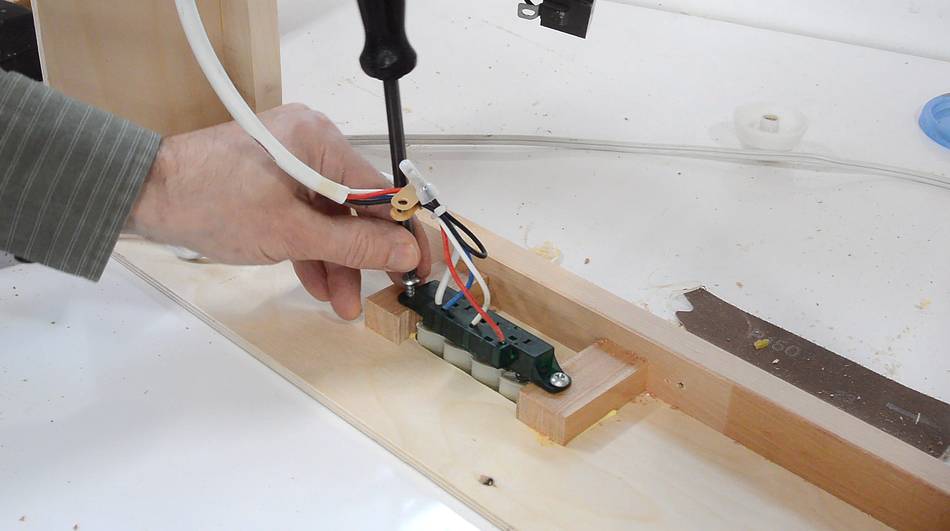
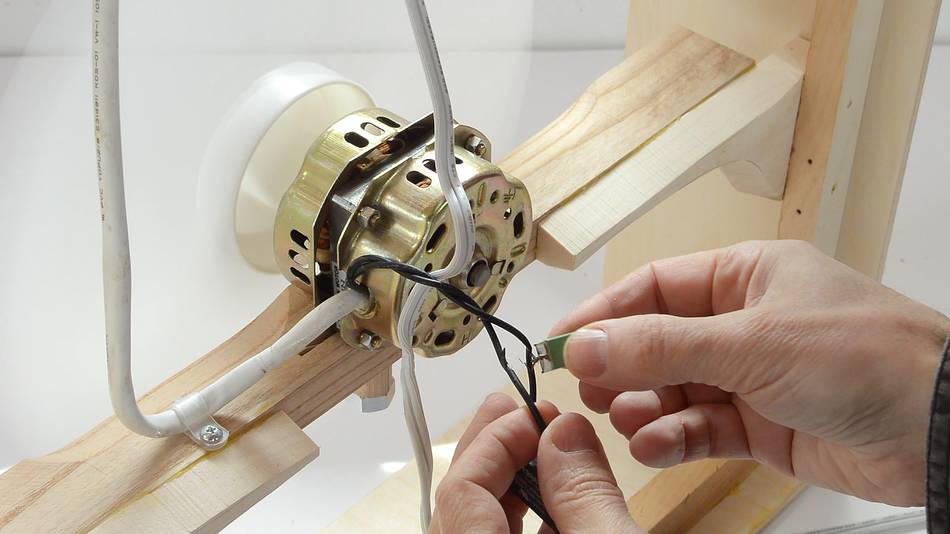
One of the reasons I hadn't done anything with this fan after
making the mounting bracket was that the motor didn't run all that well.
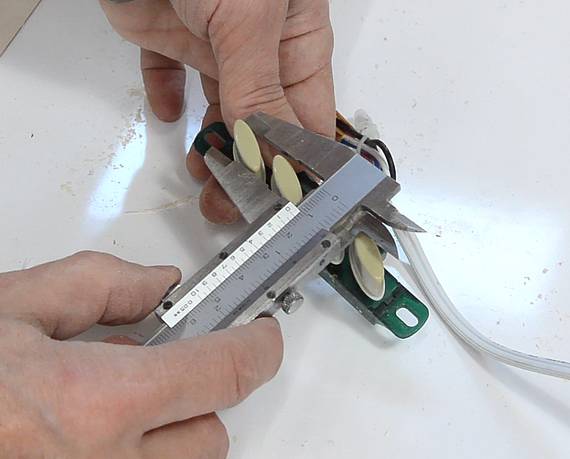
I suspected the capacitor and, indeed, connecting a 0.47 µF capacitor
in parallel to the motor's run capacitor made it run faster.
Luckily, I had another motor run capacitor kicking around. This one was
a 3 µF capacitor, whereas the motor came with a 2 µF capacitor,
but engineering-wise, these capacitors are kind of a kludge anyway, so
I figured 3 µF is ok. It certainly ran much better with that one
than with the one it came with.
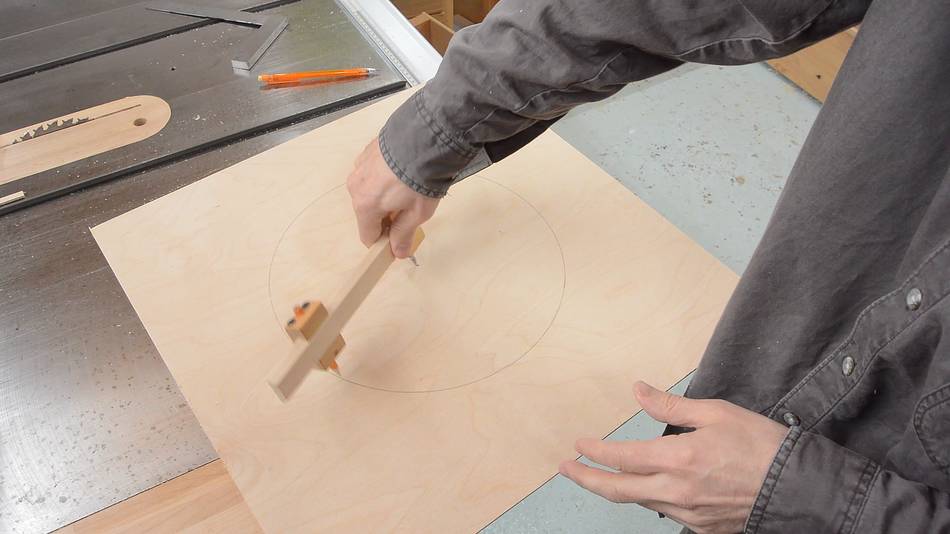
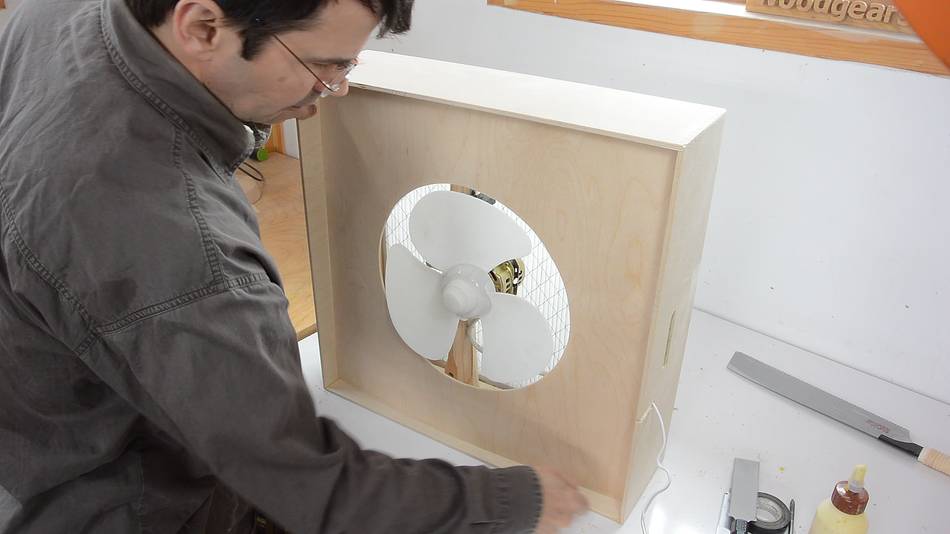
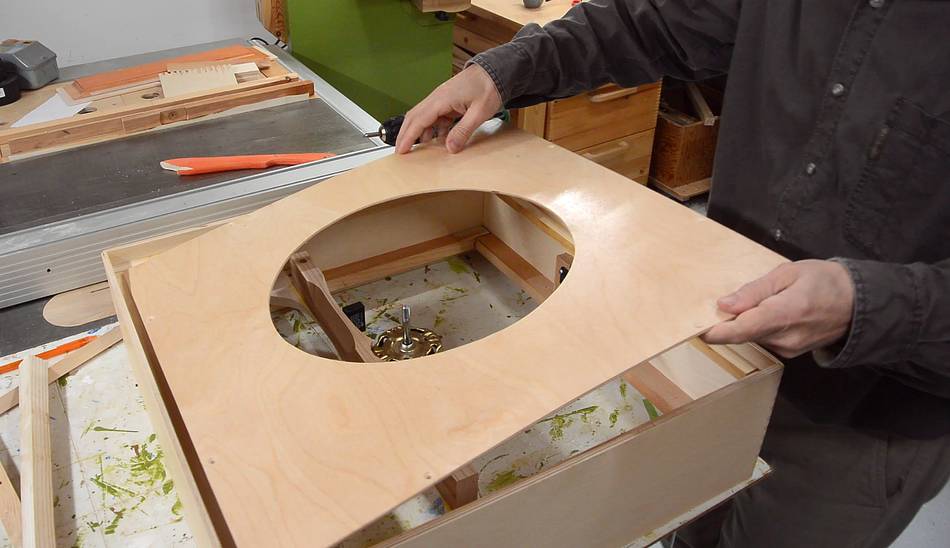
I still needed a front panel around the fan blade to make sure all the
air comes through the filter instead of just flowing in the front
around the fan.
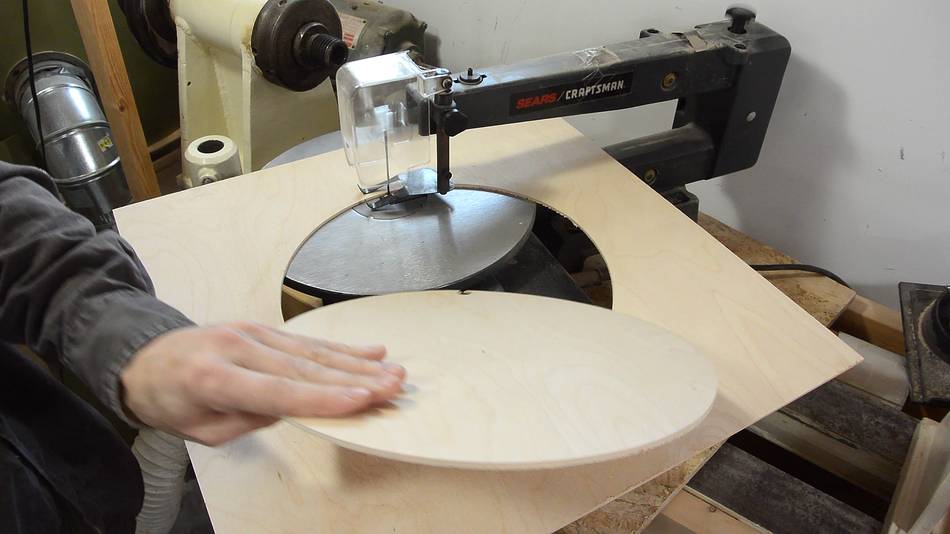
I set my beam compass to slightly
wider than the fan's radius and marked a circle on the wood.
Then cut that out on the scroll saw.
Placing it in the fan box, with just a friction fit for now.
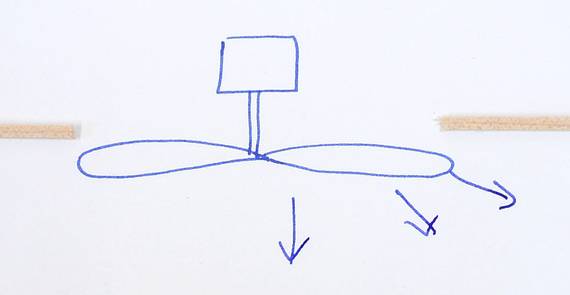
I had always assumed the best place to put the panel, or baffle, was
upstream of the fan blade (slightly behind it), because centrifugal
force would throw some of the air out from the fan sideways.
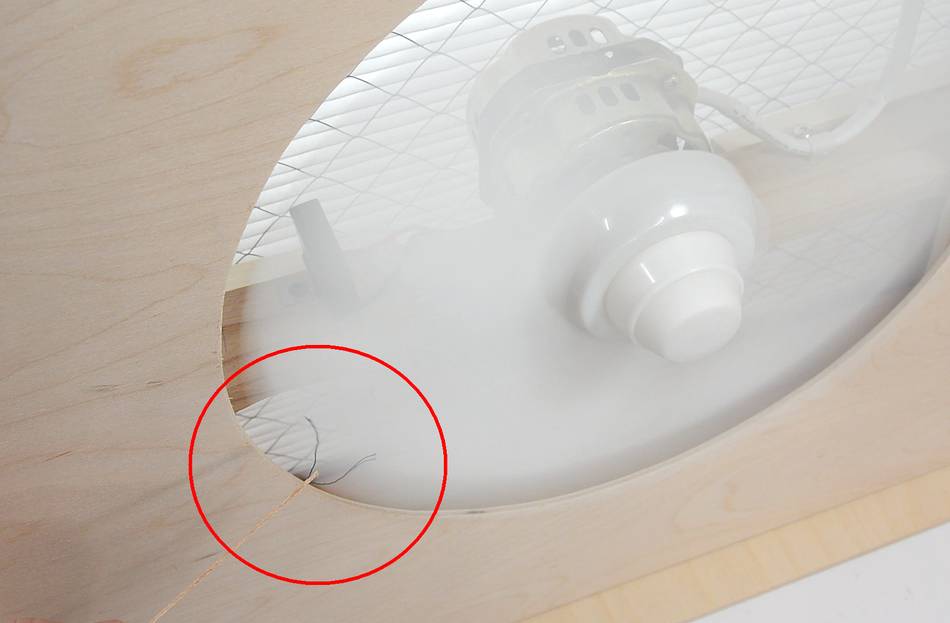
But checking the air flow with a piece of thread attached to a stick,
I found the fan actually pulls in air from the side, especially
if there is some air resistance from the filter behind. So putting the
baffle just slightly downstream of the fan would make the air sucked in
from the side also be air from the filter.
With the baffle where I put it, there was still some air pulled back near
the edges of the fan.
You can also make an air cleaner just by strapping a filter to the back
of a box fan, but box fans lack internal baffles to stop air back-flow,
which means if the filter provides any resistance to air flow, much of
the air blown out the front of the box fan is actually air that has
bwwn sucked in from the front. So building a fan box like this is a
more elegant solution.
Once I established how far back the front panel should go, I glued some
pieces of wood around the edges, which the front panel then screws to.
The inside of the box, other than the motor, is empty.
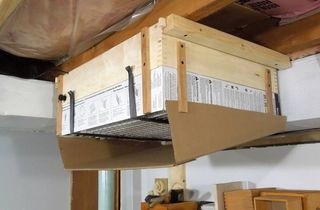
I made two blocks of wood with hooks on the end. These are tied together
with pieces of bicycle inner tube. One block gets screwed to the ceiling,
the other to the top of the fan. This makes for a little bit of vibration
isolation. That wasn't really necessary, but it was easy to add.
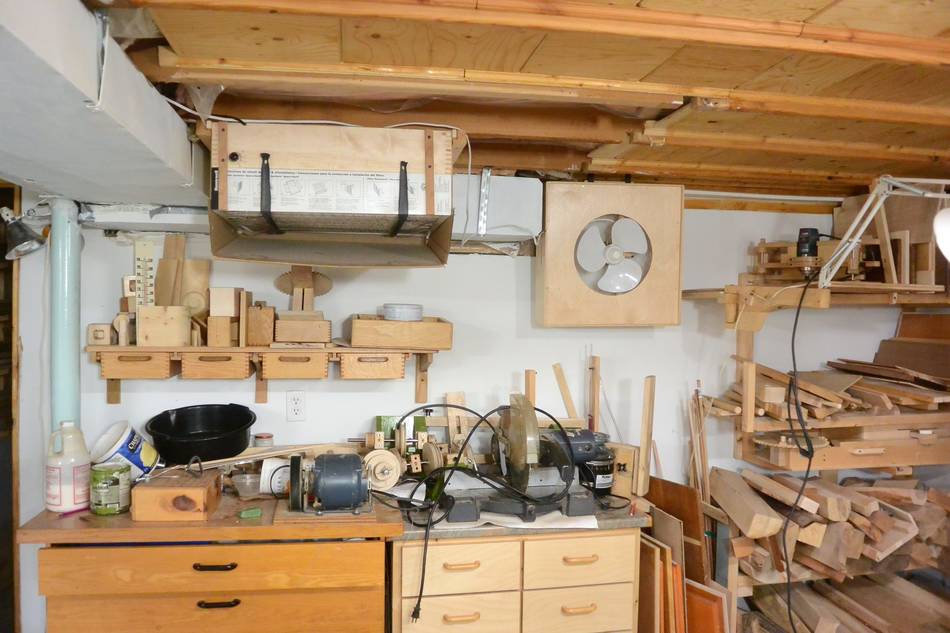
And here it is mounted. It's in the only spot that isn't in the way and doesn't
add visual clutter. To the left of it is my
old air cleaner.
I added a switch near my table saw to turn both of them
on at the same time. With both turned on, they can clear half the dust
out of the air in my shop every three minutes.
This part of the shop is the designated
chaos zone, which is why it rarely appears in any of my articles or videos.
Update 2019:
I mounted the air cleaner just 10 cm from the wall, figuring that was enough
for it to pull air from the back, but I kept getting comments that it was
too close to the wall. So in Nov 2019, I experimented with how close it can
be to the wall before airflow suffers. I figured even 5 cm would be enough,
but I was wrong. 3 cm is adequate and even at 0.9 cm from the wall, it
still has more than half the airflow that it has when it's far from the wall!
 A few years ago, I experimented with making a mount for an oscillating
fan motor that mounted the motor by same post that it pivots on when
part of the fan. I cut a thread into the post that sticks
out of the motor, then used a nut to pull it against a wooden
bracket that I shaped to fit around the motor.
A few years ago, I experimented with making a mount for an oscillating
fan motor that mounted the motor by same post that it pivots on when
part of the fan. I cut a thread into the post that sticks
out of the motor, then used a nut to pull it against a wooden
bracket that I shaped to fit around the motor.


 My first workshop air cleaner
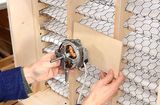 Another workshop air cleaner
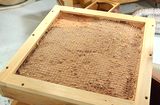 Fiberglass as dust filter experiment
 Dylos air quality monitor
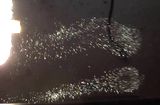 Photographing
 Macro photographing
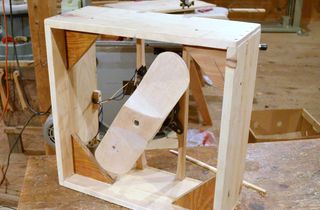 Homemade box fan
 Mini dust collector
 Comparing air purifier solutions to clear smoke from the air
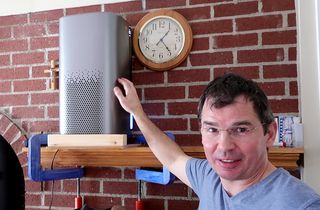 Air purifier vs wood stove