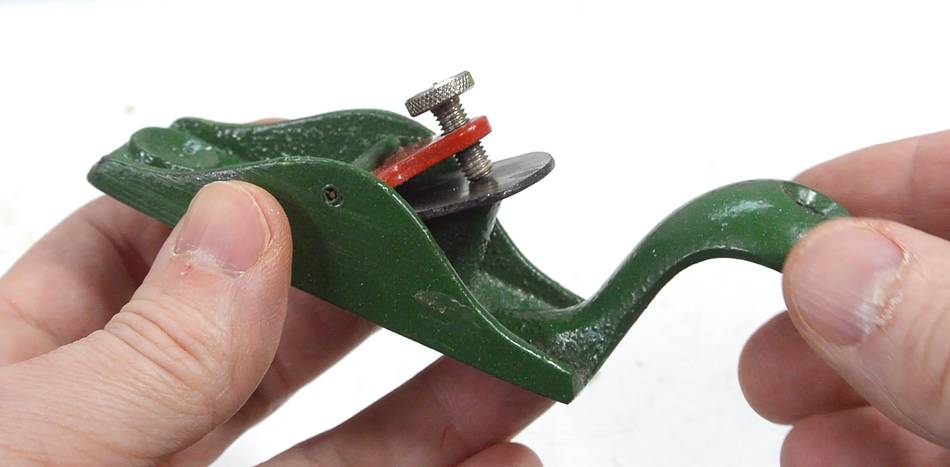
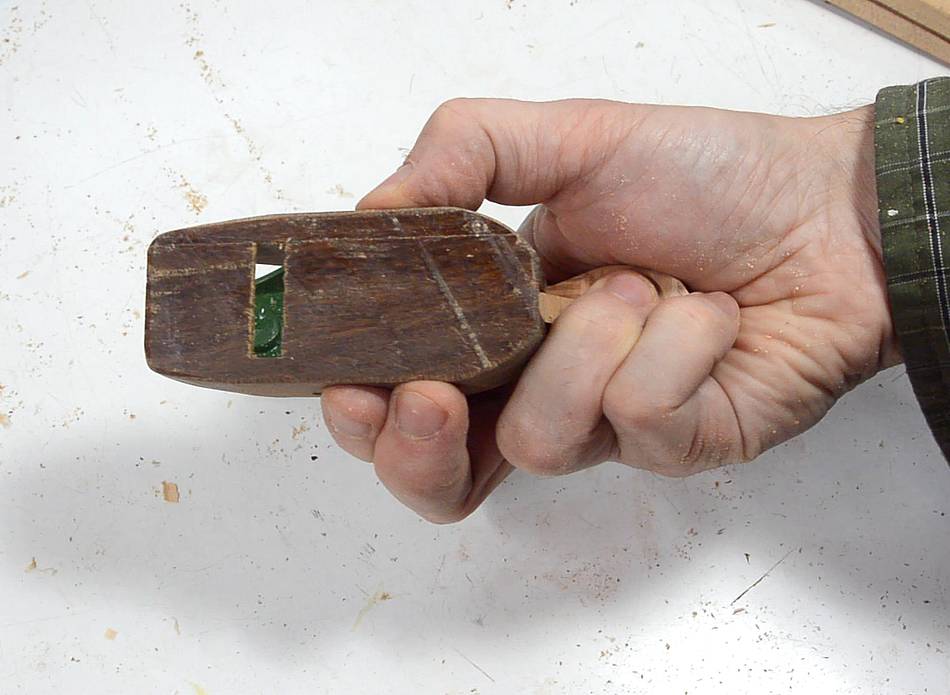
 I quite like this "Kunz" palm plane. I figured it would be nice to have one like
that for my other workshop. Rather
than buying another one, I figured I'd try making one.
I quite like this "Kunz" palm plane. I figured it would be nice to have one like
that for my other workshop. Rather
than buying another one, I figured I'd try making one.
I quite like this "Kunz" palm plane. I figured it would be nice to have one like
that for my other workshop. Rather
than buying another one, I figured I'd try making one.
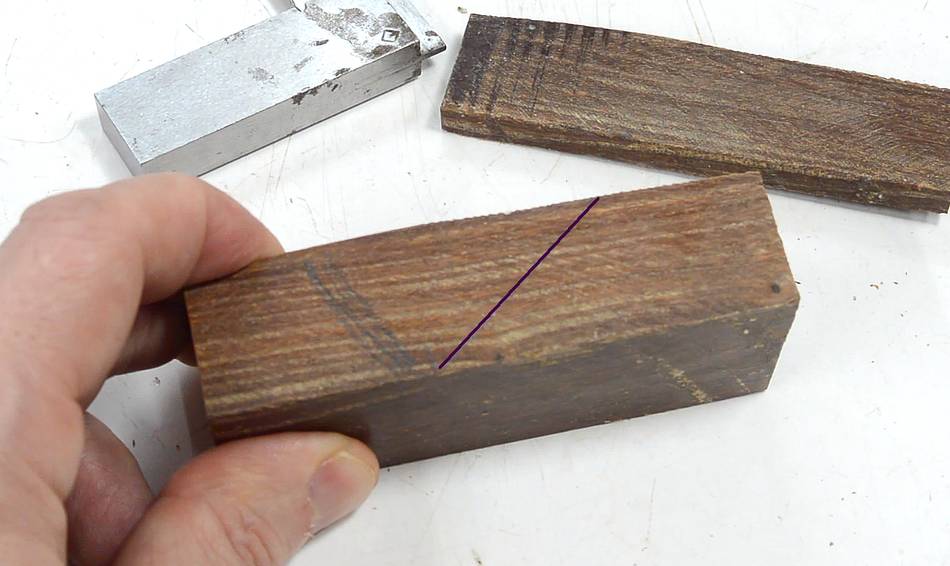
 I used some lignum vitae for this, or at least that's what I think this wood is.
It's very hard and heavy. For most of the plane,
regular hardwood would be ok, but I didn't want the sole of the plane to wear
down too fast.
I used some lignum vitae for this, or at least that's what I think this wood is.
It's very hard and heavy. For most of the plane,
regular hardwood would be ok, but I didn't want the sole of the plane to wear
down too fast.
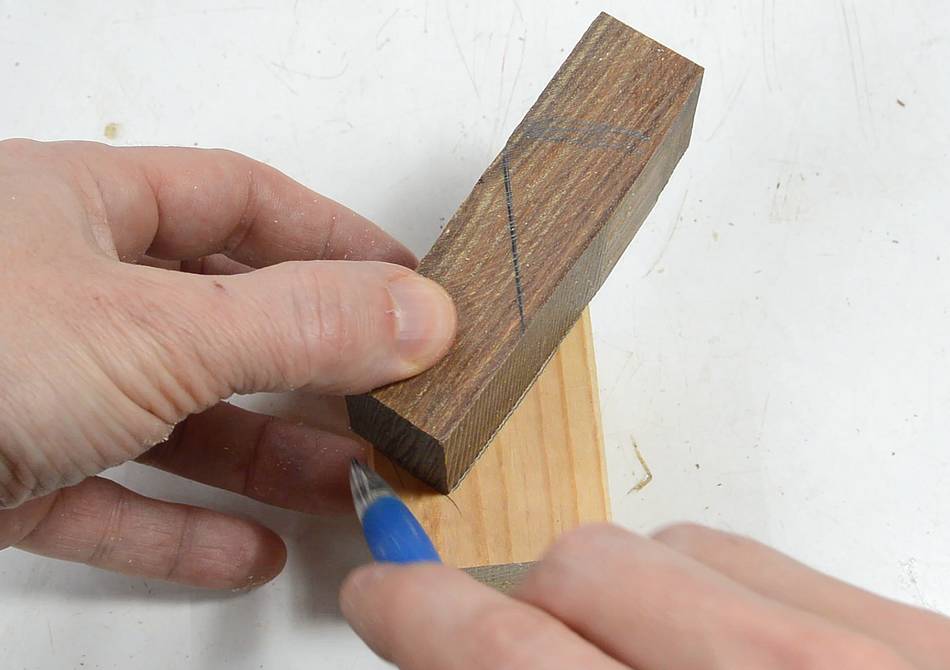
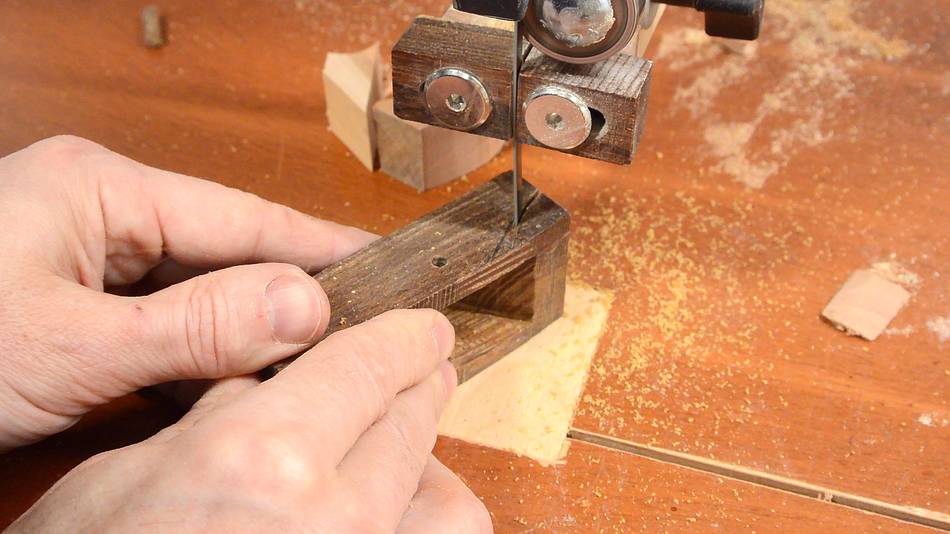
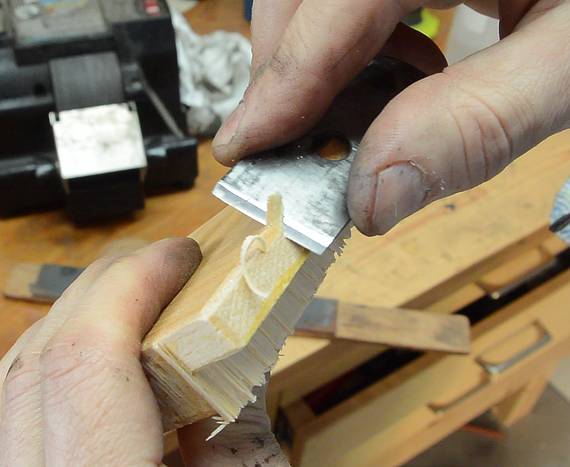
 Having cut out a block for the body of the plane, I cut off one side of it to
be able to cut the inside with a saw.
Having cut out a block for the body of the plane, I cut off one side of it to
be able to cut the inside with a saw.
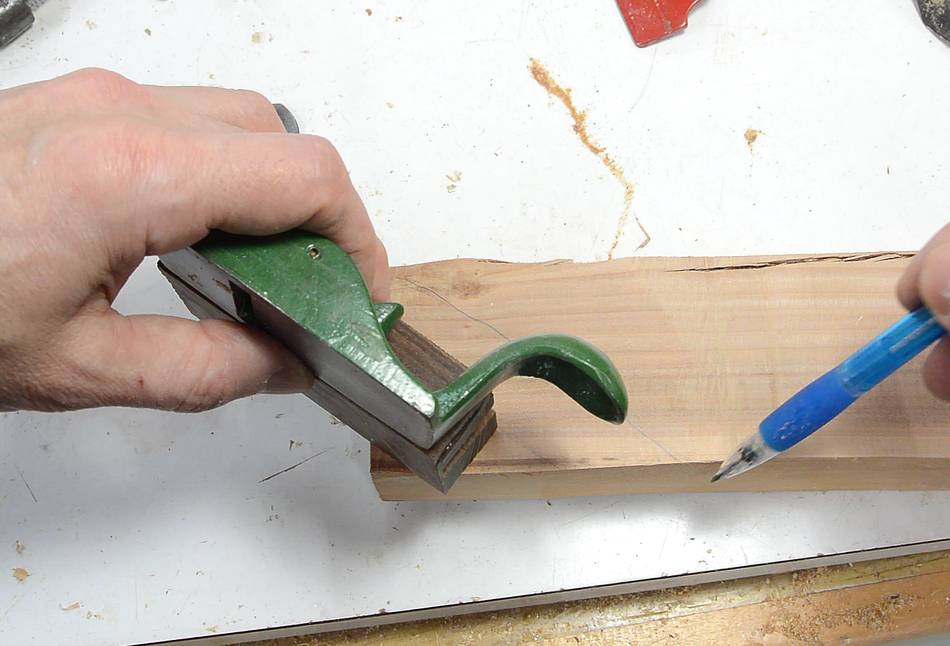
 Cavity marked out for where I need to cut.
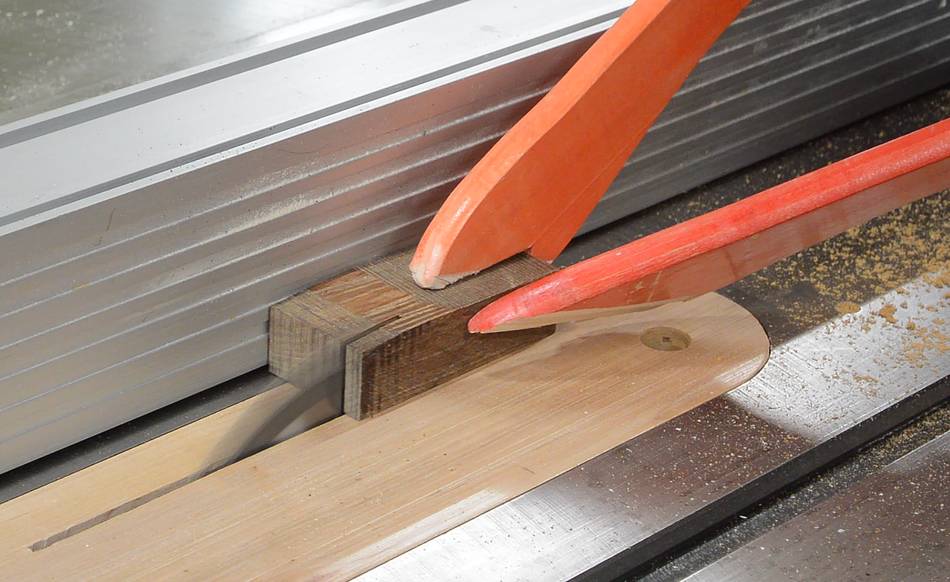
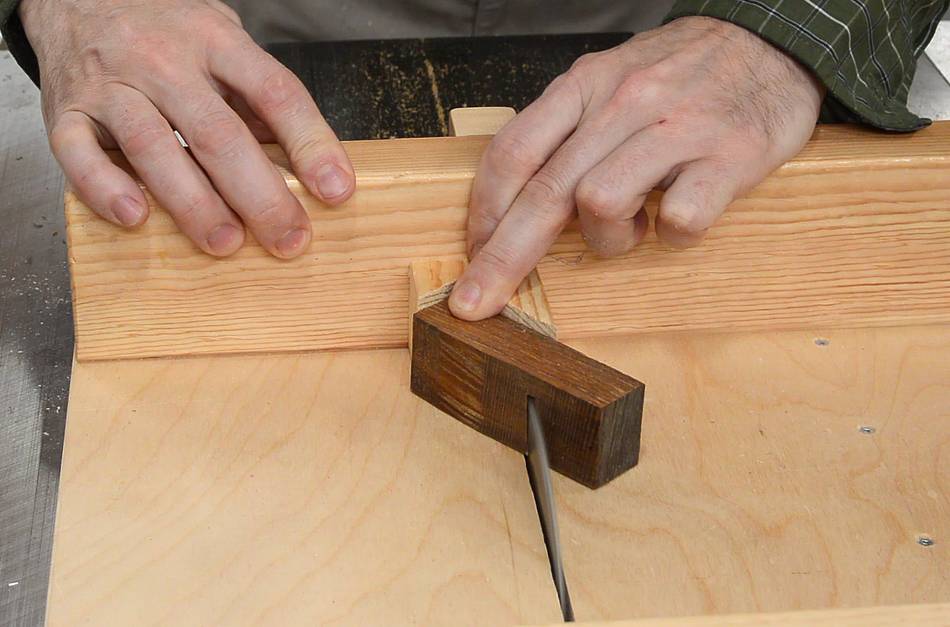
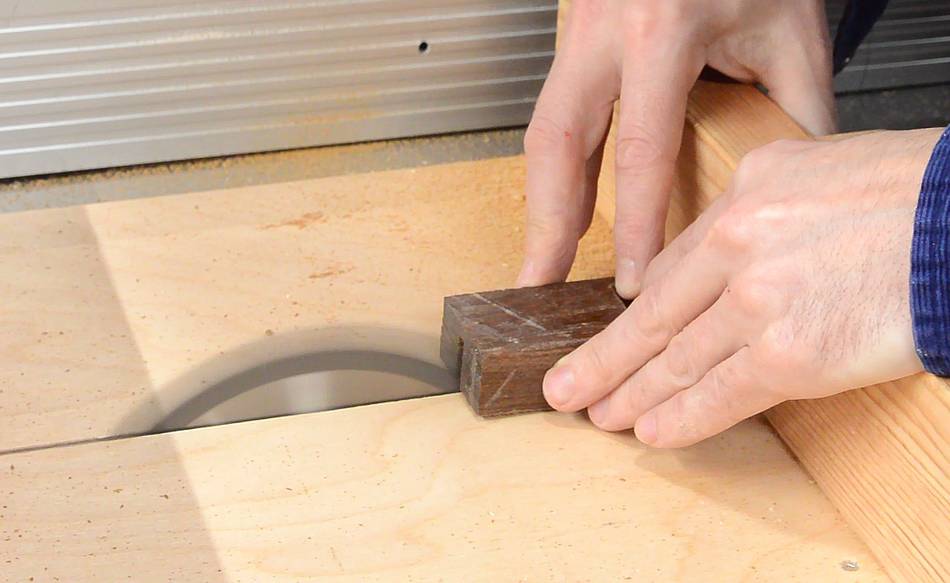
 I wanted to cut it out on the table saw, but how to hold it on the saw?
So I made a custom V-block to hold it at the right angle...
I wanted to cut it out on the table saw, but how to hold it on the saw?
So I made a custom V-block to hold it at the right angle...
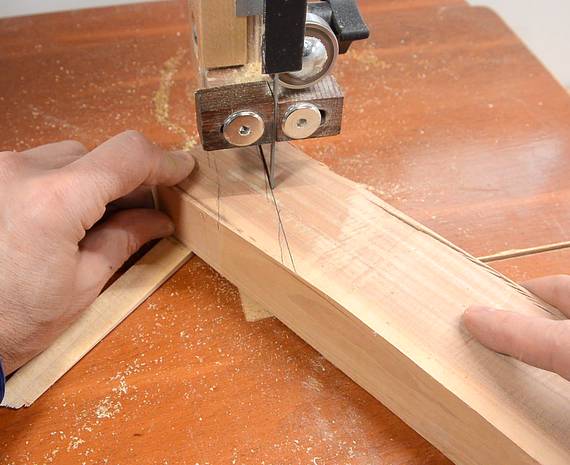
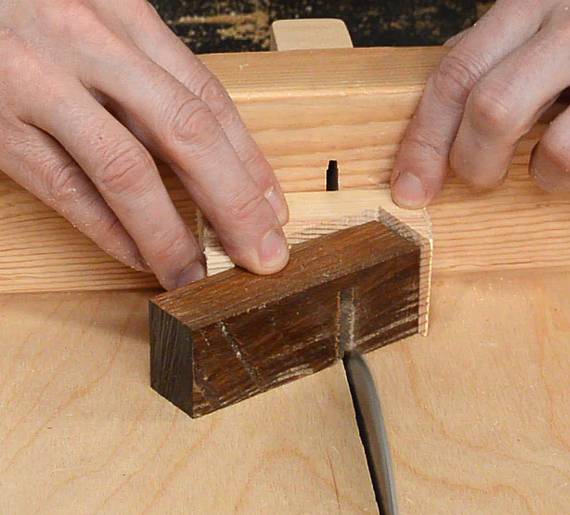 ...on my table saw sled. I made another V-block for the other angle
and also cut straight and at a few more angles to start hollowing it out.
...on my table saw sled. I made another V-block for the other angle
and also cut straight and at a few more angles to start hollowing it out.
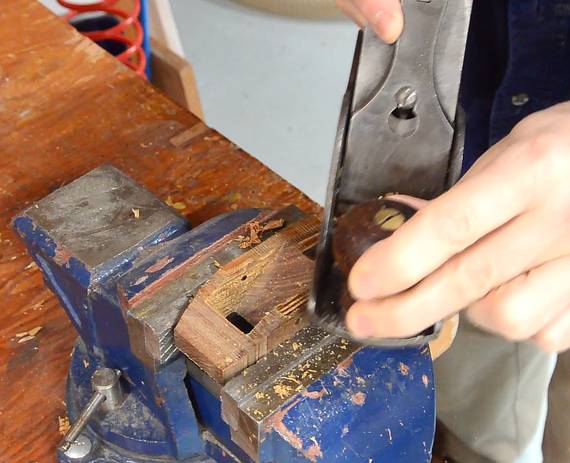
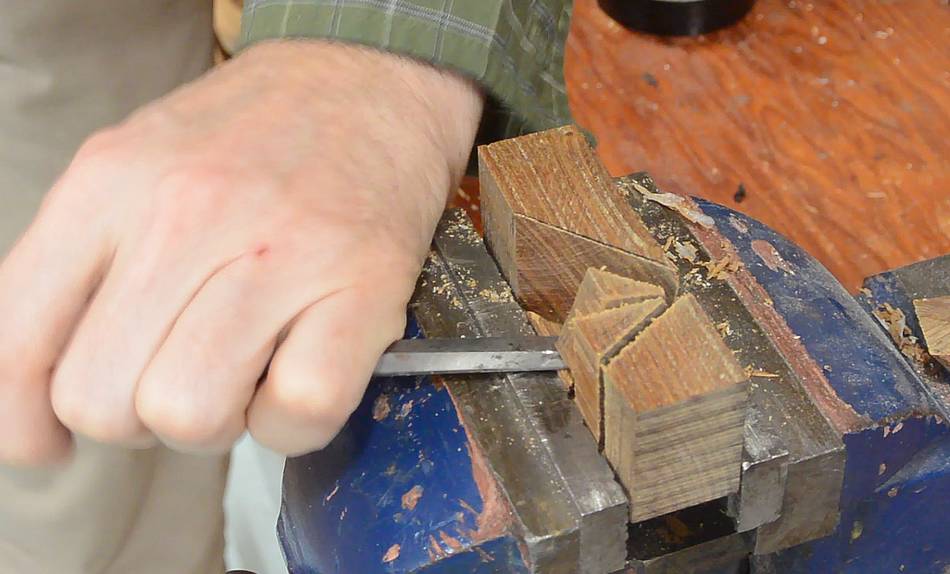 Then chiseling out the rest of it.
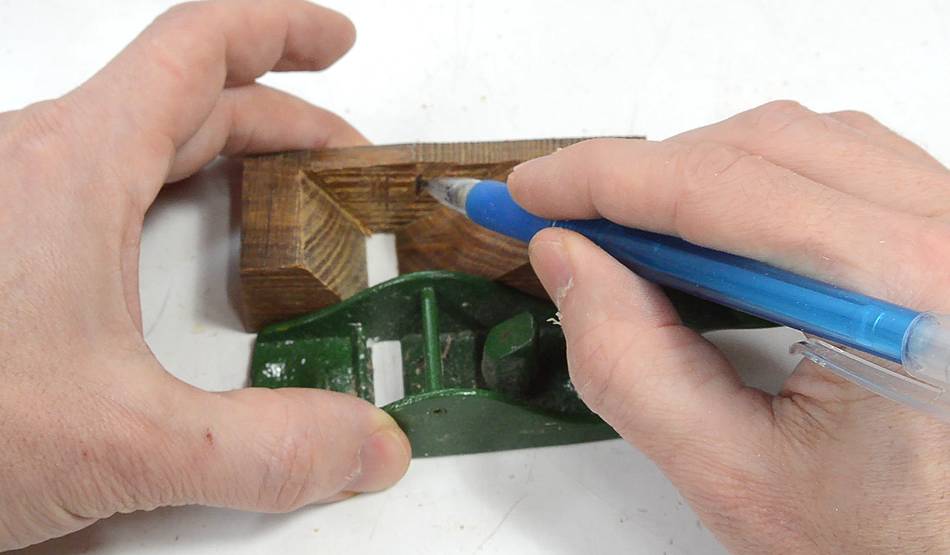 The Kunz plane has a pin across it for holding the cap iron. I figured
I might as well put the pin in the same place on mine.
The Kunz plane has a pin across it for holding the cap iron. I figured
I might as well put the pin in the same place on mine.
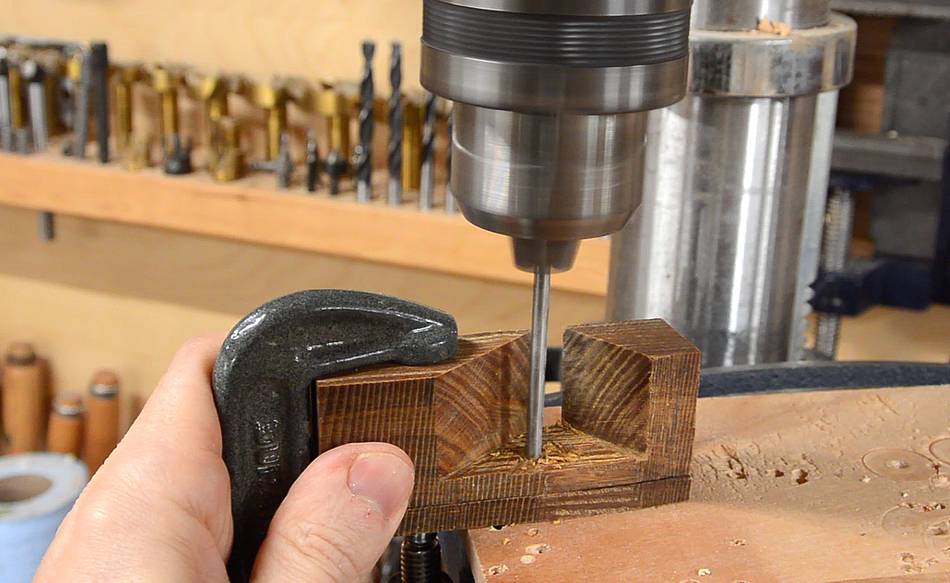 I clamped the other side of the plane against the side as I was drilling so
I could drill both parts at once and get them aligned consistently.
I clamped the other side of the plane against the side as I was drilling so
I could drill both parts at once and get them aligned consistently.
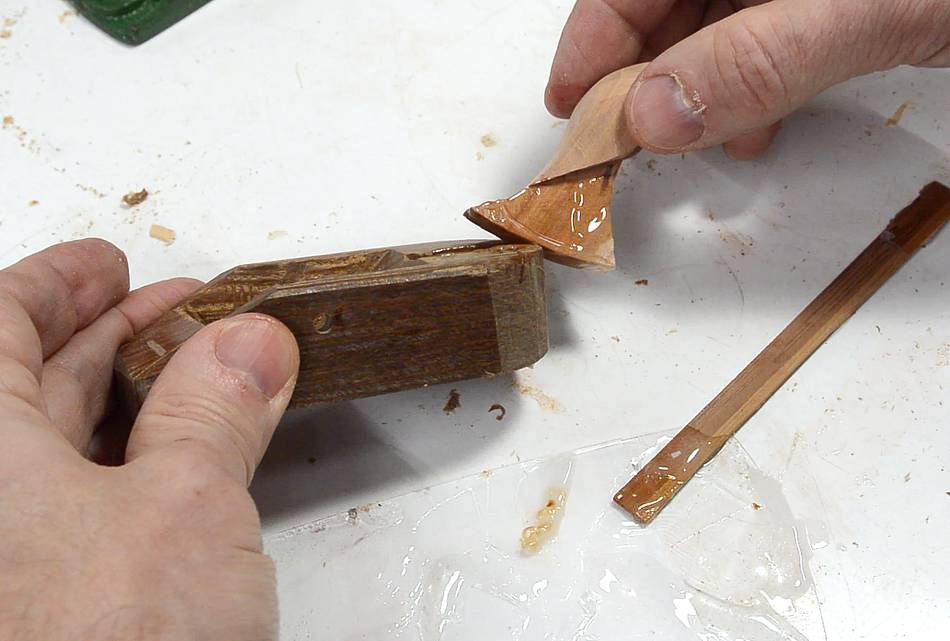
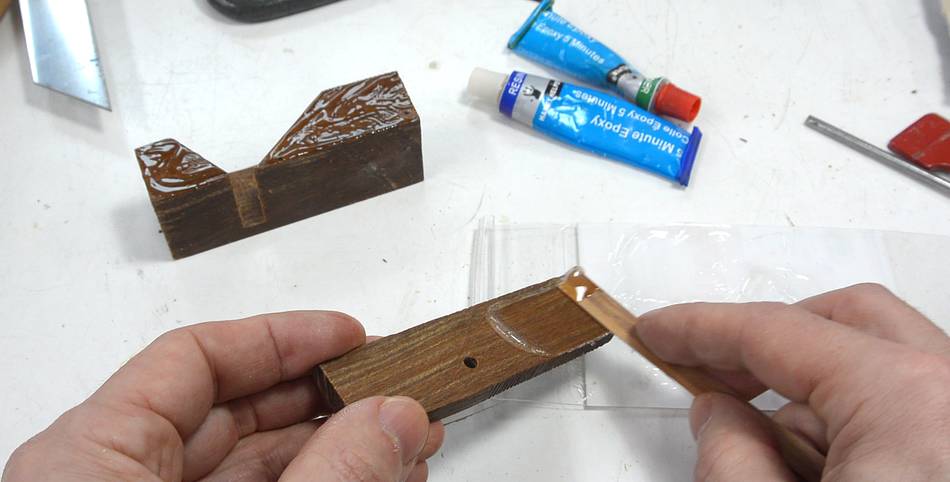 Then gluing it together with epoxy. Before gluing, I wiped the wood with
some paint thinner to hopefully remove a bit of oil (it's a very oily wood)
for better glue adhesion.
Then gluing it together with epoxy. Before gluing, I wiped the wood with
some paint thinner to hopefully remove a bit of oil (it's a very oily wood)
for better glue adhesion.
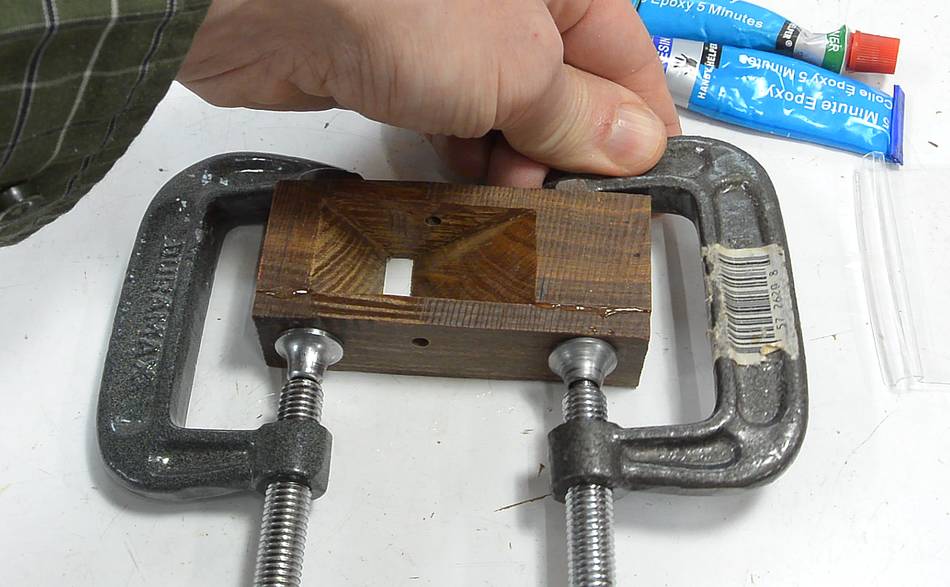 Clamping it together lightly while letting the glue harden.
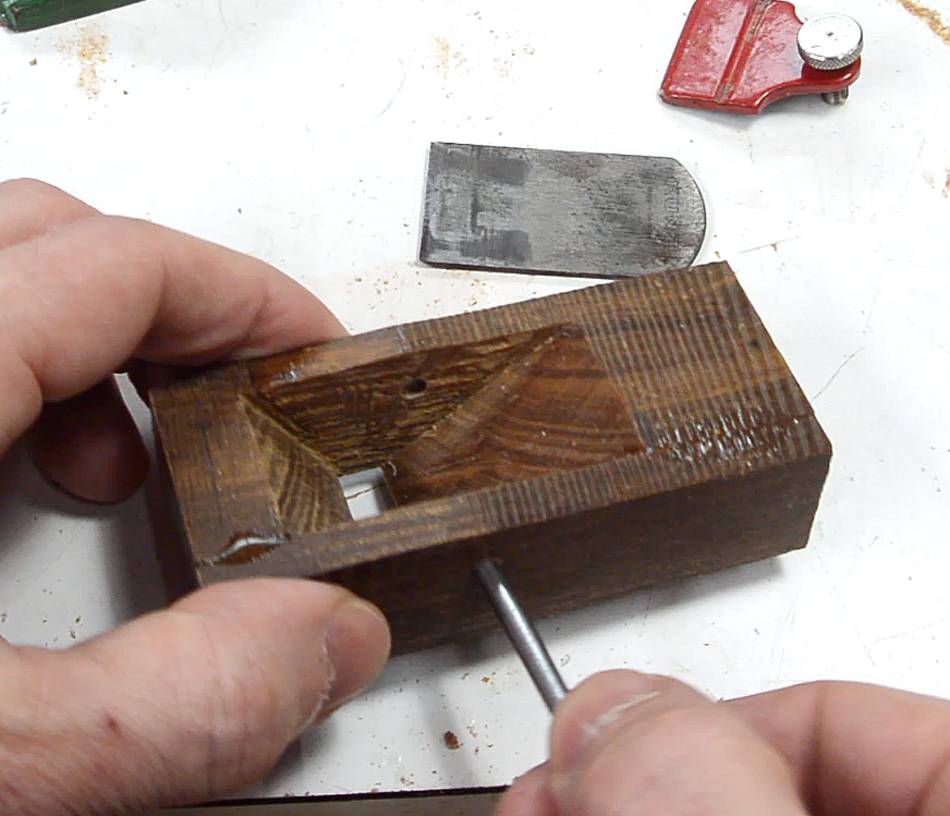
 I used a cut-off round nail for the pin. I then installed the
blade and cap iron from the Kunz plane to try it out.
I used a cut-off round nail for the pin. I then installed the
blade and cap iron from the Kunz plane to try it out.
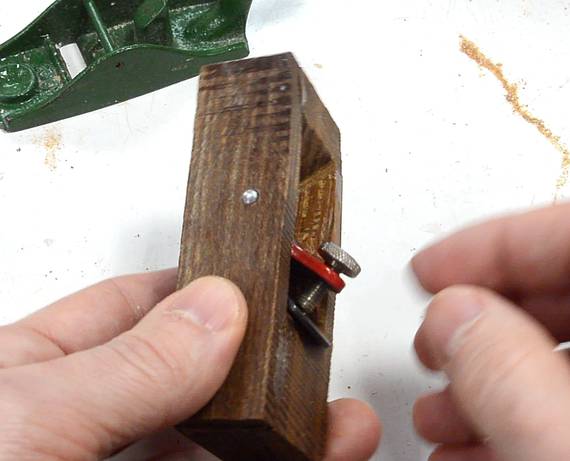
 It worked ok, but it wasn't very comfortable to hold with all the square
corners. I'll have to round those later.
It worked ok, but it wasn't very comfortable to hold with all the square
corners. I'll have to round those later.
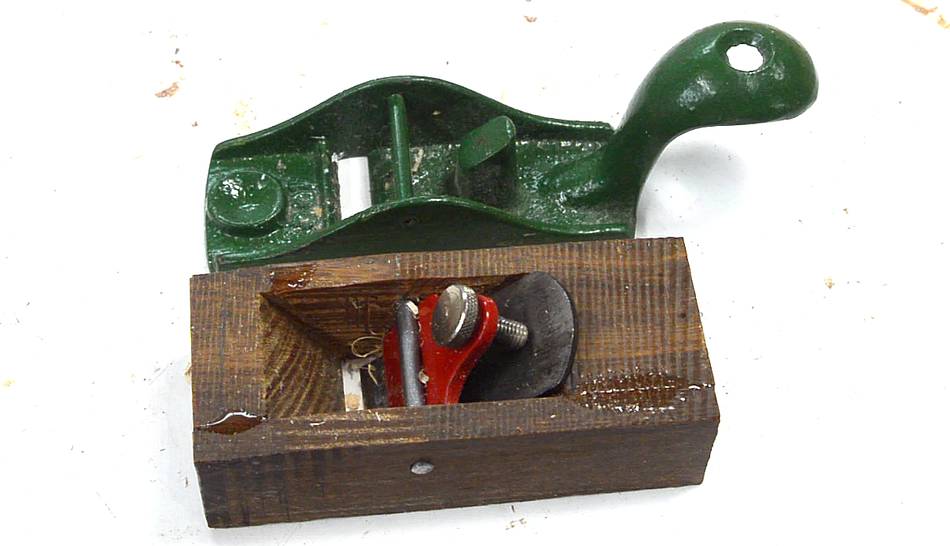 The Kunz plane has a "tail" on it, which I find quite useful for holding it.
I wanted to add a similar tail to mine.
The Kunz plane has a "tail" on it, which I find quite useful for holding it.
I wanted to add a similar tail to mine.
 I cut a slot in the back end of the plane to act as a mortise for receiving
the tail piece.
I cut a slot in the back end of the plane to act as a mortise for receiving
the tail piece.
 I wanted the grain to run at an angle for best strength for the tail,
so I sketched roughly where to cut it off on the bandsaw.
I wanted the grain to run at an angle for best strength for the tail,
so I sketched roughly where to cut it off on the bandsaw.
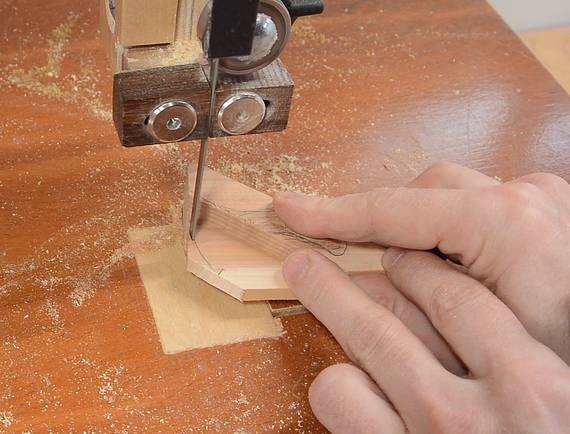
 Then sketching the tail shape onto my piece of wood.
 The tenon shape is best cut with my tenon jig.
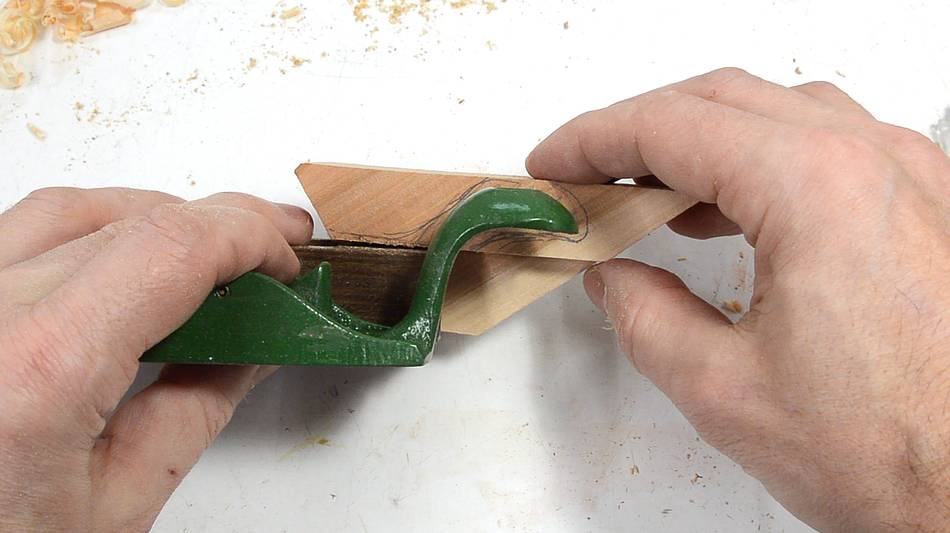
After cutting the tenon, I shaped the end of it to match the profile
of the bottom of the mortise.
The tenon shape is best cut with my tenon jig.
After cutting the tenon, I shaped the end of it to match the profile
of the bottom of the mortise.
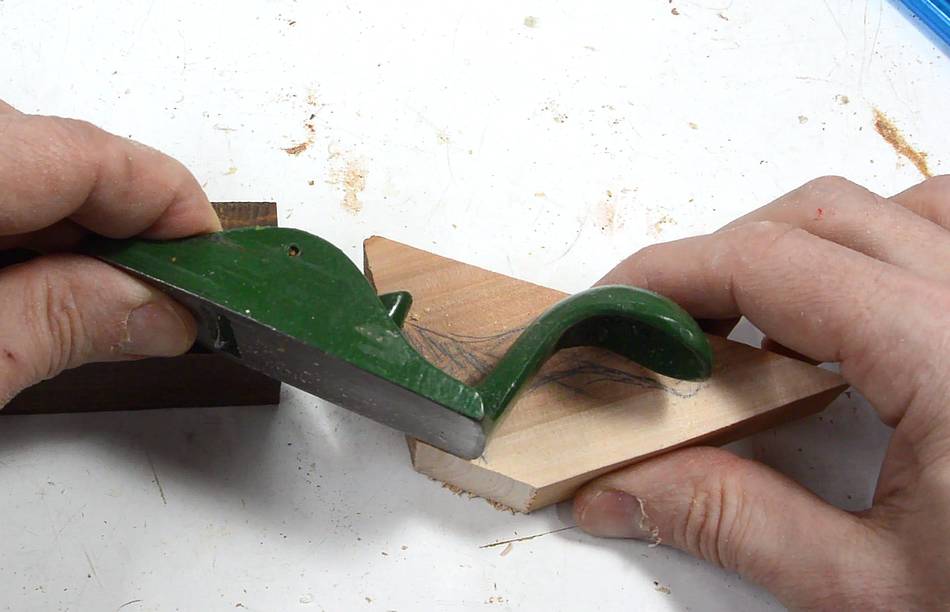
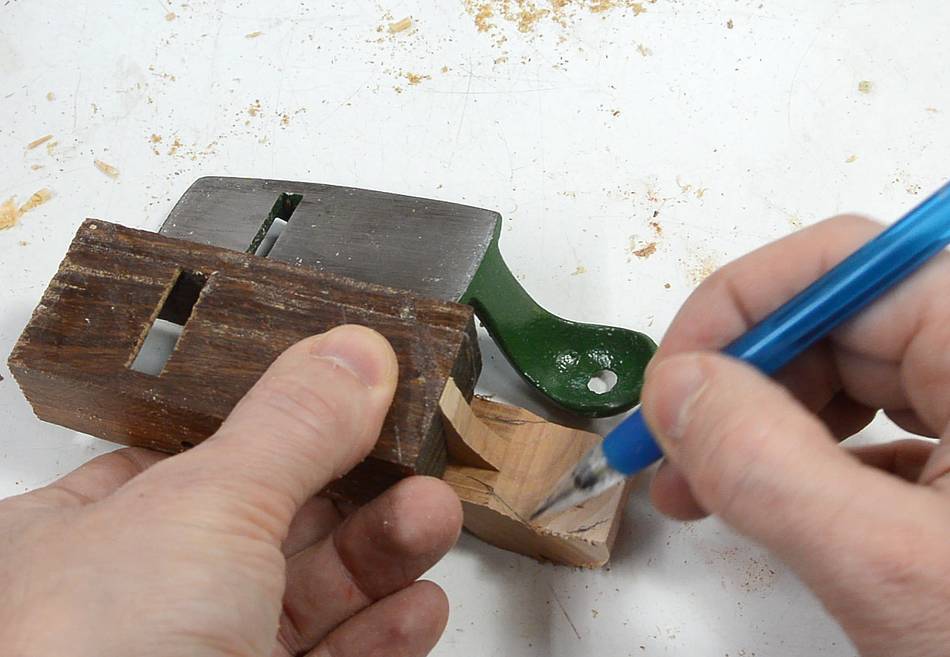
 Comparing my sketched tail shape with the Kunz plane.
I then cut that out on the bandsaw.
Comparing my sketched tail shape with the Kunz plane.
I then cut that out on the bandsaw.
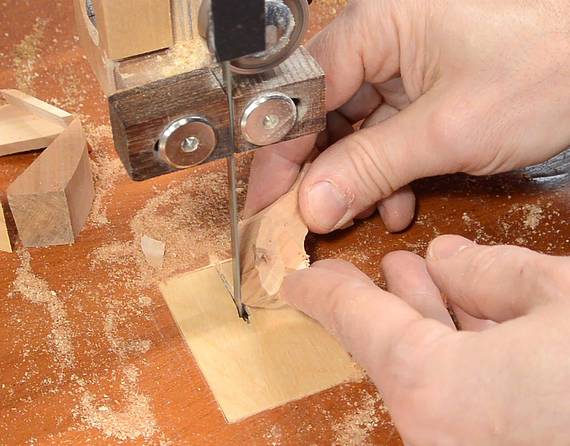 Then sketching the width of it, and more sculpting it on the bandsaw.
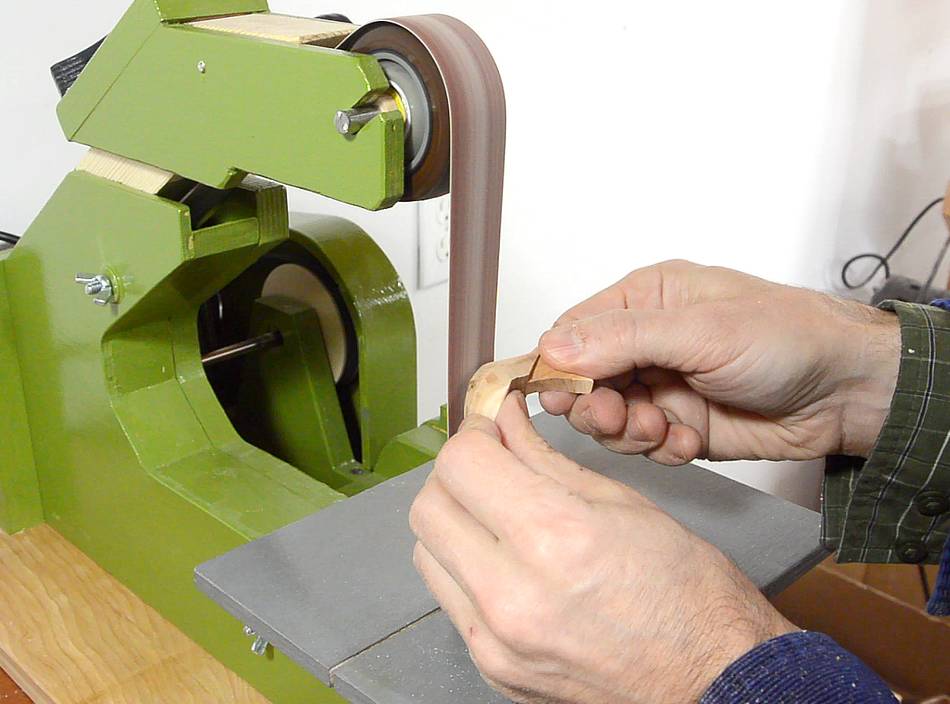
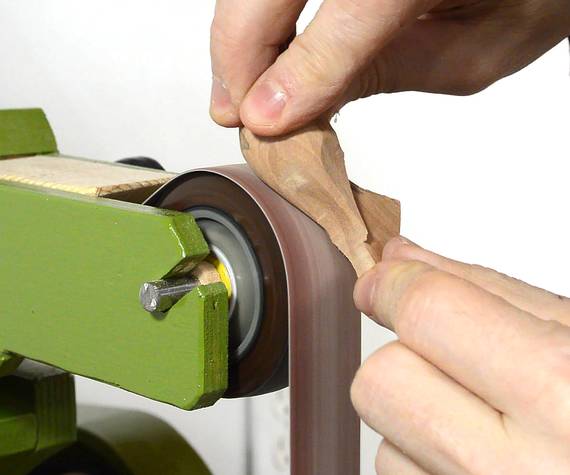 I rounded the curvature on my strip sander.
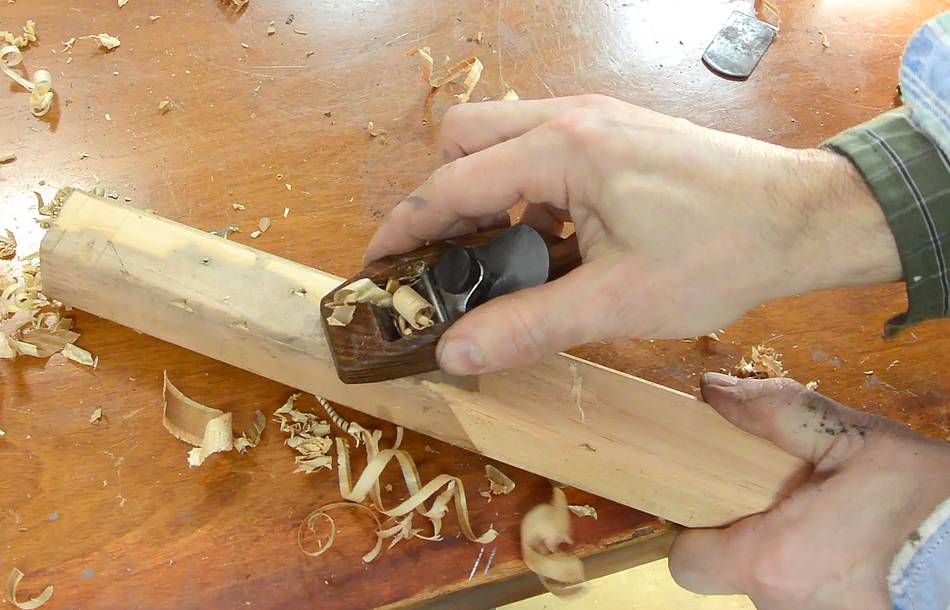
 Next I sculpted the body a bit more, tapering it towards the front and back,
and smoothing and rounding it with a hand plane.
Next I sculpted the body a bit more, tapering it towards the front and back,
and smoothing and rounding it with a hand plane.
 I ended up tapering it quite a bit on the back. The way I normally hold the Kunz
plane, my fingers are against the back of it. Tapering the back leaves more
room.
I ended up tapering it quite a bit on the back. The way I normally hold the Kunz
plane, my fingers are against the back of it. Tapering the back leaves more
room.
 Now finally ready to glue in the tail. Again, I used epoxy.
 I used some 3 mm thick bar stock to make the cap iron. I figured, might as well
pattern it on the one from the Kunz plane.
I used some 3 mm thick bar stock to make the cap iron. I figured, might as well
pattern it on the one from the Kunz plane.
 The cap iron has a notch in it to fit around the pin, I ground that in with an
angle grinder.
The cap iron has a notch in it to fit around the pin, I ground that in with an
angle grinder.

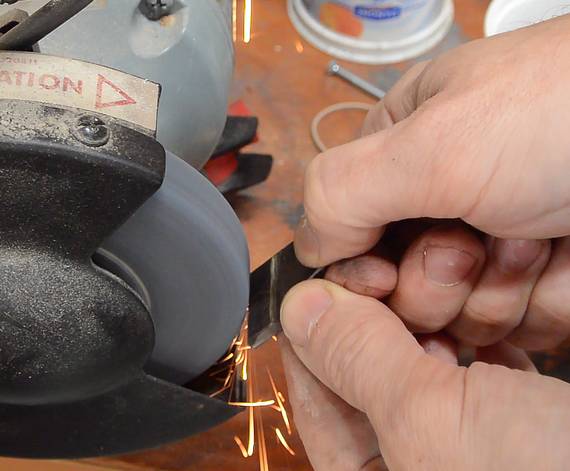 Also shaping the rest of it with an angle grinder. This worked better than
I expected, though it was slow going. Also adding a bevel on the front using
my bench grinder.
Also shaping the rest of it with an angle grinder. This worked better than
I expected, though it was slow going. Also adding a bevel on the front using
my bench grinder.
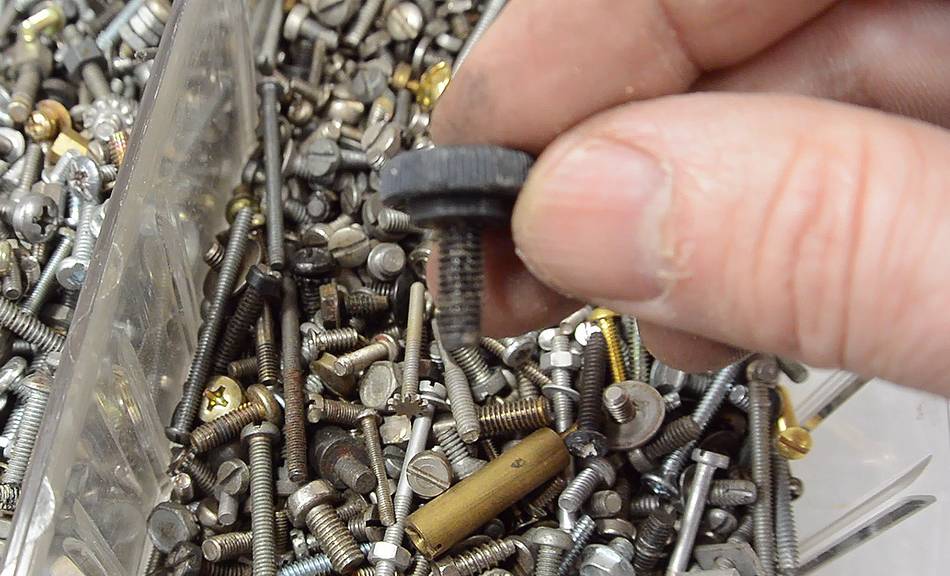
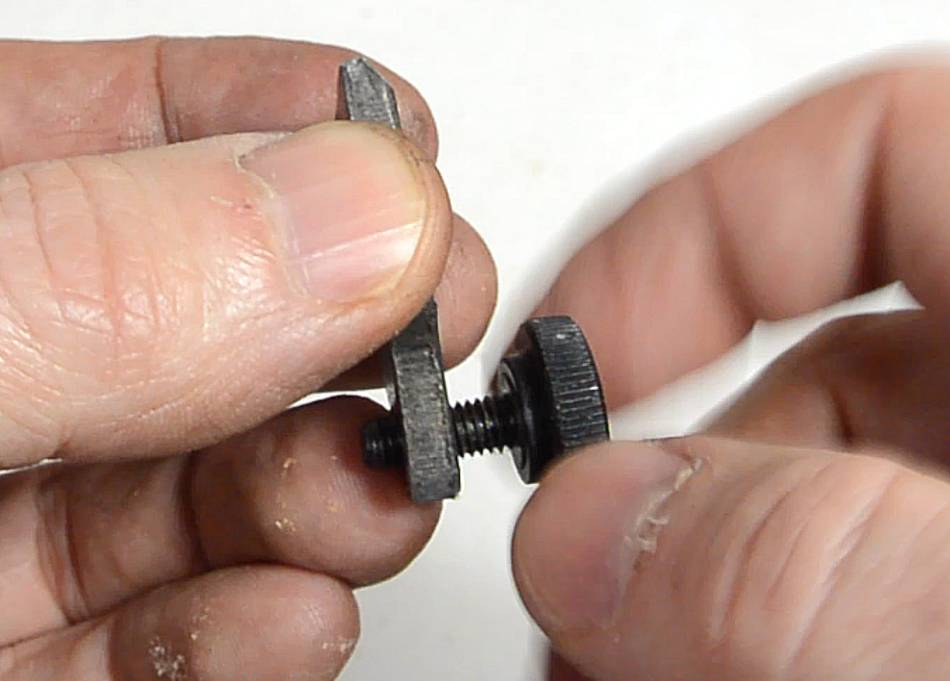
 I was puzzling over how to make a thumb screw for the cap iron, but going
through my screw collection, I found a thumb screw that was perfect for
the job.
I was puzzling over how to make a thumb screw for the cap iron, but going
through my screw collection, I found a thumb screw that was perfect for
the job.
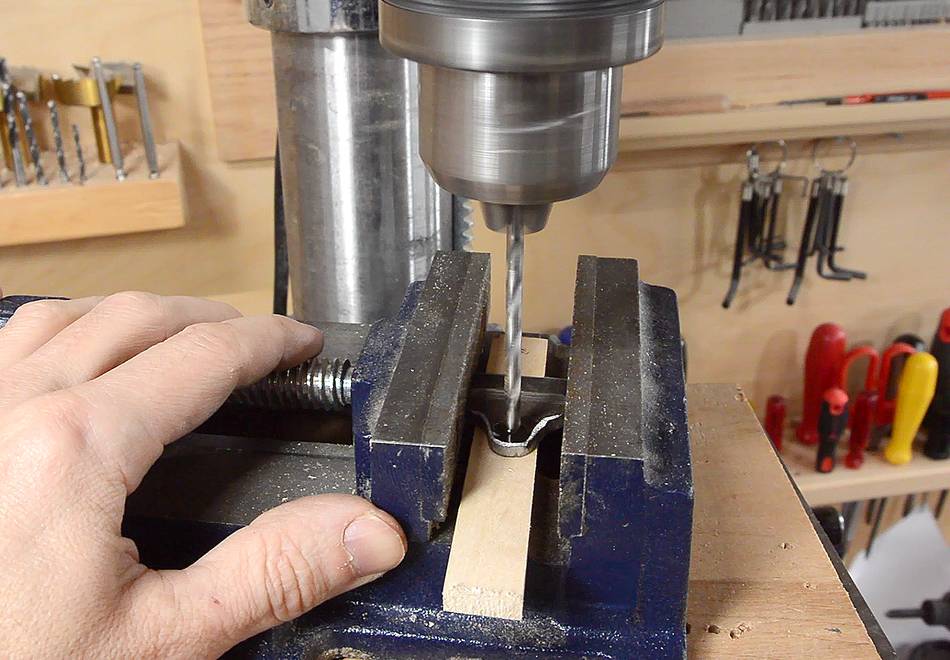
 Having picked a screw, I could now drill the hole to the appropriate size
and tap a thread into it.
Having picked a screw, I could now drill the hole to the appropriate size
and tap a thread into it.
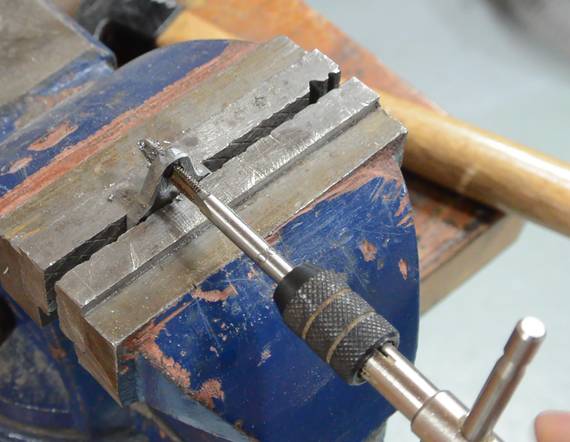
 I smoothed the edges and faces of the cap iron with a file, then took
it to the buffing wheel. This made it look more like a precision
machined part.
I smoothed the edges and faces of the cap iron with a file, then took
it to the buffing wheel. This made it look more like a precision
machined part.
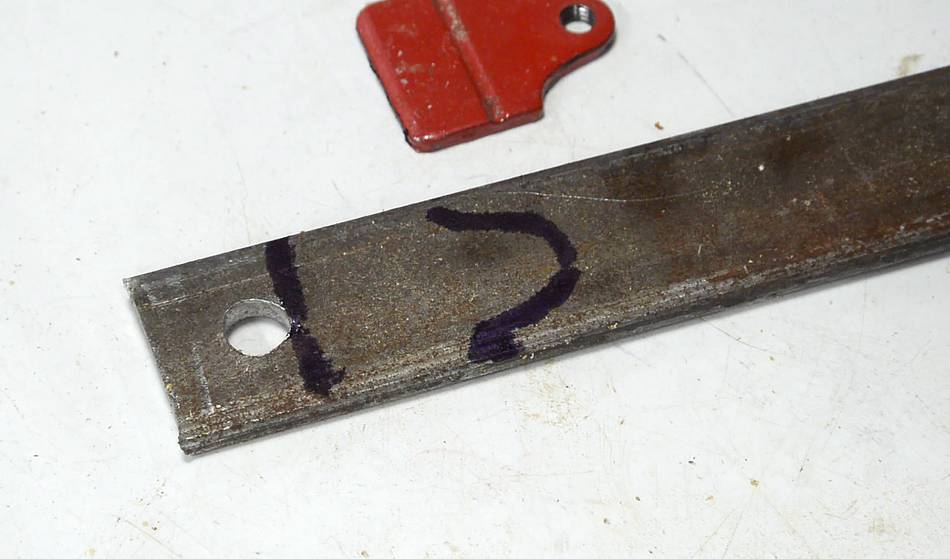
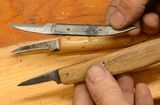
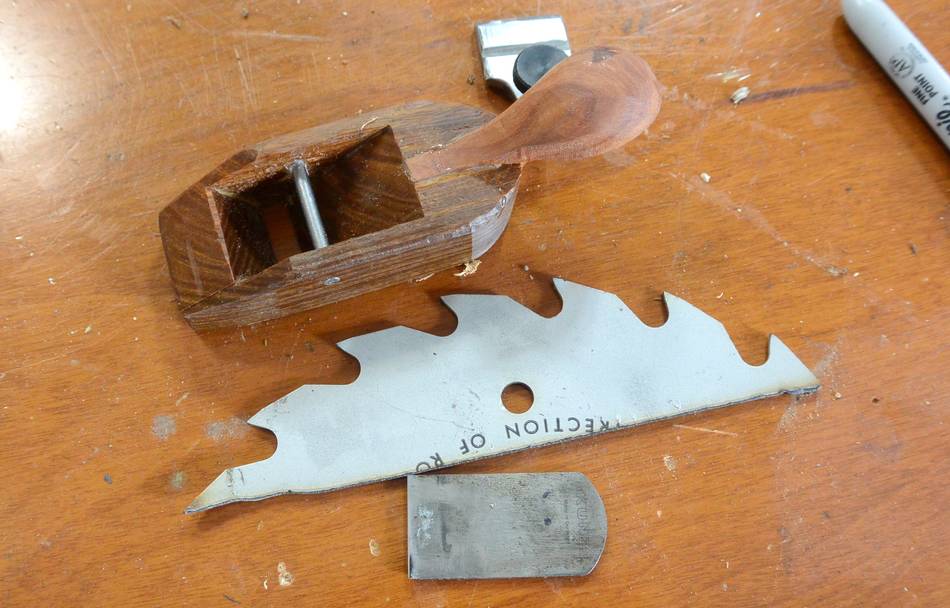 I still had part of the saw blade I used for my
carving knife left over, so I used
that for the plane blade.
I still had part of the saw blade I used for my
carving knife left over, so I used
that for the plane blade.
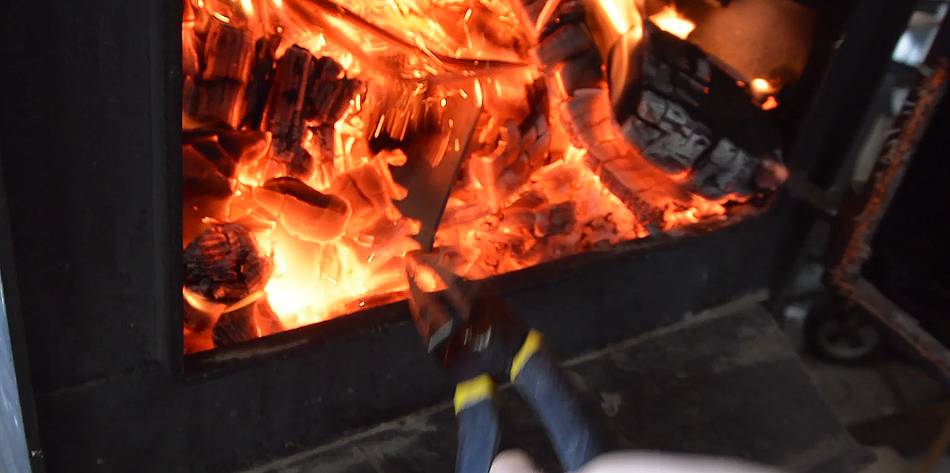 I started by heating it up in the wood stove, getting it to a dull red hot
to soften the metal.
I started by heating it up in the wood stove, getting it to a dull red hot
to soften the metal.
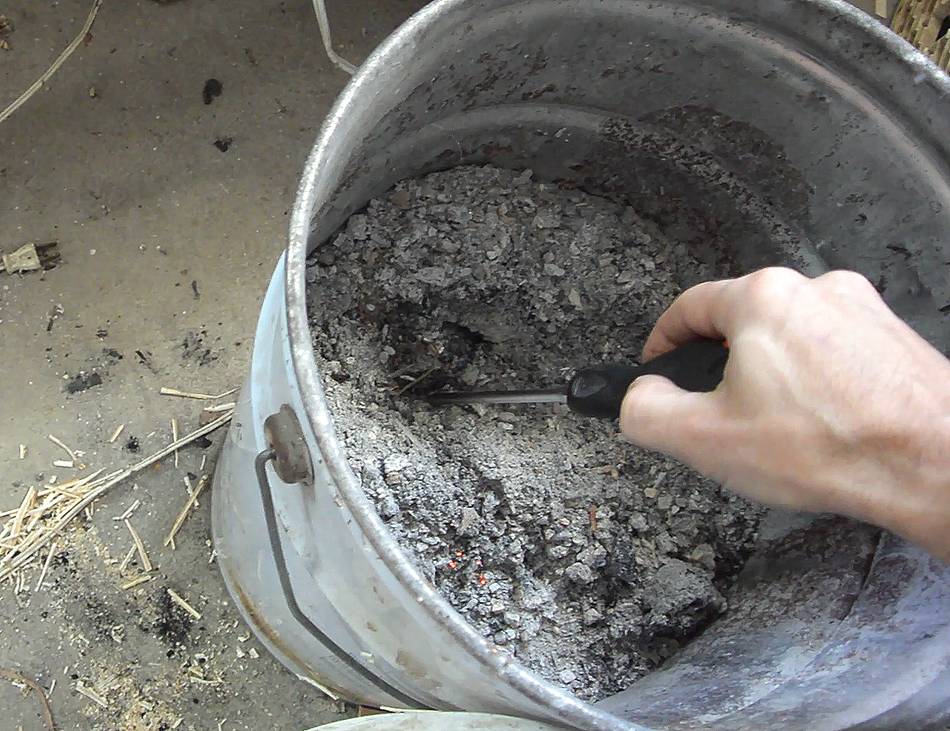 Then burying it in the ash bucket to let it cool down slowly. Heating and then
cooling it slowly removes the hardening.
Then burying it in the ash bucket to let it cool down slowly. Heating and then
cooling it slowly removes the hardening.
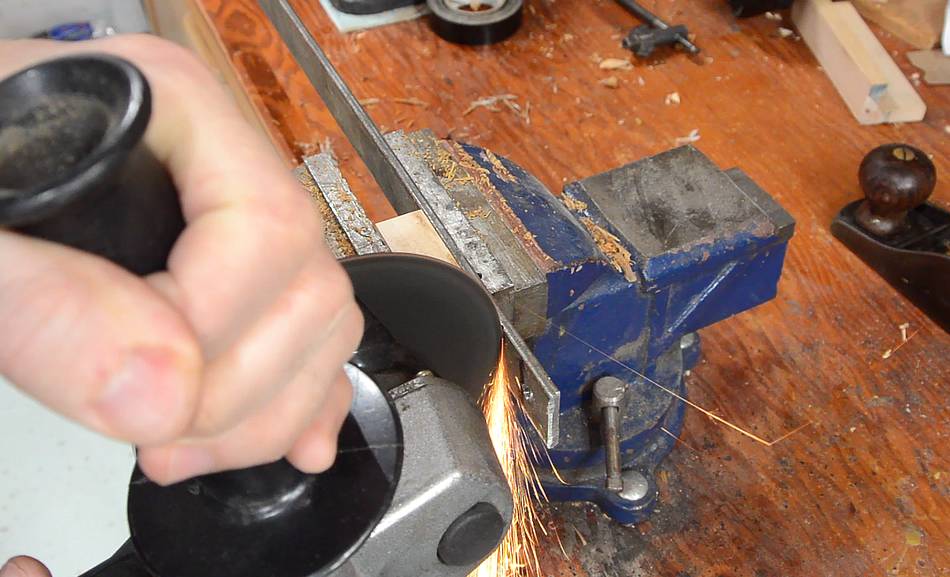
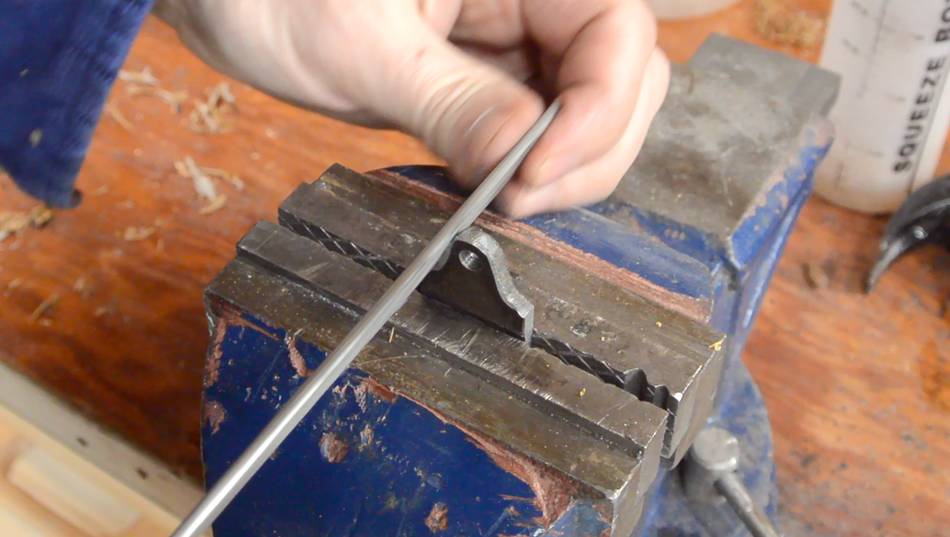
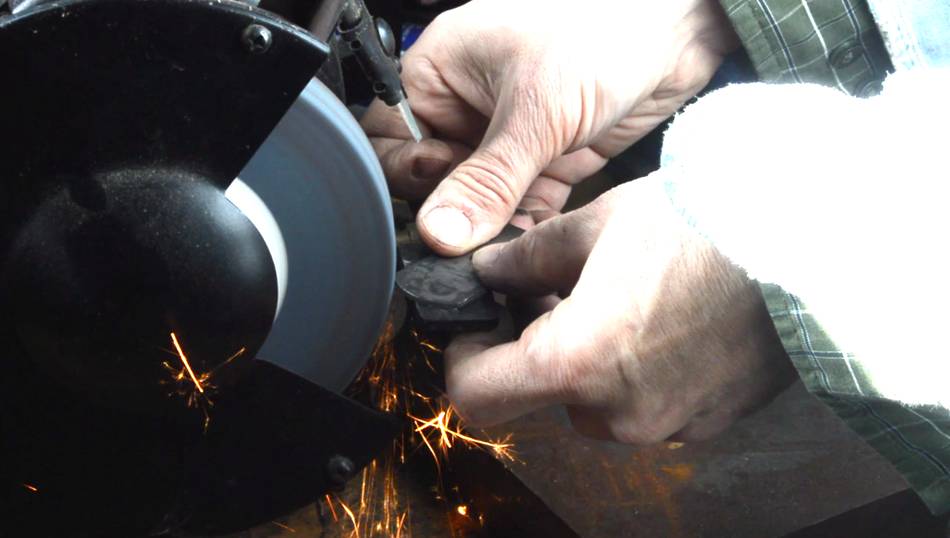
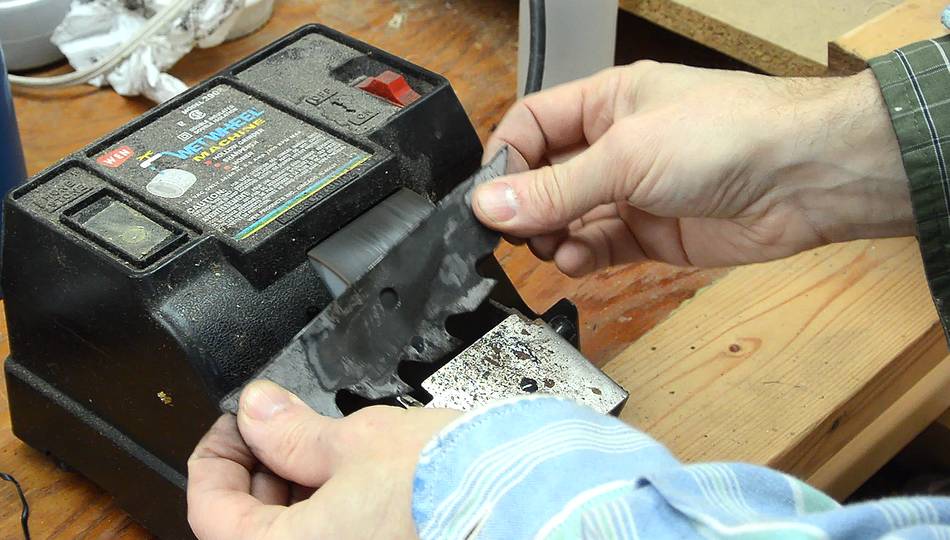 Then grinding it down to the bare metal using a cheap wet wheel grinder.
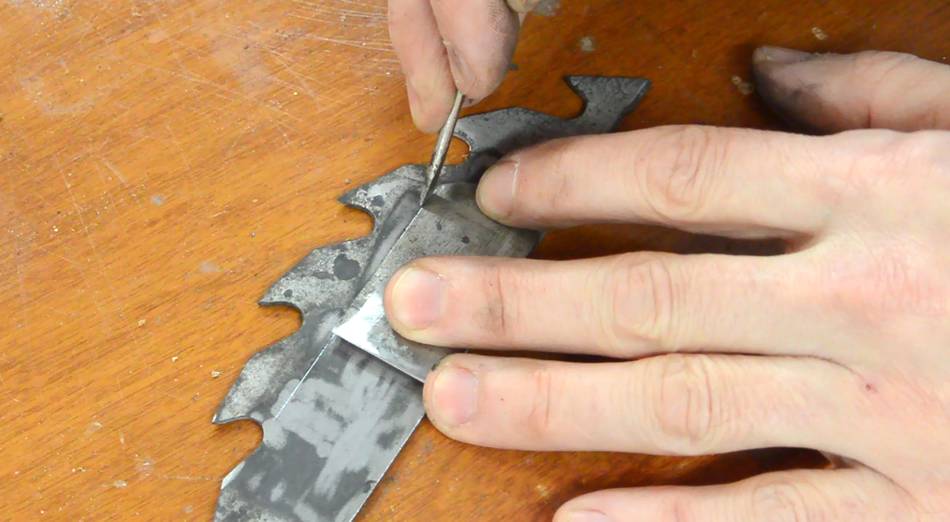
 Marking the width I needed on the blade and cutting it off
with an angle grinder.
Marking the width I needed on the blade and cutting it off
with an angle grinder.
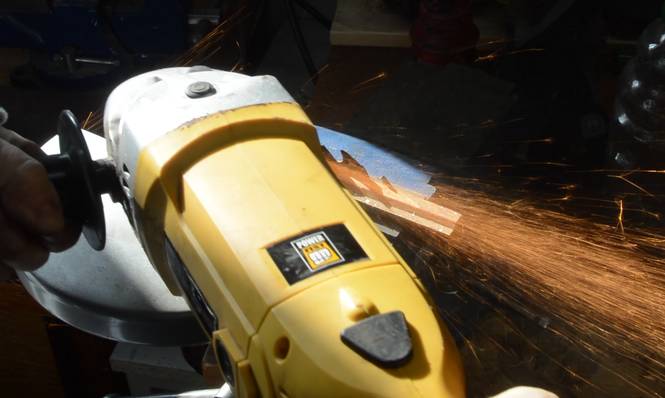
 I used a bench grinder to grind a bevel on the front and round it on
the back.
I used a bench grinder to grind a bevel on the front and round it on
the back.
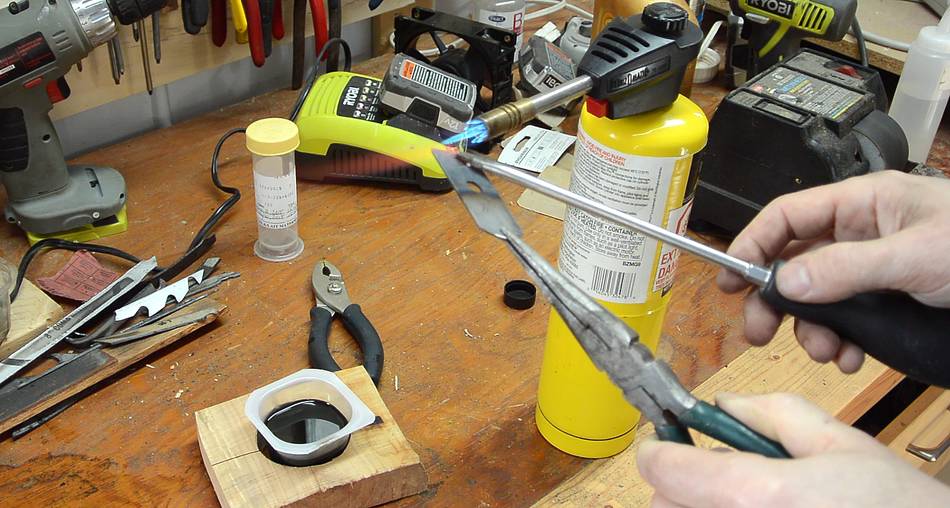
 After that, the blade was ready for re-hardening. I heated it up with a
blow torch. Once the steel is hot enough, it's no longer attracted by a
magnet. I'm using a magnetized screwdriver to check it. I then dipped
it in some used motor oil to quench it (cool it rapidly) for hardening.
Some of the motor oil got vaporized by this, and the torch promptly lit
that on fire.
After that, the blade was ready for re-hardening. I heated it up with a
blow torch. Once the steel is hot enough, it's no longer attracted by a
magnet. I'm using a magnetized screwdriver to check it. I then dipped
it in some used motor oil to quench it (cool it rapidly) for hardening.
Some of the motor oil got vaporized by this, and the torch promptly lit
that on fire.
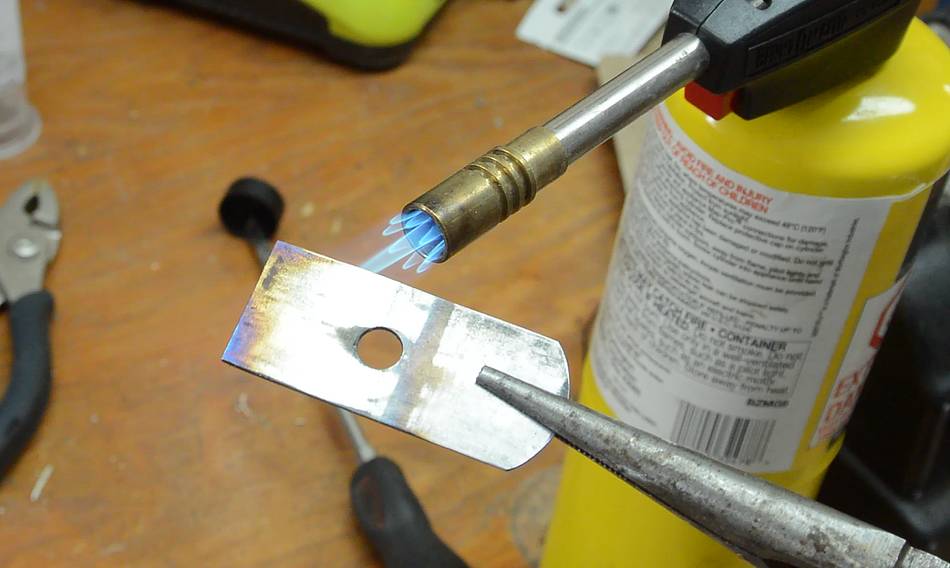 I figured I should temper the blade. Reading about tempering on the net, heating it
until it gets roughly a yellow patina is about the right temperature. But before I could
get all of it yellow, some of it already turned blue. Basically, I heated it too much
and it lost its hardening. I guess the heat of the blow torch is not hot enough for that.
So I re-hardened it and left it at that. When I made the knife, heating and quenching
it left it in a non-brittle state, so I figured if the knife didn't need tempering,
this wouldn't either.
I figured I should temper the blade. Reading about tempering on the net, heating it
until it gets roughly a yellow patina is about the right temperature. But before I could
get all of it yellow, some of it already turned blue. Basically, I heated it too much
and it lost its hardening. I guess the heat of the blow torch is not hot enough for that.
So I re-hardened it and left it at that. When I made the knife, heating and quenching
it left it in a non-brittle state, so I figured if the knife didn't need tempering,
this wouldn't either.
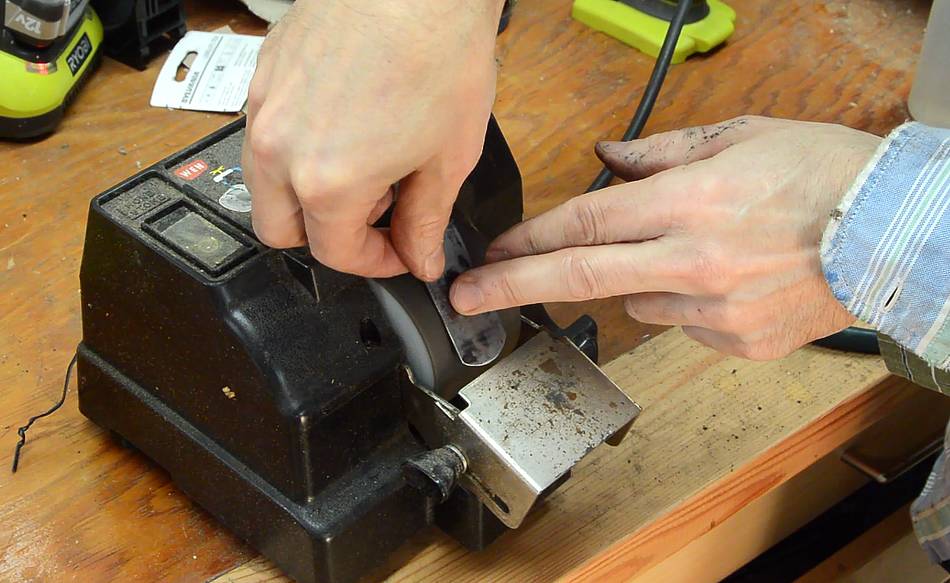 After that, I smoothed all surfaces on the grinder and did the final shaping of the cutting
edge.
After that, I smoothed all surfaces on the grinder and did the final shaping of the cutting
edge.
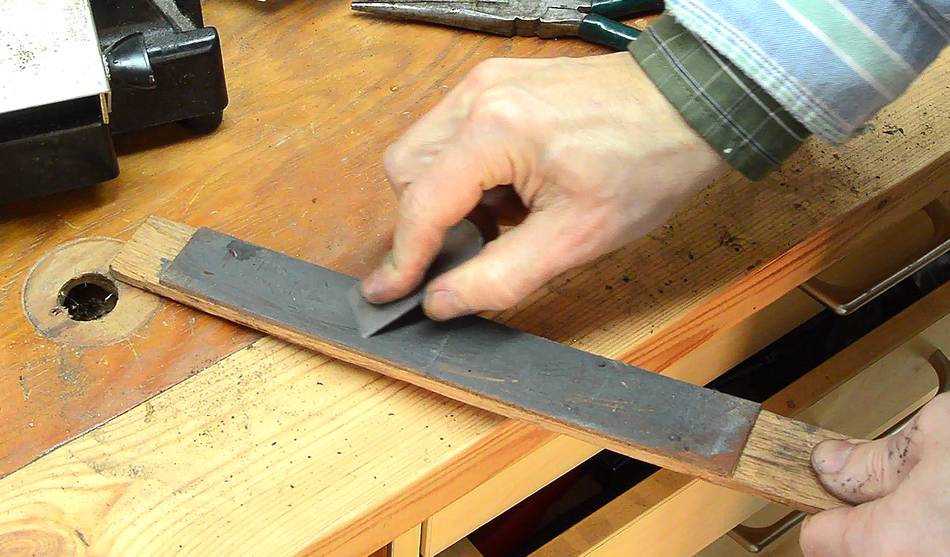
 Then doing the fine sharpening using a leather strop with honing compound on it.
I tested it by cutting shavings off the end grain of some soft wood.
Then doing the fine sharpening using a leather strop with honing compound on it.
I tested it by cutting shavings off the end grain of some soft wood.
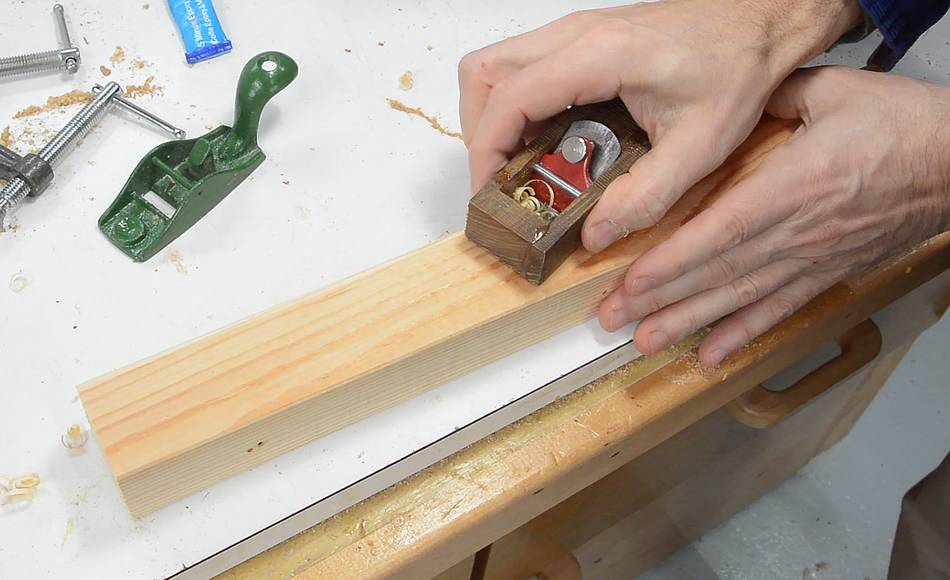
 Then putting it together and testing it for real. Palm plane complete!
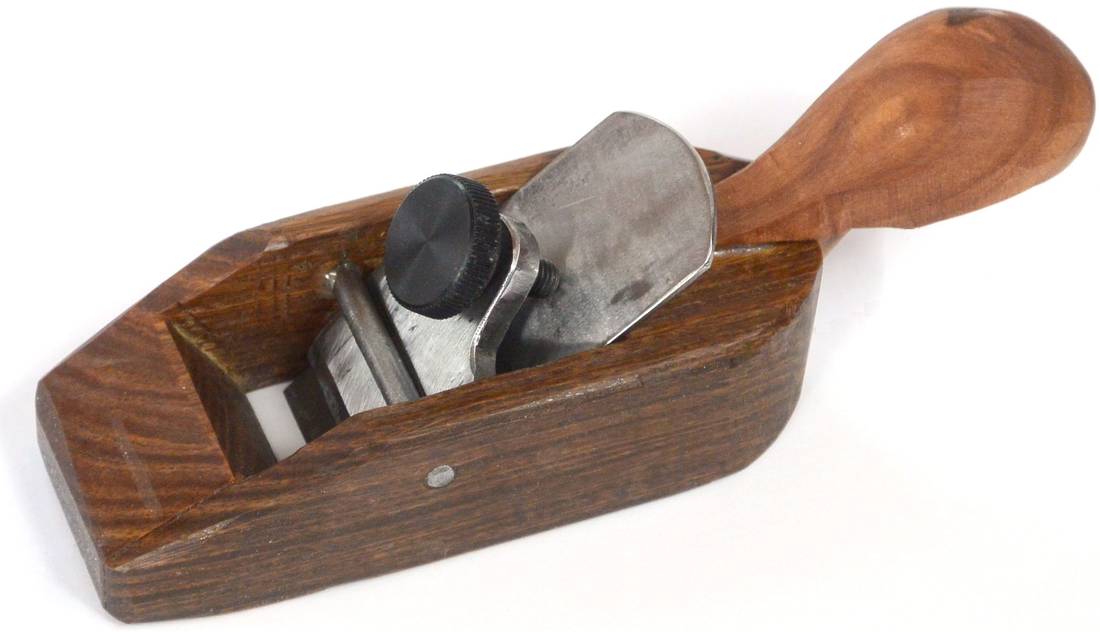 I really like how this one turned out!
If I was building it again, I'd try to make the mouth opening a bit narrower and the tail a bit larger. The tail is already larger than on the Kunz plane, but even larger would be better.
 Chip carving knife
 My favourite hand planes
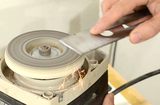 Hand plane sharpening
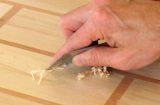 Sharpening and using
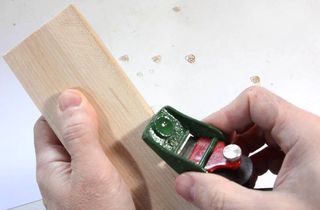 Roundovers with a hand plane
 Wall tool holders
 Plasma cutter pantograph
 Making wood thread taps