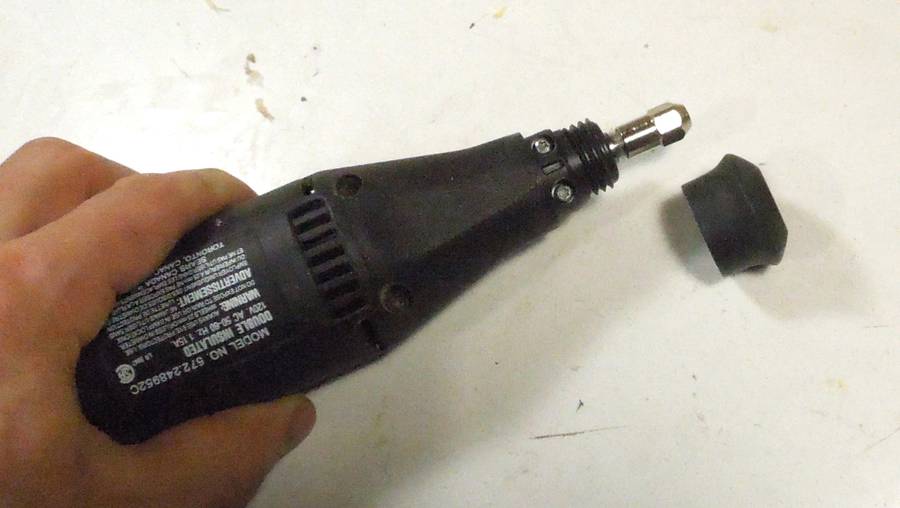
 I'm sometimes asked if a Dremel or similar rotary tool can be used with the 3D pantograph.
My answer has always been yes, though not until recently did I have a need to mount
a Dremel tool in my own pantograph.
I'm sometimes asked if a Dremel or similar rotary tool can be used with the 3D pantograph.
My answer has always been yes, though not until recently did I have a need to mount
a Dremel tool in my own pantograph.
I'm sometimes asked if a Dremel or similar rotary tool can be used with the 3D pantograph.
My answer has always been yes, though not until recently did I have a need to mount
a Dremel tool in my own pantograph.
Here I'll show some modifications to make it optimized for the Dremel tool.
 I started with a printout from the plans and modified them on paper.
I have now added these modifications to the plans, so if you want to build a mount for a Dremel,
you already have these changes (the original mount is also still in the plans). If you
bought the plans earlier, you can re-download using the link that was emailed to you
to get the latest version.
I started with a printout from the plans and modified them on paper.
I have now added these modifications to the plans, so if you want to build a mount for a Dremel,
you already have these changes (the original mount is also still in the plans). If you
bought the plans earlier, you can re-download using the link that was emailed to you
to get the latest version.
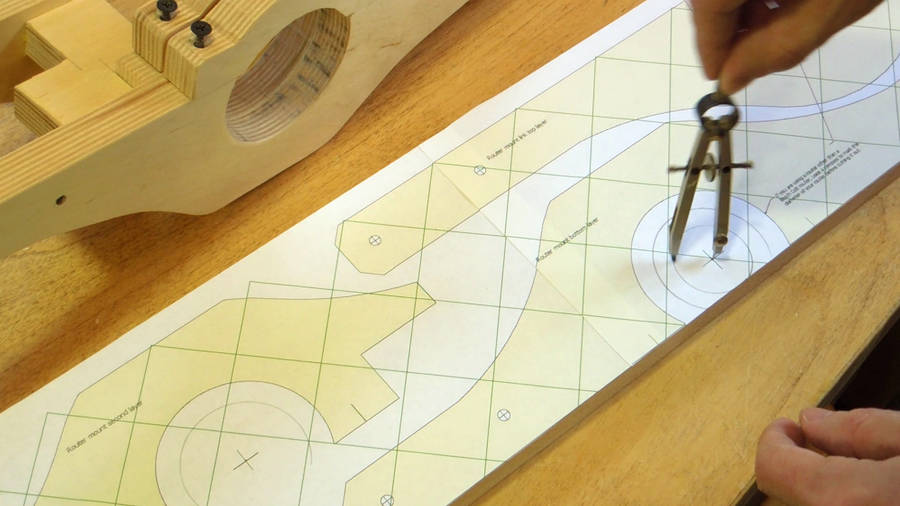
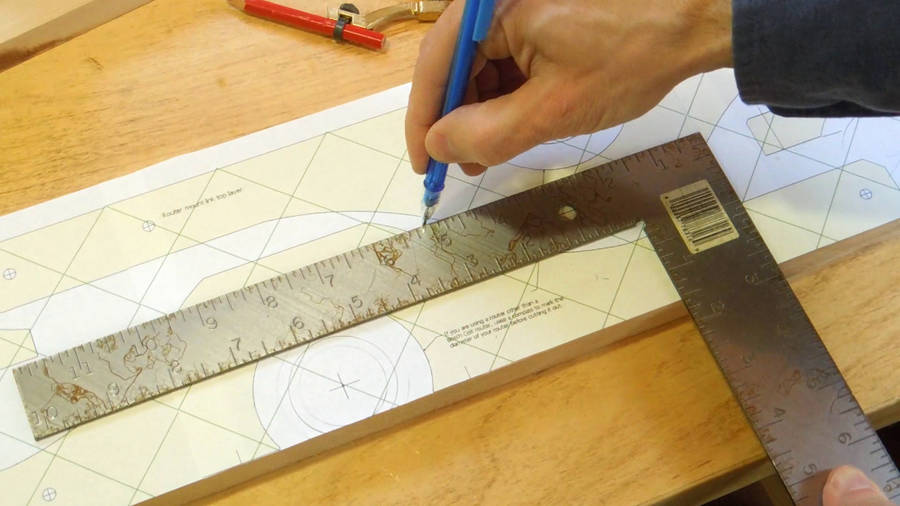
 I checked how large a hole I needed for the Dremel, then drew circle on the plans of that size.
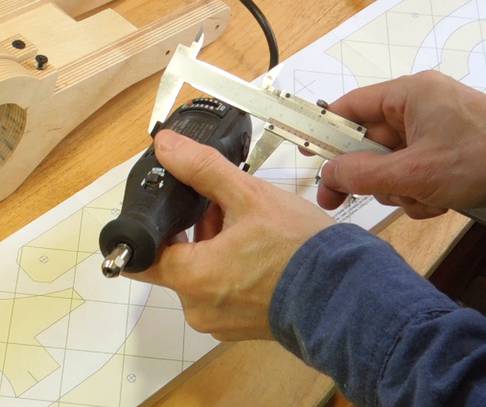
 Because the Dremel too is so much lighter and smaller, I could reduce the width
of the mounting link.
Because the Dremel too is so much lighter and smaller, I could reduce the width
of the mounting link.
I also made the mount out of regular hardwood (not plywood). I don't recommend solid wood for a router mount, but for a mount as light and narrow as this one, solid wood will do.
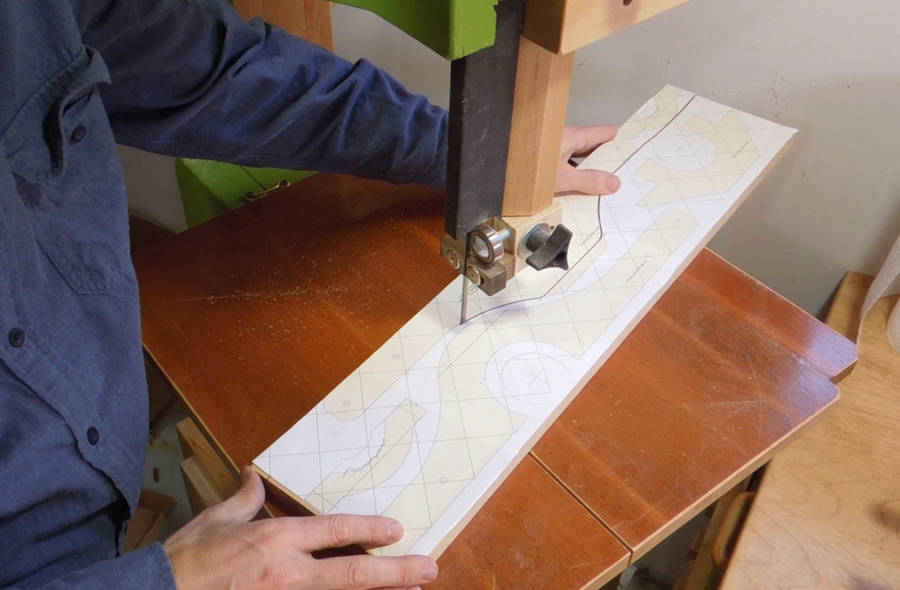
 Once I had the design changes worked out, time to cut it out on the bandsaw, as usual.
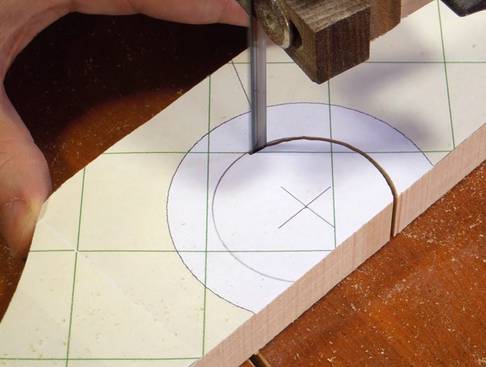
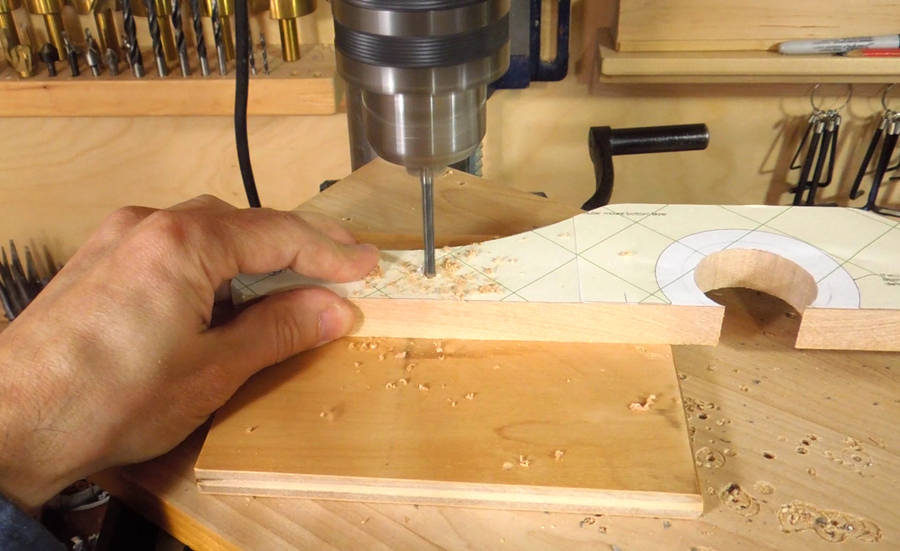 Drilling out the pivot holes. These need to be located precisely.
A brad point drill bit makes this easier.
Drilling out the pivot holes. These need to be located precisely.
A brad point drill bit makes this easier.
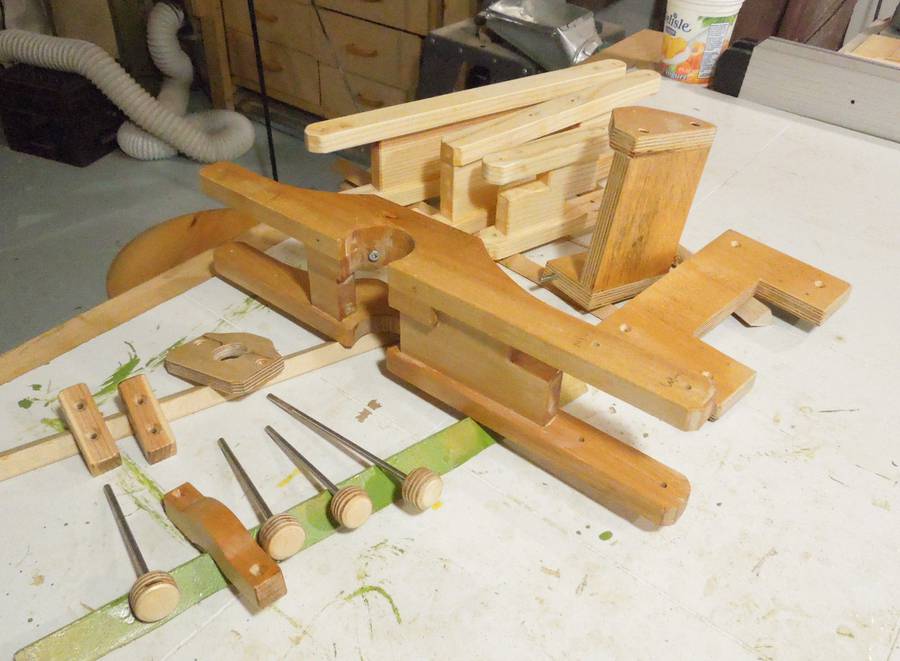
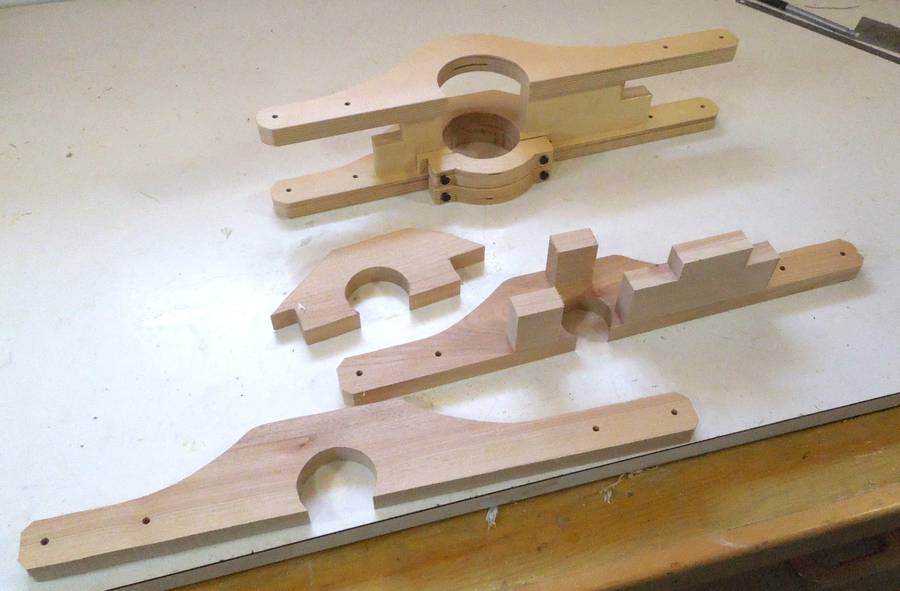 Parts all cut out and arranged. Behind the parts, my old router mount
for the pantograph.
Parts all cut out and arranged. Behind the parts, my old router mount
for the pantograph.
 I glued together all the pieces except for the bottom layer.
That way, I only have one glue joint to worry about when I align that.
I glued together all the pieces except for the bottom layer.
That way, I only have one glue joint to worry about when I align that.
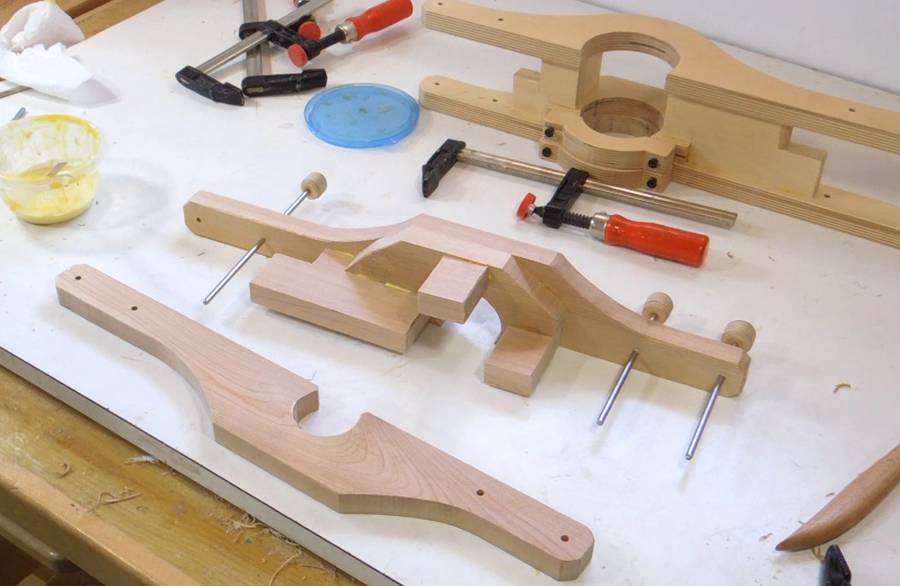 I used the pins from my other pantograph to help line things up for gluing.
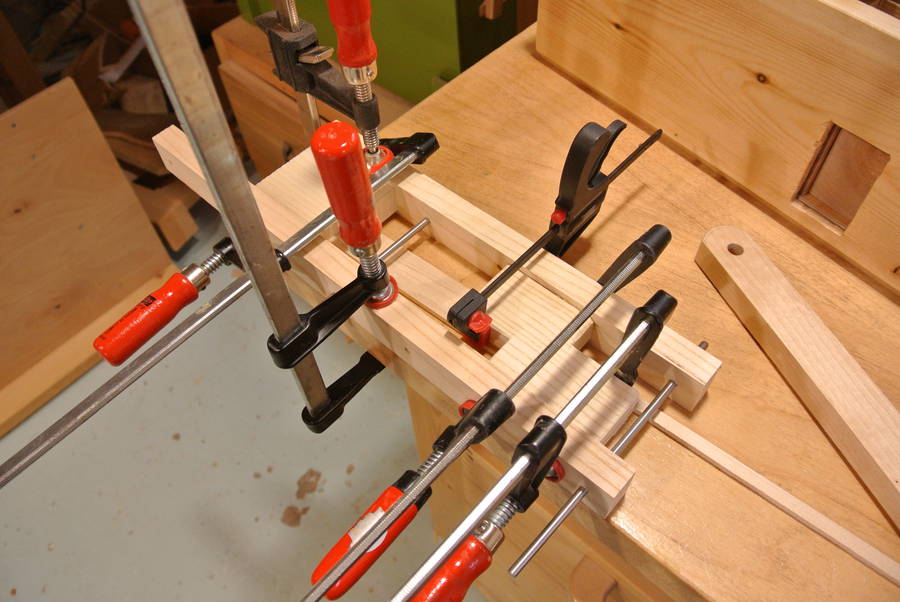
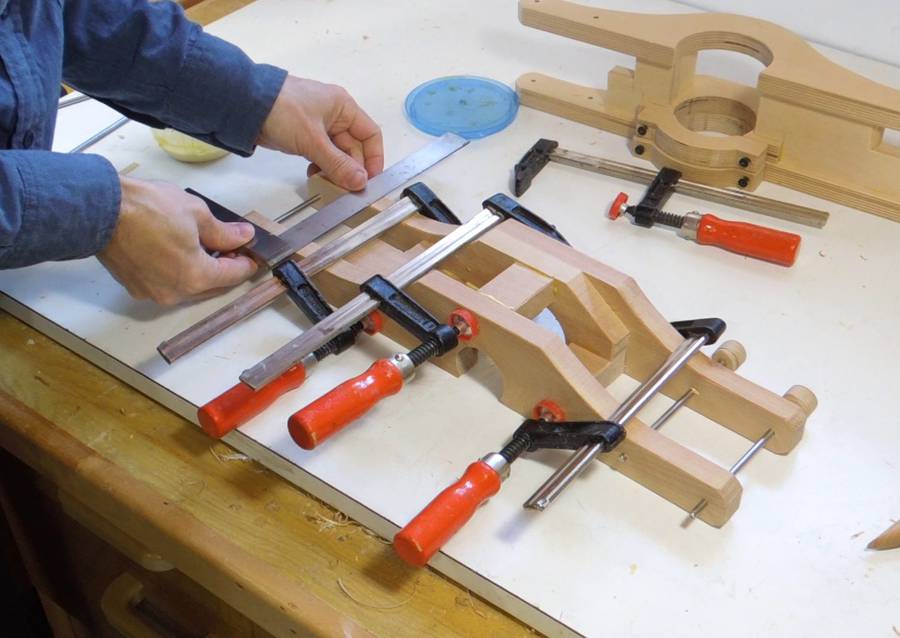 All clamped up...
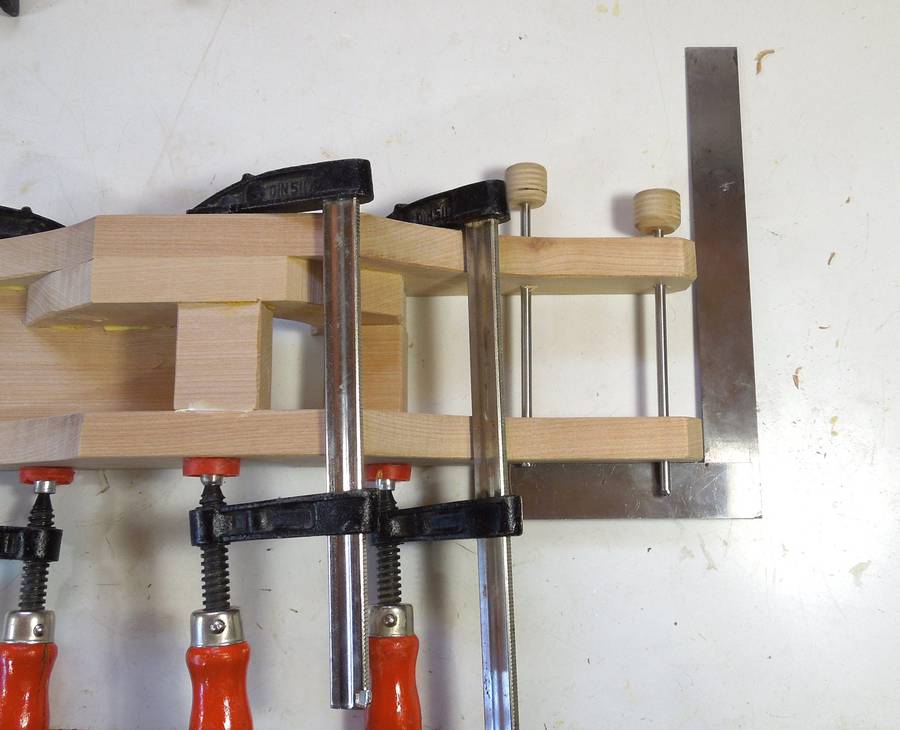 ... and checking that it's all square.
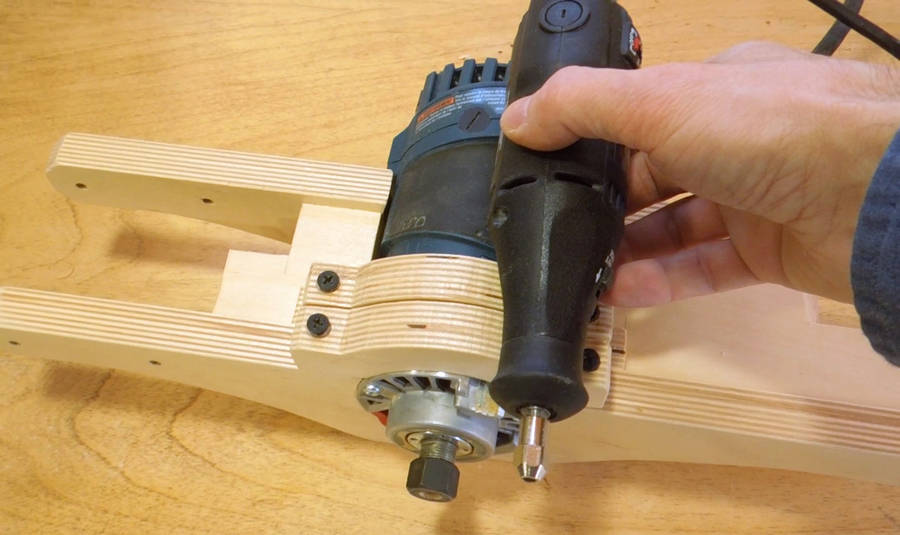
 Now... How to mount the Dremel tool?
Some Dremel tools have a front part that can be unscrewed. This reveals a screw thread that can be used with some jigs. But I don't have anything with a thread like that, so I couldn't really make use of it.
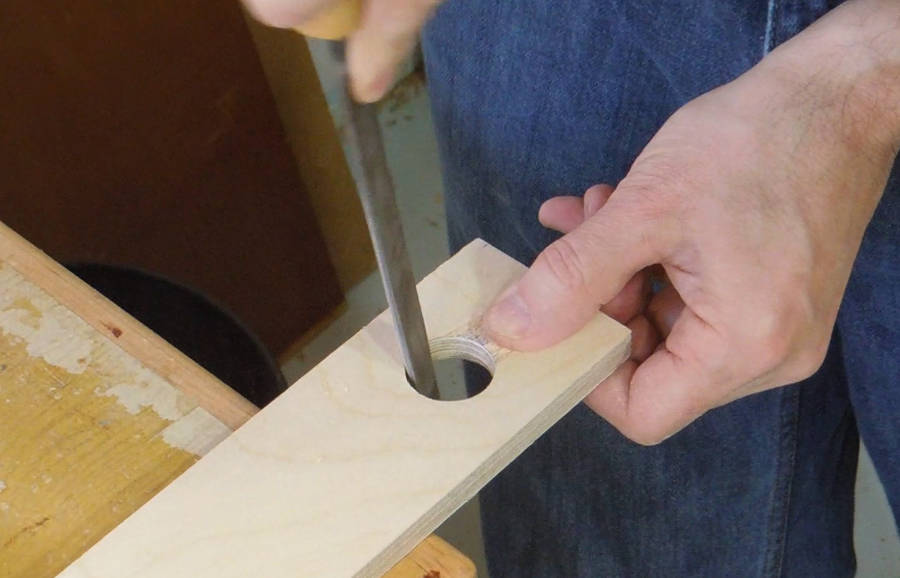 So I made a piece of wood with a hole that just fits around the narrowest part of the
Dremel tool. I didn't have a drill of that exact size, so I filed out a hole from
my next-smallest drill.
So I made a piece of wood with a hole that just fits around the narrowest part of the
Dremel tool. I didn't have a drill of that exact size, so I filed out a hole from
my next-smallest drill.
 I sized it so that if the cap is screwed onto the end of the Dremel, it's in there
tight.
I sized it so that if the cap is screwed onto the end of the Dremel, it's in there
tight.
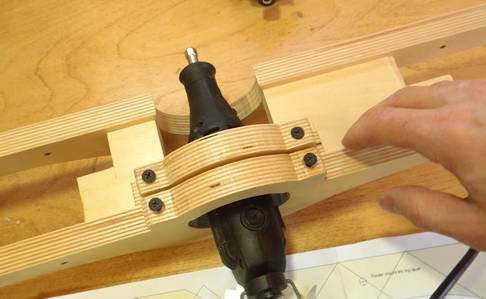
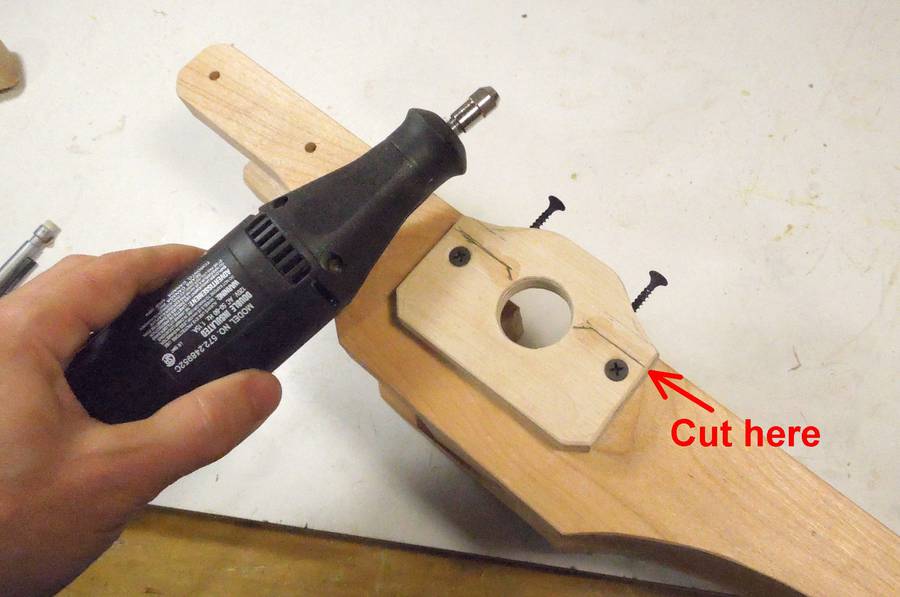 I later realized that not all Dremel tools have a front part that unscrews.
In that case, you can cut the mounting plate in half, and use some screws to
clamp it together around the Dremel tool, as shown at left.
I later realized that not all Dremel tools have a front part that unscrews.
In that case, you can cut the mounting plate in half, and use some screws to
clamp it together around the Dremel tool, as shown at left.
And then there are Dremel-like rotary tools without a "waist" near the tip. For those, you could unscrew the tip, and make a mount that clamps around the thread at the front.
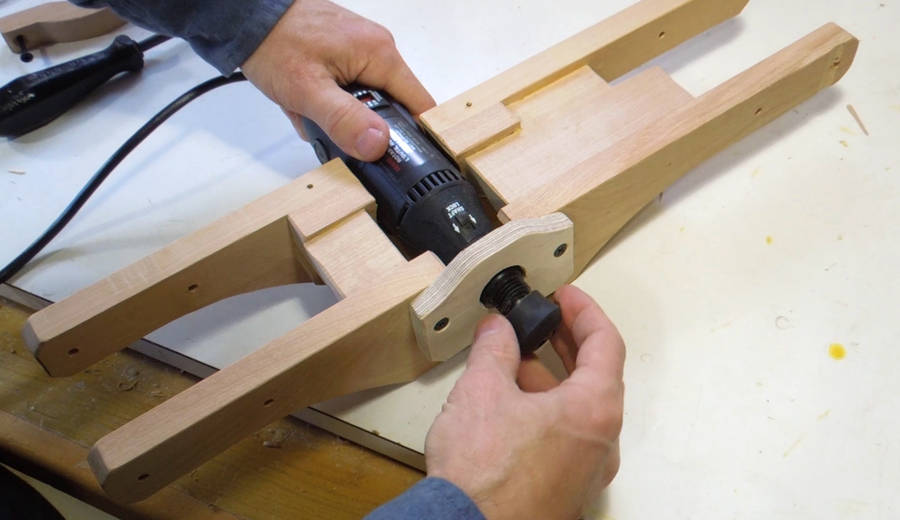
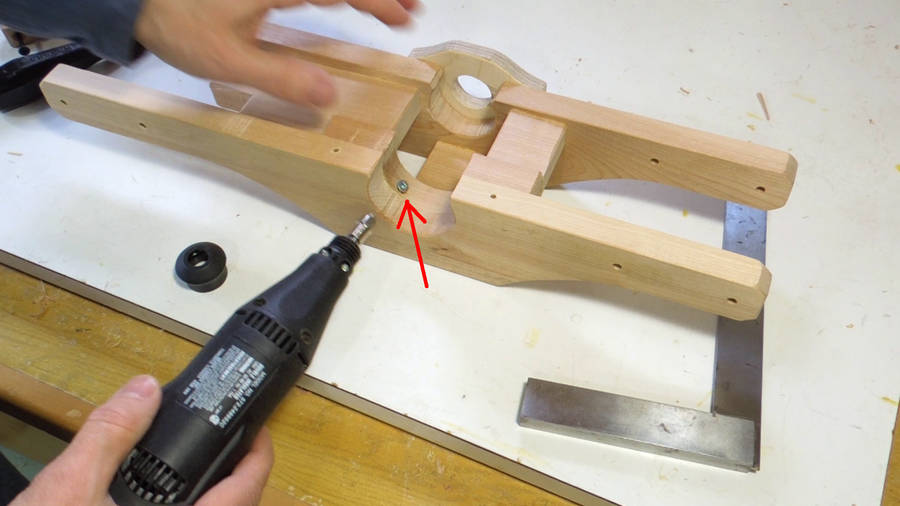 I added some screws into the mount to help hold the back of the Dremel tool in the
right place.
I added some screws into the mount to help hold the back of the Dremel tool in the
right place.
 A bracket screwed over top clamps it on.
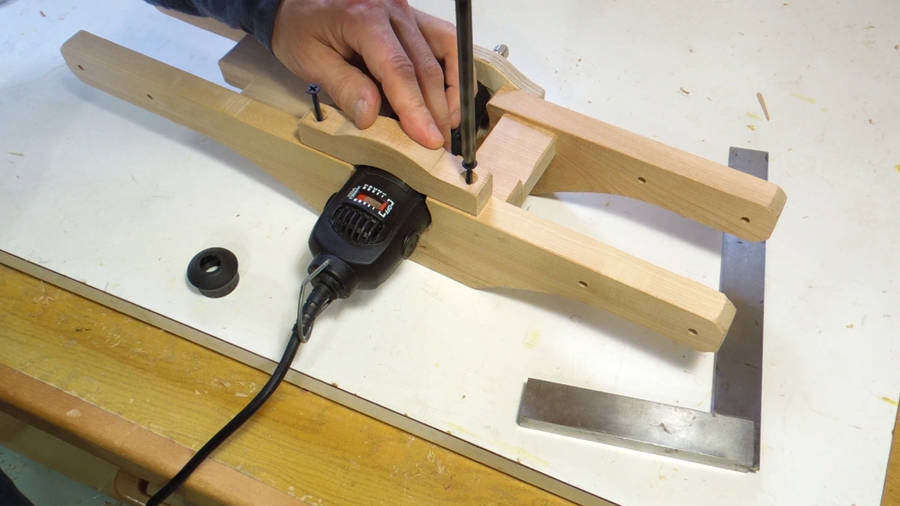
 Finished Dremel mount.
In retrospect, because I held the front of the Dremel with just a piece of plywood, I could have just made that part large enough to span the larger opening in my existing router mount. That would have saved a bit of time. But I ended up building a whole second pantograph, so the effort wasn't wasted.
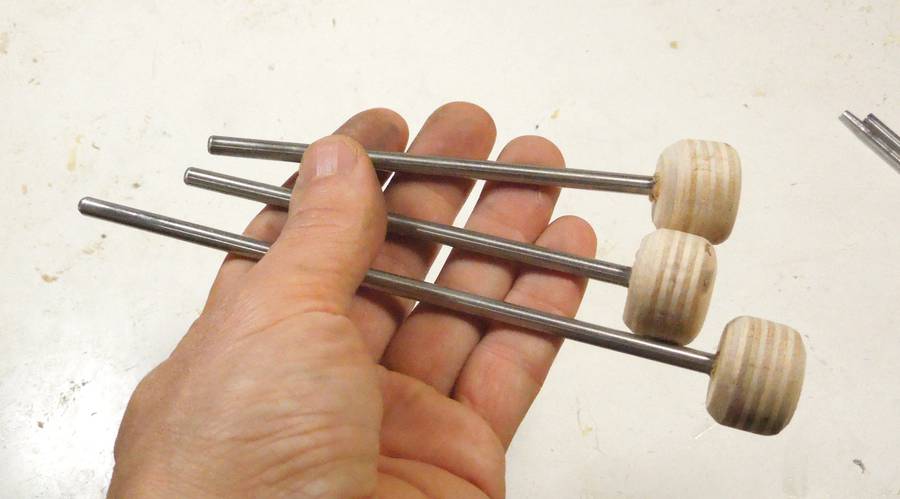 I needed to make a another set of pins with knobs on them. I made these after I built my
initial pantograph, so I hadn't covered this in the article.
I needed to make a another set of pins with knobs on them. I made these after I built my
initial pantograph, so I hadn't covered this in the article.
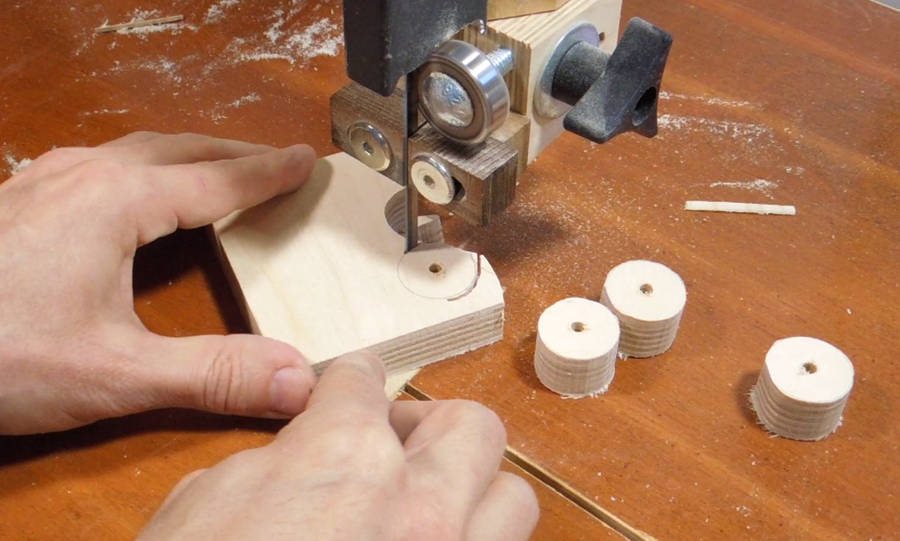 These start as small plywood circles cut out on the bandsaw. It's best to drill the holes
before cutting them out.
These start as small plywood circles cut out on the bandsaw. It's best to drill the holes
before cutting them out.
 I drilled these 11/64", that is 1/64" smaller than the 3/16" shafts
(aren't inches just crazy?).
For people in countries with more sensible systems of measurements, the holes were
about 0.4 mm smaller than the shafts.
I drilled these 11/64", that is 1/64" smaller than the 3/16" shafts
(aren't inches just crazy?).
For people in countries with more sensible systems of measurements, the holes were
about 0.4 mm smaller than the shafts.
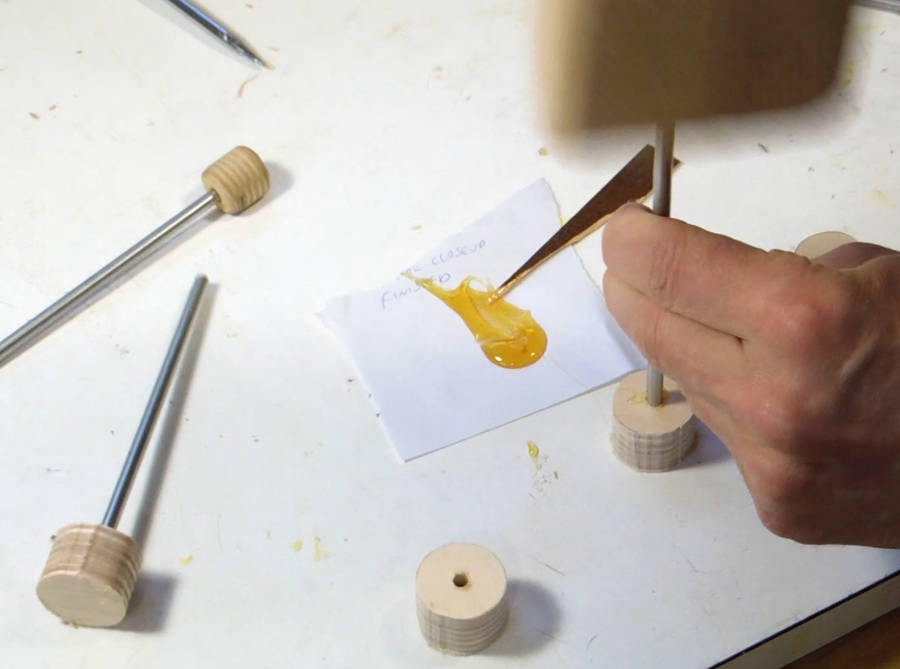
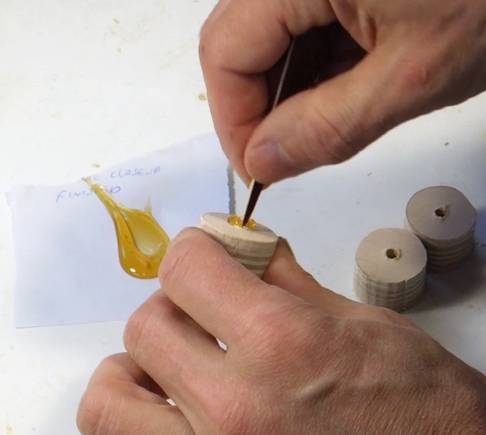
I roughened up the shafts near the end with a bench grinder, also adding a slight chamfer to the ends of the shaft. I then smeared a bit of glue in the holes, then pounded the shafts in with a hammer.
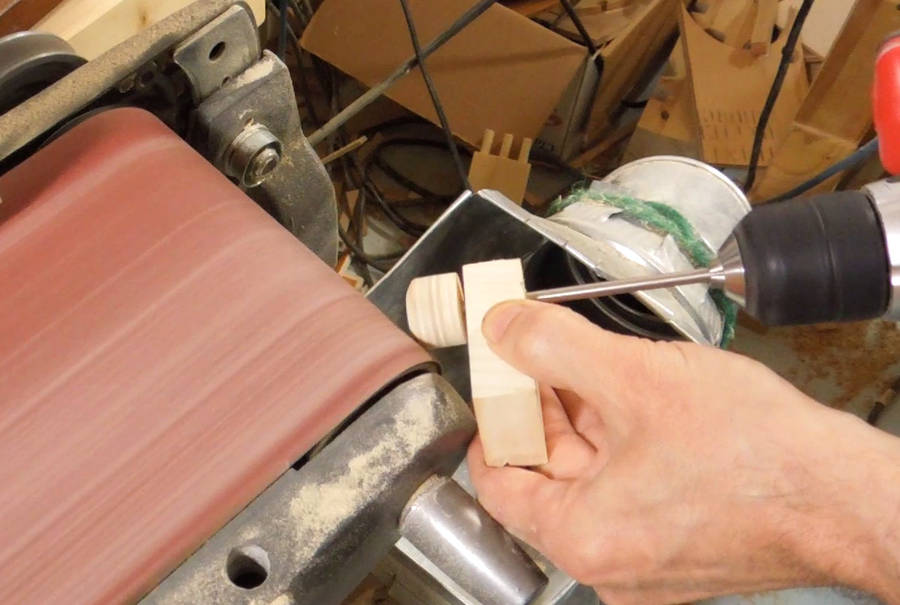 I used another block of wood to guide the shaft, then used a drill to spin the knob against
a running belt sander. This made for some nice round knobs.
I used another block of wood to guide the shaft, then used a drill to spin the knob against
a running belt sander. This made for some nice round knobs.
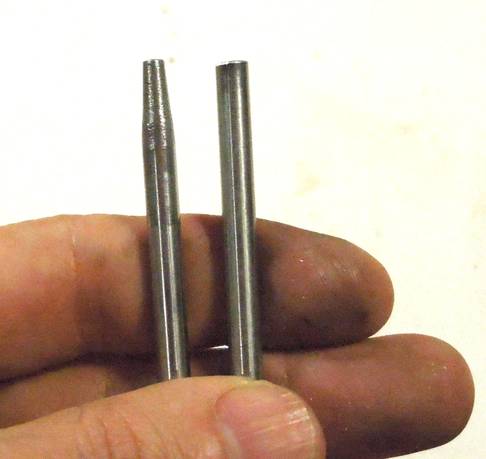
 When we experimented with inlay carving, we used a 3/64" (1.2 mm) diameter cutter on the Dremel tool,
with the pantograph set to 1:3 reduction. To keep things to scale, this means using a follower that
is 9/64" in diameter. I ended up using some 1/8" (3 mm) thick shafting, but that was a bit too
flexible. So a tapered end on a 3/16" (5 mm) pin would be better, as shown here.
When we experimented with inlay carving, we used a 3/64" (1.2 mm) diameter cutter on the Dremel tool,
with the pantograph set to 1:3 reduction. To keep things to scale, this means using a follower that
is 9/64" in diameter. I ended up using some 1/8" (3 mm) thick shafting, but that was a bit too
flexible. So a tapered end on a 3/16" (5 mm) pin would be better, as shown here.
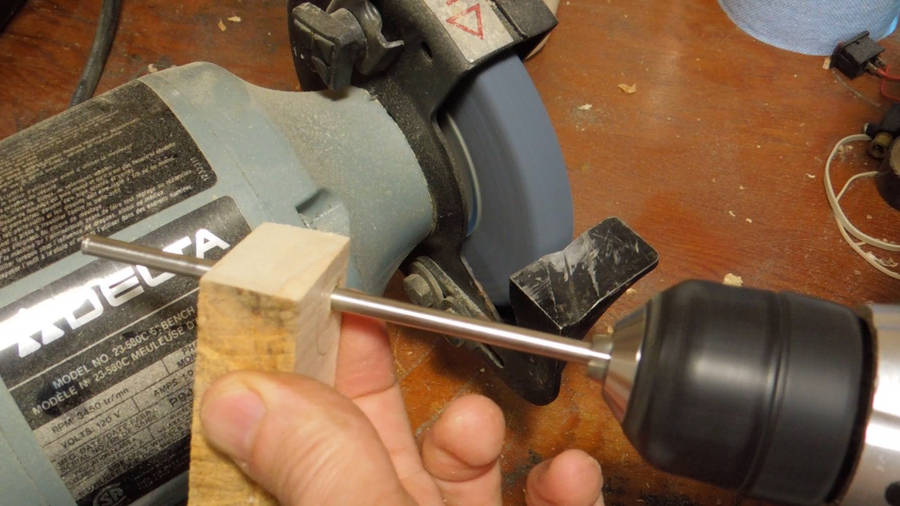 So I put the shaft in my drill, and again used a small block of wood to guide it.
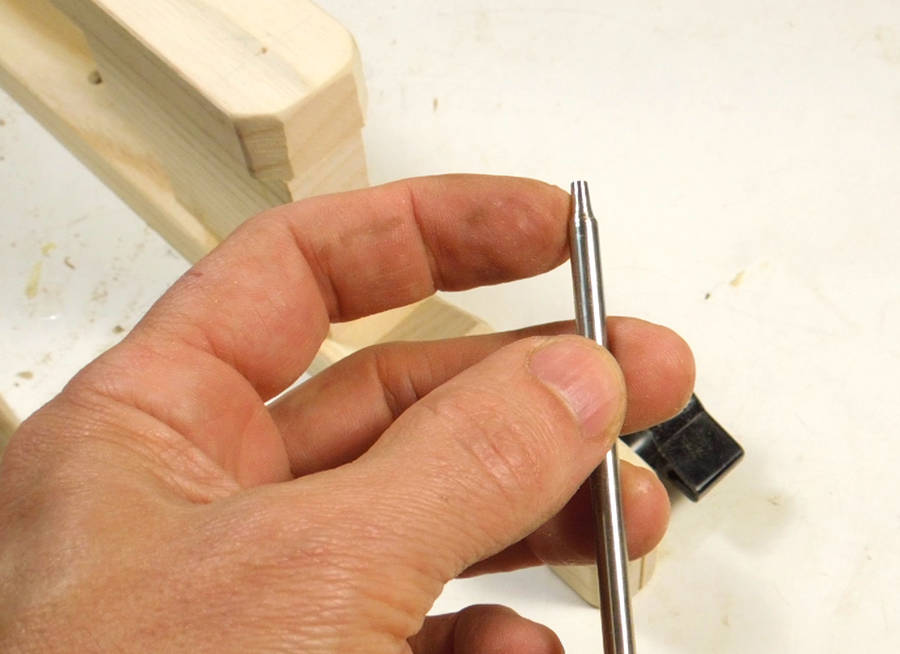
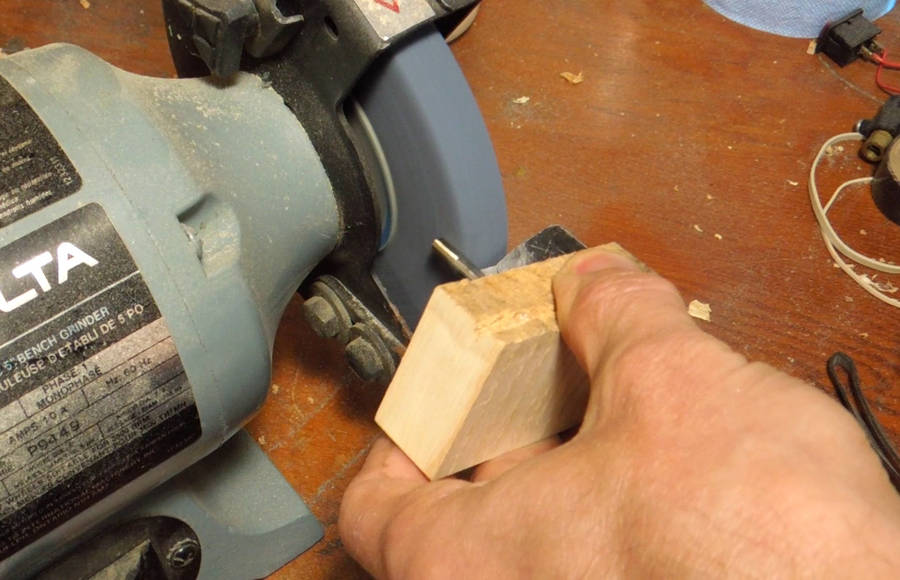 I then used my bench grinder to grind a taper onto the end of the shaft...
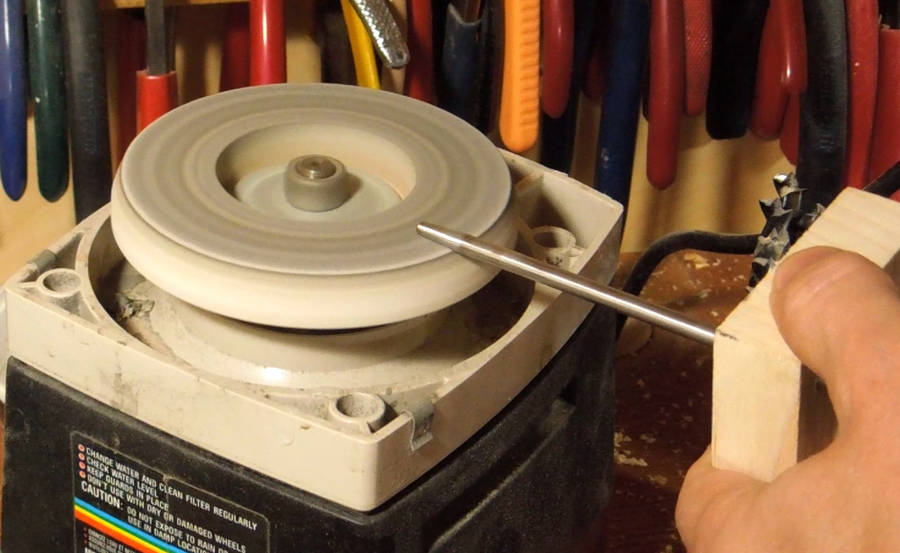
 ... and my sharpening grinder to smooth it out a little bit. I also ran them against the
buffing wheel to remove any coarse edges. I also polished the end of a 3/16" shaft.
The 3/16" shaft is for using a 1/16" cutter with 3:1 reduction,
or 3/32" cutter with 2:1 reduction.
With the pins smoothed over at the end, they won't damage a paper template.
... and my sharpening grinder to smooth it out a little bit. I also ran them against the
buffing wheel to remove any coarse edges. I also polished the end of a 3/16" shaft.
The 3/16" shaft is for using a 1/16" cutter with 3:1 reduction,
or 3/32" cutter with 2:1 reduction.
With the pins smoothed over at the end, they won't damage a paper template.
 Gluing up one of the links for the pantograph for Pat. I had the idea of clamping it all to my workbench
to ensure the whole thing was flat.
Gluing up one of the links for the pantograph for Pat. I had the idea of clamping it all to my workbench
to ensure the whole thing was flat.
 Varnishing the completed pantograph for Pat. I varnish all the jigs that I expect to
reuse many times, just to keep them from getting all dirty looking over time.
Varnishing the completed pantograph for Pat. I varnish all the jigs that I expect to
reuse many times, just to keep them from getting all dirty looking over time.
 Inlay carving experiments
 Building the router pantograph
 Guitar inlay experiments