 In this video, I'm demonstrating and explaining how compressed air can be used
to create suction. Equations aside, that seems a little counterintuitive.
In this video, I'm demonstrating and explaining how compressed air can be used
to create suction. Equations aside, that seems a little counterintuitive.
Wikipedia defines the Venturi effect as:
"The Venturi effect is the reduction in fluid pressure that results when
a fluid flows through a constricted section of pipe."
Bernoulli's equation, together with conservation of energy shows that
a stream of fluid moving through a constrained space at higher speed
must be at a lower pressure. But that's kind of a boring
and mathematical explanation. It also
doesn't fully explain everything, in my opinion.
In this video, I'm demonstrating and explaining how compressed air can be used
to create suction. Equations aside, that seems a little counterintuitive.
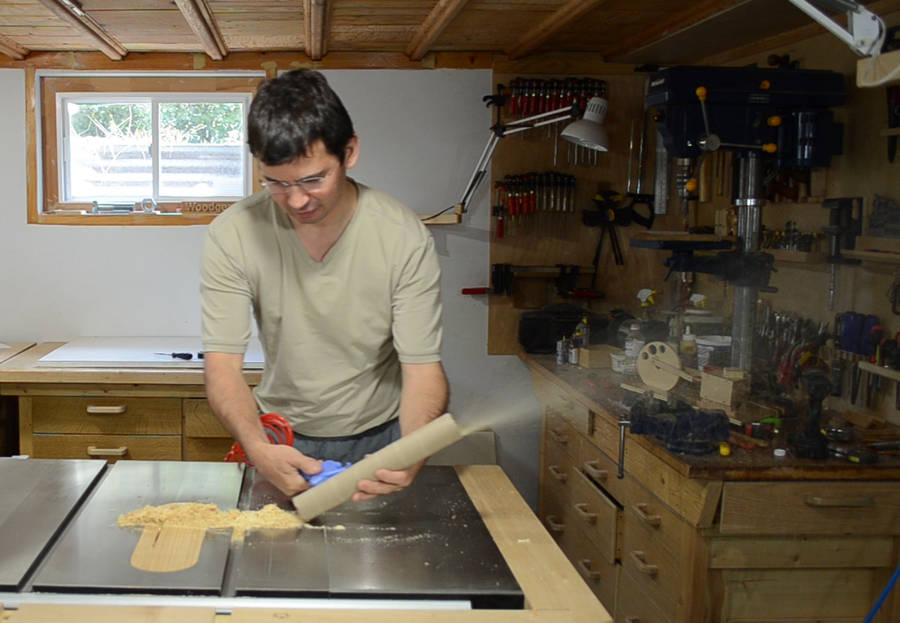
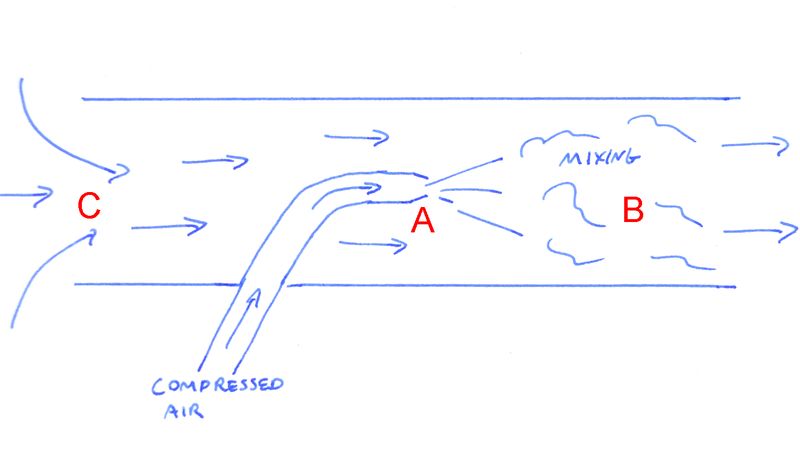
The simplest demonstration is to use a compressed air hose to blow air along a tube of cardboard. I'm blowing air from the middle of the tube towards one end. This causes suction at the other end, which causes sawdust to get sucked through the tube.
 A necessary ingredient in making this happen is the mixing of air
As air is ejected from nozzle A, it mixes with the air in the tube at B Imagine that the air from the nozzle mixes with four times as much air. Momentum is conserved, so this cloud of air, now five times as much as came out of the nozzle, is now moving at one fifth the speed of the jet from the nozzle. All that air moving to the right requires replacement air to be pulled in from the left. So we now have suction at C.
Moving five times as much air may seem efficient, but the kinetic energy of the moving air is a function of velocity squared. So we may have five times as much air moving, but the kinetic energy per volume of air is now 1/25th of what it was in the jet, and the total kinetic energy is one fifth of what we started with. Venturi pumps are not efficient.
But the Venturi effect can be useful if one needs to suck up something that shouldn't go through a pump or fan. For example, a sandblaster uses the Venturi effect to pull the abrasive sand into the stream of high speed air from a compressor.
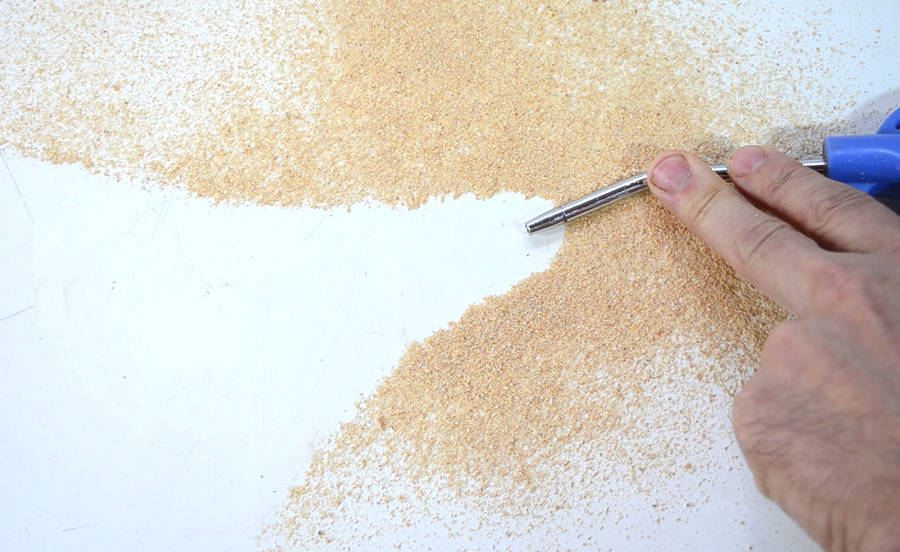 Using a tube greatly focuses the suction in one direction, but the suction happens
even with an unconstrained jet of air. For example, sprinkling some sawdust on
my workbench, then putting the nozzle down on the workbench and blowing, you can see
the swath that is cleared. Note how the swath extends even to behind
the tip of the nozzle.
Using a tube greatly focuses the suction in one direction, but the suction happens
even with an unconstrained jet of air. For example, sprinkling some sawdust on
my workbench, then putting the nozzle down on the workbench and blowing, you can see
the swath that is cleared. Note how the swath extends even to behind
the tip of the nozzle.
As the jet of air from the nozzle turbulently mixed with the surrounding air, it caused a lot more air to move, which causes suction of air from behind it.
There isn't any sort of bunching up or feathering towards the edges of the sawdust, which you would get if it had been cleared by blowing at it, it was mostly cleared by suction.
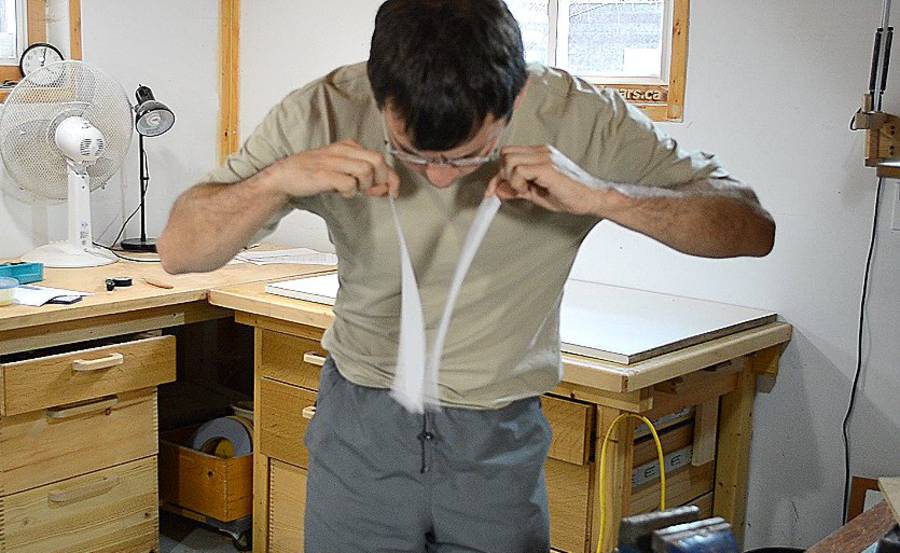 The trick of two strips of paper getting pulled together when you blow in between
them is also explained by this suction around a jet of air.
The trick of two strips of paper getting pulled together when you blow in between
them is also explained by this suction around a jet of air.
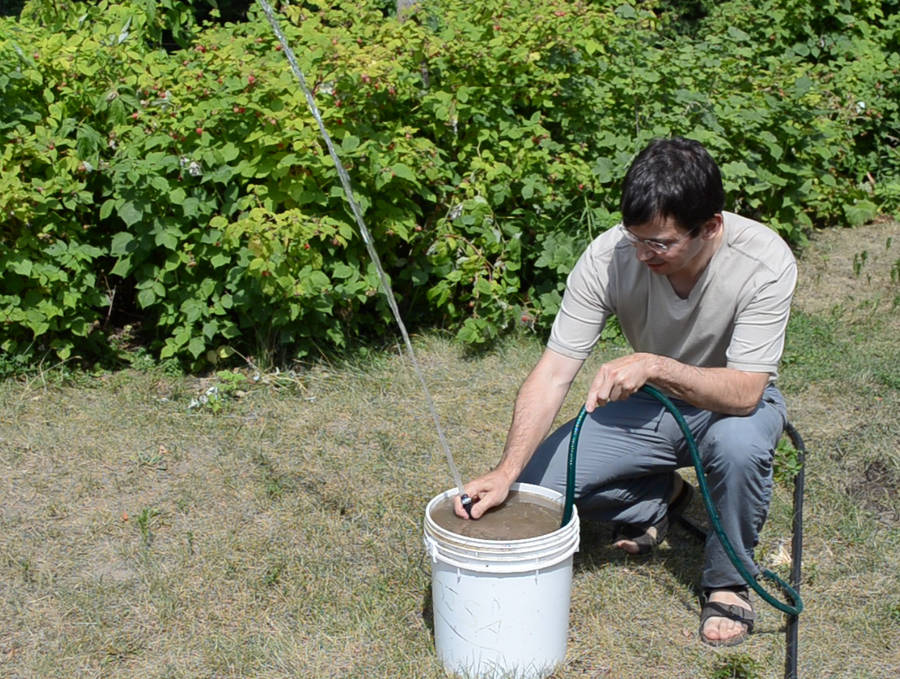 Another cool way to demonstrate the effect is to submerge a jet of water in
a bucket of muddy water. At left, the jet of water is still above
the muddy water in the bucket.
Another cool way to demonstrate the effect is to submerge a jet of water in
a bucket of muddy water. At left, the jet of water is still above
the muddy water in the bucket.
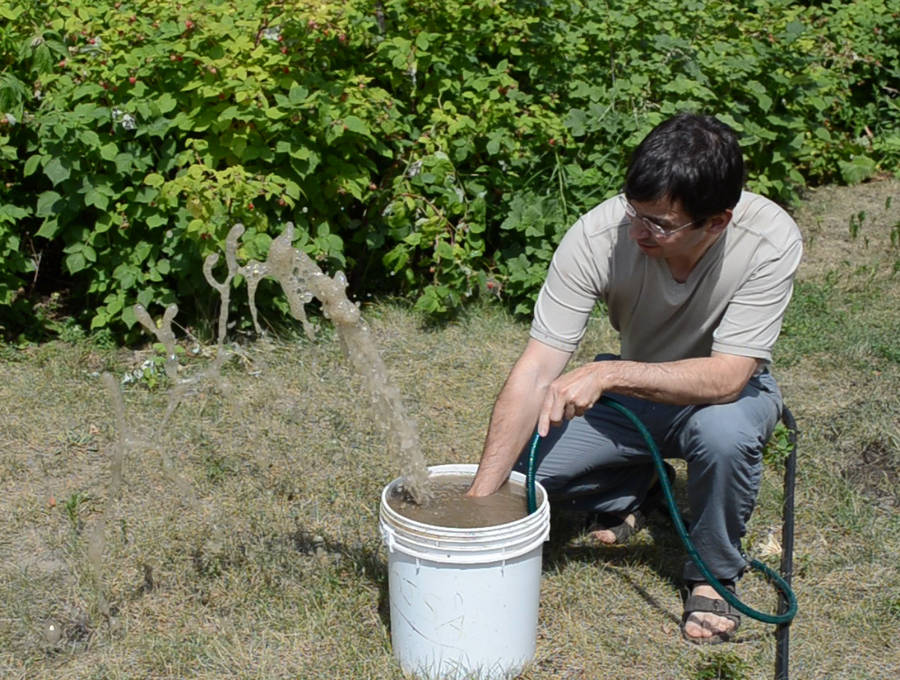 As soon as I dip the nozzle below the surface, the jet of clean water starts mixing
with the muddy water. The result is a thick slow jet of mixed water.
Note how the arc of the jet is much lower. As I leave the jet of water in
the bucket, the water level in the bucket drops.
As soon as I dip the nozzle below the surface, the jet of clean water starts mixing
with the muddy water. The result is a thick slow jet of mixed water.
Note how the arc of the jet is much lower. As I leave the jet of water in
the bucket, the water level in the bucket drops.
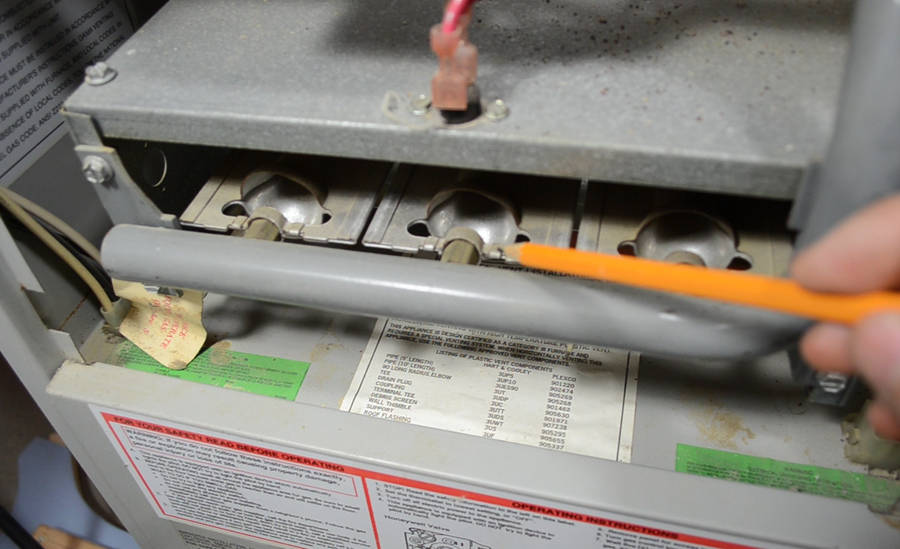 Any gas burning appliance uses the Venturi effect to pre-mix air into the
gas before injecting it into the burner. For example, on my house furnace,
there are three jets that aim gas into aluminium tubes.
The burner is at the other end of the tubes.
Any gas burning appliance uses the Venturi effect to pre-mix air into the
gas before injecting it into the burner. For example, on my house furnace,
there are three jets that aim gas into aluminium tubes.
The burner is at the other end of the tubes.
Gas burns much cleaner and hotter when pre-mixed with air. This principle was discovered by Robert Bunsen, after whom the Bunsen burner is named. And the Bunsen burner is yet another use of the Venturi effect.
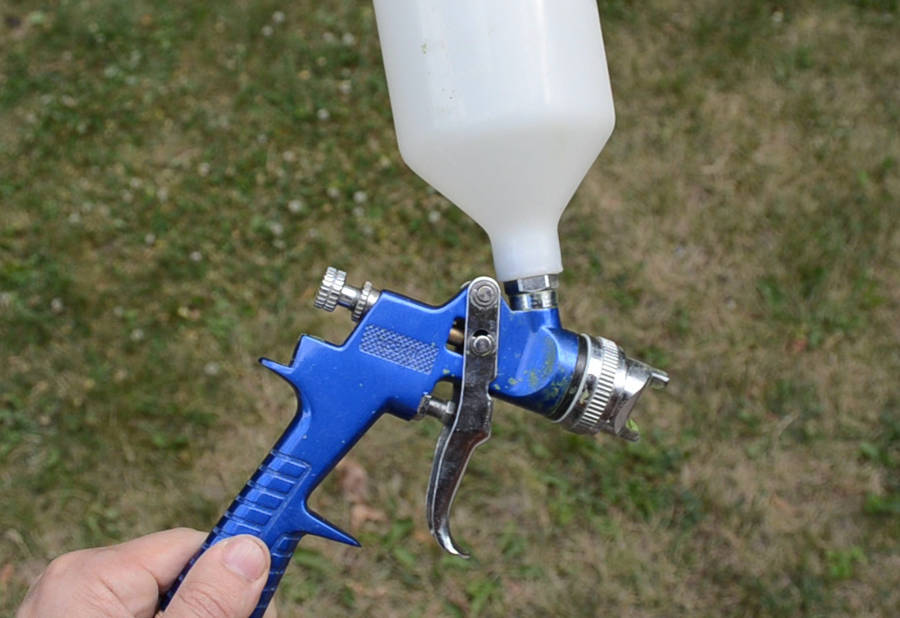 Spray guns also use the Venturi effect to help pull the paint though the spray gun,
especially for spray guns where the paint container is below the nozzle. But even
with the container above the nozzle, gravity alone would not be enough to get a good
flow of paint.
Spray guns also use the Venturi effect to help pull the paint though the spray gun,
especially for spray guns where the paint container is below the nozzle. But even
with the container above the nozzle, gravity alone would not be enough to get a good
flow of paint.
The Venturi effect is also used in Venturi vacuum pumps, which are sometimes used for vacuum pressing veneers. So yet another woodworking connection.
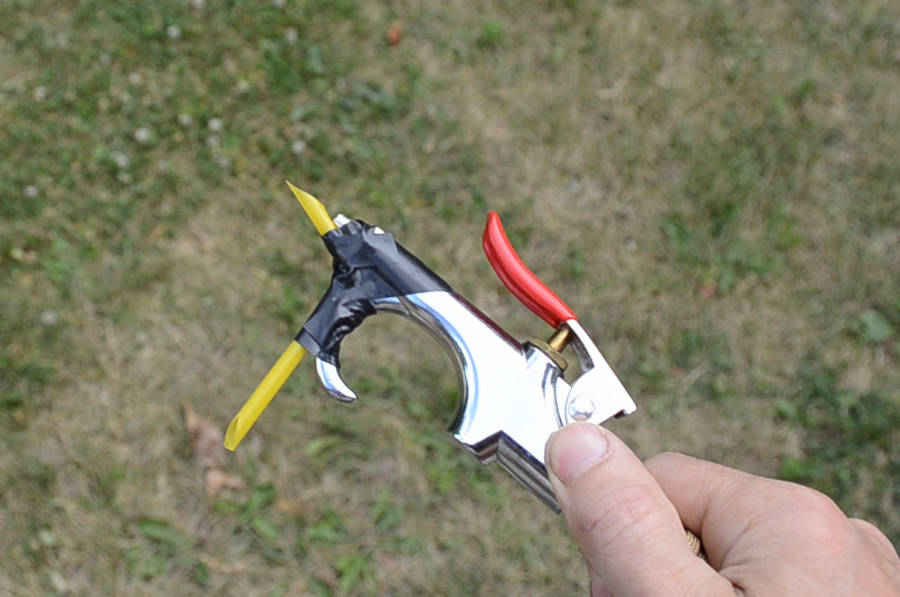 Here's a crude sort of spray gun using a compressed air nozzle and a flexible straw.
The straw is positioned in such a way that it ends in an area of suction created by the stream coming from the nozzle (as I mentioned with the sawdust on the workbench demonstration earlier)
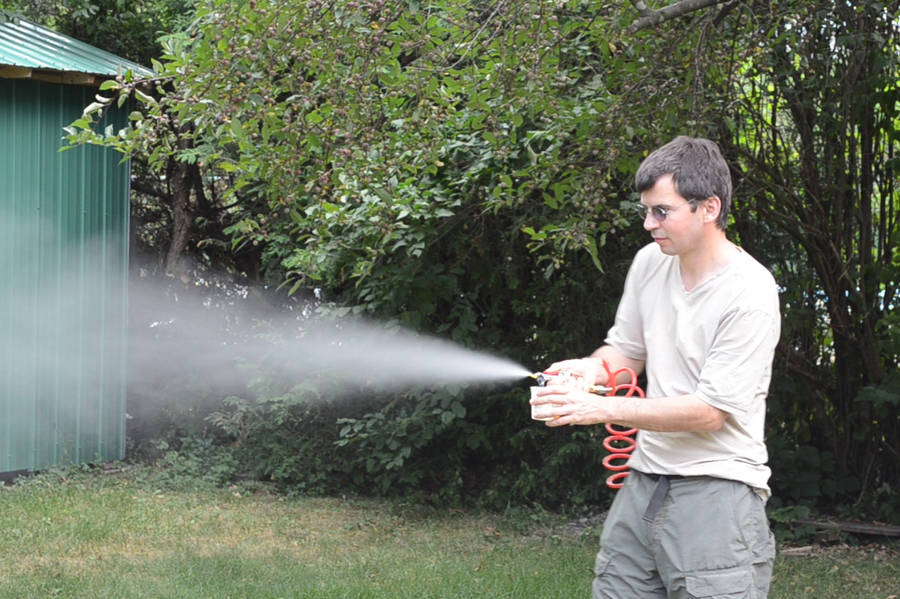 Spraying some water using this technique. It creates quite a fine mist - fine enough
that the water droplets evaporate before they fall to the ground.
Spraying some water using this technique. It creates quite a fine mist - fine enough
that the water droplets evaporate before they fall to the ground.
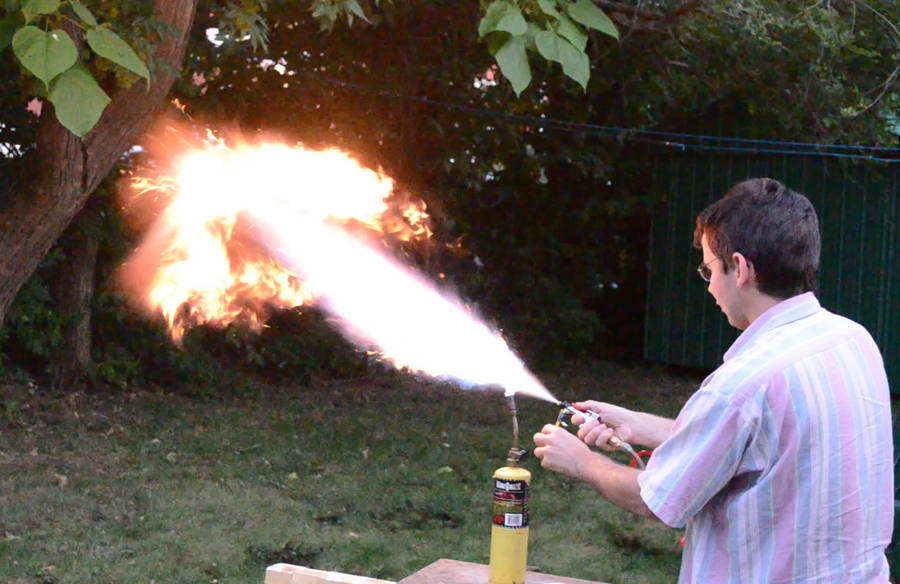 Spraying is even more fun with a flammable liquid. But, it turns out, igniting
a fast moving stream of droplets is harder than I thought. I first tried it
with gasoline, but then I switched to paint thinner because it's easier to ignite.
Spraying is even more fun with a flammable liquid. But, it turns out, igniting
a fast moving stream of droplets is harder than I thought. I first tried it
with gasoline, but then I switched to paint thinner because it's easier to ignite.
Even so, if I aim at the torch, even from a distance, I just blow out the flame without igniting my stream! It's not unlike lighting a blowtorch with a match - if you aim the torch right at the match, it just blows it out. You have to approach the torch from the side to light it with a match.
For my spray setup, I found it worked best to position the stream just above the flame. The torch ignites the stream as it goes by, making for a nice roaring flame. I needed to keep my spray over the torch to keep it lit. The flame doesn't propagate back along the sprayed stream as fast as the air is moving, so without continuous lighting near the nozzle, the flame gets pushed away and the spray extinguishes.
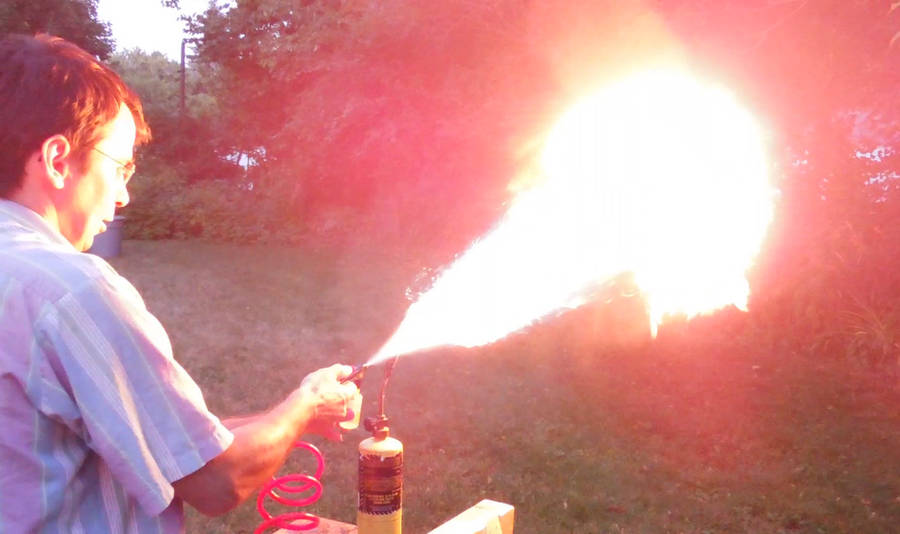 Normally, I just get one long flame, but right when lighting the stream, there's
a cloud of not-yet-lit droplets that suddenly catches, which makes for a nice
flash.
Normally, I just get one long flame, but right when lighting the stream, there's
a cloud of not-yet-lit droplets that suddenly catches, which makes for a nice
flash.
I had to tweak the straw on my sprayer to get a richer mixture. Initially, my mixture was on the lean side. A lean mixture means there is enough air to burn all the fuel, but to get a nice bright flame, you need a rich mixture with too much fuel in the air to fully burn. This means not all the carbon burns to carbon dioxide. The excess carbon then forms particles of soot. The white hot soot in turn is what makes the flame glow bright. Superheated air and combustion products (CO2 and H2O) by themselves won't glow.
That's why a jet of gas alone burns with a yellow flame, but when pre-mixed with enough air, you just get a faint blue flame. Closing the air inlet on a Bunsen burner makes for a bigger yellow flame, but it won't be as hot. Or on an oxy-acetylene torch -- turning on the oxygen makes the flame much hotter, but the flame gives off less light.
I also tried my store bought spray gun. That produced a richer mixture - not surprising. After all, the spray gun is meant to spray paint, not blow it all over the place. But my spray gun is a relatively small one, so the flame I got from that wans't nearly as big as with my bent straw experiment.
 Gyro effect explained
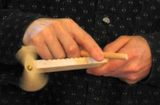 The hui game Also
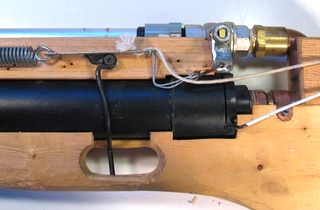 Homemade marble
 Popping balloons in baloons, presure testing
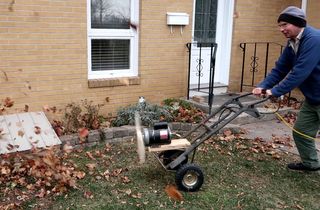 Homemade 1 hp leaf blower fan and experiments
 Planer snipe on small thickness planers
 How crowned pulleys
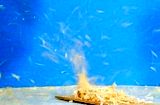 Mini tornado experiment
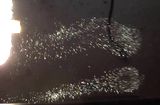 Photographing
 Blower impeller design experiments
 How DC motors and
 2 x 45° elbow vs. 90° elbow air resistance test
 How AC (induction)
 Kitchen chemistry experiment