Fireplace trim
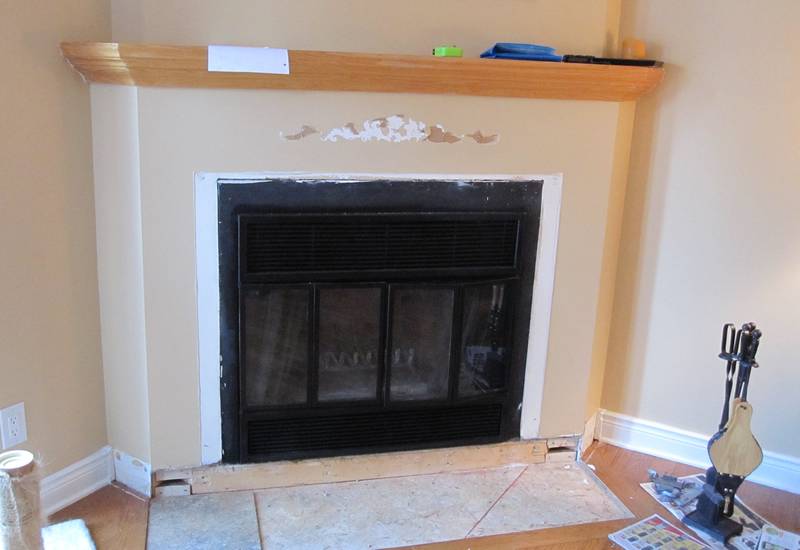 My friend Melissa wanted to get some tiles put around her fireplace. It had previously been surrounded
with some brass trim, and some very 1980s styled tiles below. The tiles and trim were
already removed when I came to take measurements and took the picture at left.
My friend Melissa wanted to get some tiles put around her fireplace. It had previously been surrounded
with some brass trim, and some very 1980s styled tiles below. The tiles and trim were
already removed when I came to take measurements and took the picture at left.
She wanted some oak trim to the left and right of the fireplace, and she wanted the trim to extend all the
way into the corner with the main wall.
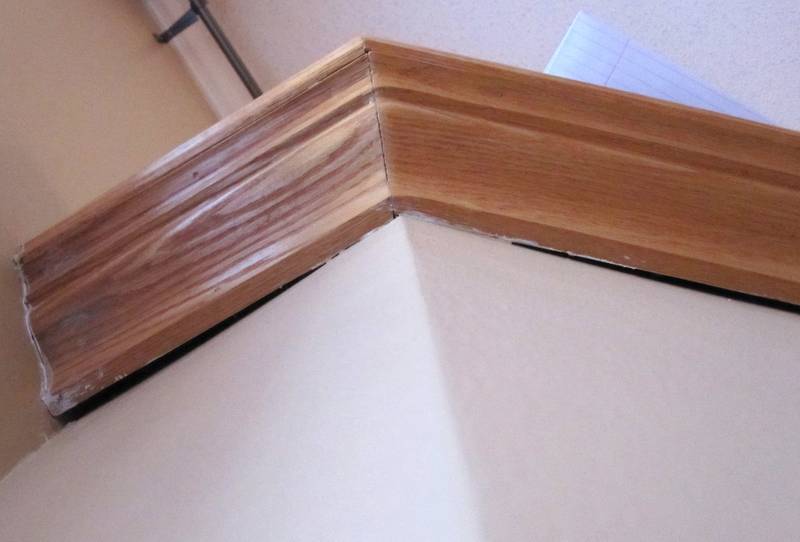 A challenge working with existing structures is that they are rarely quite straight
and square, even for newer houses, and even if they look square.
A challenge working with existing structures is that they are rarely quite straight
and square, even for newer houses, and even if they look square.
The drywall below the mantle was really crooked. Seen from a normal
angle, you never see this gap. But if I were to just attach the new trim flat
against the drywall, it would never line up with the mantle.
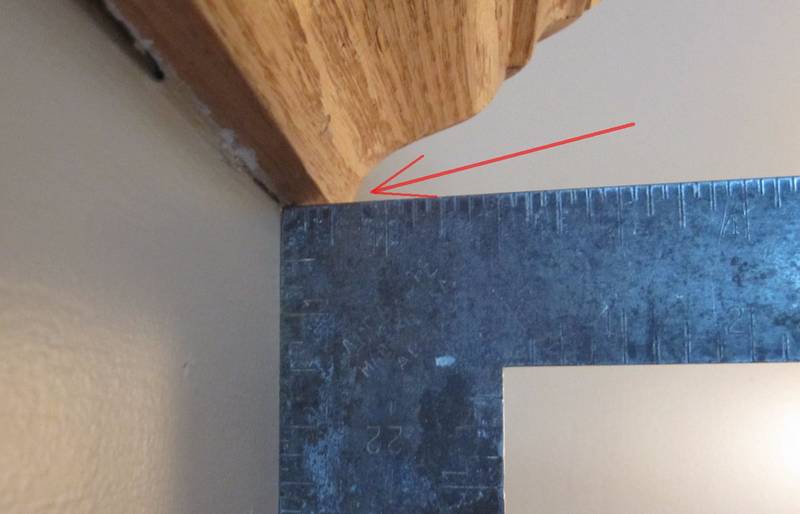
The trim has to butt up against the bottom of the existing mantle.
Unfortunately, the bottom edge of that mantle has a bit of a bevel to it.
The joint between the new trim and the old trim would be visible, so
the new pieces had to match that bevel to avoid having an ugly crack
between the pieces.
 I needed some boards that were 1 cm thick.
It would look bad if the trim below stuck out more than the bottom
edge of the mantle trim. That bottom edge is 1 cm thick, so I
didn't want to go any thicker than that.
I needed some boards that were 1 cm thick.
It would look bad if the trim below stuck out more than the bottom
edge of the mantle trim. That bottom edge is 1 cm thick, so I
didn't want to go any thicker than that.
I bought some 5/4" (3 cm) thick oak boards and resawed them on my homemade bandsaw. First I tried my newer homemade bandsaw, but the 1/2 HP motor on that saw just wasn't enough to cut through 20 cm (8") of dry oak. But my first homemade bandsaw, with it's powerful 1.5 HP motor, and a new blade cut through it like butter.
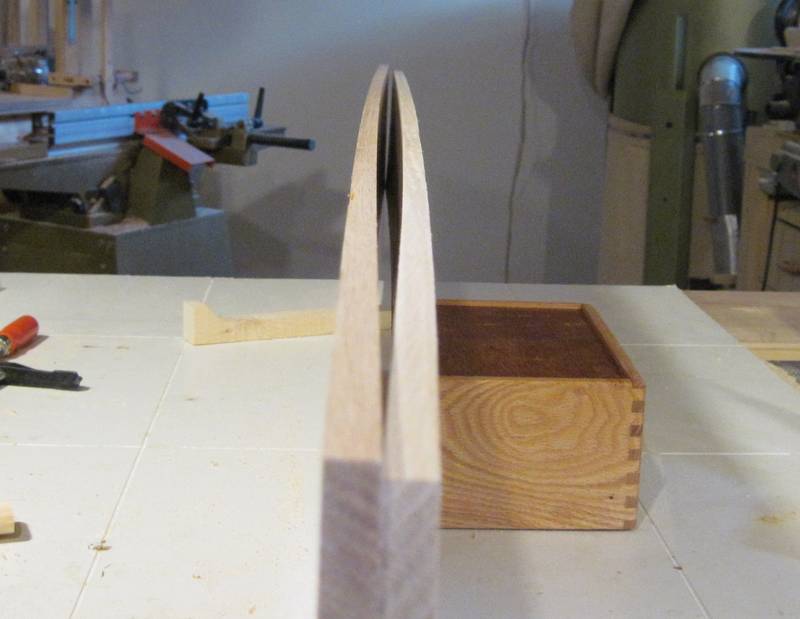
Unfortunately, those boards had been kiln dried, and were a little bit "Case hardened",
so the resawed boards had a bit of a curve to them. But with my boards only 1 cm thick,
it really didn't take much force to bend them straight, so I figured I'd be ok once they were
fastened to the wall.
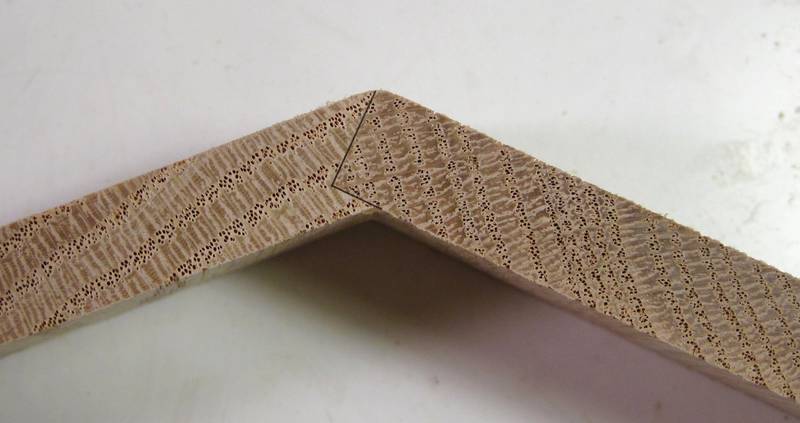 Joining boards at a 45 degree angle is always a bit of a challenge. I first thought of cutting
a 22.5 degree bevel on both pieces, but aligning the long boards on a narrow joint for gluing
would have been very challenging.
So instead, I cut a square notch at 45 degrees into one board, and left the other board square.
Joining boards at a 45 degree angle is always a bit of a challenge. I first thought of cutting
a 22.5 degree bevel on both pieces, but aligning the long boards on a narrow joint for gluing
would have been very challenging.
So instead, I cut a square notch at 45 degrees into one board, and left the other board square.
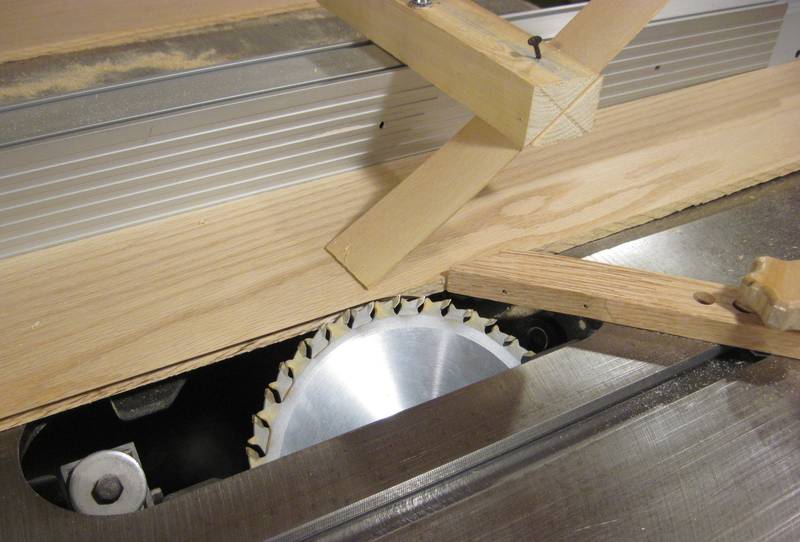 There are, of course, dedicated "birds-mouth" style router bits for cutting a
notch for that sort of joint. But I don't have one of those router bits.
So I put a dado blade in my table saw and tilted it 45 degrees.
There are, of course, dedicated "birds-mouth" style router bits for cutting a
notch for that sort of joint. But I don't have one of those router bits.
So I put a dado blade in my table saw and tilted it 45 degrees.
Turns out, my dado insert didn't have the right kind of clearance for this kind of cut. And rather than make a dedicated insert, I went ahead and made the cut without one.
Getting the board exactly aligned and up against the fence and table for the whole cut was critical. So I used my featherboard, and attached another piece of wood to the top of my rip fence (which, luckily, has two T-slots in the top, so I could attach something to it) to act sort of like a featherboard from the top.
Since this project, I built a
tilting router lift, so next time
I'll just tilt my router 45-degrees and cut it with a straight router bit.
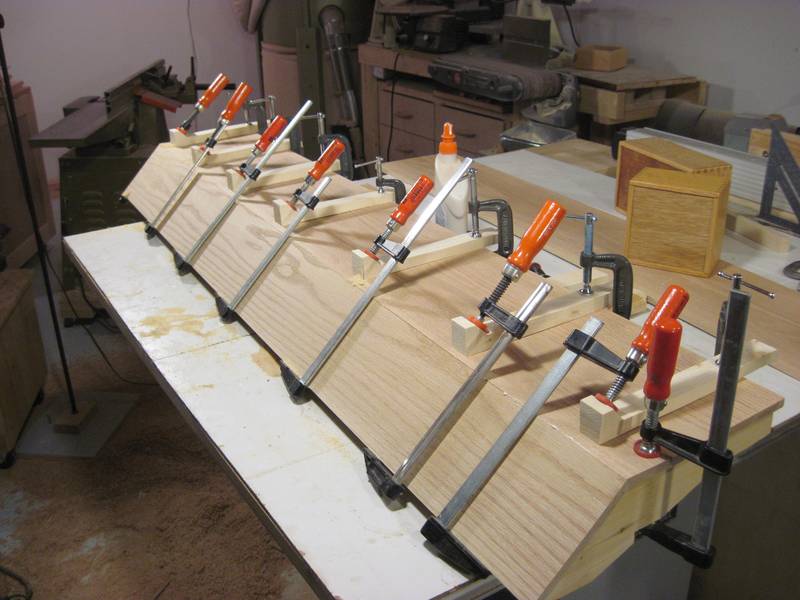 Gluing the boards together. The board that's
horizontal is the one that is square, and the one at a 45 degree angle has the notch
cut into it. With the notch pressed against up against the corner of the square board,
the joint nicely aligned itself.
Gluing the boards together. The board that's
horizontal is the one that is square, and the one at a 45 degree angle has the notch
cut into it. With the notch pressed against up against the corner of the square board,
the joint nicely aligned itself.
I made these temporary cauls with a 45 degree hook on the end. I clamped those onto my horizontal board with C-clamps. The hook on the ends of the calls then provided a nice spot for my bar clamps to clamp against.
It turns out, with the 45 degree angle glued together, that was enough to counteract the slight
curvature my boards had, so the result was nearly perfectly straight.
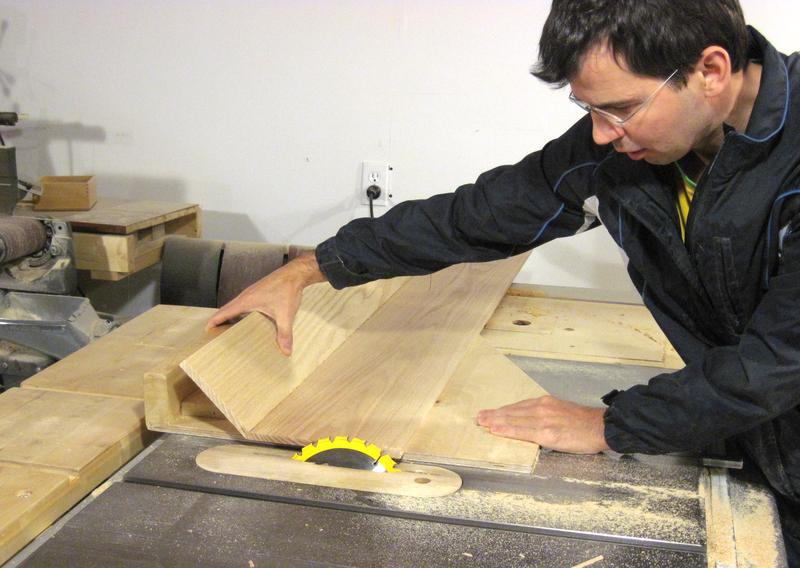 Here's making the bevel cut for the top of the trim to match the existing bevel
of the mantle.
Here's making the bevel cut for the top of the trim to match the existing bevel
of the mantle.
Cutting the bevel into the end of the trim. I had to make this as two cuts with the blade tilted into the stock (my saw is a right tilt saw). Both cuts had to start from the edge and stop just short of the corner. If I cut it all the way through, I would have ended up with a notch in the face of the other board.
Having to cut from the edge to the corner limited my options for how to
make this cut. For this particular
cut, I had to come from the back, moving the stock forward (cutting with the back edge
of the blade). This is, of course, an unsafe operation, and I gave some thought to
what might happen if things were to go wrong. But I was only grazing the edge with
the blade, my blade set very low, and my stock was relatively large. So I figured even
if it does catch and kick, the risk of my hands touching the blade was minimal.
I cut very slowly and carefully. Of course, it's the risks you aren't
prepared for that get you in the end, not the deliberate ones. Nothing
happened this time.
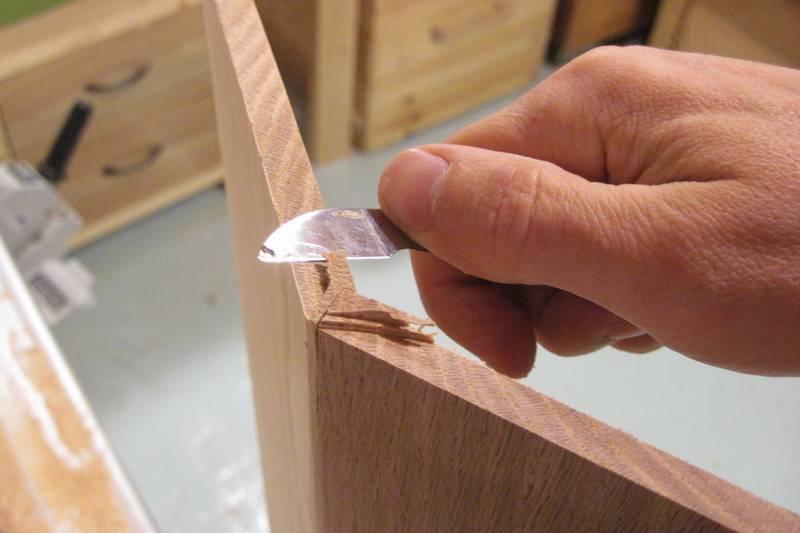 I didn't cut all the way into the corner. I cleaned up the rest
with a carving knife.
I didn't cut all the way into the corner. I cleaned up the rest
with a carving knife.
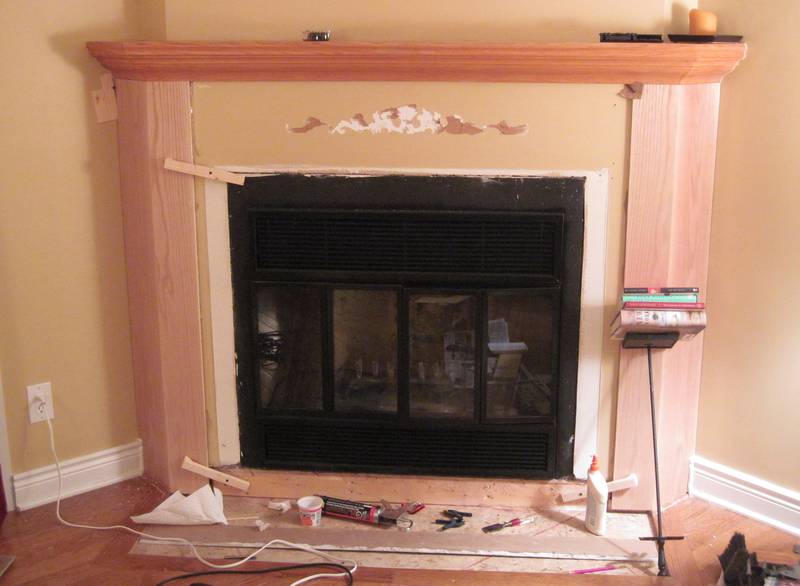 Both pieces glued on. I brought along those cauls that
I made for gluing the boards together.
They were handy for screwing against the wall to press my boards against the fireplace.
More challenging was finding a place to screw them into though, because the studs
behind the drywall were mostly in the corners, behind the trim I was
installing.
Both pieces glued on. I brought along those cauls that
I made for gluing the boards together.
They were handy for screwing against the wall to press my boards against the fireplace.
More challenging was finding a place to screw them into though, because the studs
behind the drywall were mostly in the corners, behind the trim I was
installing.
I screwed the boards directly into the studs in the corners.
I covered those screws with small plugs.
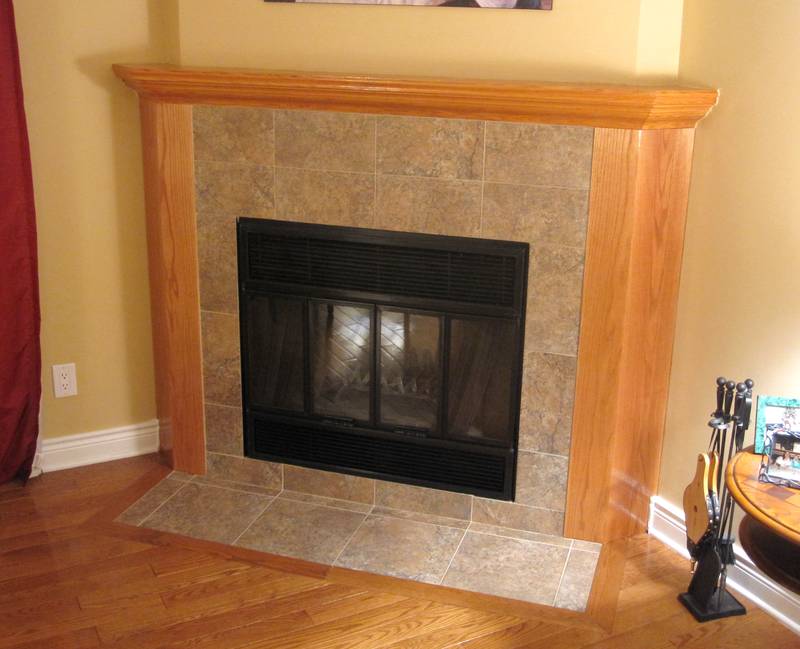 And here's the fireplace all done. Melissa was able to match the stain
of the existing mantle fairly closely. The tile guy did a nice job too.
And here's the fireplace all done. Melissa was able to match the stain
of the existing mantle fairly closely. The tile guy did a nice job too.
The whole fireplace does look a little flat, and the proportions would probably be better
if the mantle was a little bit lower. But changing that would have involved much more
work. Melissa likes it, and that's what really matters.
See also:
 Skylight installation
 Making curtain rods
 New treads for old stairs
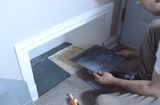 Installing a boot nook
 Molding tricks with a
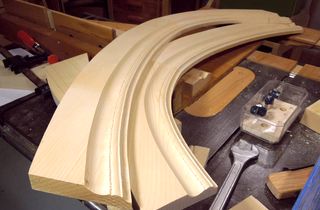
 Parallelogram baby gate
More home improvement projects on woodgears.ca