 A friend's dad recently passed away and was cremated.
The family decided not to buy one of the urns from the funeral home.
So I built a wooden urn for them.
A friend's dad recently passed away and was cremated.
The family decided not to buy one of the urns from the funeral home.
So I built a wooden urn for them.
A friend's dad recently passed away and was cremated.
The family decided not to buy one of the urns from the funeral home.
So I built a wooden urn for them.
Although this is a project of a more solemn nature, I actually think this is a perfect project for a hobby woodworker to tackle. It's an object that is manageable in a small shop, it's an opportunity to make something special, and it saves money.
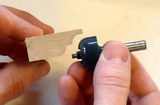
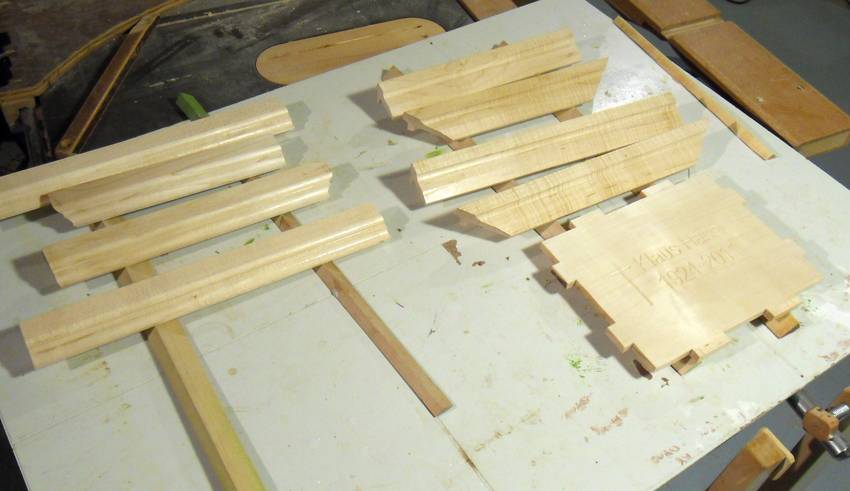
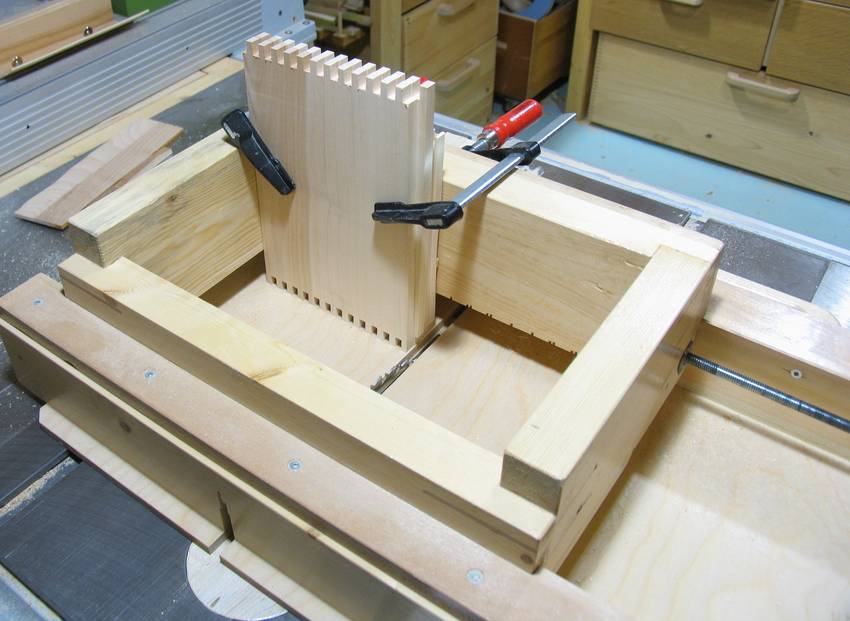 I made the basic box out of 1 cm (3/8") thick maple, with 1/4" (6 mm) fingered box
joints in the corners. I used my screw advance
box joint jig to make the joints.
I made the basic box out of 1 cm (3/8") thick maple, with 1/4" (6 mm) fingered box
joints in the corners. I used my screw advance
box joint jig to make the joints.
 I didn't take many photos of those steps because
I wasn't sure at first whether I'd write about this project, and I
already covered the technique in various other articles.
I didn't take many photos of those steps because
I wasn't sure at first whether I'd write about this project, and I
already covered the technique in various other articles.
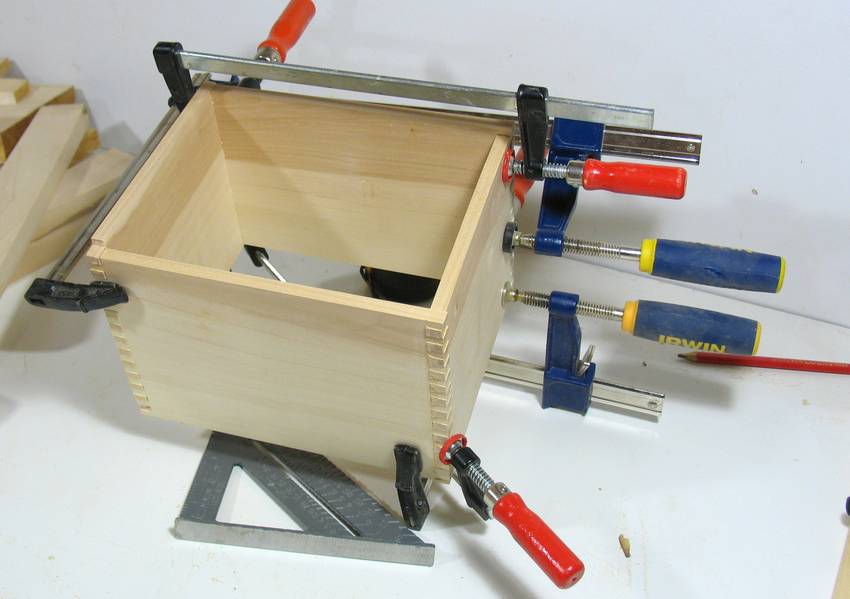
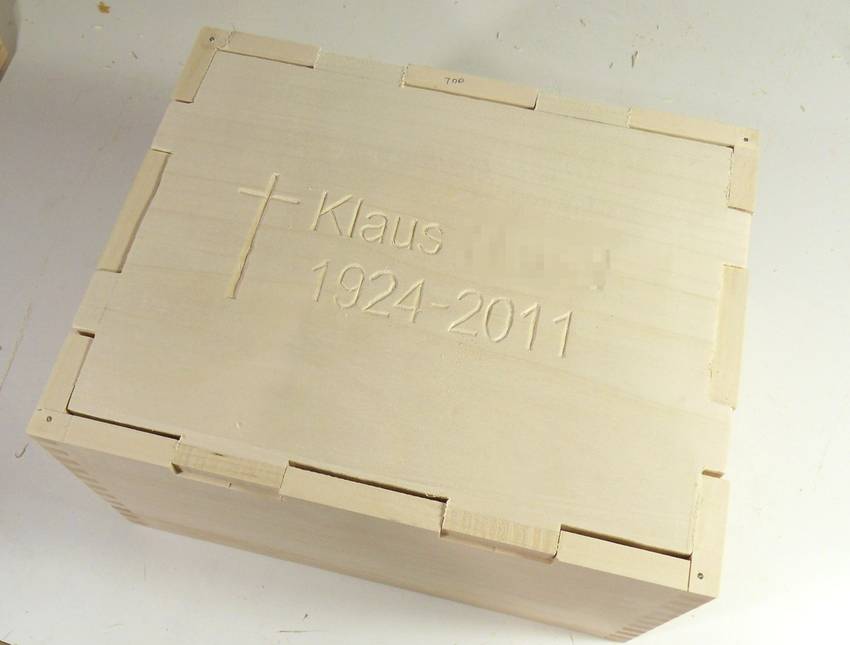
 The funeral home had put the ashes in a rectangular container 16 x 21 x16 cm in size.
So I dimensioned the urn to allow that container to be placed inside.
The funeral home had put the ashes in a rectangular container 16 x 21 x16 cm in size.
So I dimensioned the urn to allow that container to be placed inside.
 I ran into a bit of a challenge for how to fit the top of the box. I made the top
out of solid maple. As such, I had to allow for it to expand and contract with
humidity changes, so I couldn't just glue it on top or into the box. A ledge inside
the box for the top to rest on would have been good, but that would have added
extra height to the box, which I wanted to avoid.
I ran into a bit of a challenge for how to fit the top of the box. I made the top
out of solid maple. As such, I had to allow for it to expand and contract with
humidity changes, so I couldn't just glue it on top or into the box. A ledge inside
the box for the top to rest on would have been good, but that would have added
extra height to the box, which I wanted to avoid.
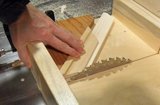
So, instead, I cut tabs out of the box corners and made the lid partially protrude into the sides.
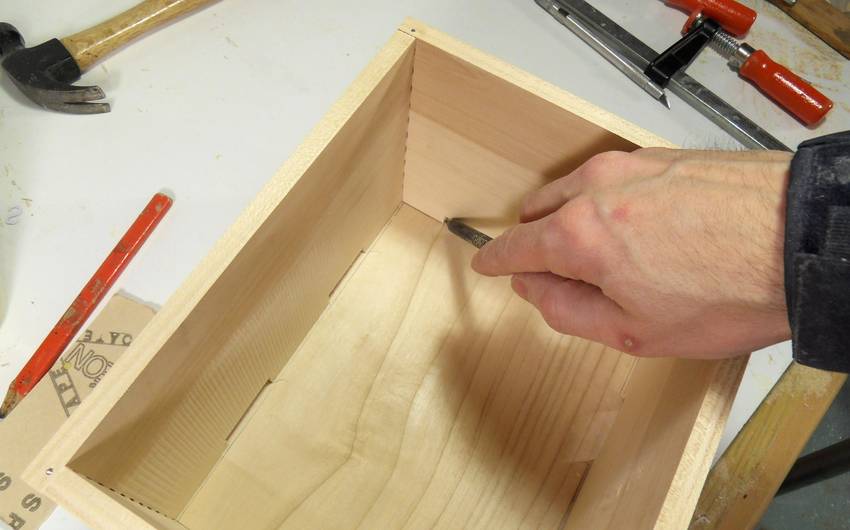 I put the box upside-down on my piece for the top and marked it
to transfer the notch locations...
I put the box upside-down on my piece for the top and marked it
to transfer the notch locations...
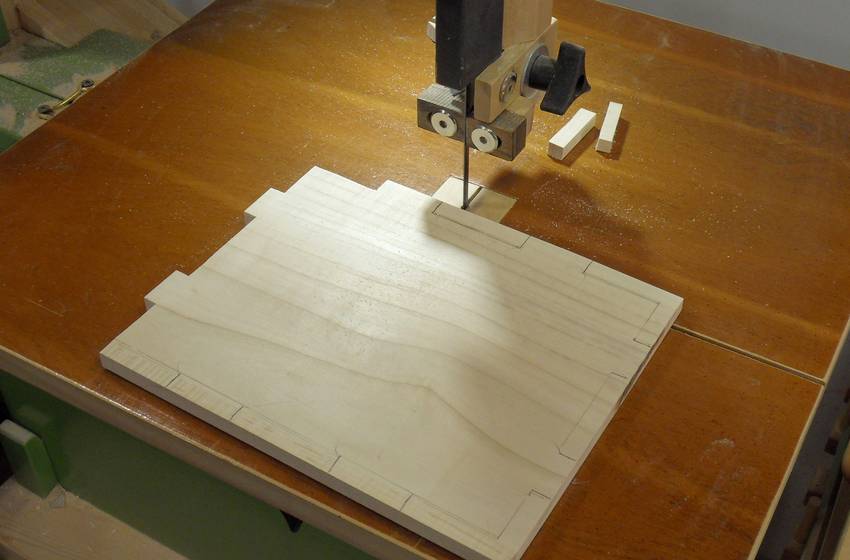 and then cut it out with a bandsaw.
 I made sure the top had room to expand and contract across the grain. It was February
when I built the box, so the wood was bone dry when I
measured it. The wood will expand a bit with the higher humidity during the summer.
I left just over 1 mm on either side. Based on
previous experiments, I figured I should allow
for 1% of expansion.
I made sure the top had room to expand and contract across the grain. It was February
when I built the box, so the wood was bone dry when I
measured it. The wood will expand a bit with the higher humidity during the summer.
I left just over 1 mm on either side. Based on
previous experiments, I figured I should allow
for 1% of expansion.
This made for a rather ugly gap around the edges of the lid, but the trim would cover that up.
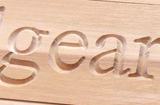
![]() I carved an inscription into the top. I contemplated building some sort of
pantograph to do this, but I didn't want to go on too much of a detour
building this urn.
I carved an inscription into the top. I contemplated building some sort of
pantograph to do this, but I didn't want to go on too much of a detour
building this urn.
(Update: I have since built a router pantograph suitable for lettering)
I printed what I wanted to put on the top as a mirror image in "high quality" mode, then taped the paper, printed side down to the piece of wood. I rubbed a pencil on the back side wherever I saw black though the paper. This technique works best with fresh ink-jet printouts where the oils in the ink have not yet evaporated. I got the idea from one of Steve Ramsey's videos
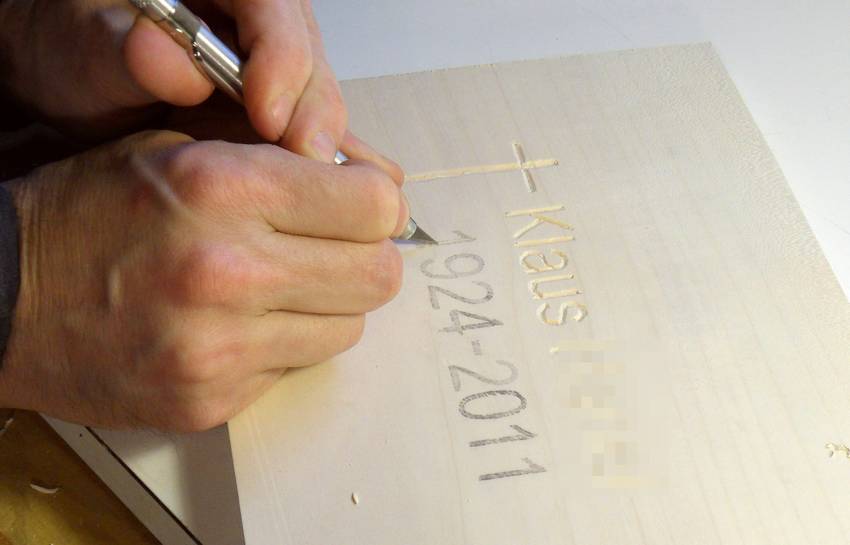 I experimented with carving letters on some scrap before I tackled the lid.
What worked best for me was to score deeply in the center of each line, then cut
at 45 degrees from either side to make a V shaped cut. With the score line down
the middle, my second cut would already start to lift the chips,
which made it easier for the knife to pass through the wood.
It also prevented chipout on the opposite edge of the line I was cutting.
It's also important to always cut in a direction out of the grain.
When carving the outside edges of a "0", for example, carve the outside edge from
the middle of the sides to the top and bottom, and carve the inside edges
in a direction from the top and bottom to the middle of the sides.
I experimented with carving letters on some scrap before I tackled the lid.
What worked best for me was to score deeply in the center of each line, then cut
at 45 degrees from either side to make a V shaped cut. With the score line down
the middle, my second cut would already start to lift the chips,
which made it easier for the knife to pass through the wood.
It also prevented chipout on the opposite edge of the line I was cutting.
It's also important to always cut in a direction out of the grain.
When carving the outside edges of a "0", for example, carve the outside edge from
the middle of the sides to the top and bottom, and carve the inside edges
in a direction from the top and bottom to the middle of the sides.
I experimented with rubbing paint into the letters on my test pieces, but that really highlighted imperfections in my work. It actually looks quite nice just in relief, so I opted not to paint the letters.
I later looked up letter carving, and found various videos demonstrating elegant techniques of doing it. But they always used relatively soft wood. I'd like to these people try their techniques in hard maple!
 I pre-finished the molding and lid before assembling the rest of the urn. That way,
I wouldn't be accidentally gluing the top panel to the molding with varnish, and there
wouldn't be the potential of a varnish edge becoming exposed with shrinkage.
I pre-finished the molding and lid before assembling the rest of the urn. That way,
I wouldn't be accidentally gluing the top panel to the molding with varnish, and there
wouldn't be the potential of a varnish edge becoming exposed with shrinkage.
It also meant that I didn't have to be as careful about glue squeeze out, because the excess glue wouldn't soak into the surface. Glue soaked into the wood always ends up showing up especially well when you apply varnish.
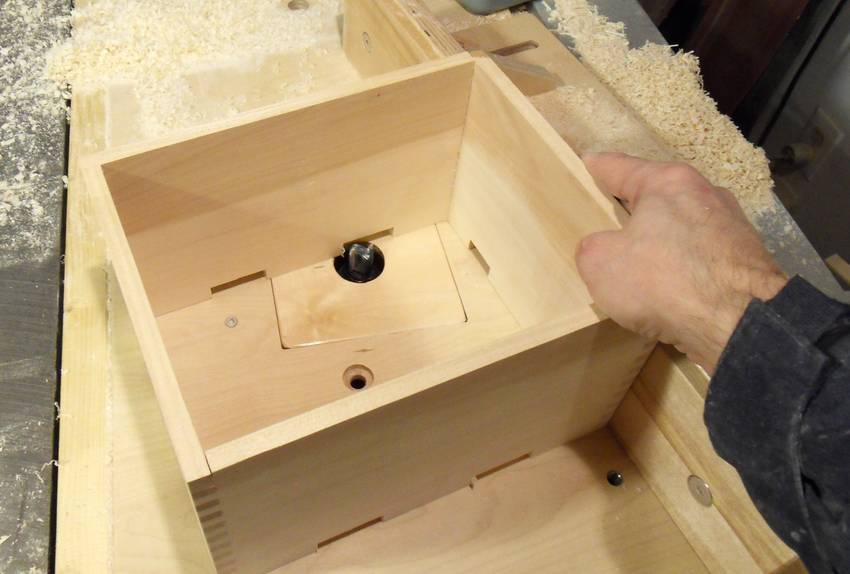
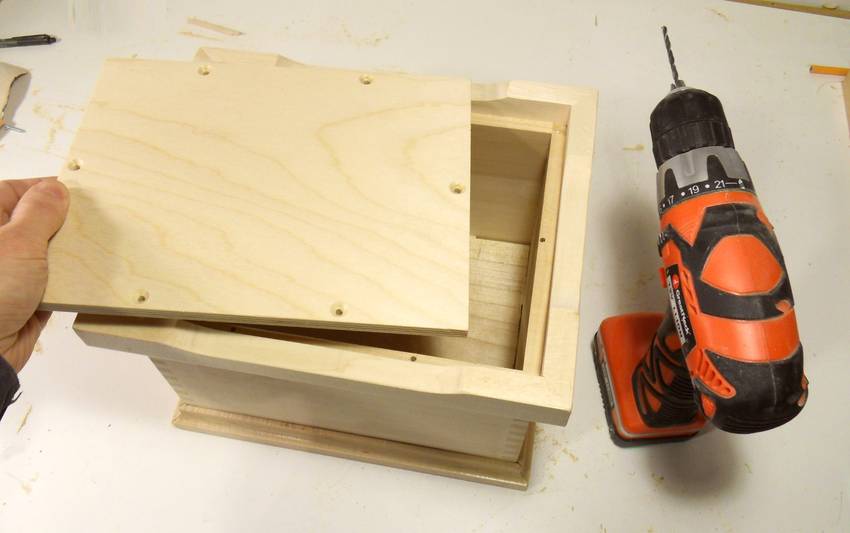 Finally, I made a lid for the bottom of the box. The molding around the bottom edge
naturally forms a sort of rabbet-ledge for the lid to screw in to. A good thing, because
my box walls were too thin to cut much of a ledge into.
Finally, I made a lid for the bottom of the box. The molding around the bottom edge
naturally forms a sort of rabbet-ledge for the lid to screw in to. A good thing, because
my box walls were too thin to cut much of a ledge into.
 Although the urn looks super precisely made, I actually made a few mistakes here and
there. Cutting miters perfectly is not something I have mastered at this point, and
the miter on this corner was particularly off. But carving the corresponding profile
into the longer piece goes a long way to hiding the flaw.
Although the urn looks super precisely made, I actually made a few mistakes here and
there. Cutting miters perfectly is not something I have mastered at this point, and
the miter on this corner was particularly off. But carving the corresponding profile
into the longer piece goes a long way to hiding the flaw.
I also had a gap as large as half a millimeter in some of my miters. But rubbing glue and sawdust into those does a good job of acting as a wood filler, without having to admit that one used wood filler! And an advantage of having a sawdust drawer in the stand for my bandsaw is that I always have layer of sawdust of from the exact wood I'm working with in the drawer!
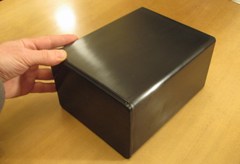
 Overall, I think the urn came out looking quite nice. It was a different style from my
usual projects. I normally make things in more of a casual functional Ikea-esque
style, whereas here I aimed for a more serious and respectful look.
Overall, I think the urn came out looking quite nice. It was a different style from my
usual projects. I normally make things in more of a casual functional Ikea-esque
style, whereas here I aimed for a more serious and respectful look.
As it came nearer to completion, it felt more and more like this urn should be some sort of sacred object. It was an odd feeling, because at the same time it was just some pieces of wood that I had shaped and glued together. What exactly is it that makes an object sacred? We rarely talk about the creation of sacred objects. Mostly, sacred objects just "are", but all sacred objects were at some point made, either by man or by nature. Food for thought...
 Carving relief letters
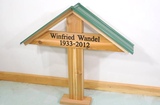 Building a grave marker
 Making a picture frame
 Screw advance box joint jig
 Milk crate boxes
 Small corner shelf