 Before I started building my 26" bandsaw
I ordered a 1/4" and a 1/2" bandsaw blade for it.
Before I started building my 26" bandsaw
I ordered a 1/4" and a 1/2" bandsaw blade for it.
Before I started building my 26" bandsaw
I ordered a 1/4" and a 1/2" bandsaw blade for it.
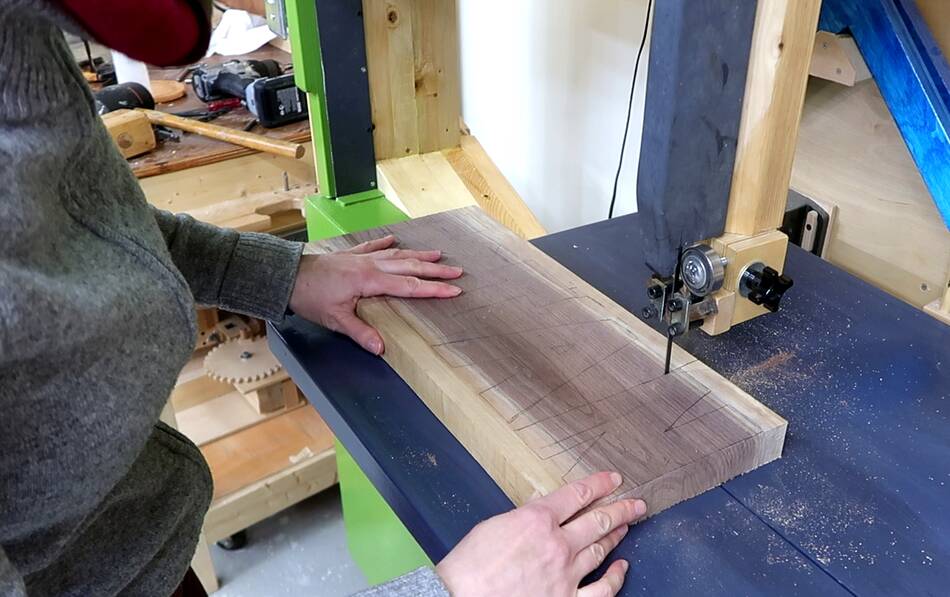
Once the saw was complete, I found I was getting quite a bit of chatter when cutting. I investigated this further and made a video about it, concluding that it was because the teeth on the blades had too much of a hook shape for what I was cutting. Several people commented on the youtube video that they had similar experience with hook tooth blades.
So I was confident this wasn't the fault of my new bandsaw, despite other folks commenting all kinds of theories about why it would be my bandsaw.
Just as I finished the saw, Rachel wanted to cut out some letters, similar to these ones. The saw cut ok in the softer sap wood, but as soon as she cut into the heartwood of this walnut, the saw chattered like crazy. I told her to use my 20" bandsaw with a different blade on it instead.
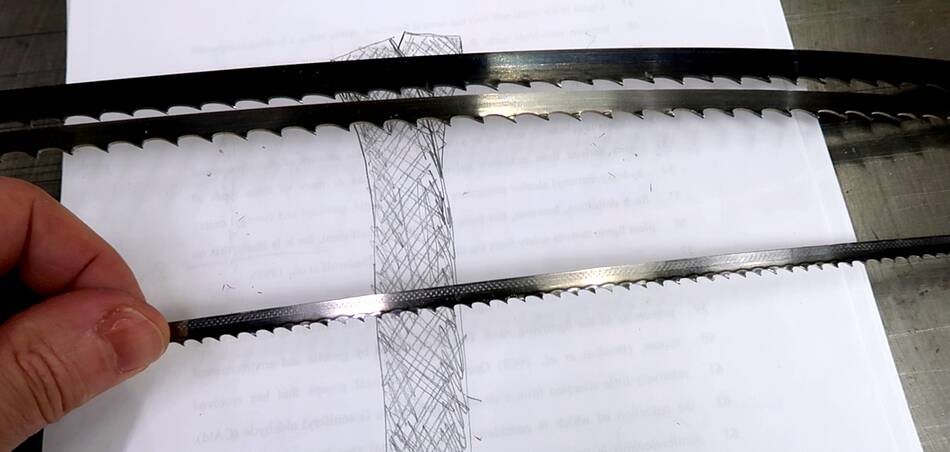
 While I was confident the chatter wasn't because of my saw, the way to be
really sure is to try some different bandsaw blades. So I ordered
two more blades for this bandsaw, one of them a 3/8" 3 TPI blade, the middle
one at left, between the 1/2" 3 TPI blade blade (top) and the 1/4" 4 TPI blade
on the bottom. All of the blades I ordered came from R&D bandsaws
in Ontario.
While I was confident the chatter wasn't because of my saw, the way to be
really sure is to try some different bandsaw blades. So I ordered
two more blades for this bandsaw, one of them a 3/8" 3 TPI blade, the middle
one at left, between the 1/2" 3 TPI blade blade (top) and the 1/4" 4 TPI blade
on the bottom. All of the blades I ordered came from R&D bandsaws
in Ontario.
 So I started experimenting, cutting up scraps of the walnut left over from
Rachel's project, with lots of swapping of blades on the saw.
So I started experimenting, cutting up scraps of the walnut left over from
Rachel's project, with lots of swapping of blades on the saw.
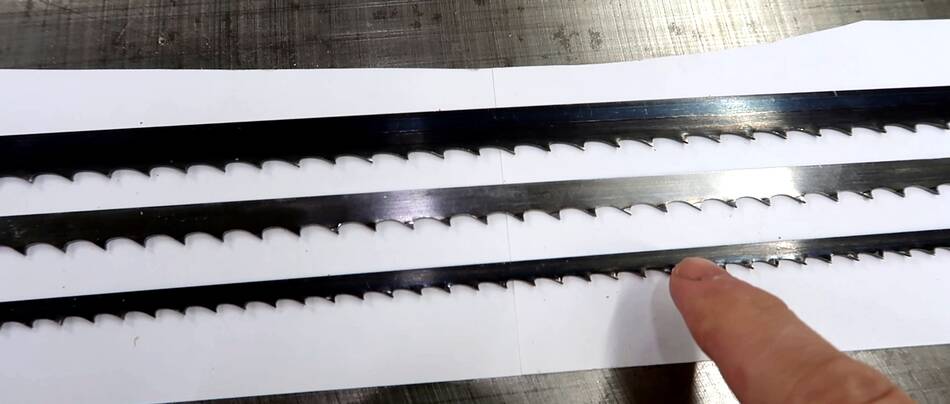
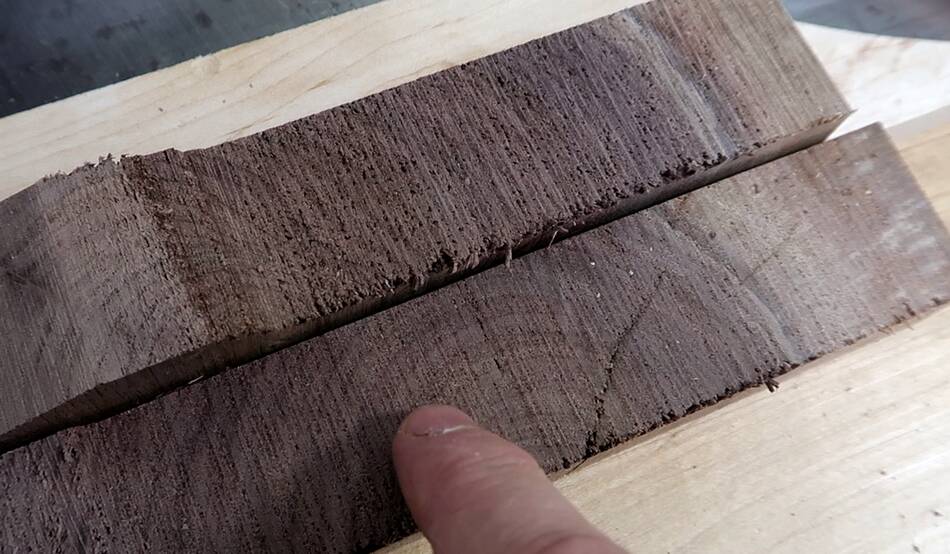
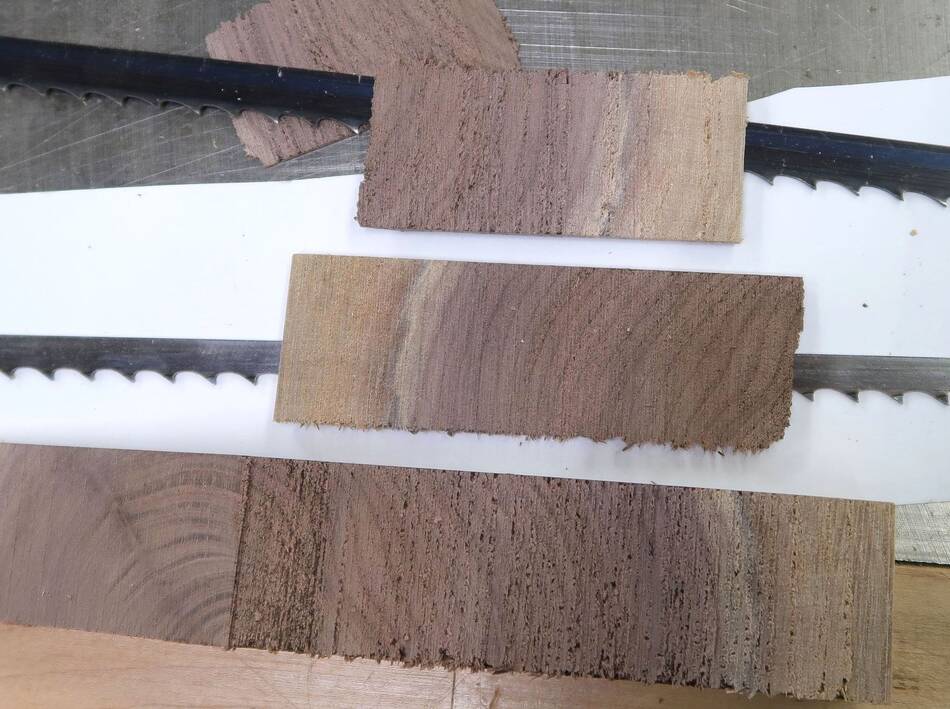 At left, samples of that same walnut, cut with the three different blades.
Top sample cut by the 1/2" 3 TPI blade, middle by the 3/8" 3 TPI blade,
and bottom one cut by the 1/4" 4 TPI blade that gave me the most chatter
problems. I was pushing the stock through relatively fast for all of these.
Cutting very slowly doesn't trigger the chatter.
At left, samples of that same walnut, cut with the three different blades.
Top sample cut by the 1/2" 3 TPI blade, middle by the 3/8" 3 TPI blade,
and bottom one cut by the 1/4" 4 TPI blade that gave me the most chatter
problems. I was pushing the stock through relatively fast for all of these.
Cutting very slowly doesn't trigger the chatter.
 Hook tooth angle makes the chatter problem worse. In hard woods, the hook
part of the hook tooth can really bite into the wood and pull the blade in.
In softer woods, the wood yields more readily so the teeth can't hook onto the
wood the same way.
Hook tooth angle makes the chatter problem worse. In hard woods, the hook
part of the hook tooth can really bite into the wood and pull the blade in.
In softer woods, the wood yields more readily so the teeth can't hook onto the
wood the same way.
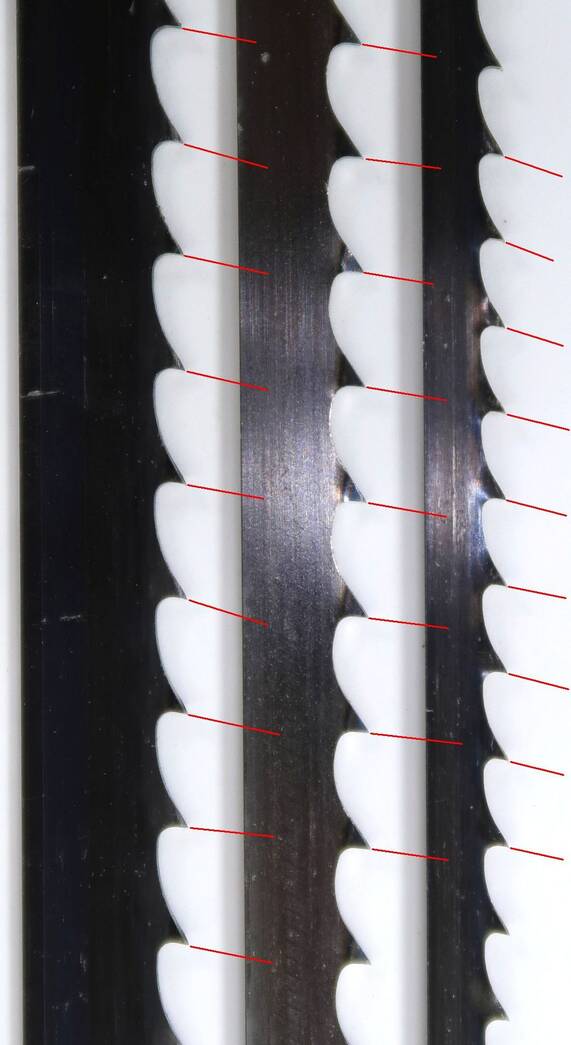
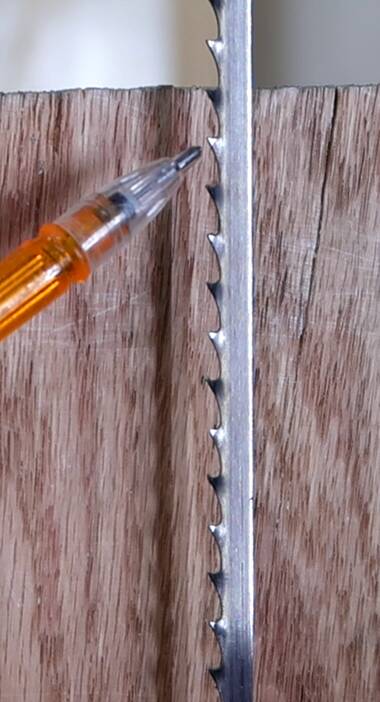
I took a close-up photo of the three blades (at right), and tried to eyeball the angle of each tooth. The 1/4" blade, on the right, seems to have the most hook to it, and the 3/8" blade, which doesn't chatter, has the least hook.
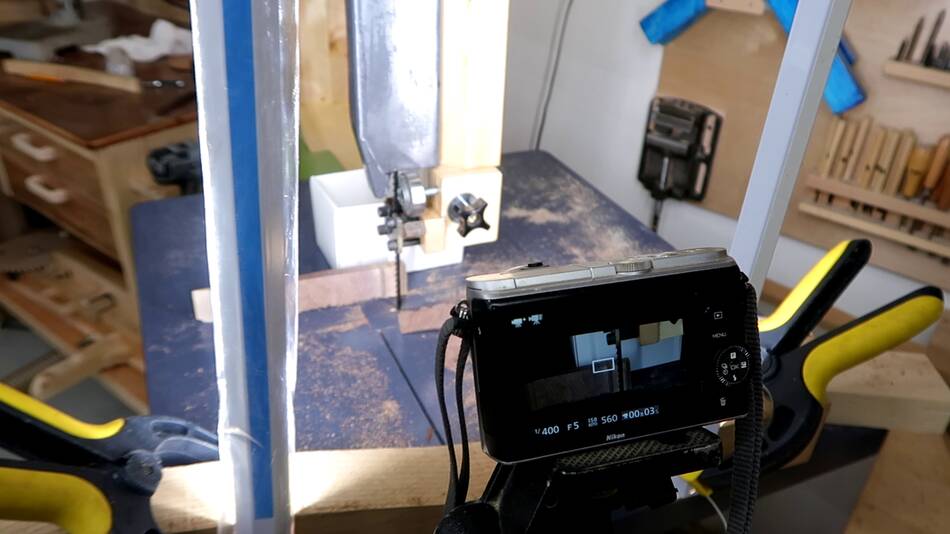 I wanted a closer look at this chattering action, so I set up my old Nikon J1
to film at 600 frame per second while I cut the wood.
I wanted a closer look at this chattering action, so I set up my old Nikon J1
to film at 600 frame per second while I cut the wood.
Sure enough, when the chatter happens, the blade just lurches forward in the cut.
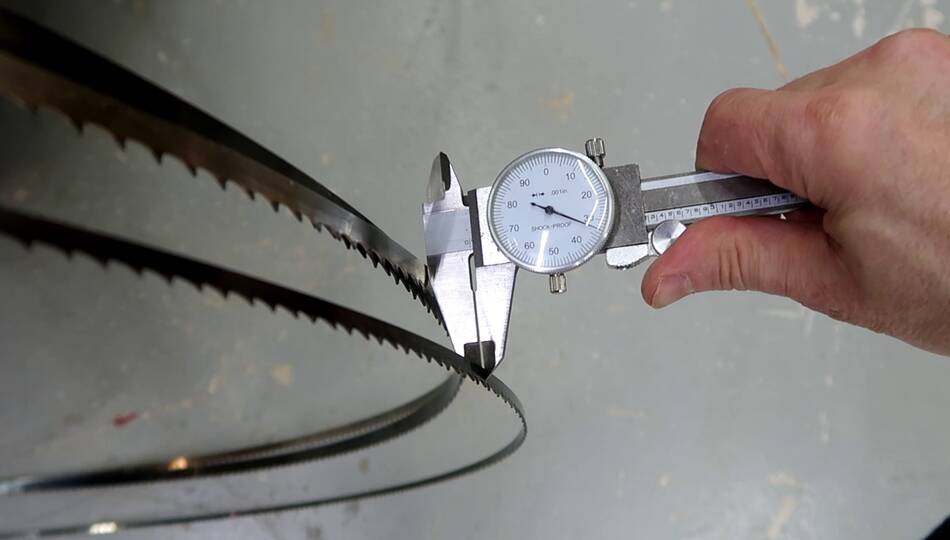 I also measured the blades I had. The metal on all three of these
was 0.032" thick, 0.81 mm.
I also measured the blades I had. The metal on all three of these
was 0.032" thick, 0.81 mm.
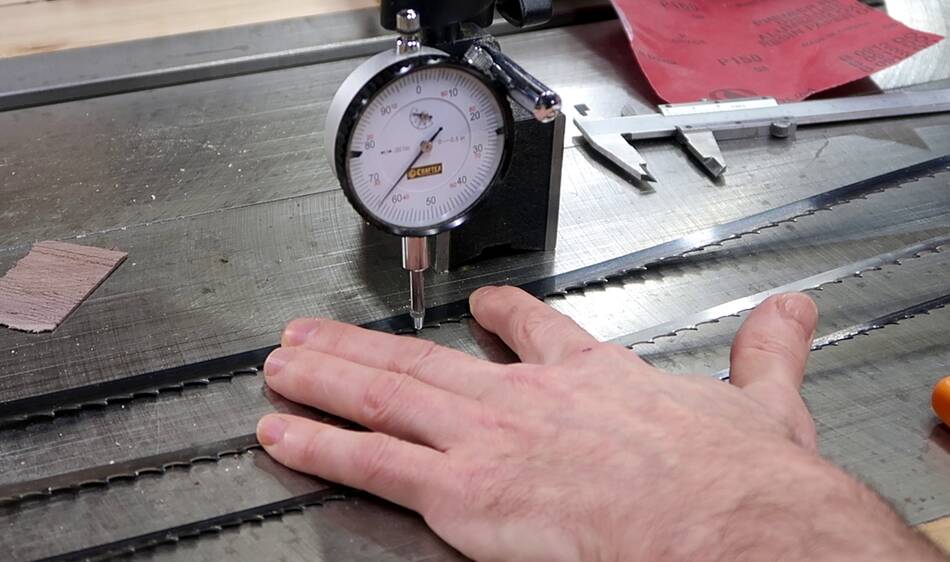 I set up a dial indicator to act as a height gauge, and I measured how far
the teeth were up from my saw table. The teeth set downwards end up lifting
the blade up by the amount of their set. I then measured the height
of the tips of the teeth set upwards.
For my 1/2" blade, I was able to read the total set (in both directions) plus
the thickness of the blade. The 1/2" blade measured .064" (1.63 mm).
Minus .032" blade thickness and divide by two comes to 0.016" of set (0.41 mm)
in either direction.
I set up a dial indicator to act as a height gauge, and I measured how far
the teeth were up from my saw table. The teeth set downwards end up lifting
the blade up by the amount of their set. I then measured the height
of the tips of the teeth set upwards.
For my 1/2" blade, I was able to read the total set (in both directions) plus
the thickness of the blade. The 1/2" blade measured .064" (1.63 mm).
Minus .032" blade thickness and divide by two comes to 0.016" of set (0.41 mm)
in either direction.
The 1/4" blade read 0.062 (0.015" of set), while the 3/8" blade, which cut the cleanest, read at 0.052", or 0.010" of set.
 Seeing that the blade that cut the cleanest had smallest set to it, I figured it
might help to reduce the set on the 1/4" blade. The way that blade cut
the way it was, it was nearly unusable to me, so I had nothing to lose.
Seeing that the blade that cut the cleanest had smallest set to it, I figured it
might help to reduce the set on the 1/4" blade. The way that blade cut
the way it was, it was nearly unusable to me, so I had nothing to lose.
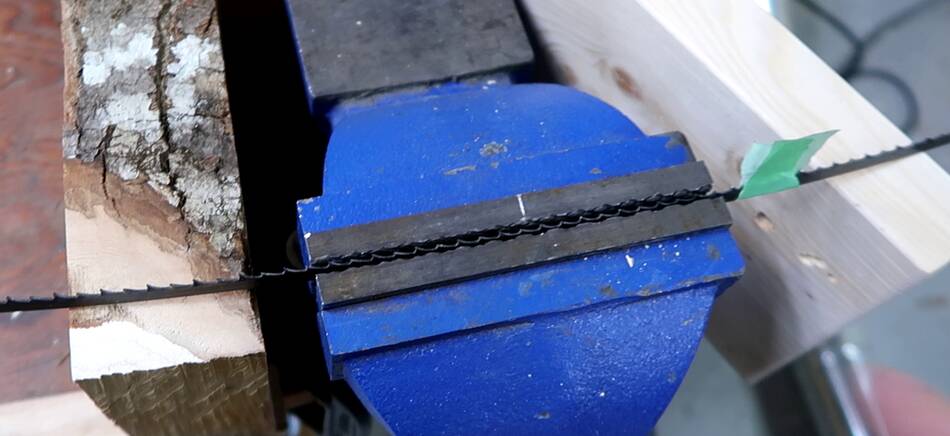
I clamped the blade in the vise, then moved it by about 1/3 of the width of the vise jaws, re-clamped, and continued that way around the blade. That way each tooth would get pressed several times. The vise jaws have grooves in them, so sometimes some of the teeth could be where the grooves are. Clamping multiple times hopefully get all of them.
But re-measuring the tooth set after this, it only made a small difference.
 So time for a more barbaric measure. Stoning the side of the blade.
I flipped the blade inside out so the teeth were facing up (backwards) in the saw. I then pressed a sharpening stone to the side of the blade, with a piece of wood on the other side to press the blade against the stone. Then repeating that on the other side.
 Measuring the set after this, it hardly made a difference, so I went at it
again but more aggressively. Re-measuring after, I got .050",
just a bit less than the 3/8" blade that doesn't chatter.
Measuring the set after this, it hardly made a difference, so I went at it
again but more aggressively. Re-measuring after, I got .050",
just a bit less than the 3/8" blade that doesn't chatter.
On the right, you can see the sides of the tooth tips now have a shine to them from where the part protruding to the side is ground flat.
 But trying the blade again, it still chattered quite a bit when the wood
was pushed hard into it, though subjectively, I think not quite as bad.
But trying the blade again, it still chattered quite a bit when the wood
was pushed hard into it, though subjectively, I think not quite as bad.
But the cut quality, even with the chatter, was much improved. This makes the blade much more usable to me.
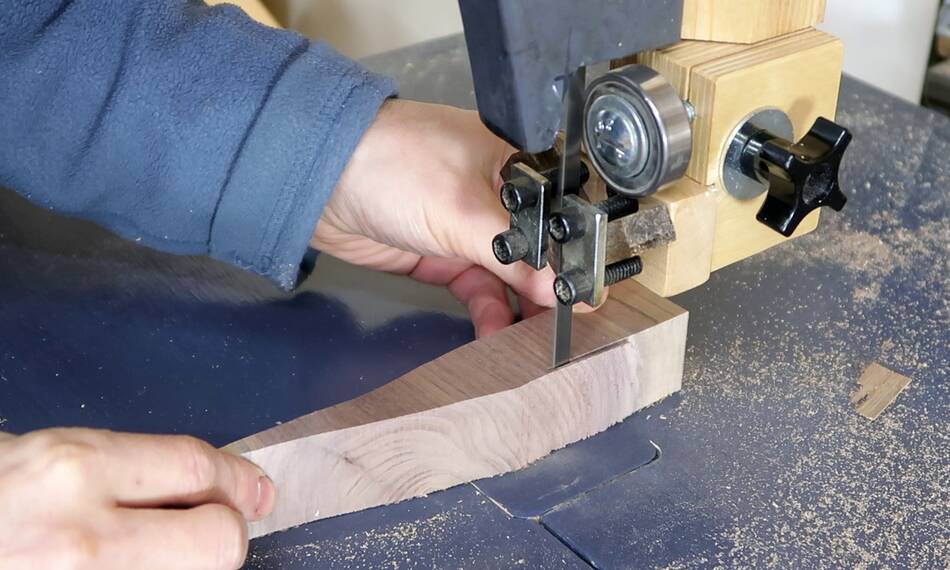
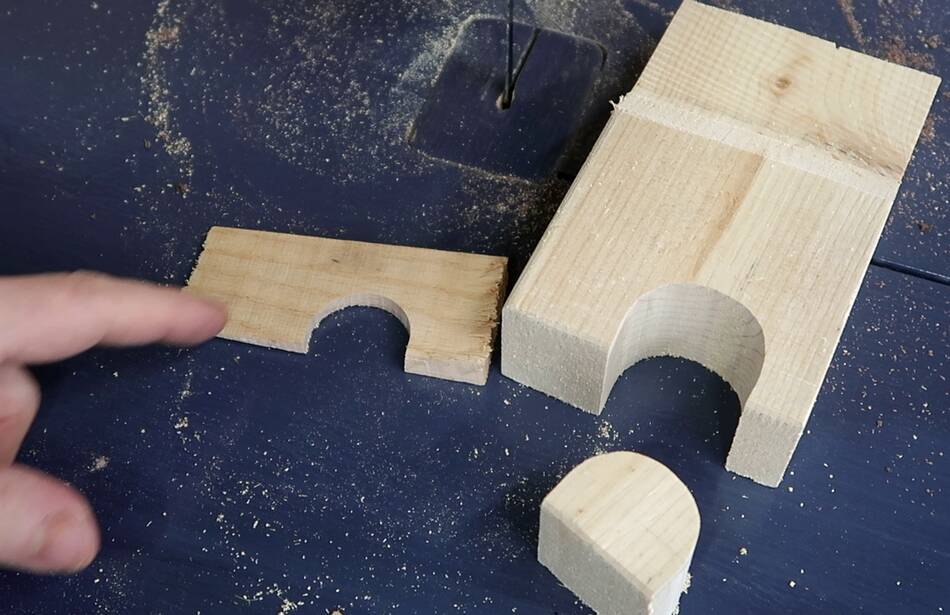 But reducing the set makes the blade less able to cut around tight curves.
Picture at left: left, original cut radius, right, new cut radius.
But reducing the set makes the blade less able to cut around tight curves.
Picture at left: left, original cut radius, right, new cut radius.
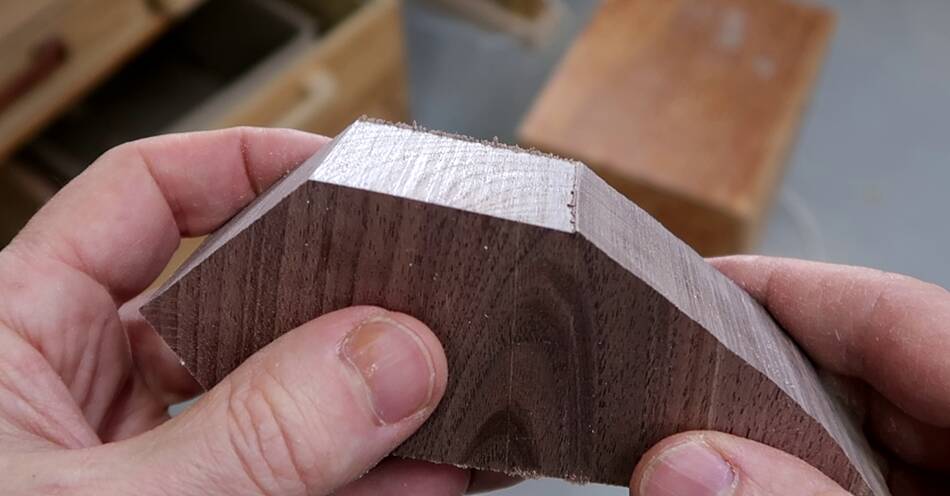 And when cutting slowly, so the blade doesn't chatter, the cut positively has
a shine to it.
And when cutting slowly, so the blade doesn't chatter, the cut positively has
a shine to it.
 With the blade as it was, the corners of the teeth would define the edge of
the cut, which would make for a very tiny zigzag as each tooth, pointy on
the side, carved out another chunk.
With the blade as it was, the corners of the teeth would define the edge of
the cut, which would make for a very tiny zigzag as each tooth, pointy on
the side, carved out another chunk.
But if the side tips of the teeth are flattened, this zigzag turns into a straight line.
But the reduced set also makes it a bit easier to guide the bandsaw precisely, so long as it's within the curvature the blade can cut.
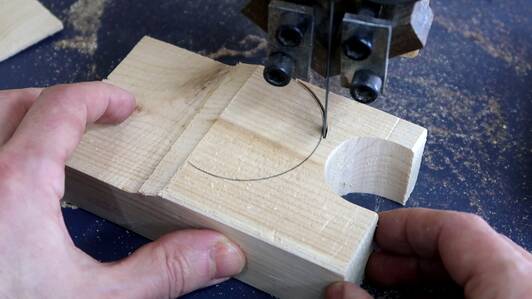
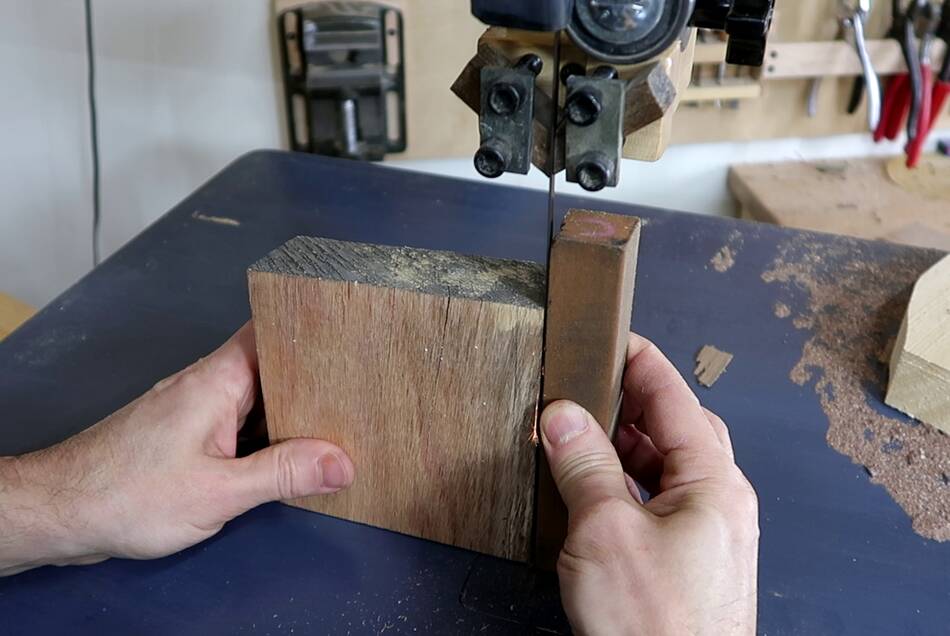
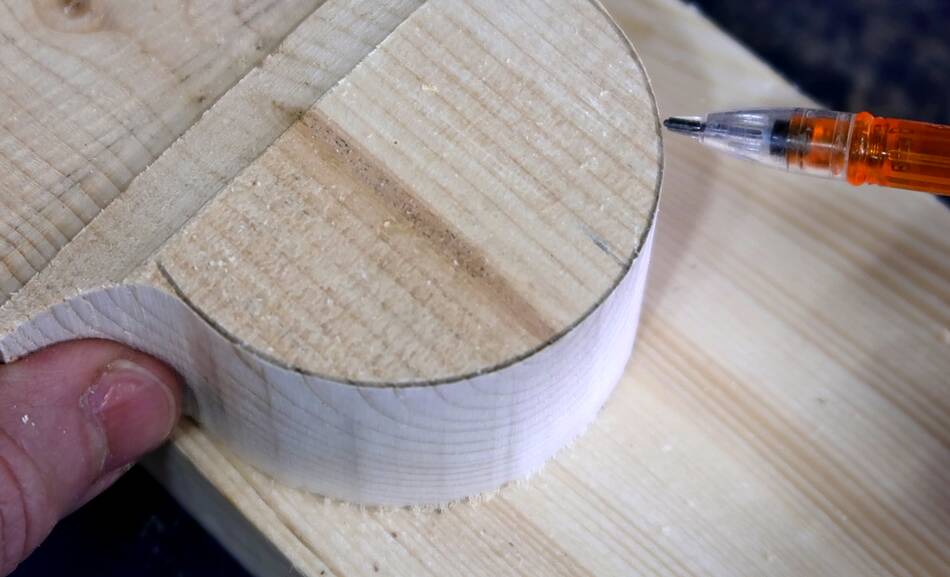 To demonstrate, I very carefully cut around a circle I drew on a piece of wood,
cutting to the edge of the line, but not beyond.
To demonstrate, I very carefully cut around a circle I drew on a piece of wood,
cutting to the edge of the line, but not beyond.
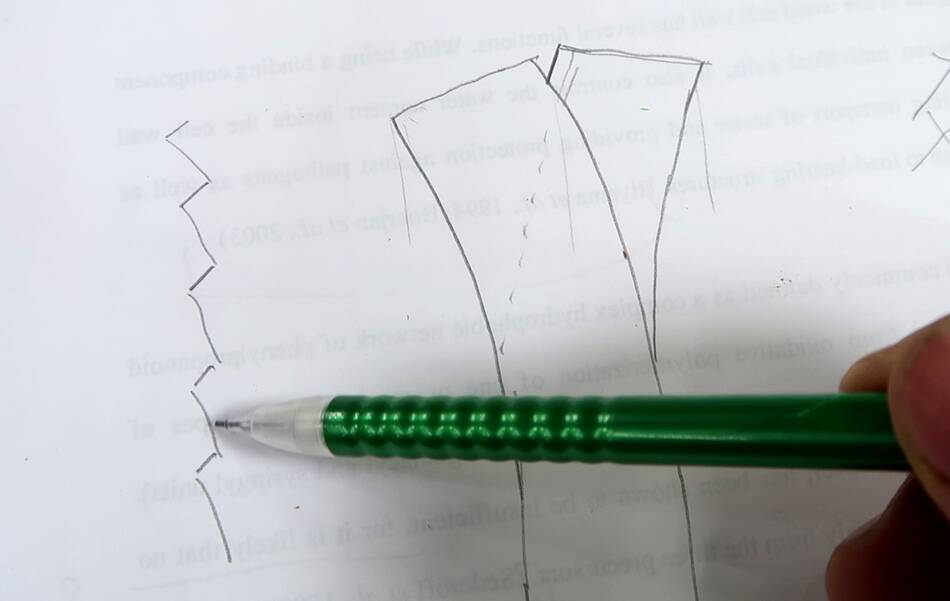
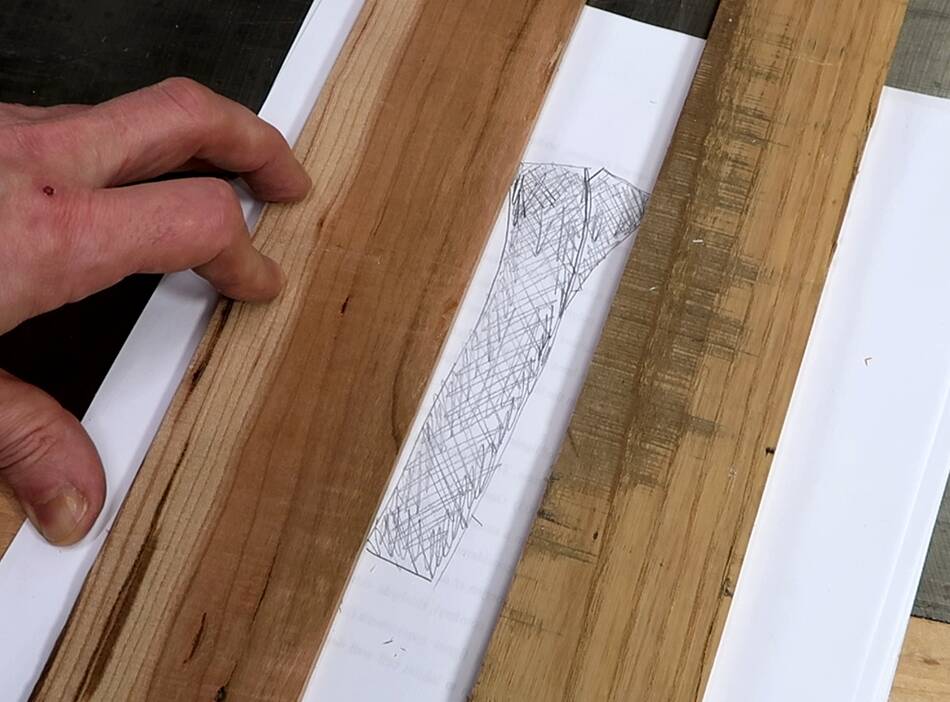 When I make cuts like that, I'm actually always pushing the wood sideways against
the blade slightly, so that the back of the blade rubs against the side of my cut.
When I make cuts like that, I'm actually always pushing the wood sideways against
the blade slightly, so that the back of the blade rubs against the side of my cut.
Then, by rotating the piece of wood, I'm effectively steering the blade through the wood. At left, the cross section of the bandsaw blade is drawn on the paper and the two strips of wood represent the side of the cut.
If I were cutting entirely straight, without the back of the blade touching the side of the cut, even very slight sideways movement of my fingers would result in a wobble in the cut.
 I also ordered a 6 TPI 1/4" blade. This blade makes a clean cut without me having
to mess with it. The downside of a blade with a lot of teeth is that its not very
good for cutting very deep because there isn't much room to clear the sawdust
between teeth. Also, each tooth needs to be a bit sharper than on a low TPI blade
to still grab the wood effectively. And when the blade needs sharpening,
those 1000 tiny teeth on that blade take a lot more time to resharpen.
If you don't sharpen your blades, a low TPI blade will cut more wood before it's
too dull to use than a high TPI blade.
I also ordered a 6 TPI 1/4" blade. This blade makes a clean cut without me having
to mess with it. The downside of a blade with a lot of teeth is that its not very
good for cutting very deep because there isn't much room to clear the sawdust
between teeth. Also, each tooth needs to be a bit sharper than on a low TPI blade
to still grab the wood effectively. And when the blade needs sharpening,
those 1000 tiny teeth on that blade take a lot more time to resharpen.
If you don't sharpen your blades, a low TPI blade will cut more wood before it's
too dull to use than a high TPI blade.
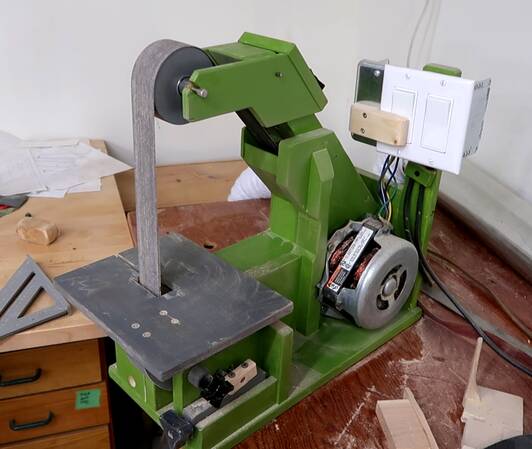
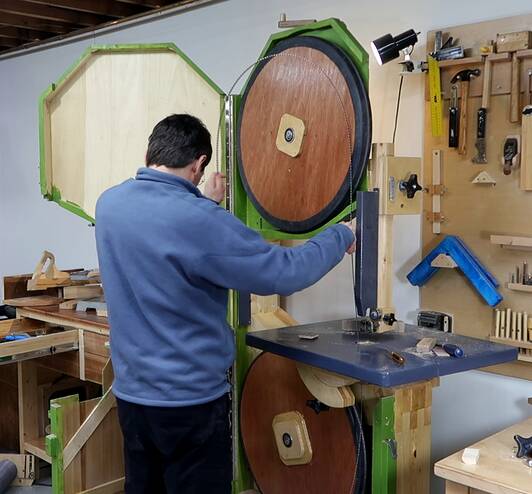
Cutting clean and accurate is important to me because I like to use my bandsaw, together with my 1:1 templates from my BigPrint program as a sort of pretend CNC. I recently had the thought that, if I had an actual CNC, I could just run out all the parts for another strip sander like the one at right, and then I'd have two of them. But then I realized, that's a dumb idea. Cutting the parts for that sander only took 15 minutes on my "pretend CNC" bandsaw, which is probably less time than it would take on a real CNC if you include set-up time and way faster than a hobby CNC. And that half hour was only a fraction of the time I spent building that sander.
 Why bandsaw blades squeal (2012)
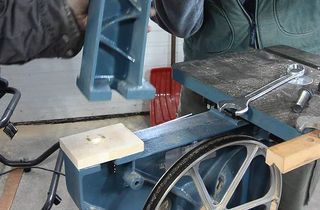 Wooden bandsaw riser block (2017)
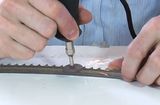 Sharpening bandsaw
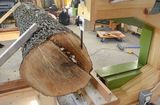 Bandsaw on a dolly sawmill (2017)
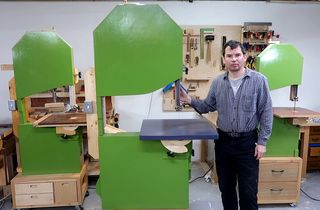 26" bandsaw build (2021)
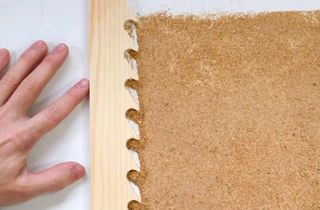 The physics of bandsaw resawing
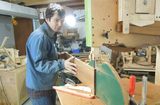 Resawing shelves to guitar sides
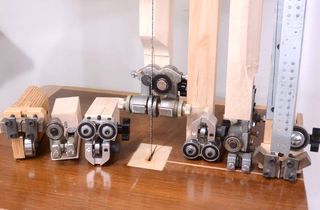 Comparing bandsaw blade guides