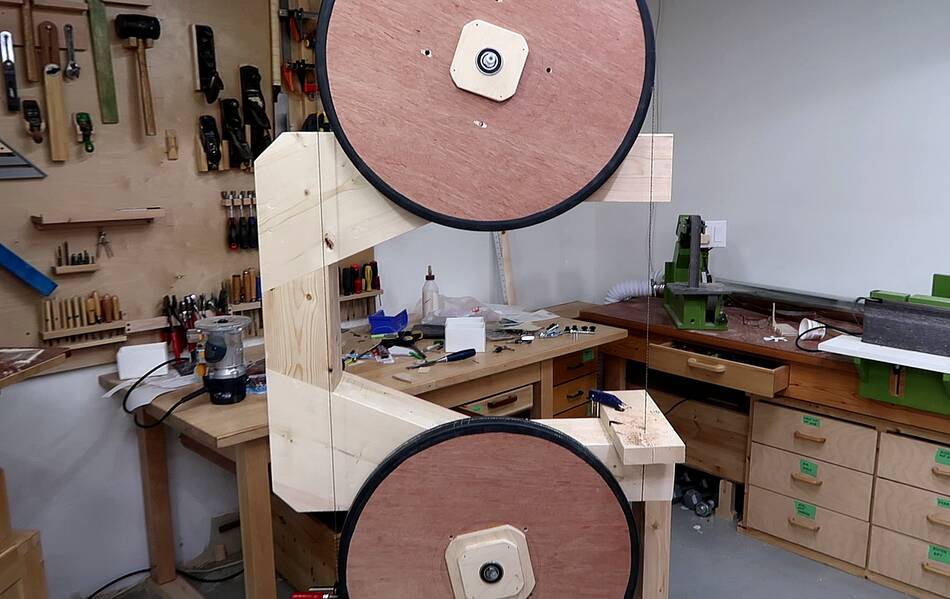
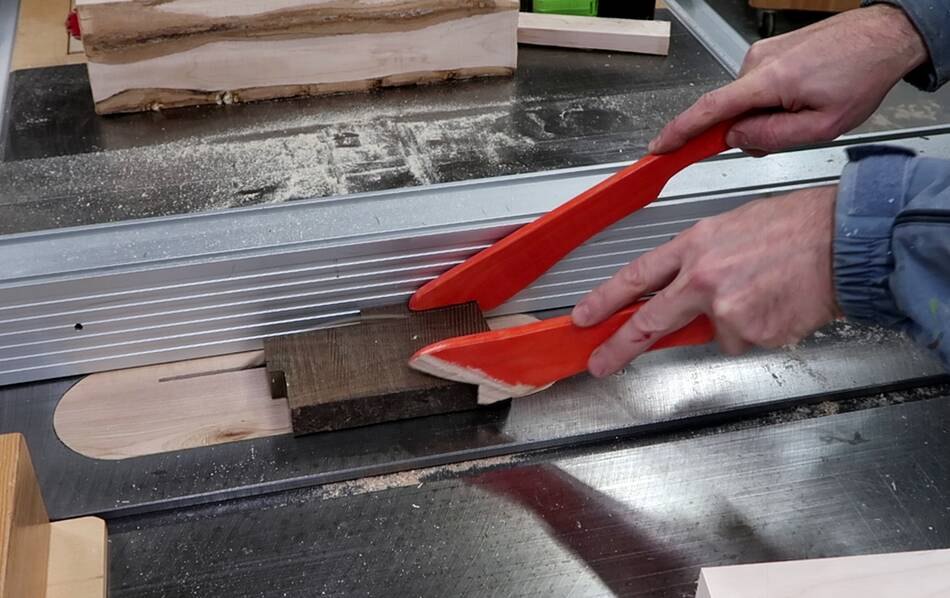
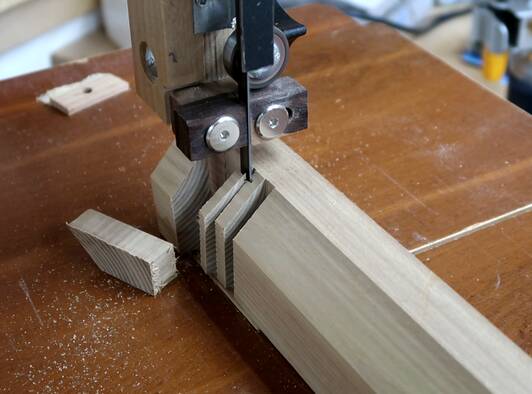
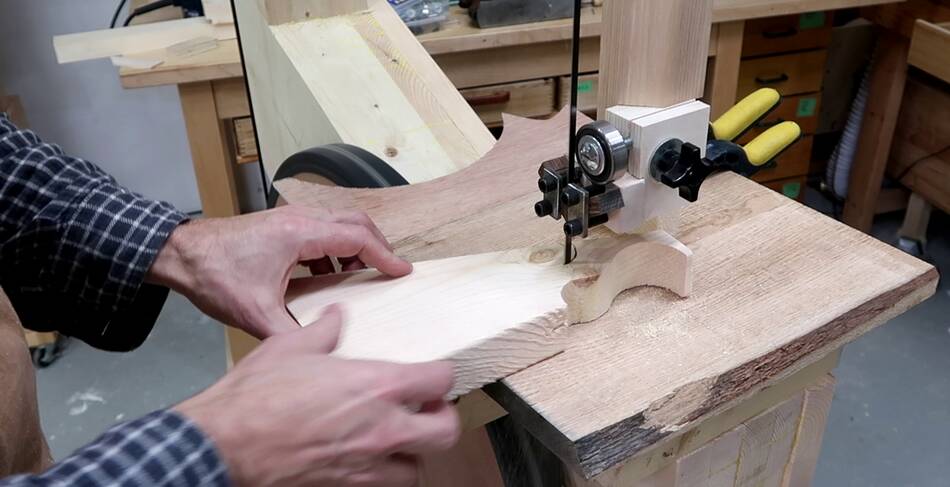
 I have already made some test cuts with my 26" bandsaw, even though I
haven't made blade guides for it yet -- by relying on a slot
in my temporary table to guide the blade.
I have already made some test cuts with my 26" bandsaw, even though I
haven't made blade guides for it yet -- by relying on a slot
in my temporary table to guide the blade.
I have already made some test cuts with my 26" bandsaw, even though I
haven't made blade guides for it yet -- by relying on a slot
in my temporary table to guide the blade.
 The guides I want to make for this bandsaw are the same as
the guides on my 20" bandsaw.
I'm pretty happy with that design, so I'll use it again.
The guides I want to make for this bandsaw are the same as
the guides on my 20" bandsaw.
I'm pretty happy with that design, so I'll use it again.
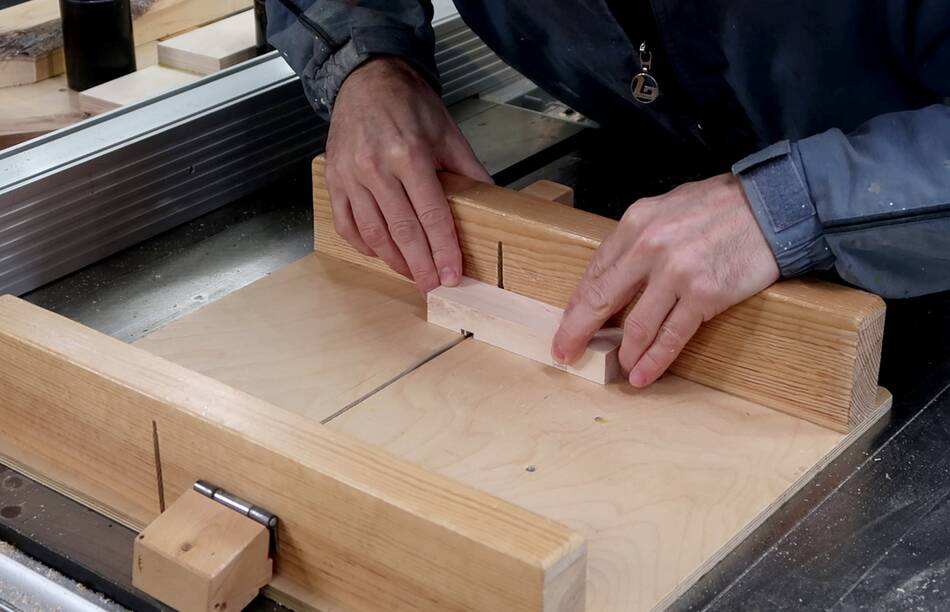 The upper and lower blade guides both have this block with a notch cut
out of it behind the guide blocks. I cut a piece of hard maple big
enough for both blocks in one piece and am cutting the notches on my
table saw using a table saw sled.
The upper and lower blade guides both have this block with a notch cut
out of it behind the guide blocks. I cut a piece of hard maple big
enough for both blocks in one piece and am cutting the notches on my
table saw using a table saw sled.
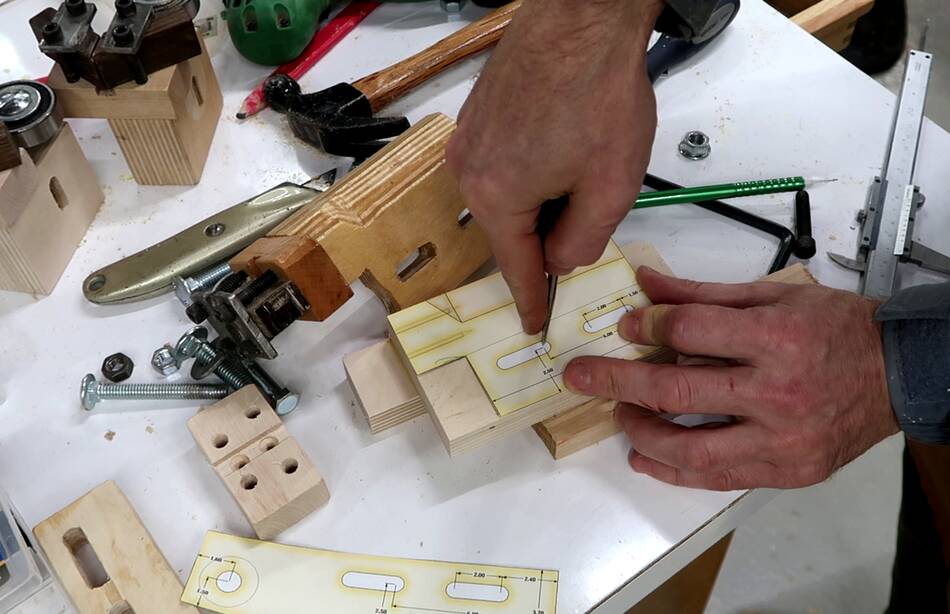
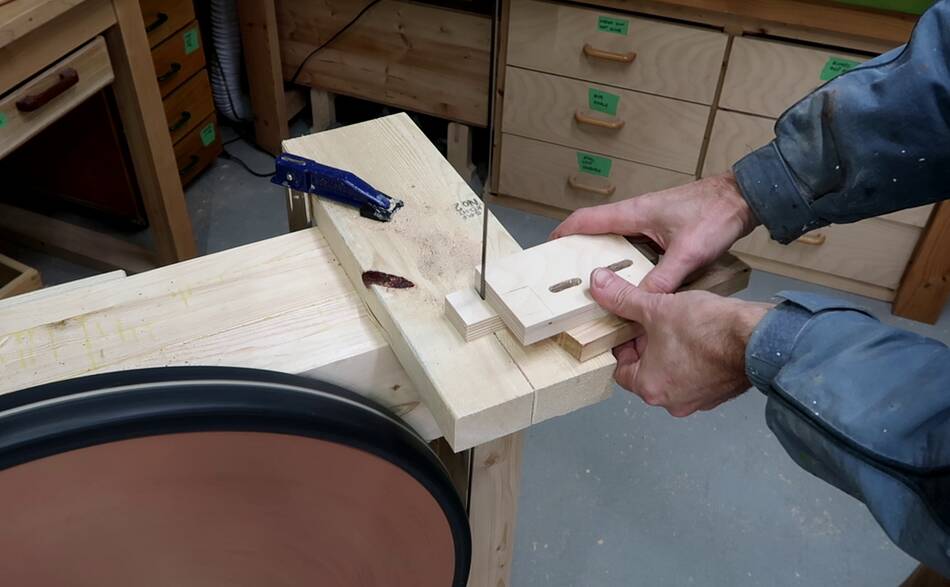
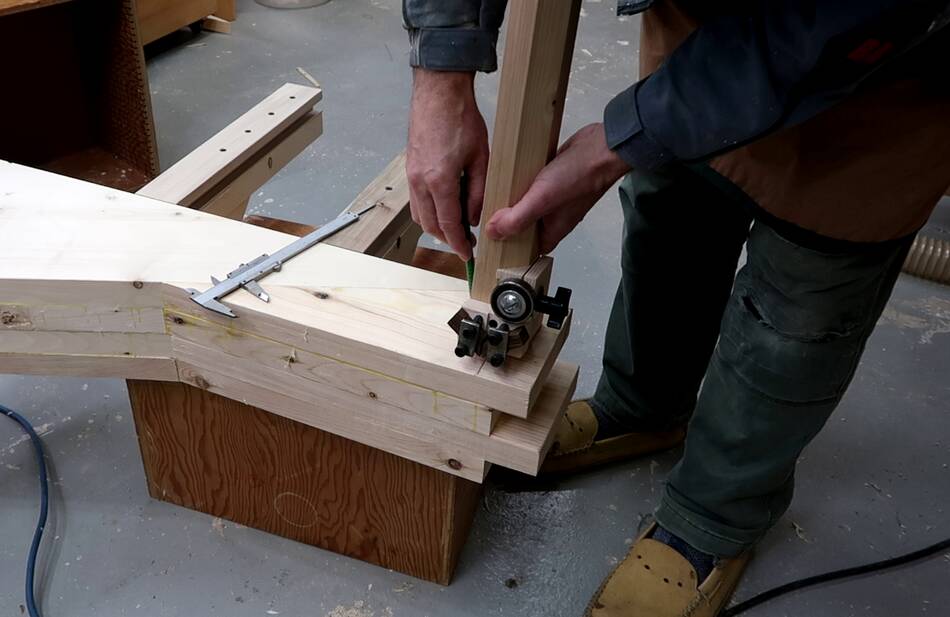
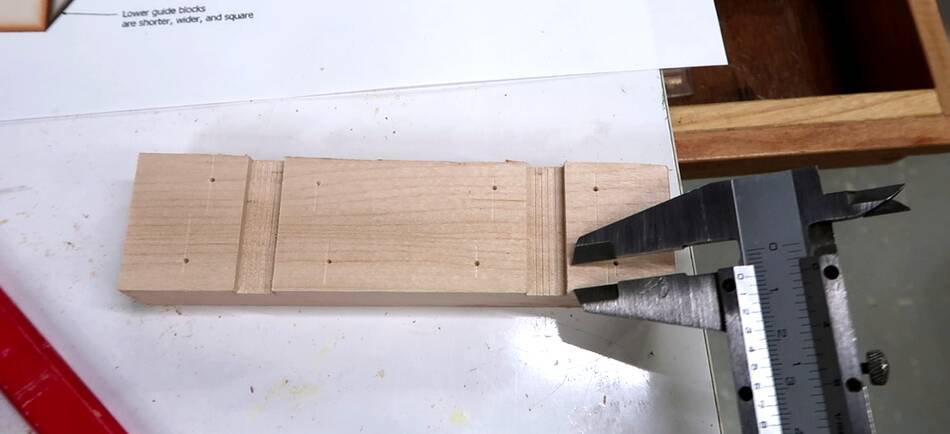 Notches cut, now marking the locations of the holes for the bolts
that hold the guide blocks. I could use the templates for this, but
it's just as easy scratching lines on the wood with a set of callipers
using the dimensions on the drawings.
Notches cut, now marking the locations of the holes for the bolts
that hold the guide blocks. I could use the templates for this, but
it's just as easy scratching lines on the wood with a set of callipers
using the dimensions on the drawings.
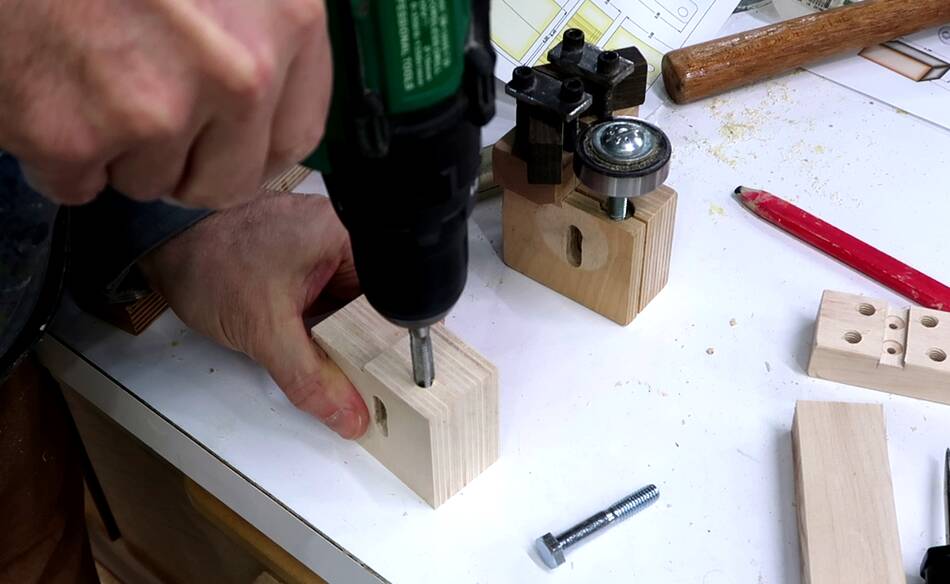
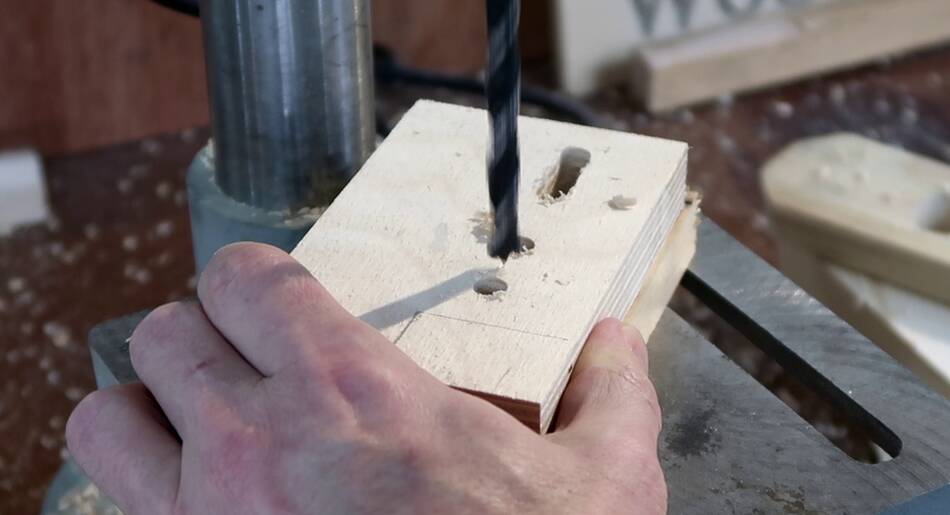
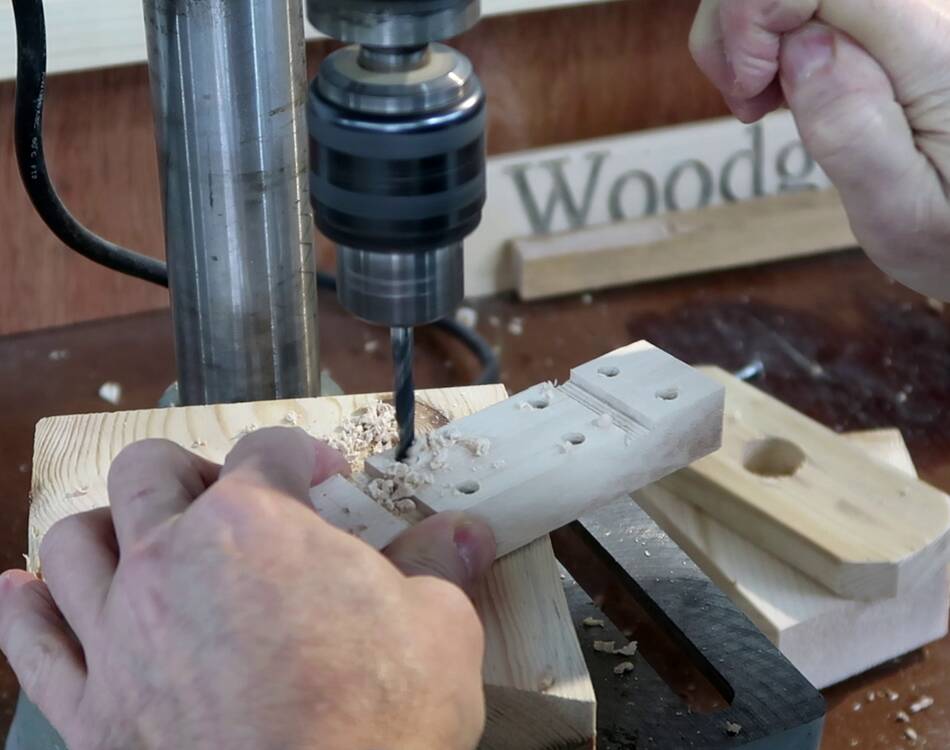 Then drilling out the holes. The holes are sized to be the minor diameter
of the machine screws that will go in them.
Then drilling out the holes. The holes are sized to be the minor diameter
of the machine screws that will go in them.
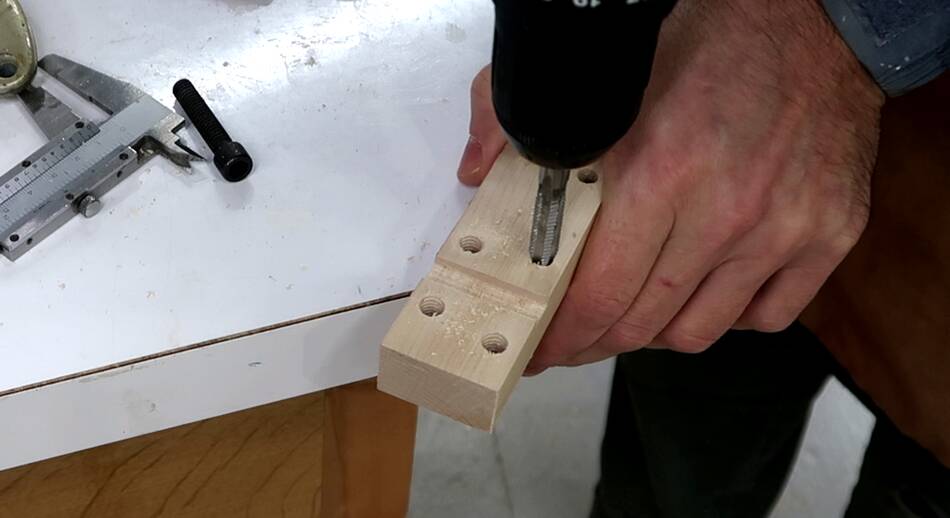
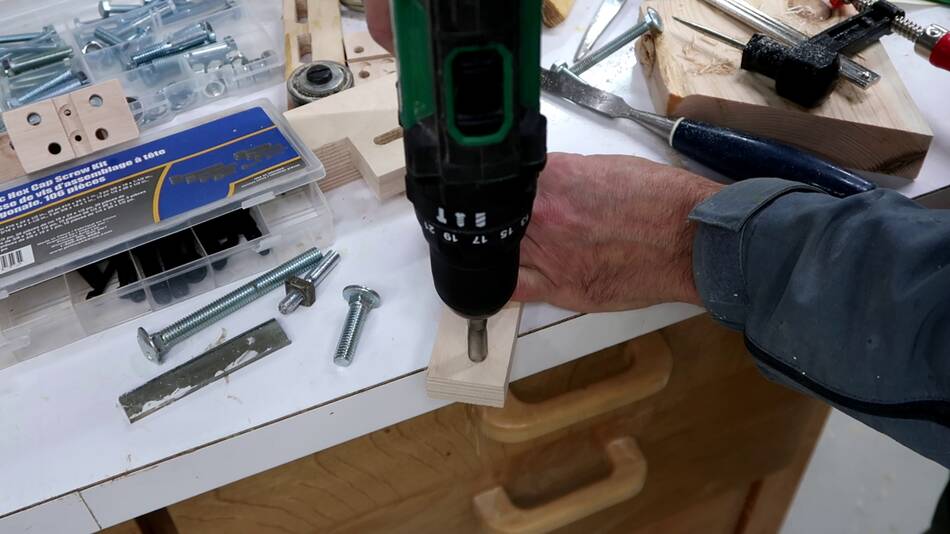
 Then using a tap in a drill to cut threads in the holes. I'm using a 5/16"
tap (roughly M8), though in my plans
I have this as 1/4" (roughly M6), but
the bolts I had were 5/16, so I'm using that size.
Then using a tap in a drill to cut threads in the holes. I'm using a 5/16"
tap (roughly M8), though in my plans
I have this as 1/4" (roughly M6), but
the bolts I had were 5/16, so I'm using that size.
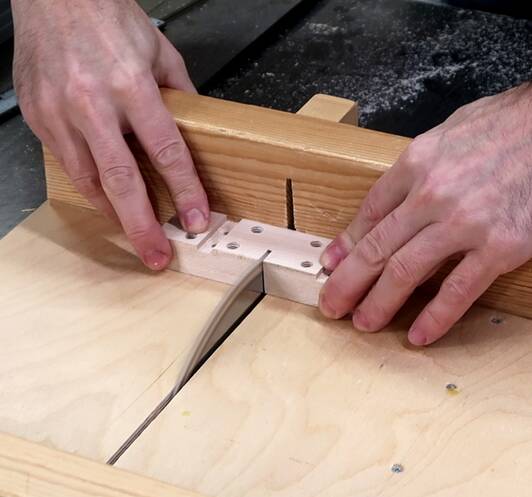
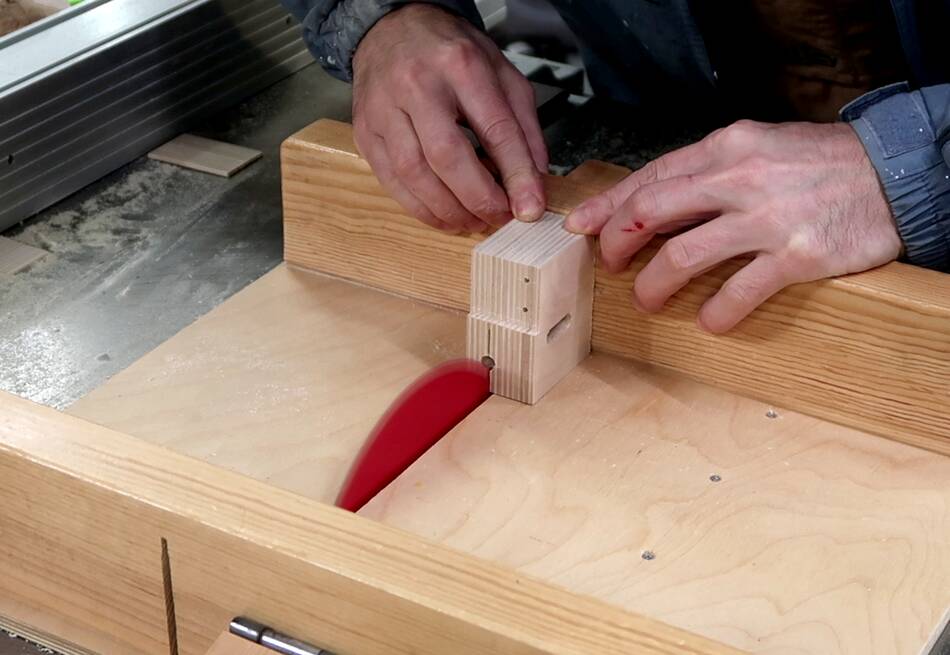
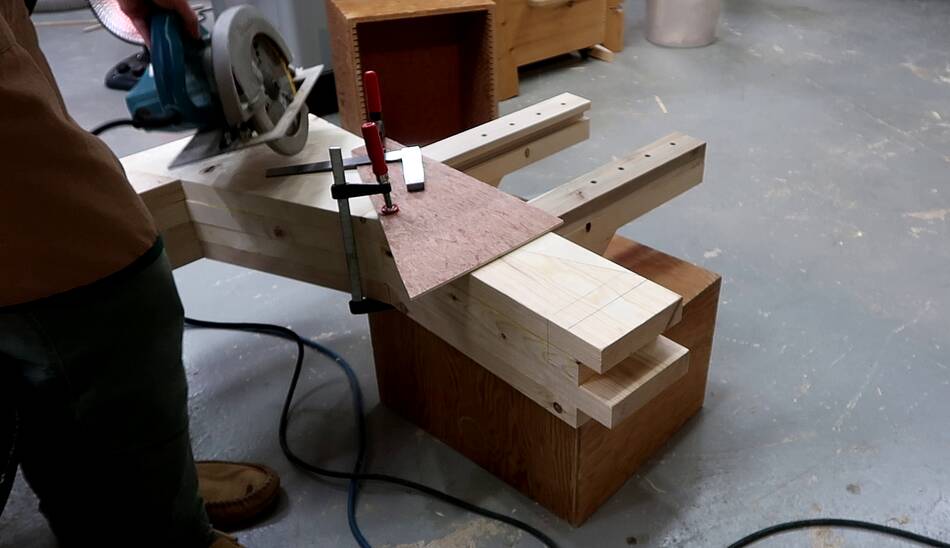
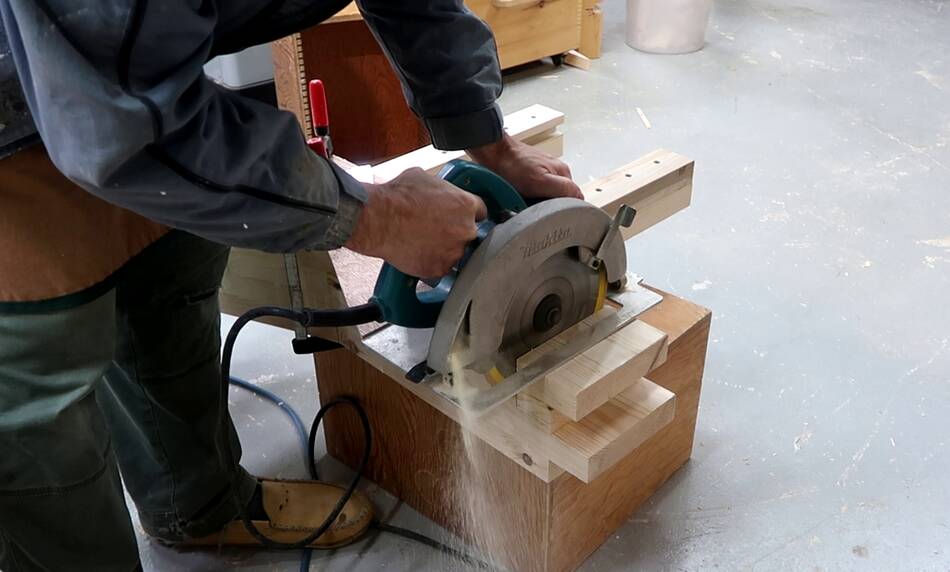
With all the holes drilled, cutting the piece apart to make two blocks.
 The main body of the upper guides is a piece of plywood 36 mm thick. I glued
two layers of 18 mm baltic birch together to get to that thickness.
The main body of the upper guides is a piece of plywood 36 mm thick. I glued
two layers of 18 mm baltic birch together to get to that thickness.
If you don't have any high quality plywood such as baltic birch, I'd recommend making this block out of solid hardwood instead.
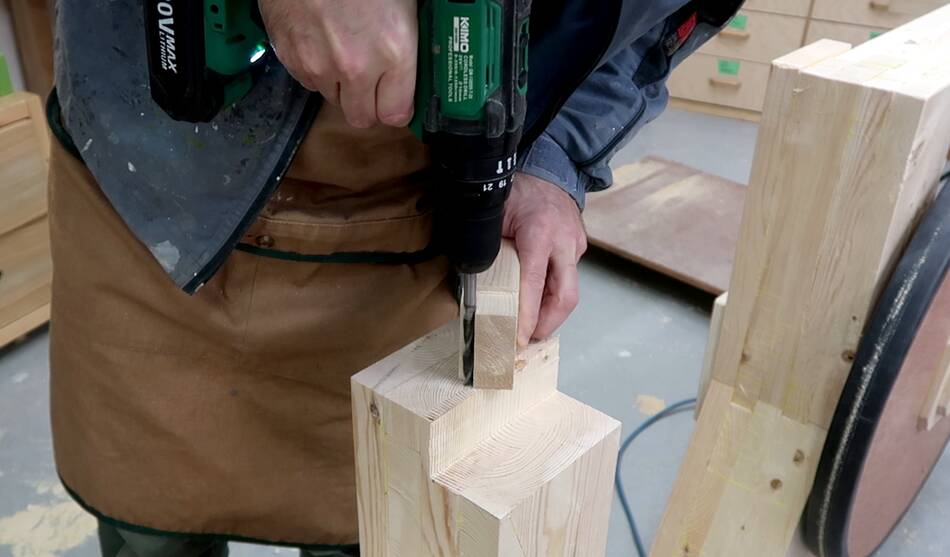
 I need a slot in the side of this block. I drilled three 5/16" holes
side-by-side, then drilled in between them to hog out more of it. Drilling
between holes is tricky even with a forstner bit and a drill press. If you
don't have either, don't try to do this and just clear the slot with a chisel.
I need a slot in the side of this block. I drilled three 5/16" holes
side-by-side, then drilled in between them to hog out more of it. Drilling
between holes is tricky even with a forstner bit and a drill press. If you
don't have either, don't try to do this and just clear the slot with a chisel.
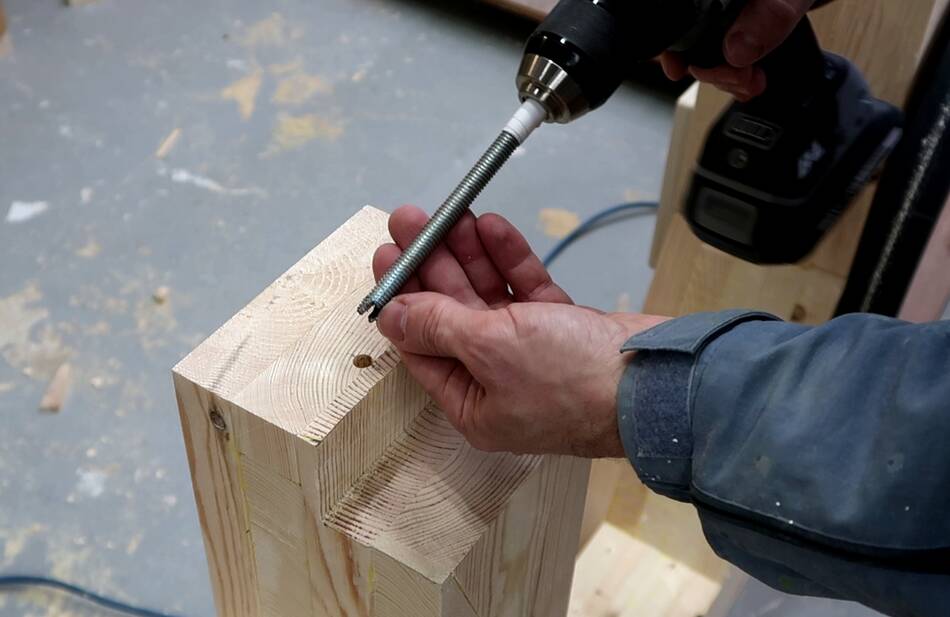
 And another hole in the front of the block, sized for tapping a 5/16" thread,
which I am tapping using a metal tap chucked into a hand drill.
And another hole in the front of the block, sized for tapping a 5/16" thread,
which I am tapping using a metal tap chucked into a hand drill.
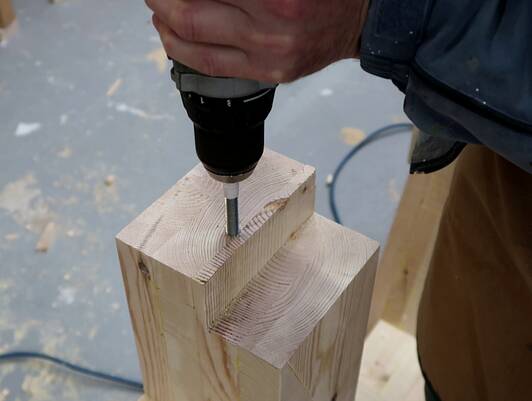
 After tapping and drilling that hole, I need to cut a slot through it. This slot
allows the block to clamp down on the bolt that goes in the hole I just
threaded when it's clamped down against the guide post.
After tapping and drilling that hole, I need to cut a slot through it. This slot
allows the block to clamp down on the bolt that goes in the hole I just
threaded when it's clamped down against the guide post.
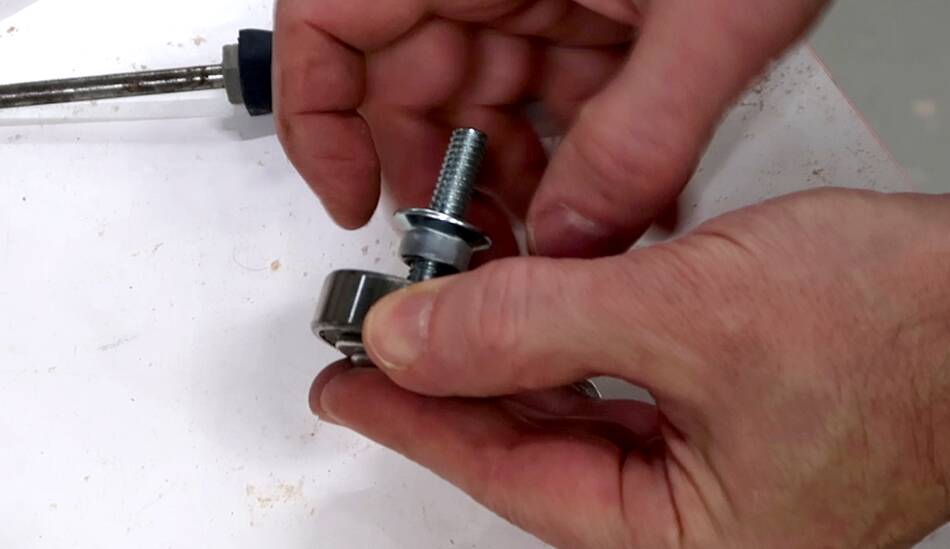
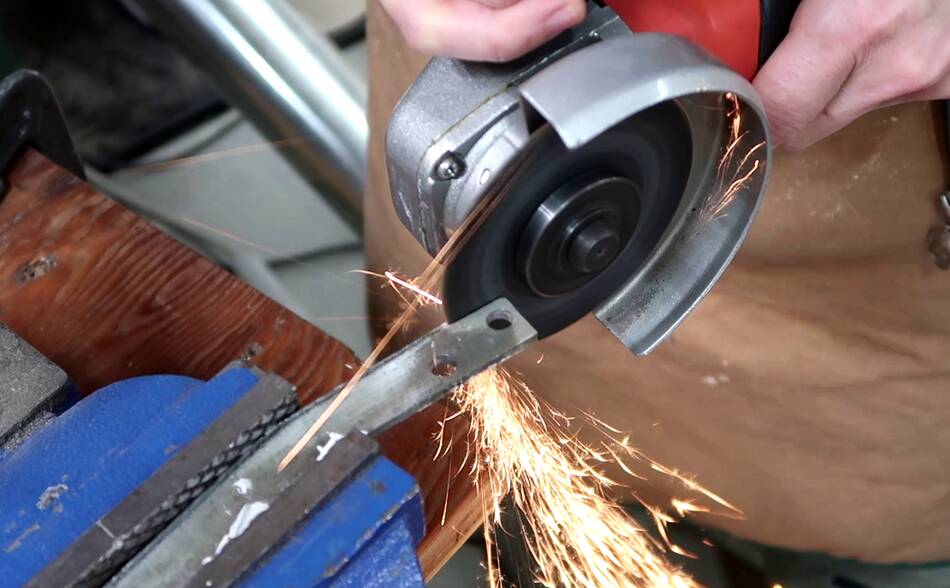
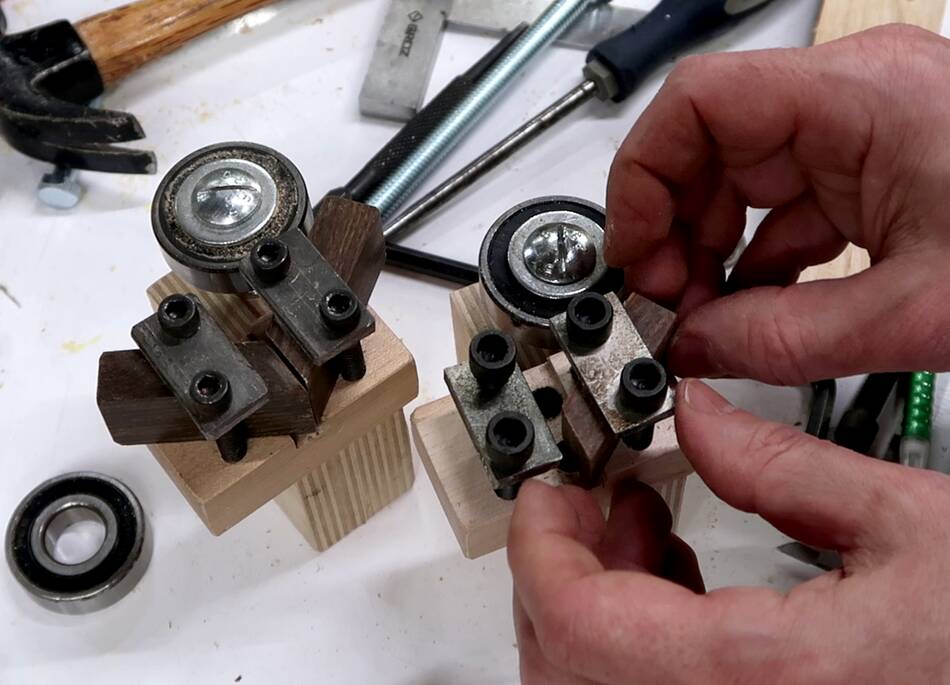
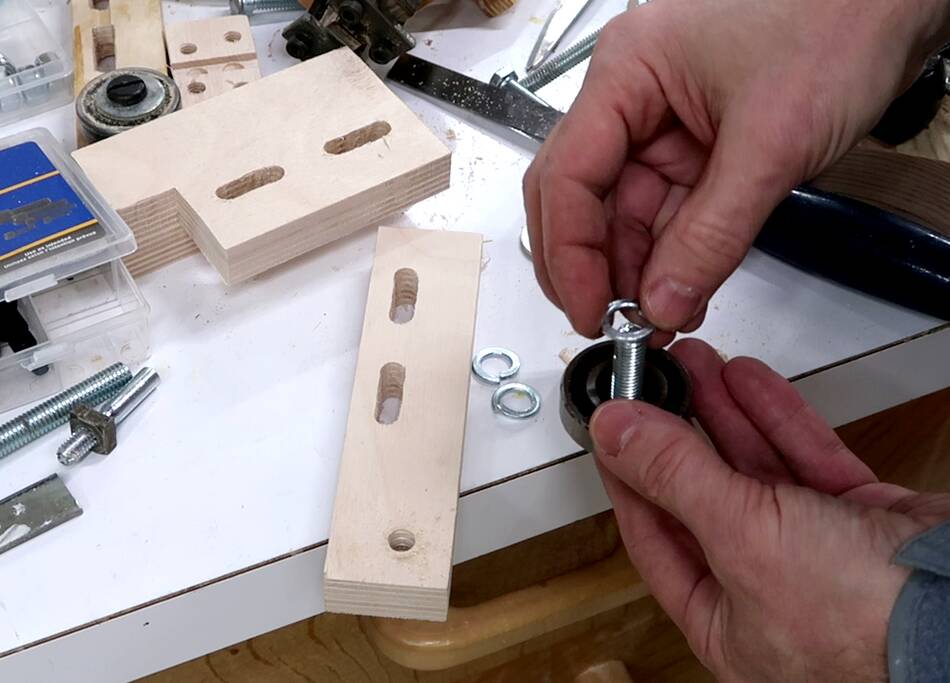
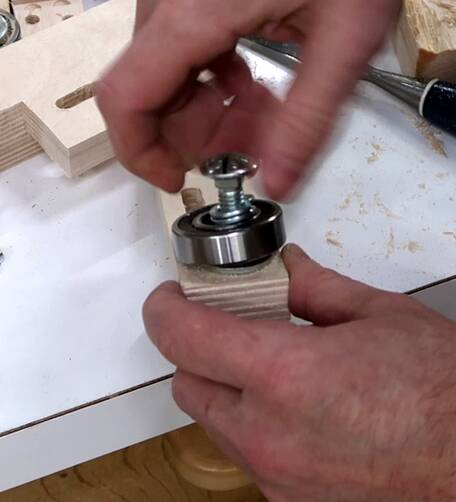
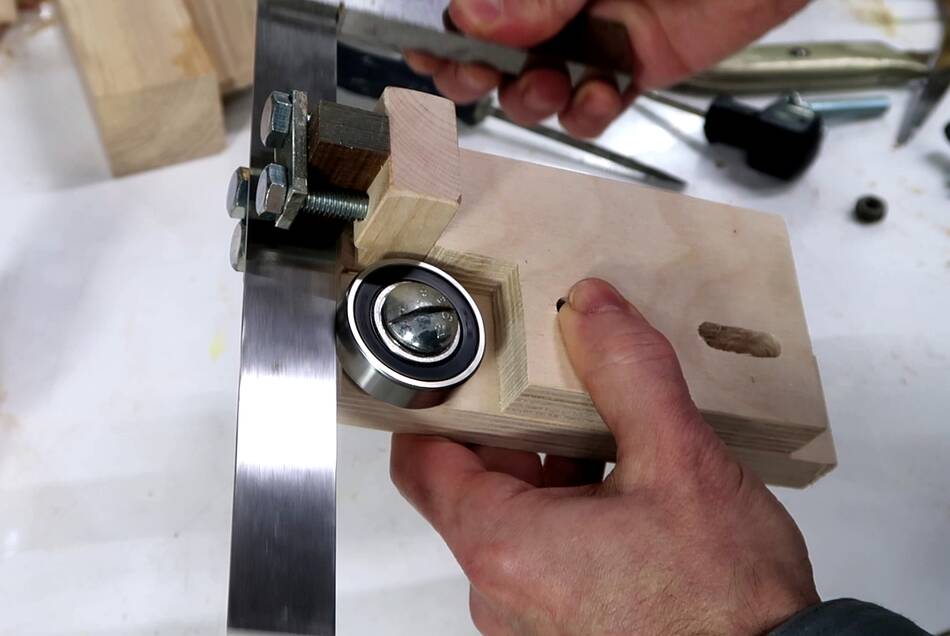
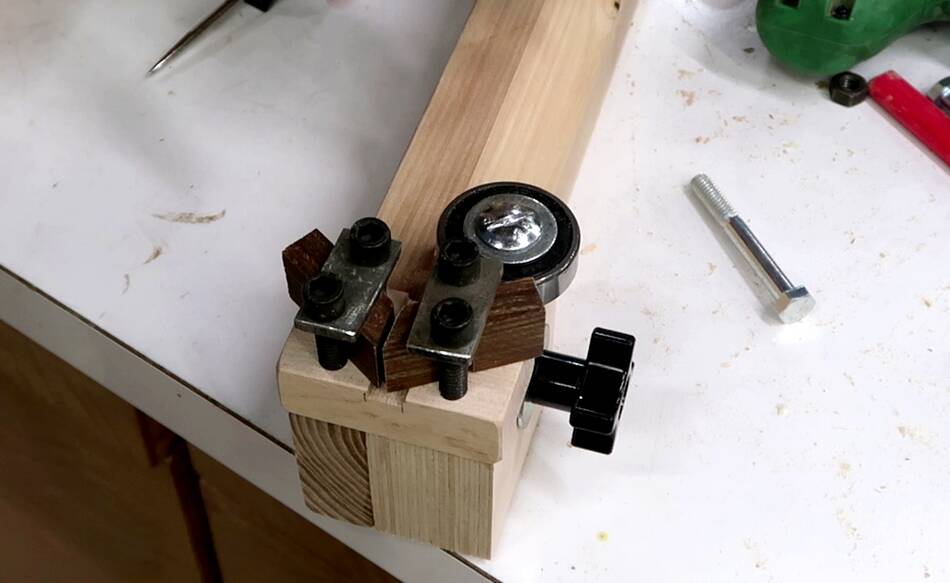
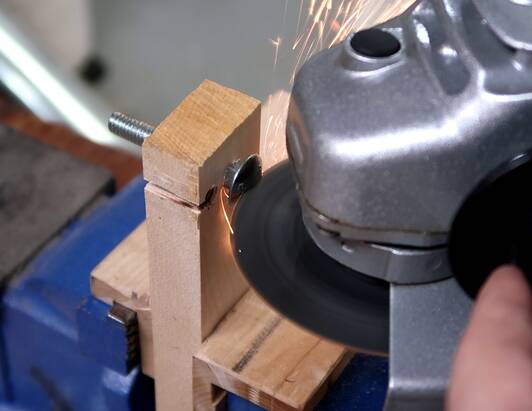 I need to mount a ball bearing on a bolt. I'm using a carriage bolt for this
because it has big flat head, but I need to be able to turn this carriage bolt
with a screw driver, so I cut a slot in its head with an angle grinder (see picture
at right)
I need to mount a ball bearing on a bolt. I'm using a carriage bolt for this
because it has big flat head, but I need to be able to turn this carriage bolt
with a screw driver, so I cut a slot in its head with an angle grinder (see picture
at right)
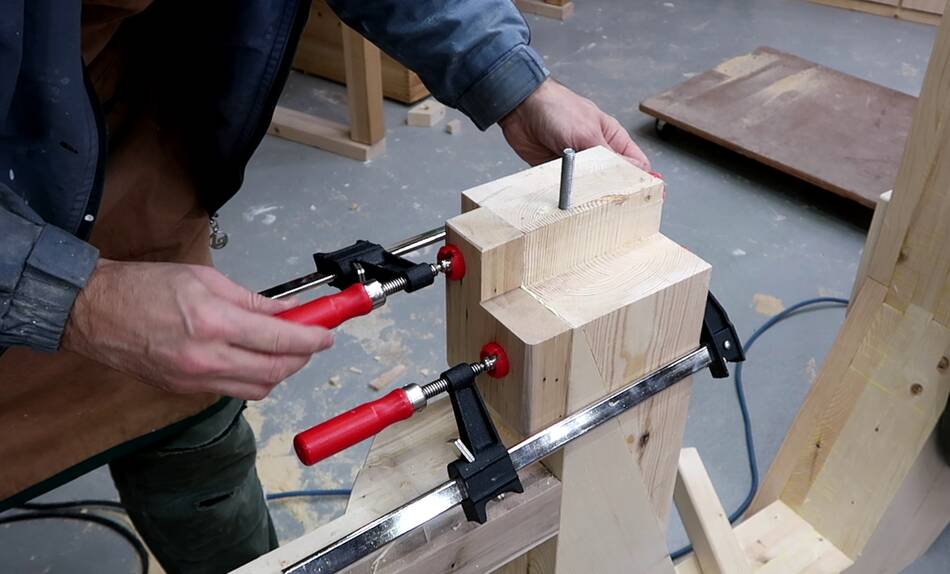
 Then screwing the block I made earlier to the main body of the upper blade guide.
 I need to make some metal plates with two holes in them to hold the
guide blocks. I have some 3 mm thick scraps of metal that I'm using for this.
I need to make some metal plates with two holes in them to hold the
guide blocks. I have some 3 mm thick scraps of metal that I'm using for this.
When drilling holes in metal, it's usually easier to drill a small pilot hole followed by the actual size hole. The center of larger metal drills don't cut very effectively, so if the center is already drilled out, much less downward pressure is needed while drilling.
 I drilled the holes for the metal plates wile they were still part of a
longer piece of metal. Then I cut the plates to their
final size with an angle grinder.
I drilled the holes for the metal plates wile they were still part of a
longer piece of metal. Then I cut the plates to their
final size with an angle grinder.
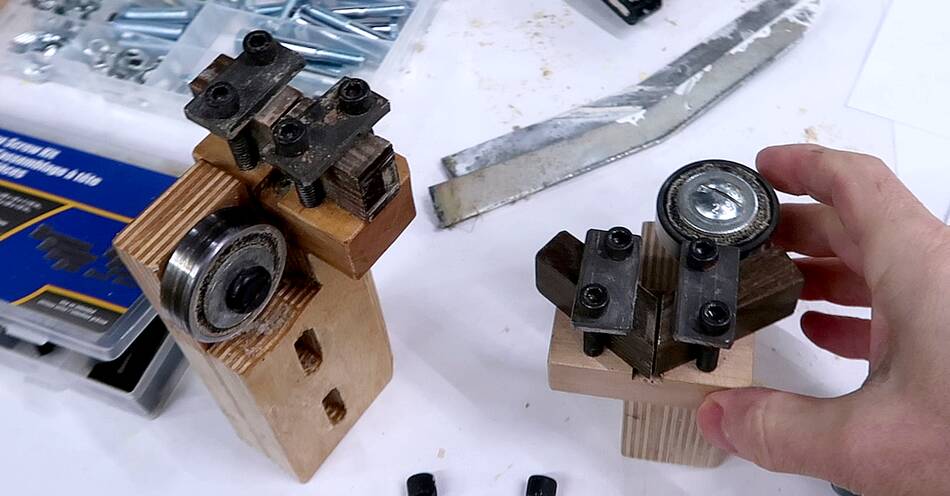
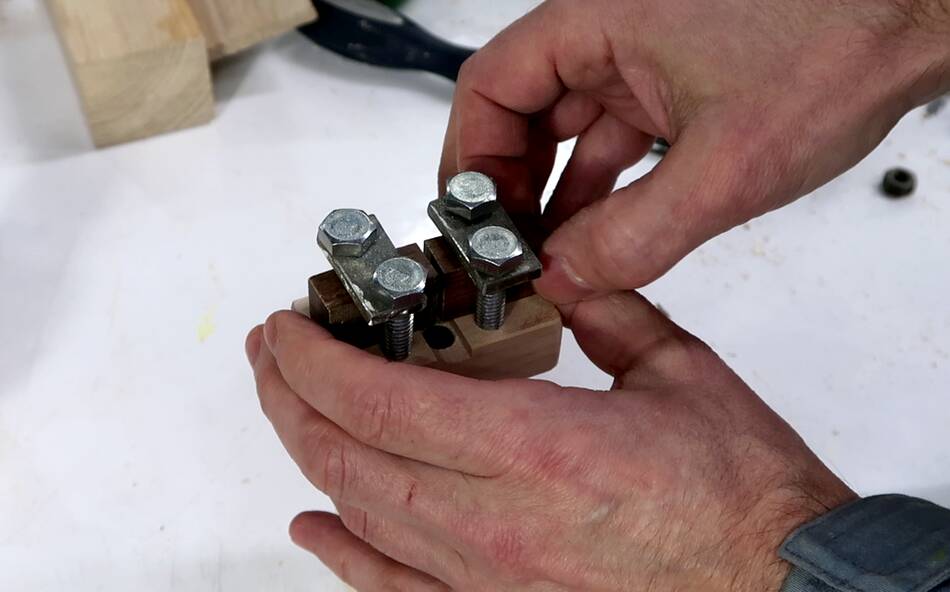
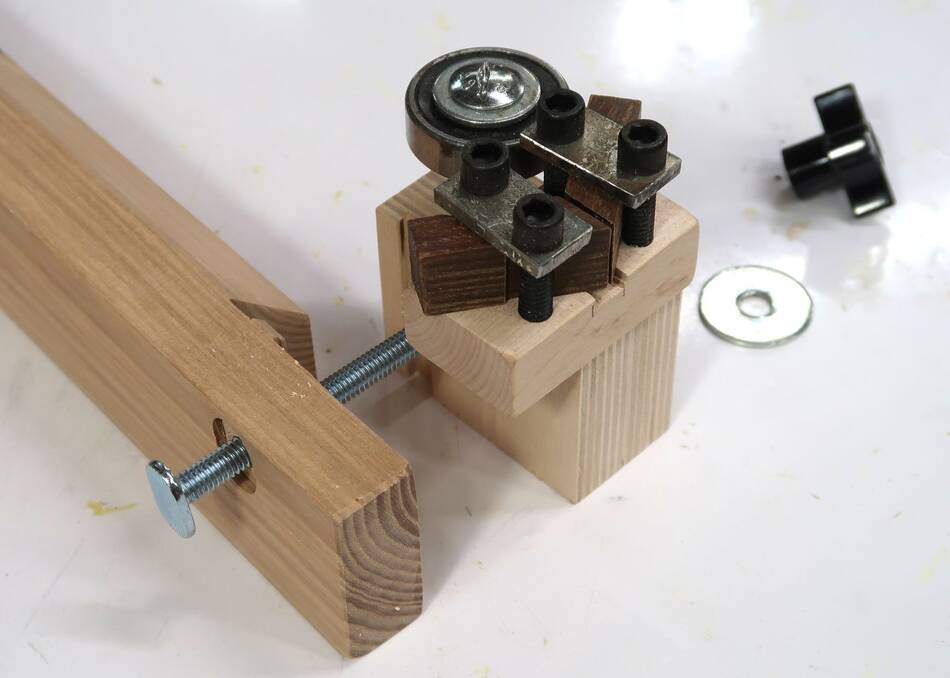
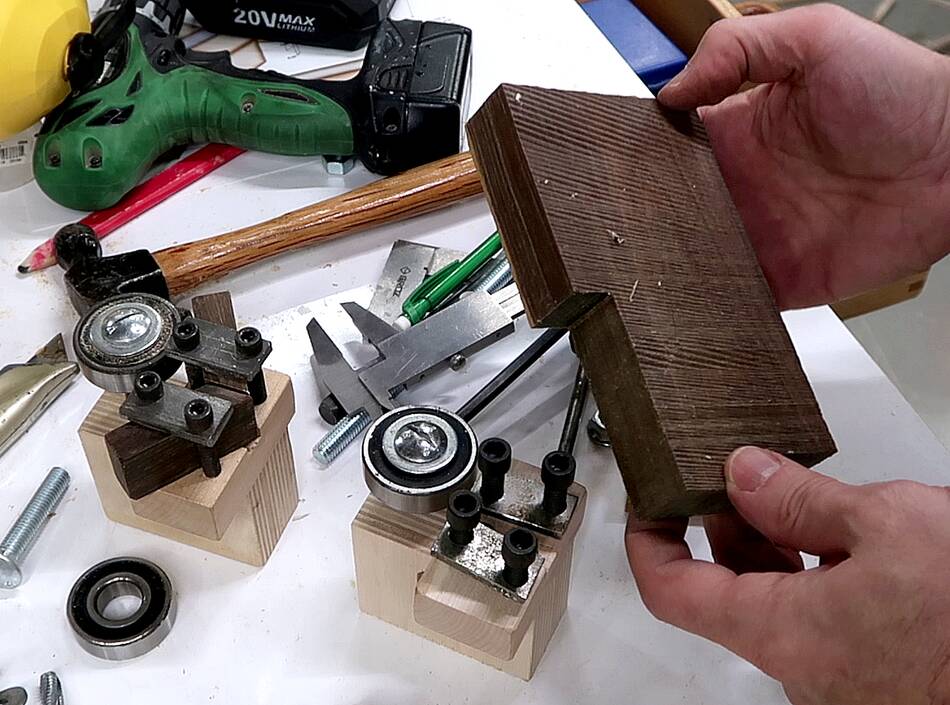 Plates mounted on the upper guide, also with the ball bearing mounted. At left
you can see the complete blade guide from my 20" bandsaw.
Plates mounted on the upper guide, also with the ball bearing mounted. At left
you can see the complete blade guide from my 20" bandsaw.
I'm making the guide blocks out of some lignum vitae, which is the hardest wood I know of. But any exotic wood would do. In fact when I built my first bandsaw 11 years ago, I just used hard maple soaked in oil. I had to sand those guide blocks flat on occasion from wear, but the guy who bought the saw from me back in 2018 reports he's still using the original guide blocks!
And once those guide blocks do wear out, it's not difficult to make new ones!
 Cutting a piece off my scrap of lignum vitae to make the guide blocks...
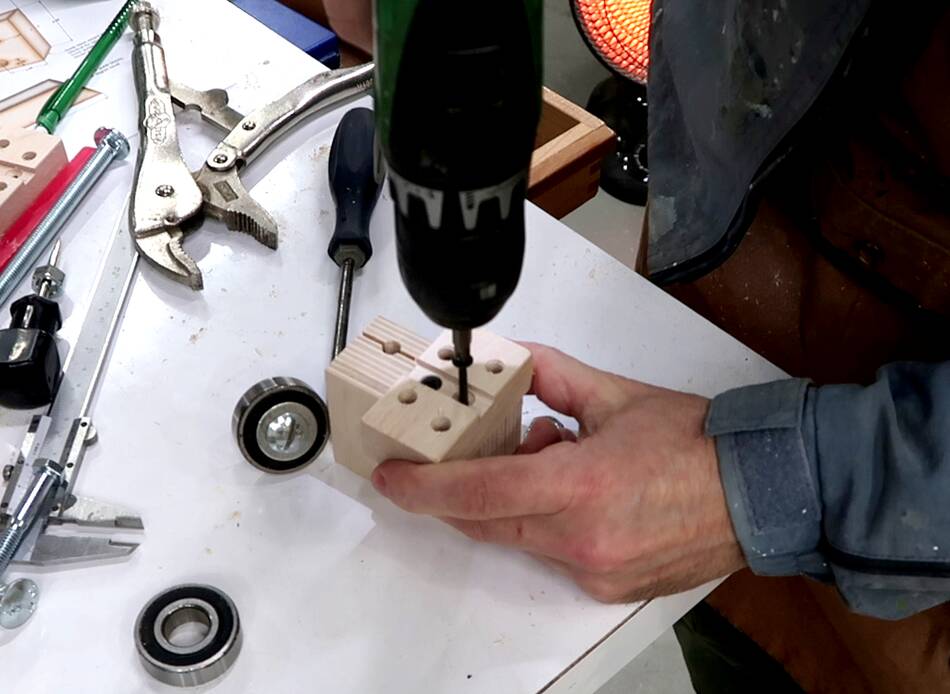
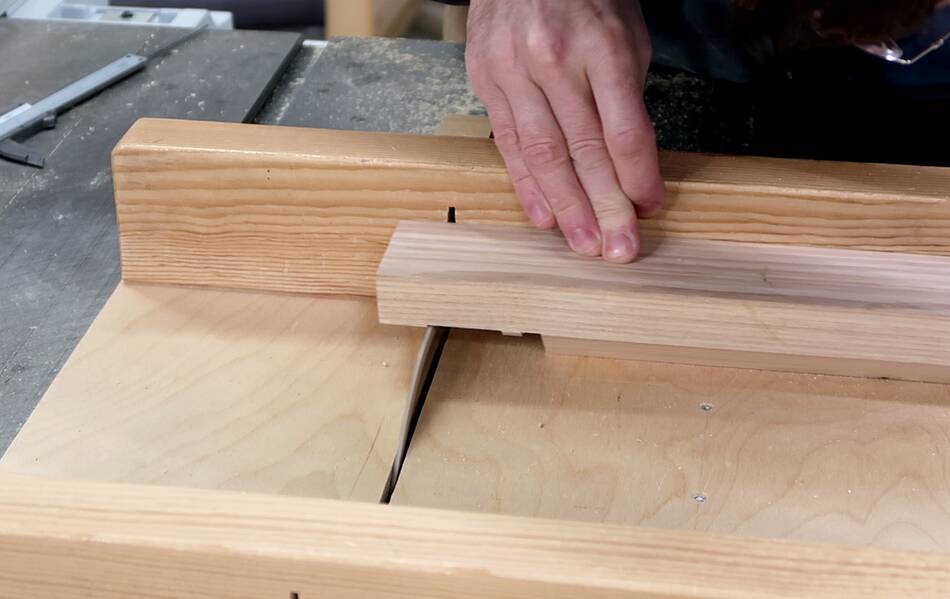
 ... and fitting the guide blocks in. I had to cut some slight notches
out of the side of these guide blocks because the slightly larger screws
I used got in the way a bit.
... and fitting the guide blocks in. I had to cut some slight notches
out of the side of these guide blocks because the slightly larger screws
I used got in the way a bit.
This completes the upper blade guide.
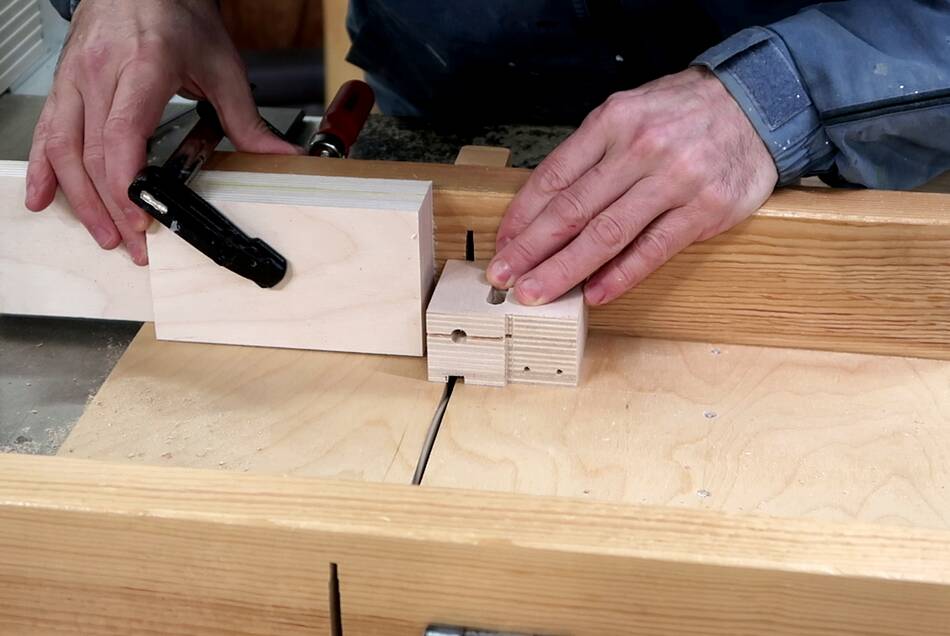
 I'm using my paper templates to mark where I need to cut slots in the
for the lower blade guide.
I'm using my paper templates to mark where I need to cut slots in the
for the lower blade guide.
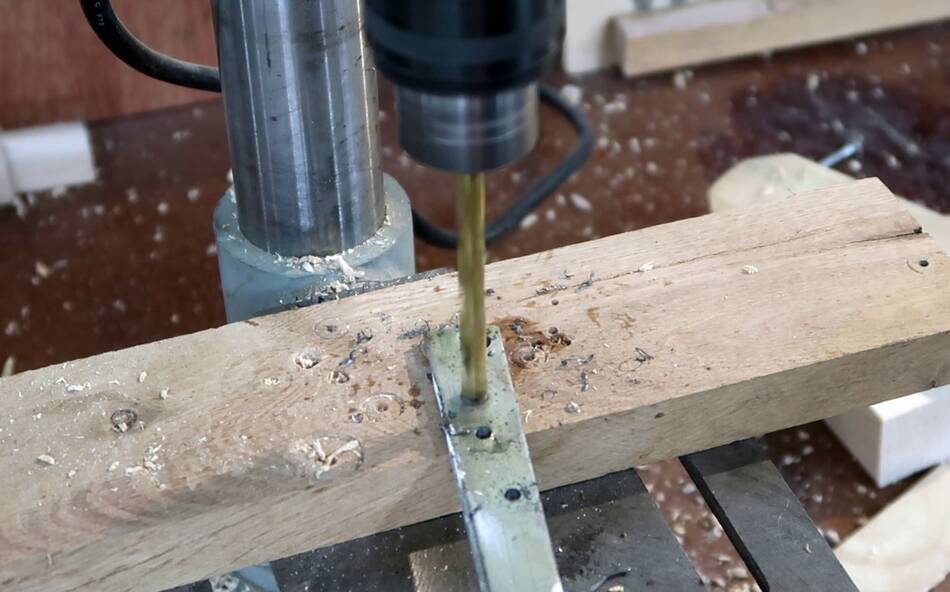
 Then using the same technique of drilling overlapping holes to make
the slots.
Then using the same technique of drilling overlapping holes to make
the slots.
My slot mortiser would do a much better job of cutting these slots, but I wanted to show that you don't need my fancy tools to make this bandsaw.
 Cutting some of the excess off using my unfinished bandsaw.
Though the table saw would work just as well for some of these cuts.
Cutting some of the excess off using my unfinished bandsaw.
Though the table saw would work just as well for some of these cuts.
 Threading a hole into a piece of baltic birch plywood for the lower
thrust bearing mount.
Threading a hole into a piece of baltic birch plywood for the lower
thrust bearing mount.
 And mounting another ball bearing on a carriage bolt for the lower
thrust bearing. I had some lock washers that fit inside the bearing
and around the bolt to help keep the bearing centered on the bolt.
Another washer behind the ball bearing offsets it slightly from
the wood so it doesn't rub against the wood as it spins.
And mounting another ball bearing on a carriage bolt for the lower
thrust bearing. I had some lock washers that fit inside the bearing
and around the bolt to help keep the bearing centered on the bolt.
Another washer behind the ball bearing offsets it slightly from
the wood so it doesn't rub against the wood as it spins.
 Mounting the lower guide blocks. The lower guide blocks aren't at an
angle like the top guide blocks are.
Mounting the lower guide blocks. The lower guide blocks aren't at an
angle like the top guide blocks are.
I would have preferred to use the same kind of allen key screws on the bottom as I used on the top, but I ran out. So I used regular hex-bolts instead.
 Showing how the blade guide will guide the blade (or in this case,
my square as a stand in)
Showing how the blade guide will guide the blade (or in this case,
my square as a stand in)
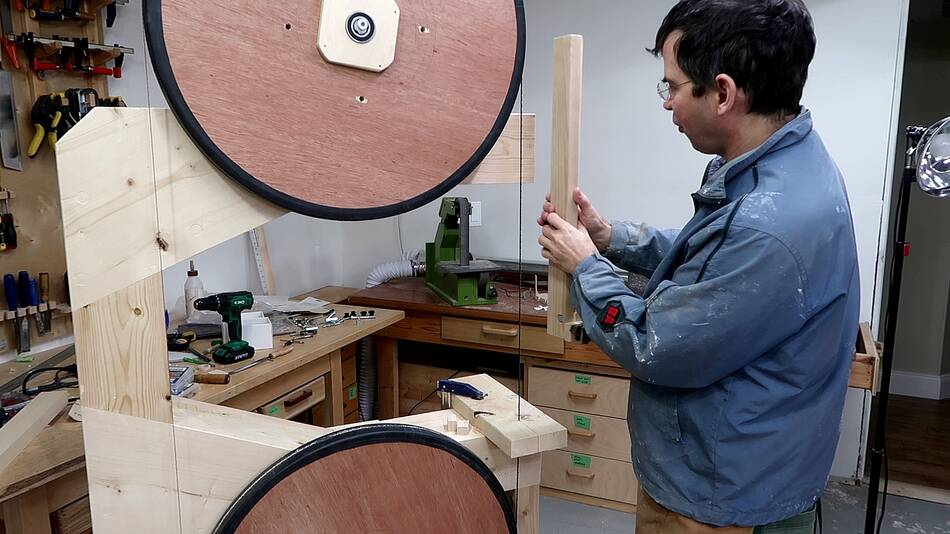
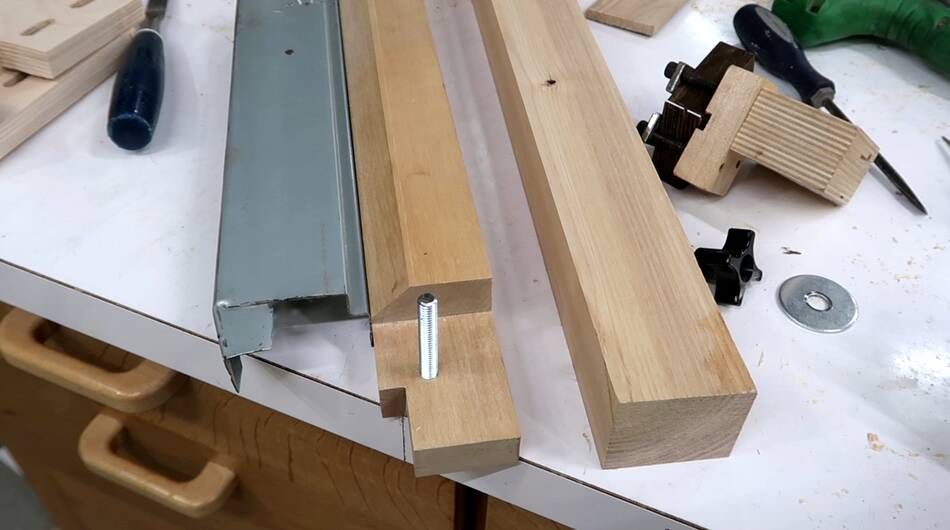 Now I need to mount the blade guides. The top blade guide mounts to a
column that can be adjusted up and down. At left, the column from my 20"
bandsaw, with the metal blade guard attached. At right, the blank for
the guide column on my new bandsaw.
Now I need to mount the blade guides. The top blade guide mounts to a
column that can be adjusted up and down. At left, the column from my 20"
bandsaw, with the metal blade guard attached. At right, the blank for
the guide column on my new bandsaw.
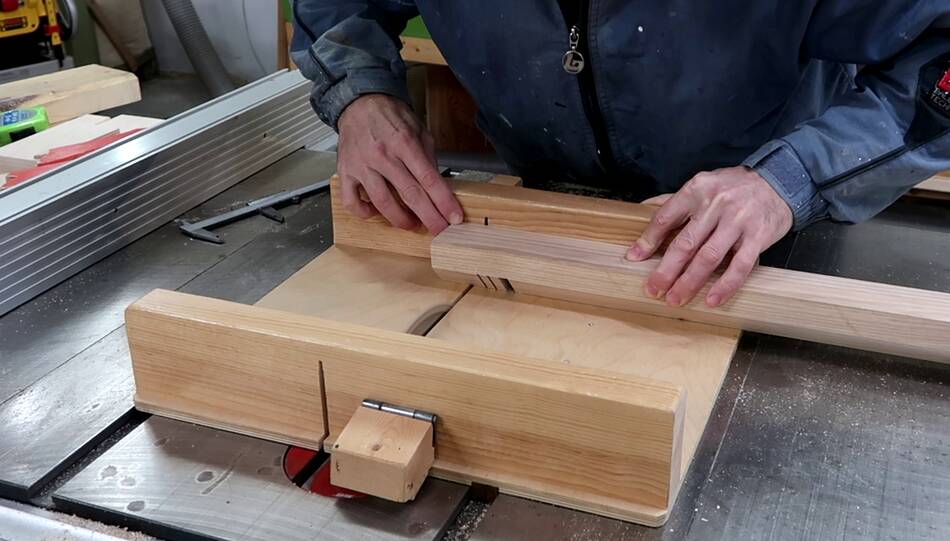
 Cutting away a 45'degree bevel from this column. I have to do this on
the left side of the fence because my table saw is a right-tilting saw.
Cutting away a 45'degree bevel from this column. I have to do this on
the left side of the fence because my table saw is a right-tilting saw.
 Then cutting away a notch on the bottom, first by making a series of cuts,
then cutting away most of the material on one of my bandsaws.
Then cutting away a notch on the bottom, first by making a series of cuts,
then cutting away most of the material on one of my bandsaws.
 Then sliding the workpiece side-to-side to flatten out the bottom of the
notch.
Then sliding the workpiece side-to-side to flatten out the bottom of the
notch.
You can also see towards the right of the notch that I left a bit of extra material, a bit of a ridge, so to say.
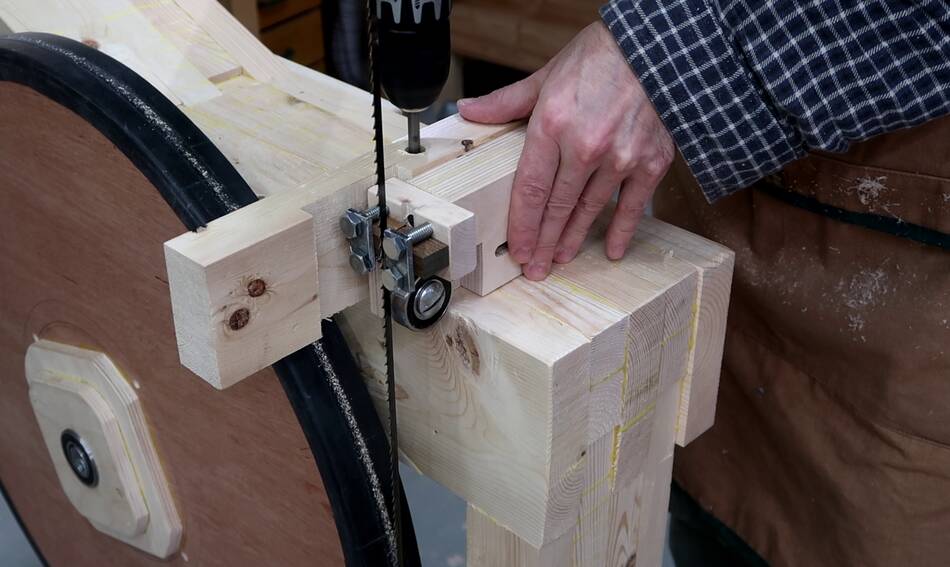
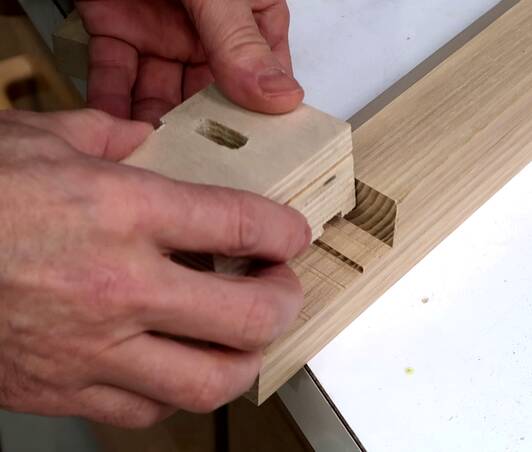 I cut a corresponding slot into the body of the upper blade guide. I had to
take that upper blade guide apart again to make this cut.
I cut a corresponding slot into the body of the upper blade guide. I had to
take that upper blade guide apart again to make this cut.
With the notch fitting around the tab, this prevents the front of the block from dropping down, especially when the blade guides are moved forward a bit.
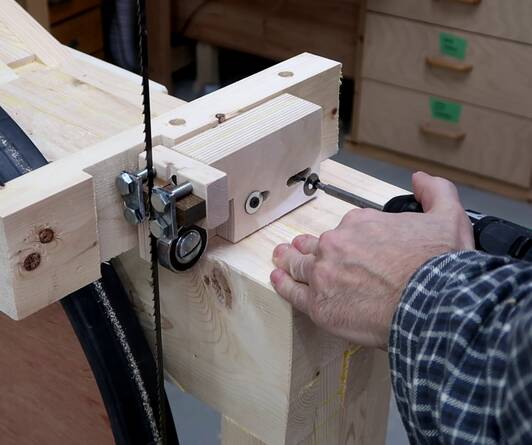
 The guide body is attached to the guide column with a bolt through both.
I'm using a "jig bolt" here because I have lots of those, though a hex bolt
or carriage bolt would work as well, as long as you cut the right shape
of cavity to recess the head.
The guide body is attached to the guide column with a bolt through both.
I'm using a "jig bolt" here because I have lots of those, though a hex bolt
or carriage bolt would work as well, as long as you cut the right shape
of cavity to recess the head.
 Blade guide mounted on guide column.
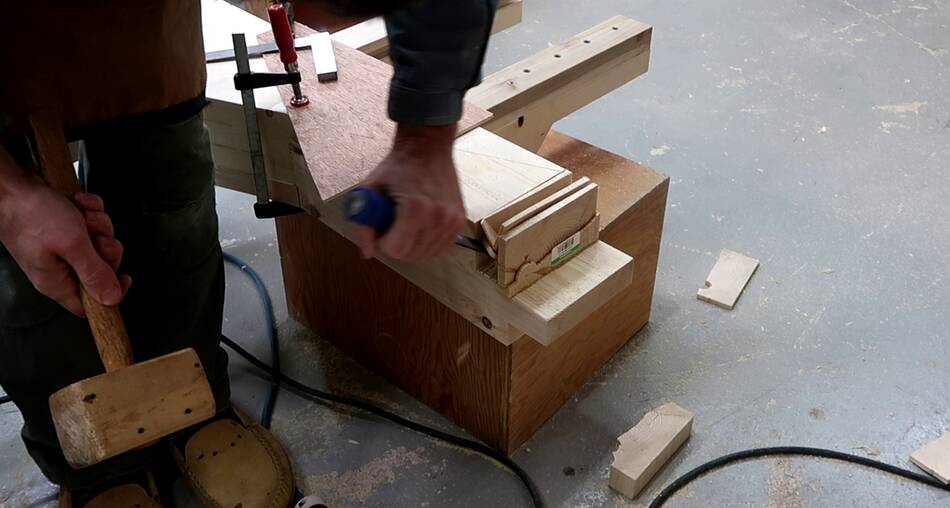
 I need to cut a notch out of the frame for that guide column to fit into,
so the next step is to work out exactly where that notch needs to be.
I need to cut a notch out of the frame for that guide column to fit into,
so the next step is to work out exactly where that notch needs to be.
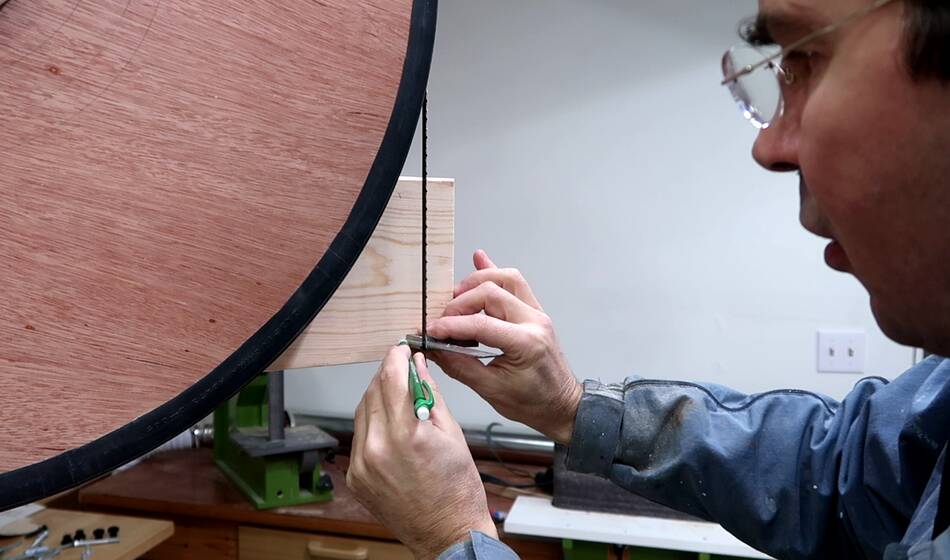
 I use a square to project the position of the bandsaw blade back onto
the frame.
I use a square to project the position of the bandsaw blade back onto
the frame.
I also measure how far from the frame to the center ridge (crown) of the wheels. The blade is usually tracking right on top of that ridge or crown.
 Then marking how far to the left of the blade the guide column needs to
be so that the guide ends up centered on the blade.
Then marking how far to the left of the blade the guide column needs to
be so that the guide ends up centered on the blade.
I also measured how deep I need to cut the notch. With the blade guides blocks adjusted all the way back, the front edge of the blade guides should be as far forward of the frame as the center ridge of the wheels.
 I clamped a scrap of plywood to the frame to act as a fence for
my circular saw.
I clamped a scrap of plywood to the frame to act as a fence for
my circular saw.
 I checked all my measurements before making this cut. Then a series of
cuts next to that to hog out the material for the notch.
I checked all my measurements before making this cut. Then a series of
cuts next to that to hog out the material for the notch.
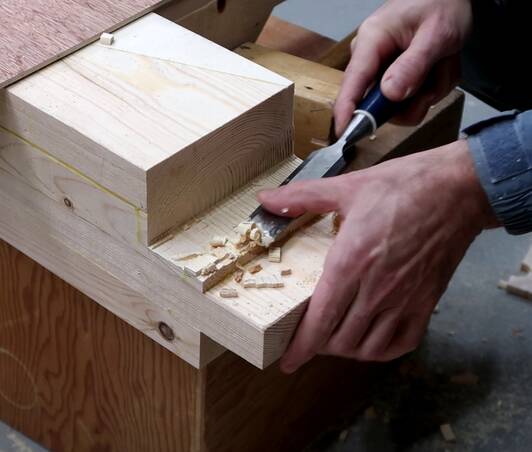 Then chiselling out the rest of that notch.
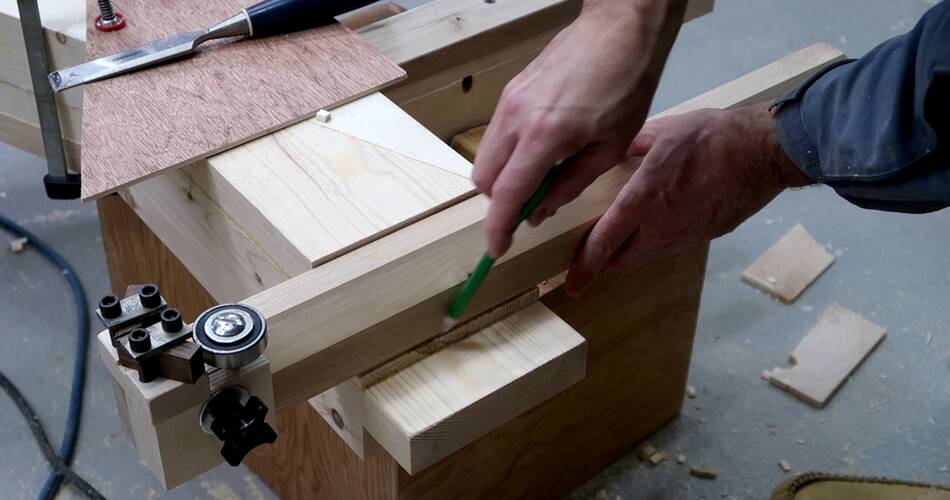 With the guide column placed in the notch, I mark where to cut off the rest
of the frame.
With the guide column placed in the notch, I mark where to cut off the rest
of the frame.
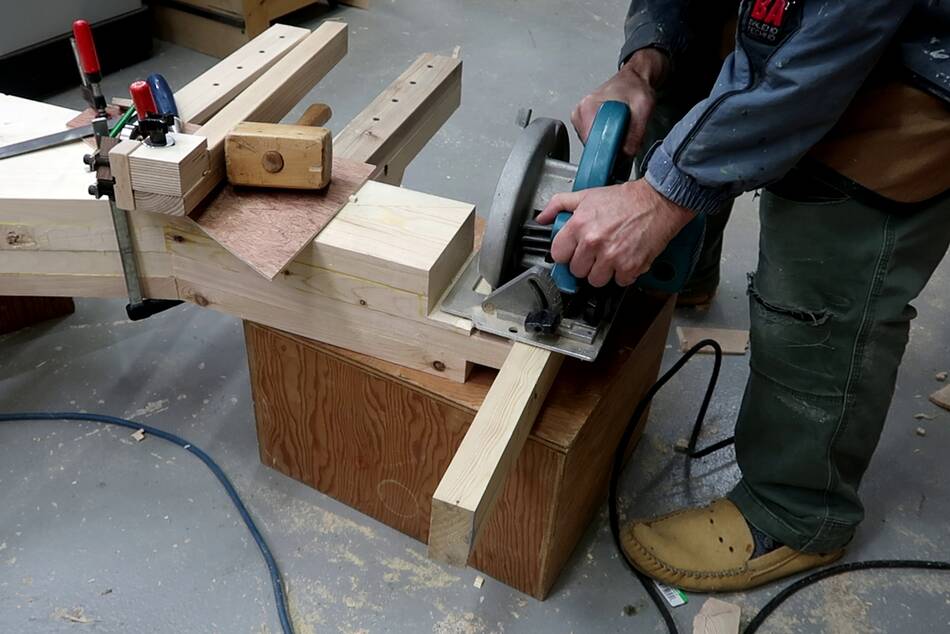 And cut that off with a circular saw. Note the extra piece of wood
supporting the circular saw to help keep it level.
And cut that off with a circular saw. Note the extra piece of wood
supporting the circular saw to help keep it level.
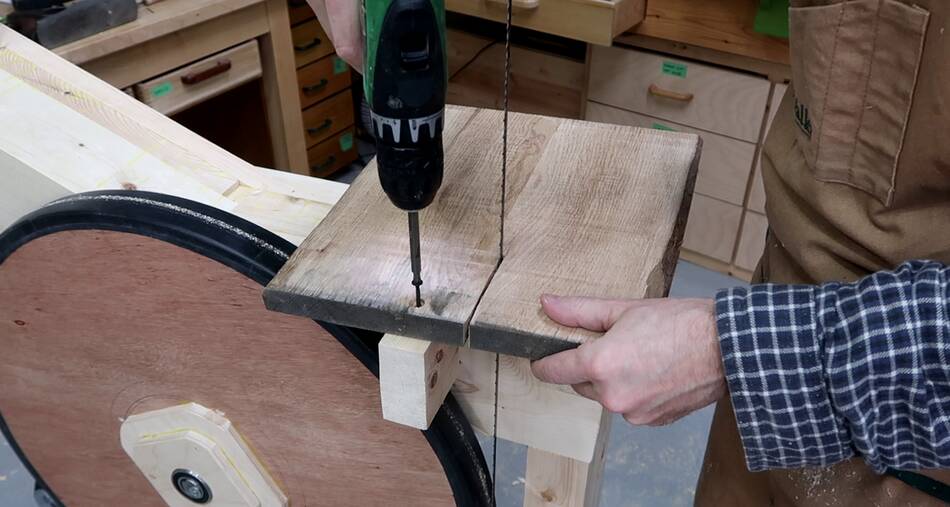
 Then with the bandsaw frame on it's side, I need to drill a hole next to the
notch for a piece of threaded rod to go into.
Then with the bandsaw frame on it's side, I need to drill a hole next to the
notch for a piece of threaded rod to go into.
 When I built my 20" bandsaw I glued the piece of threaded rod into the
frame with construction adhesive. But once one of these tubes of
glue is started, the rest goes bad soon after.
So this time I just screwed the threaded rod into an undersized hole.
When I built my 20" bandsaw I glued the piece of threaded rod into the
frame with construction adhesive. But once one of these tubes of
glue is started, the rest goes bad soon after.
So this time I just screwed the threaded rod into an undersized hole.
I cut a big notch in the front of the threaded rod to act as a sort-of thread cutter, then just screwed the rod into the hole with my drill.
If for some reason this won't hold, I can always glue it back in with construction adhesive later.
 I added a block of hardwood to the top-side of the notch to give the blade
guide column a bit more bearing surface, which should make it clamp
more rigidly.
I added a block of hardwood to the top-side of the notch to give the blade
guide column a bit more bearing surface, which should make it clamp
more rigidly.
 The part that clamps the guide block in place has a 45° piece on one edge.
Last time I found it tricky to glue this bevelled piece on, so this time I glued on a square piece and cut the bevel with the table saw afterwards, though making this cut is not the safest thing to do.
If your table saw is a left tilt saw (as most are), you will have to make this cut on the right side of the fence.
 Another piece of wood with a rectangular notch in it goes against the back
edge to keep the block from sliding forward. That way, when the block is
tightened down with a knob on the threaded rod, it pushes the guide post
diagonally into the notch in the frame, making contact on the side and on
the back.
Another piece of wood with a rectangular notch in it goes against the back
edge to keep the block from sliding forward. That way, when the block is
tightened down with a knob on the threaded rod, it pushes the guide post
diagonally into the notch in the frame, making contact on the side and on
the back.
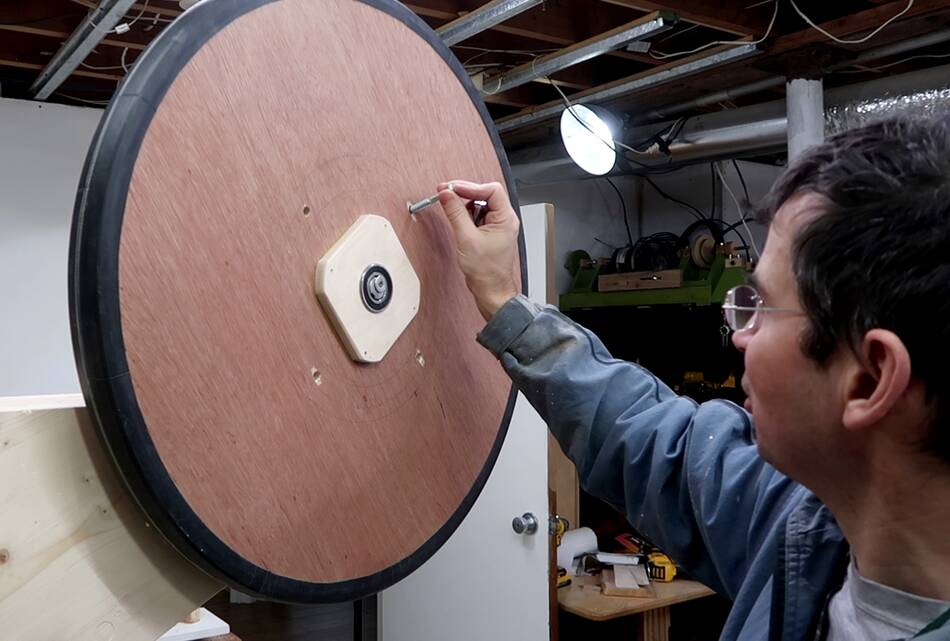 Getting ready to try out the saw. I still haven't balanced the wheels, but
I placed some bolts into the holes on the top wheel to balance that
out to some extent.
Getting ready to try out the saw. I still haven't balanced the wheels, but
I placed some bolts into the holes on the top wheel to balance that
out to some extent.
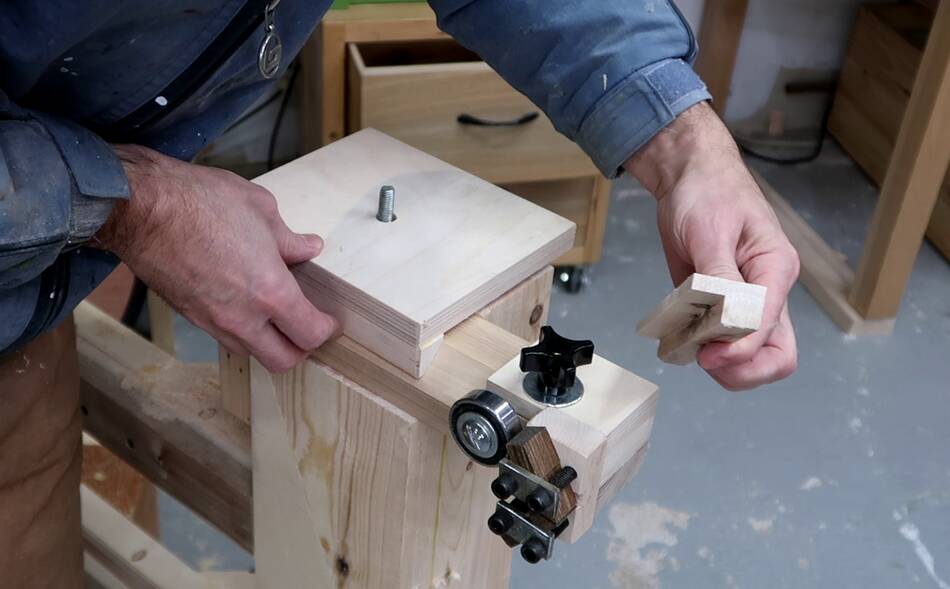
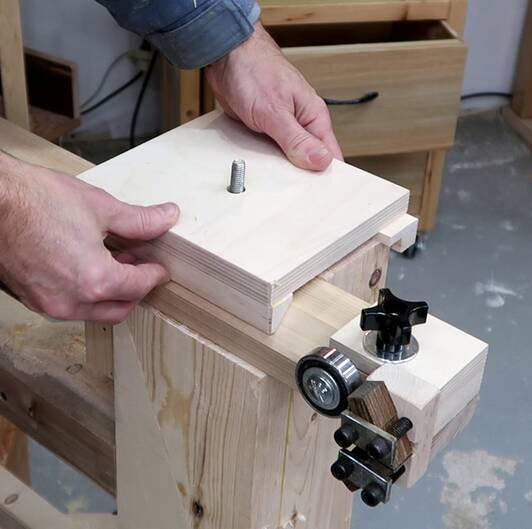
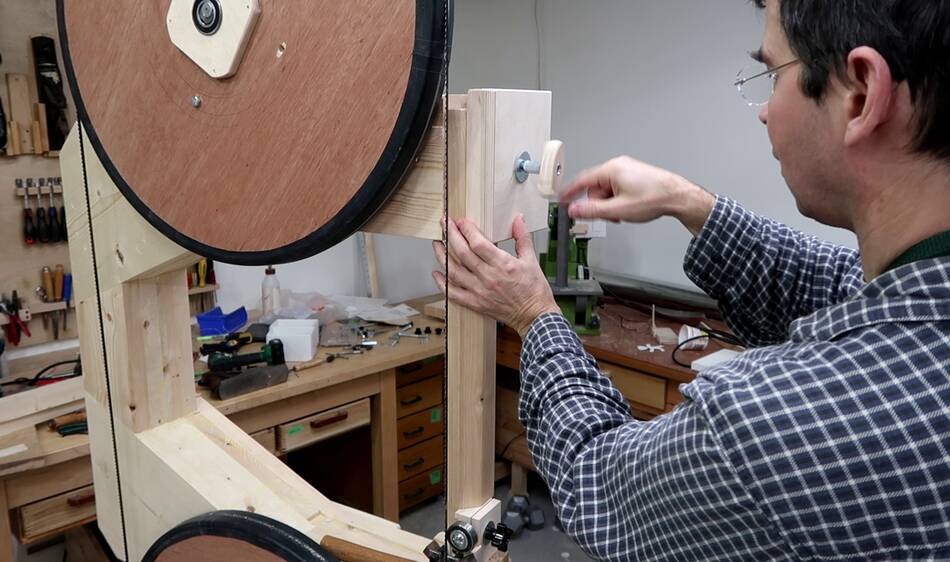 Then clamping on the upper guide post. I made a threaded knob out of
a long coupler nut pressed into a hole in a piece of plywood.
Then clamping on the upper guide post. I made a threaded knob out of
a long coupler nut pressed into a hole in a piece of plywood.
 I'm screwing a piece of 2x4 to the frame to mount the lower blade guides
to for now.
I'm screwing a piece of 2x4 to the frame to mount the lower blade guides
to for now.
The lower blade guides will mount to the trunnion support beam, which I haven't made yet.
 Then another scrap of wood to act as a temporary table.
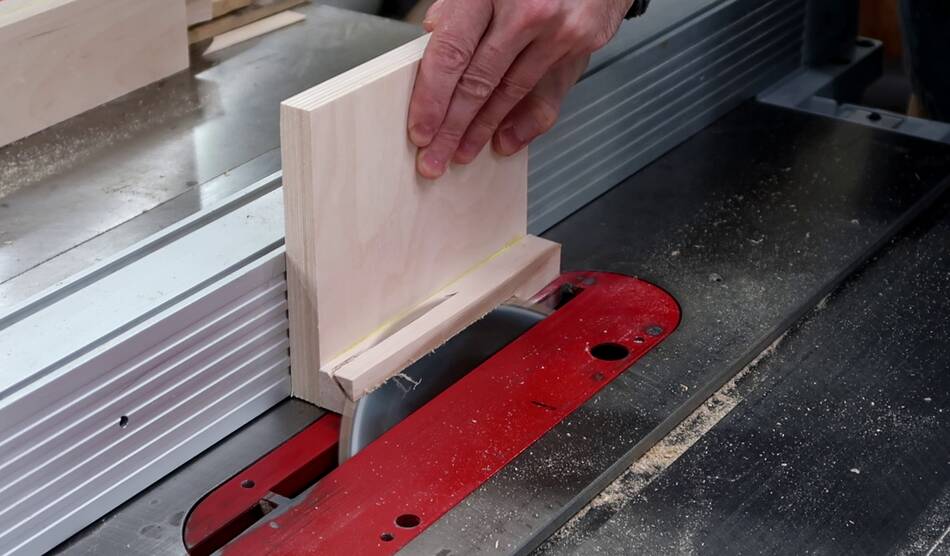
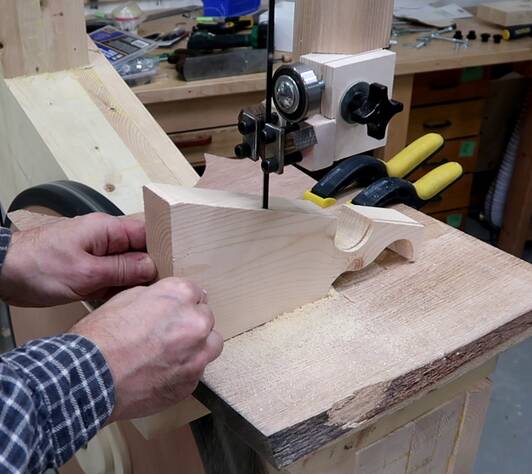 And trying it out, cutting some pieces of wood.
Also trying a bit of resawing, but with just a 1/4" blade. I have a wider blade, but without any guards on the saw, I prefer to stick with the thinner lighter blade, just in case it might come off.
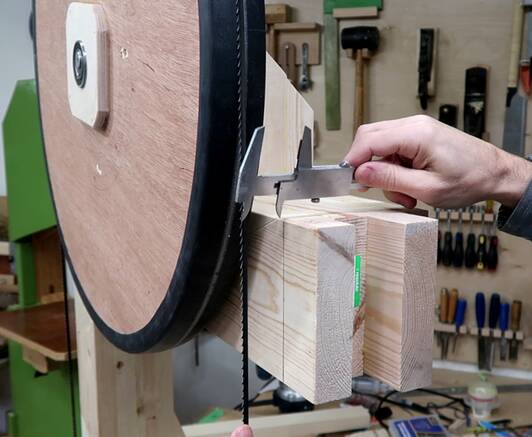
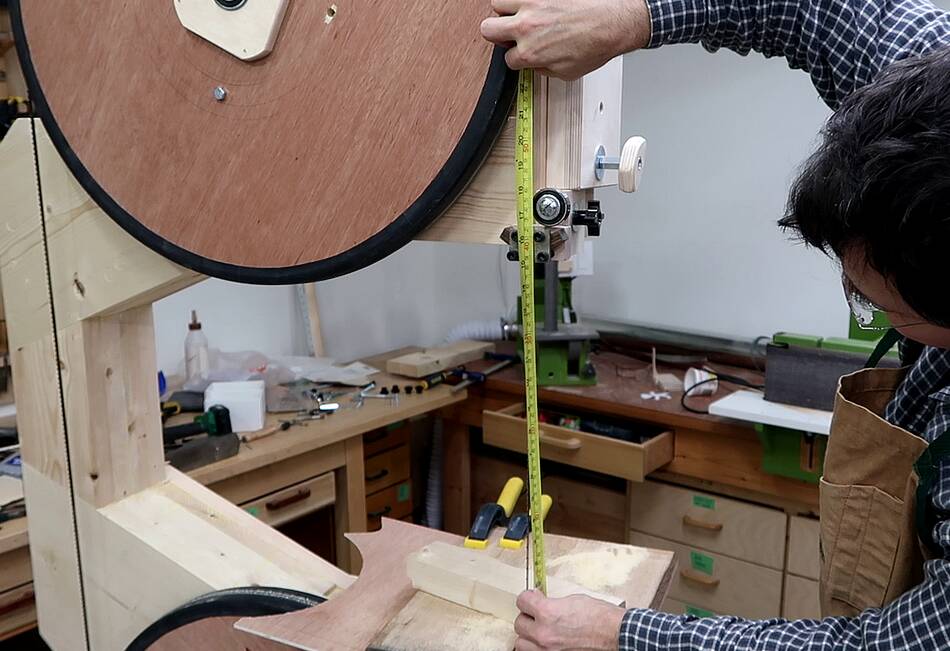 And finally, checking resaw height. The final table will be thicker and higher,
so I measured from a piece of 2x4 lumber on my table to the blade guide in
it's highest position. I have 38 cm, or 15 inches. So the final maximum
resaw height should come close to that.
And finally, checking resaw height. The final table will be thicker and higher,
so I measured from a piece of 2x4 lumber on my table to the blade guide in
it's highest position. I have 38 cm, or 15 inches. So the final maximum
resaw height should come close to that.
Next: Trunnions for the table
 Trunnions for the table
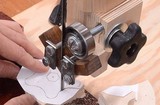 Last time making blade guides for my 20" bandsaw
 Making the bandsaw wheels
 Making the wheel mounts for this bandsaw
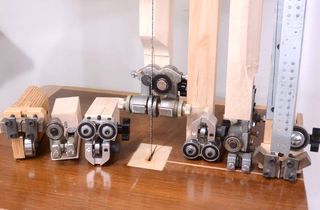 Comparing bandsaw blade guides