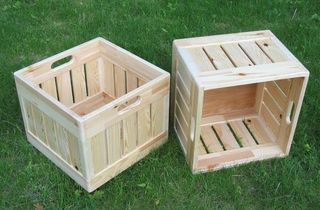
Back in 2009 I built these milk crate inspired boxes,
partly to show off my box joint jig, slot mortiser and tenon jig.
But I have gotten much better at making videos since then, so when
I wanted to build some similar boxes 11 years later, I documented the process again.
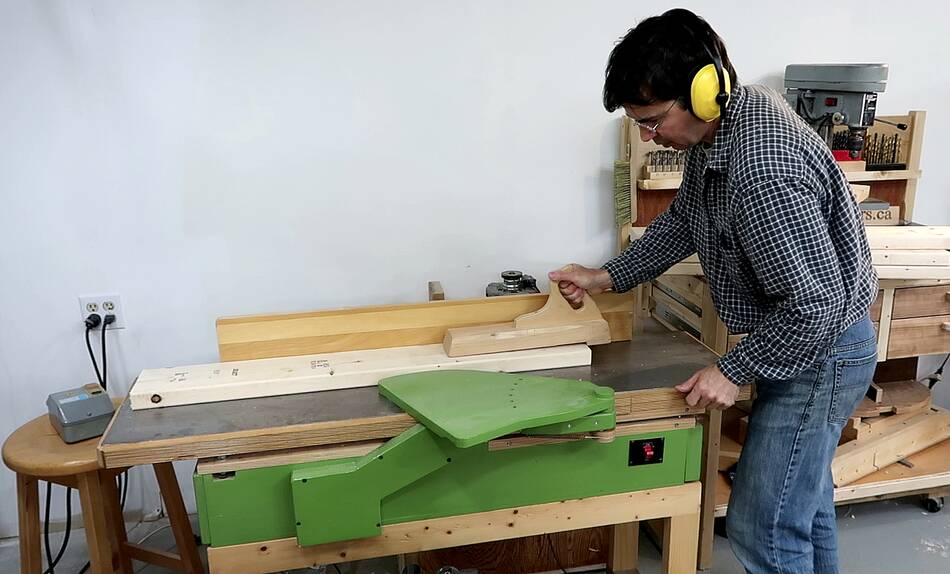
I started with some 2x6 lumber, because that's what I had on hand and didn't want
to go shopping. The first step was to cut it to shorter length and straighten it on
my homemade jointer.
Then cutting it down to thickness on the table saw. I did this in three passes
for some of the pieces because it's best to feed the material through
relatively fast, but with only a 1.75 hp motor in the saw, I can't cut at full
depth and feed fast at the same time.
I cut off most of the thickness I didn't need instead of planing it down
because I wanted to use the offcuts for the slats in the boxes.
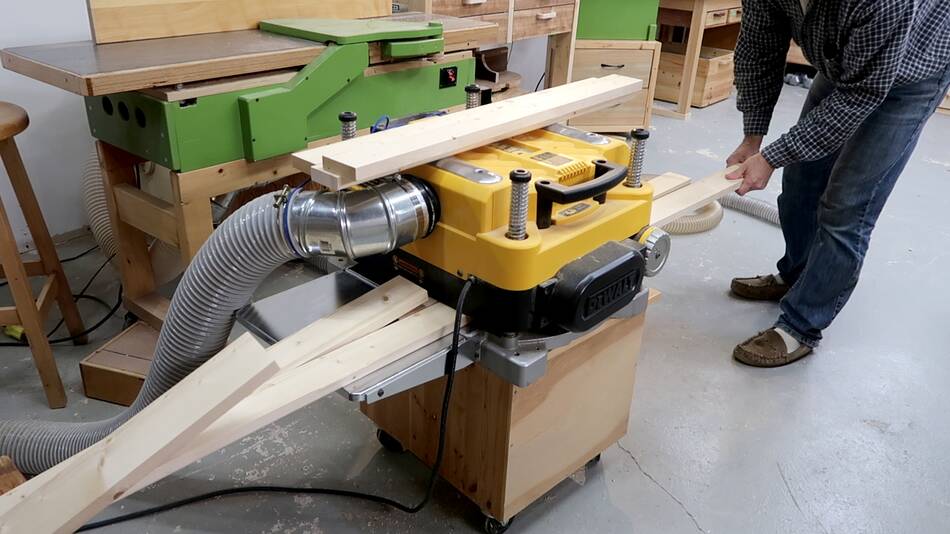
Then planing the pieces to final thickness. I'm feeding the pieces in back to back
to avoid planer snipe at the start and end of the pieces, except for the first and
last pieces.
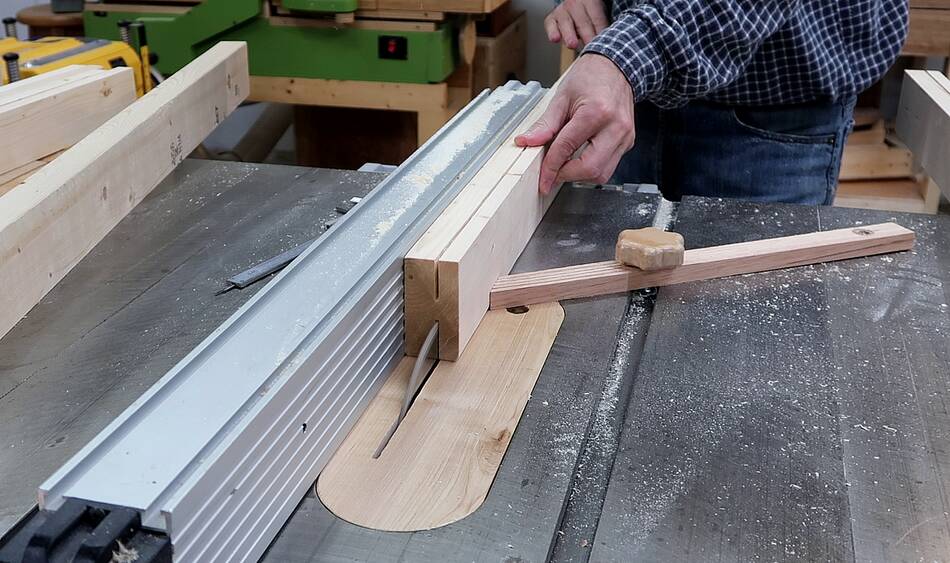
Cutting the pieces to length using a
table saw sled with a stop block clamped to it.
I drew a sketchup CAD model of the crates
to work out the sizes. I made a 1:1 printout of
some aspects of it on one sheet of paper. I cut out the part that showed
where the mortises for the slats go and glued these to a piece of wood to make
a sort of "story stick" for the mortise layout.
I was then able to use this story stick to set up my slot mortiser to put the
mortises in the right position.
With the stop block clamped to the table, I cut the first mortise in
all 16 pieces. I'm making two of these boxes, each box has four sides, each side
a top and bottom, making for 16 pieces with mortises in them.
For the third mortise, I had to move the stop block further out than the table
was wide, so I camped an extension to it to have a place to clamp the stop
block to.
I removed most of the material by making a series of
plunge cuts. That works best with a spiral bit on side grain. After that
sweeping side-to-side to remove the remaining material. That minimizes the
up and down forces on the router bit, which reduces bit deflection and makes
for more precise cuts.
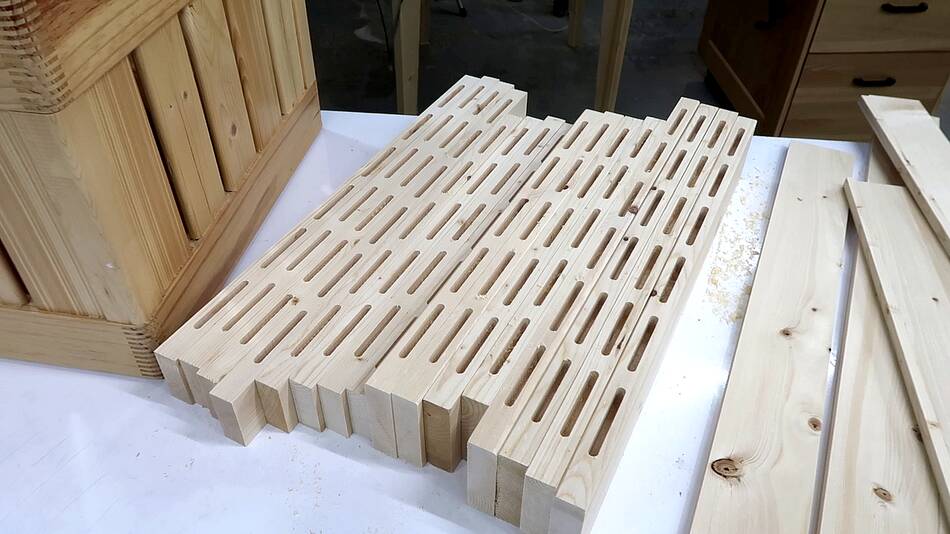
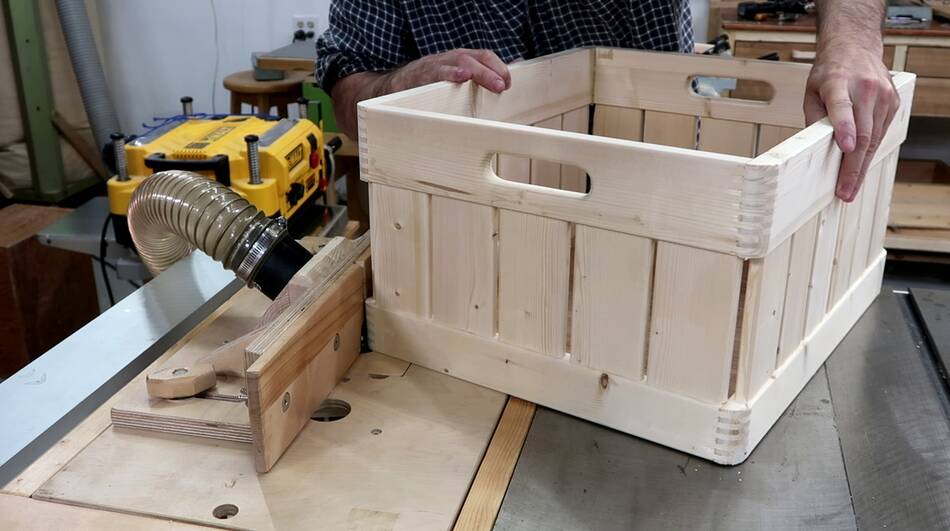
All the mortises cut. The boxes will be rectangular, with the short side having
five slats and the long side six. 88 mortises in total.
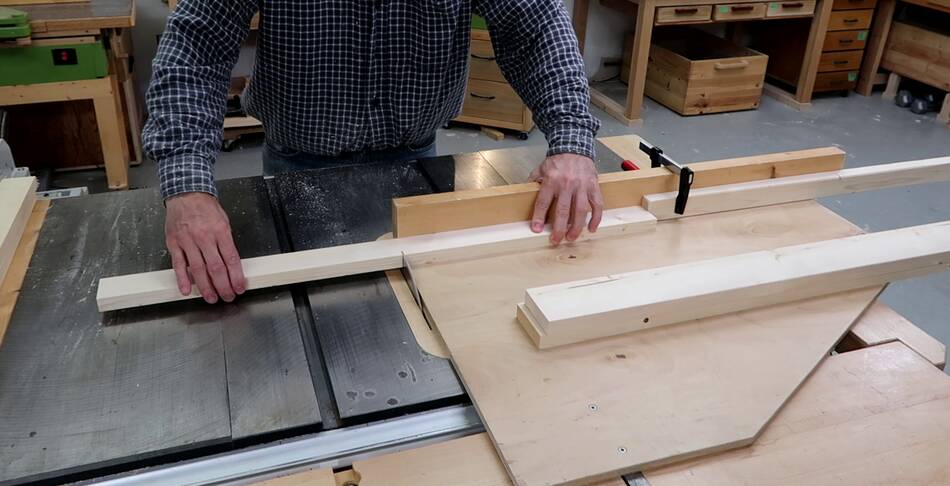
After that I planed the scraps from earlier to the right thickness for the slats,
ripped them to the right width, and cut the pieces to length on the table saw
using my small table saw sled. With so many short pieces to be cut, it was
easy to avoid using some of the parts with knots in them.
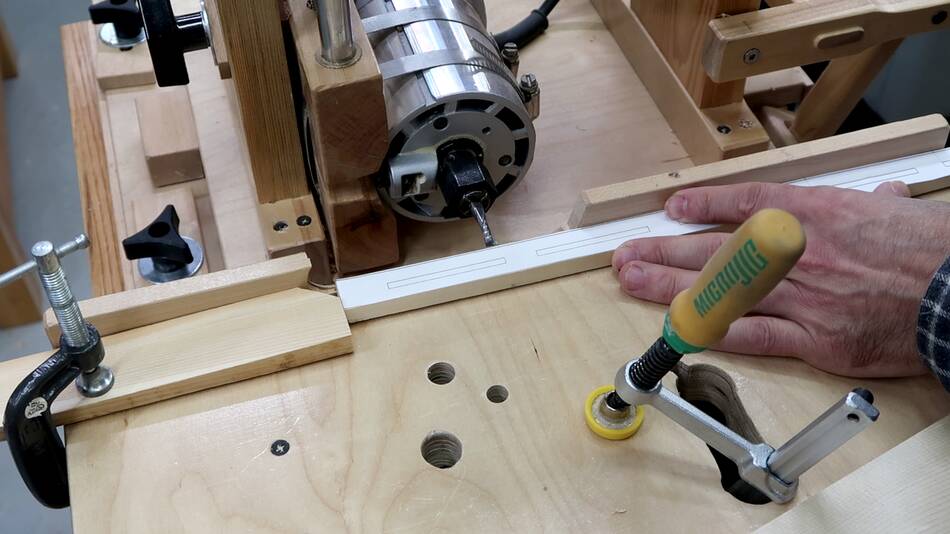
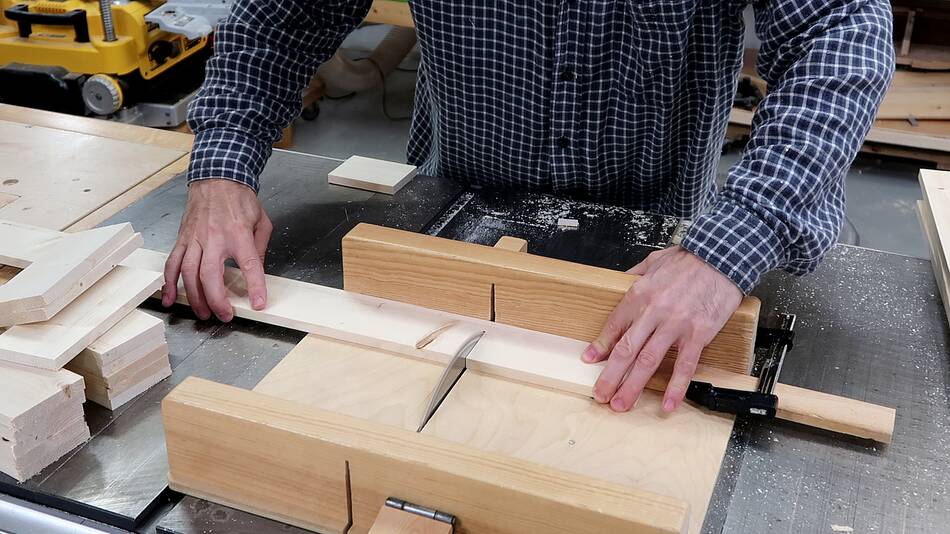
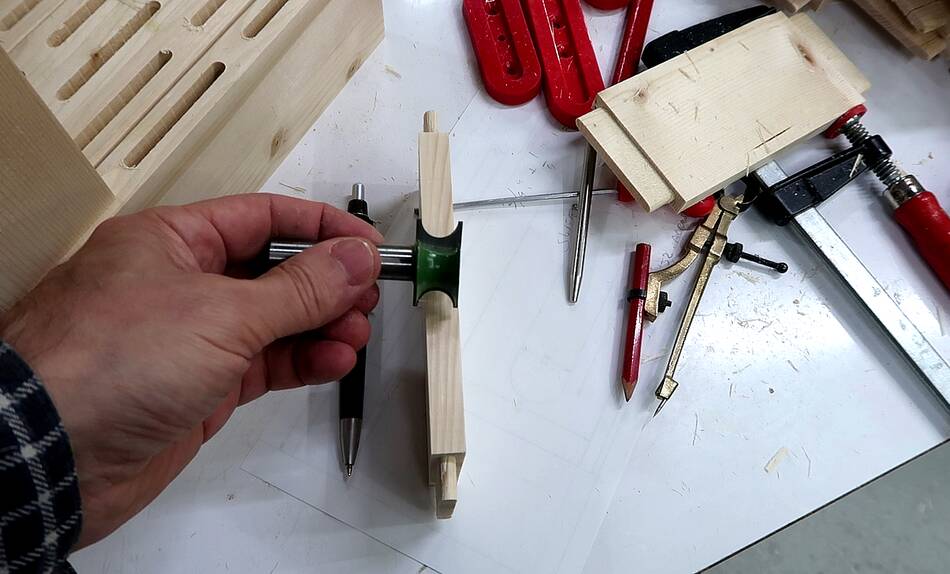
I need to cut tenons on the ends of the slats. I cut out a tenon template roughly
on the bandsaw and table saw, then used my
strip sander to precisely round the ends of the templates.
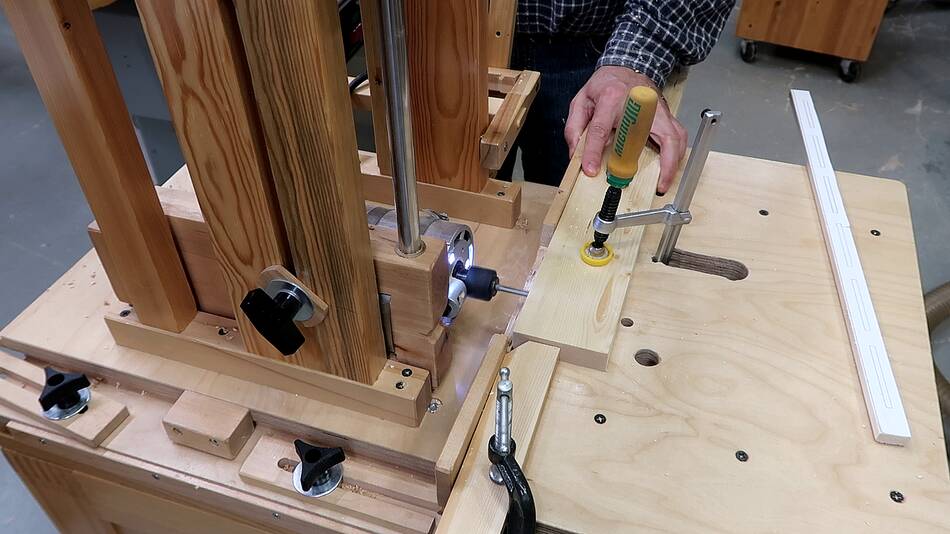
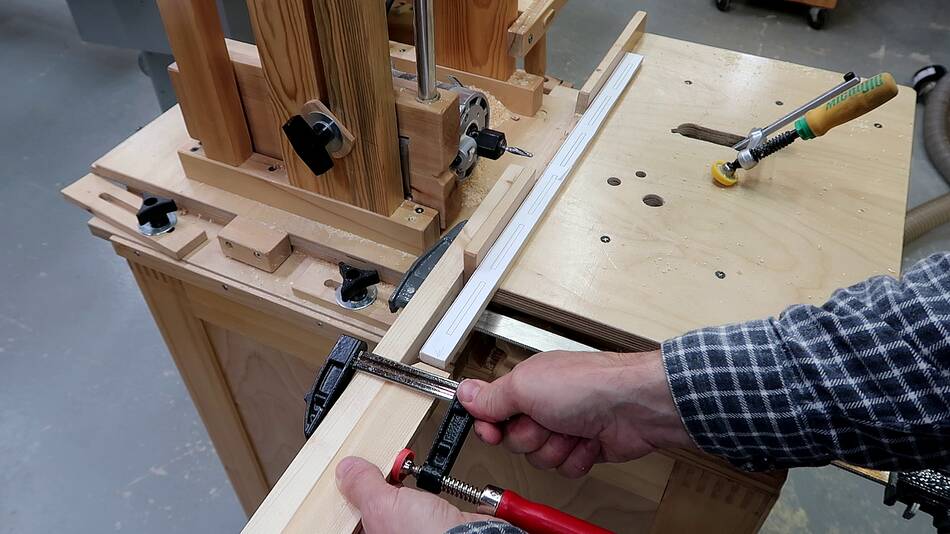
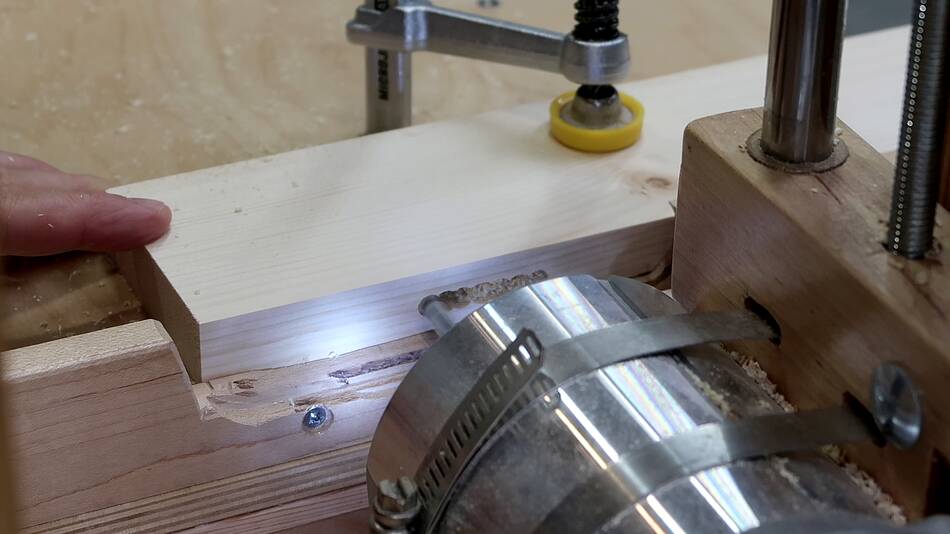
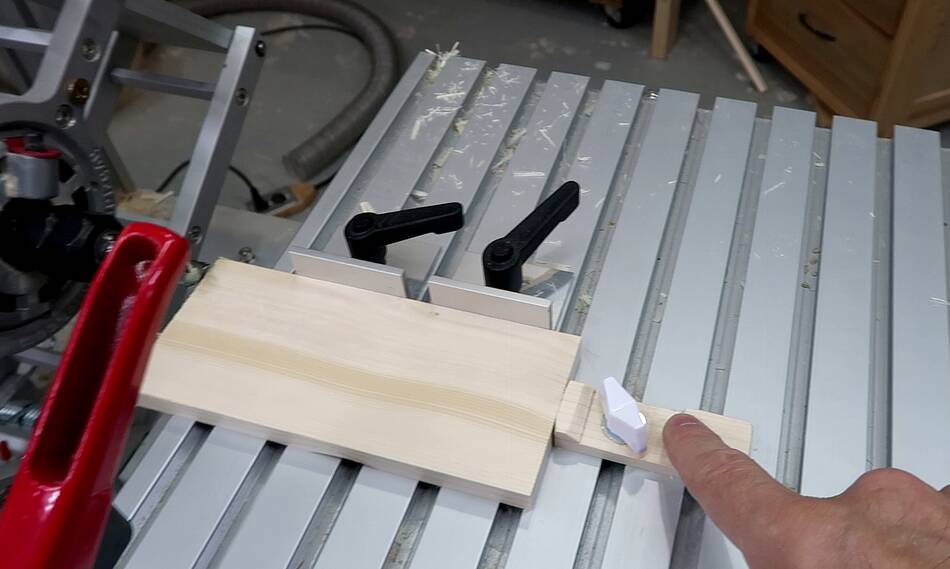
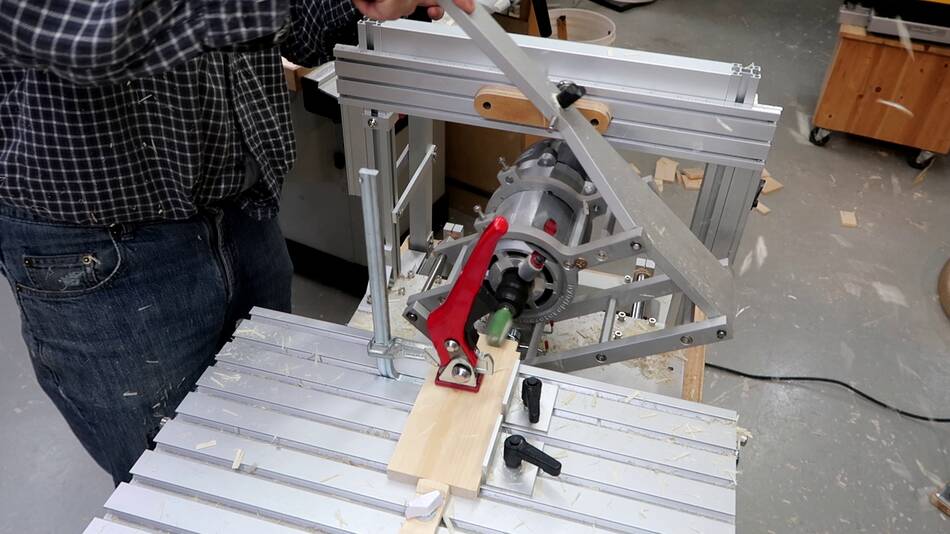
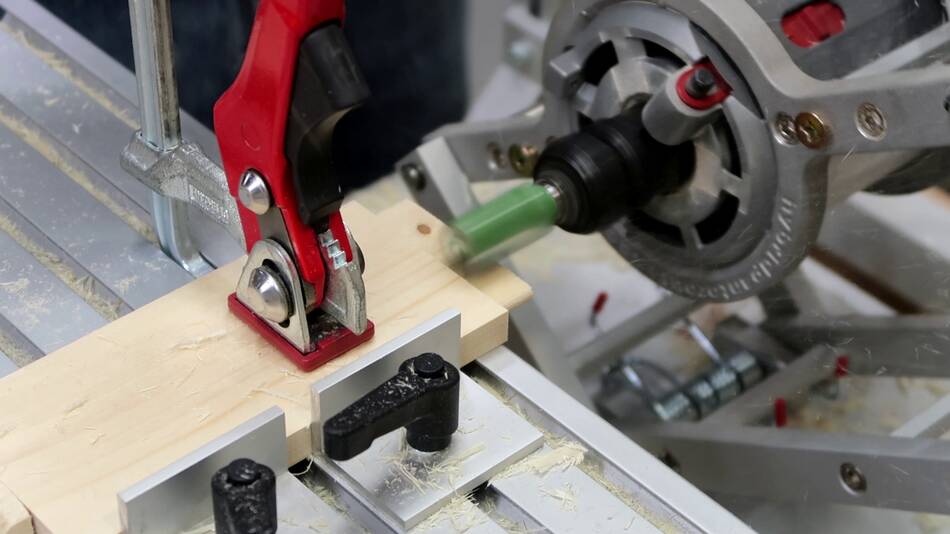
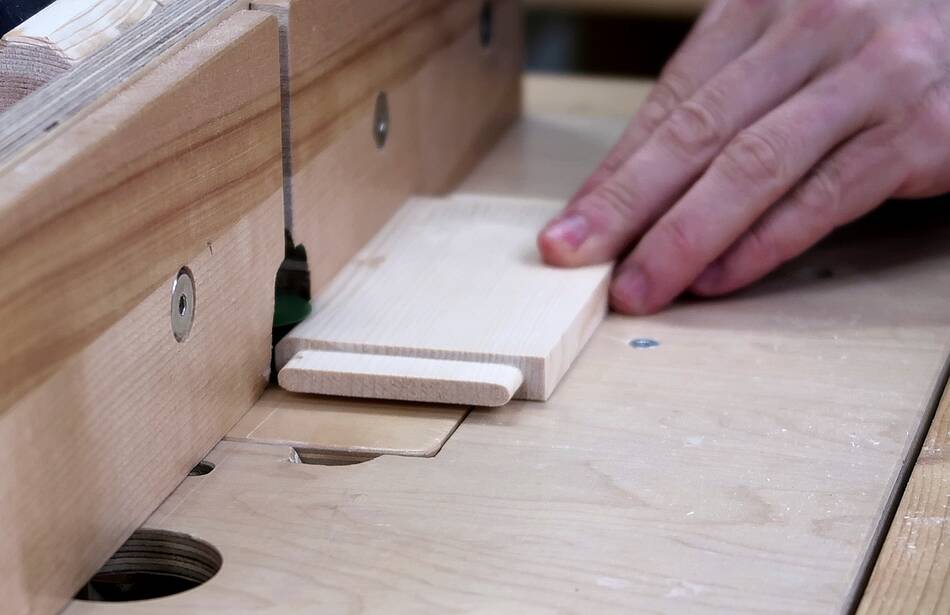
I'm using my metal pantorouter to cut these tenons. Normally, I use the router
bit as a "front stop" when placing the workpieces, but that requires that the
router is turned off while placing a work piece. With 44 slats to be tenoned
on both ends, I didn't want to stop the router between pieces, so I added
this stop for the back end of the workpieces.
Routing the tenons.
The last time I built crates like this,
I hadn't invented the pantorouter yet,
so I used my quick-set tenon jig to cut the
tenons, then cut them to width and rounded the edges. Cutting the tenons on
the pantorouter makes this all one step, so it's faster.
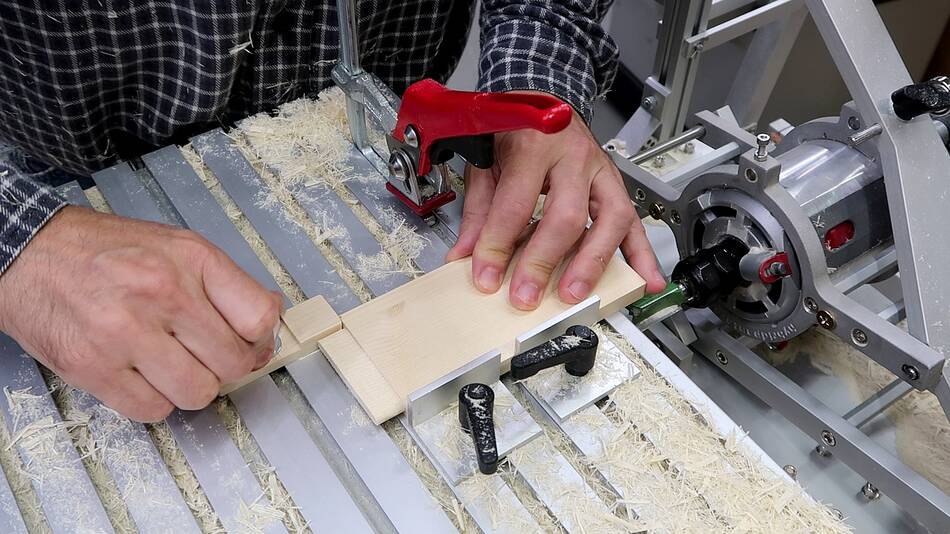
I wanted to make sure the shoulder to shoulder length of the slats were
all consistent, so after I routed all the tenons on one end of the slats, I
changed the stop to go against the shoulder of the tenons I already cut.
That way, any length variation in the workpieces or positioning errors when
I clamped them for the first tenon would not contribute to errors in the
shoulder to shoulder length of the workpieces.
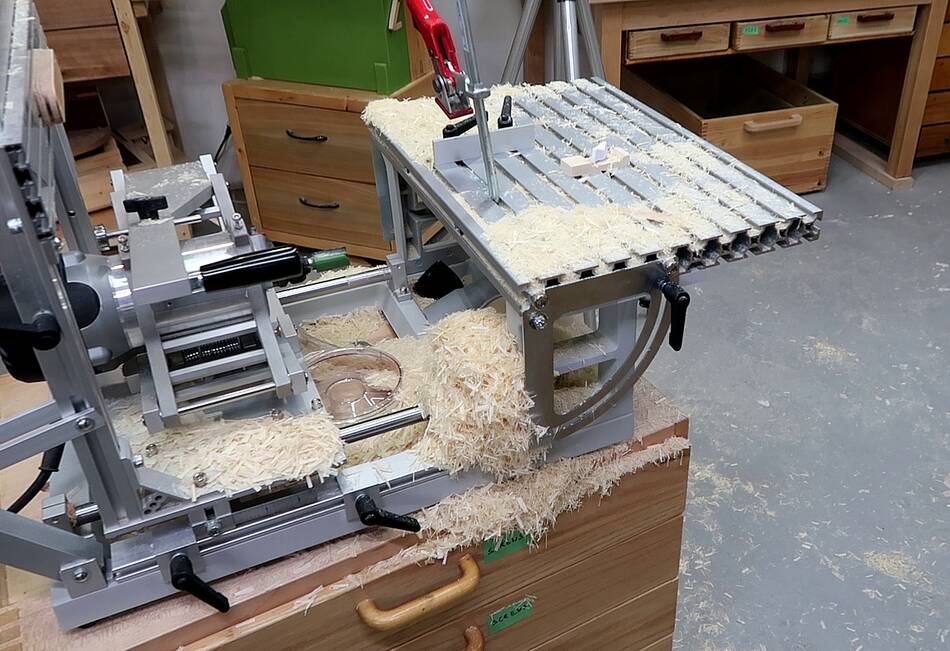
A lot of dust after cutting all the tenons. I could have used the dust collection
shroud on the pantorouter, which works quite well. But instead I just ran the
router at relatively low speed, and stood in the wind blowing out of
my air cleaner.
With the router set to a slow speed, it didn't throw the chips too far.
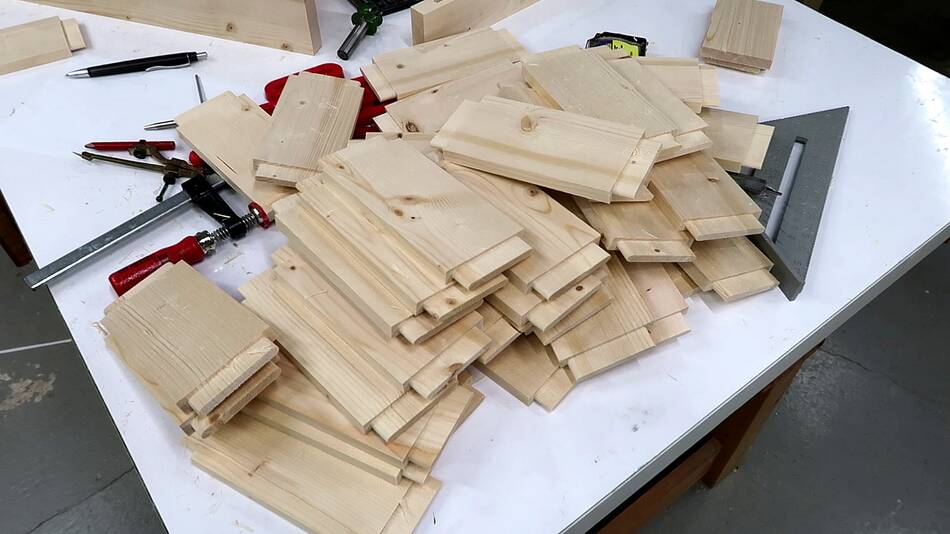
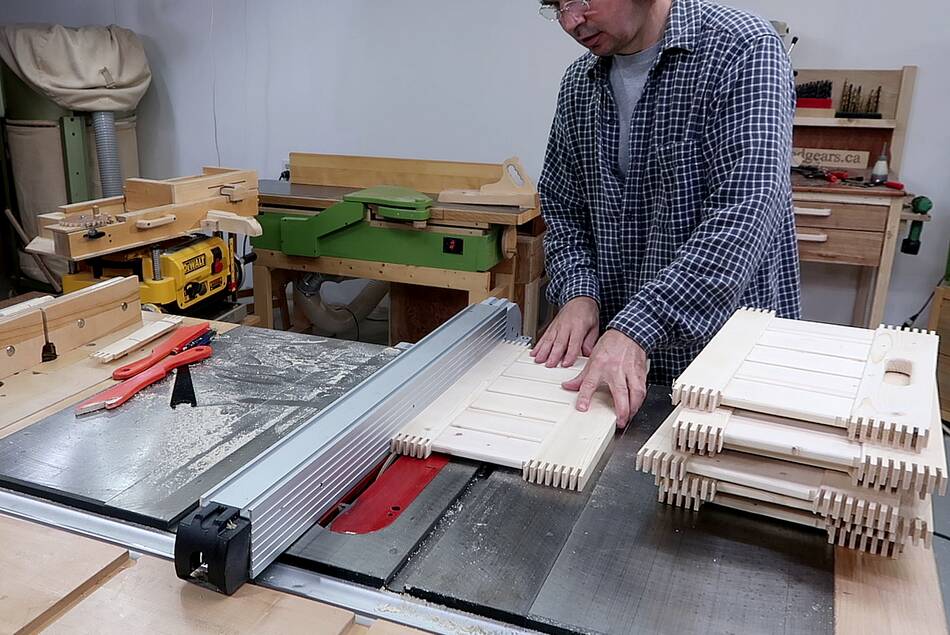
All the slats with tenons cut.
I wanted to round the edges of the slats. I used a 1/2" half-round bit to round
two corners at the same time. Last time I had to pass each slat over the router
four times to do all four edges.
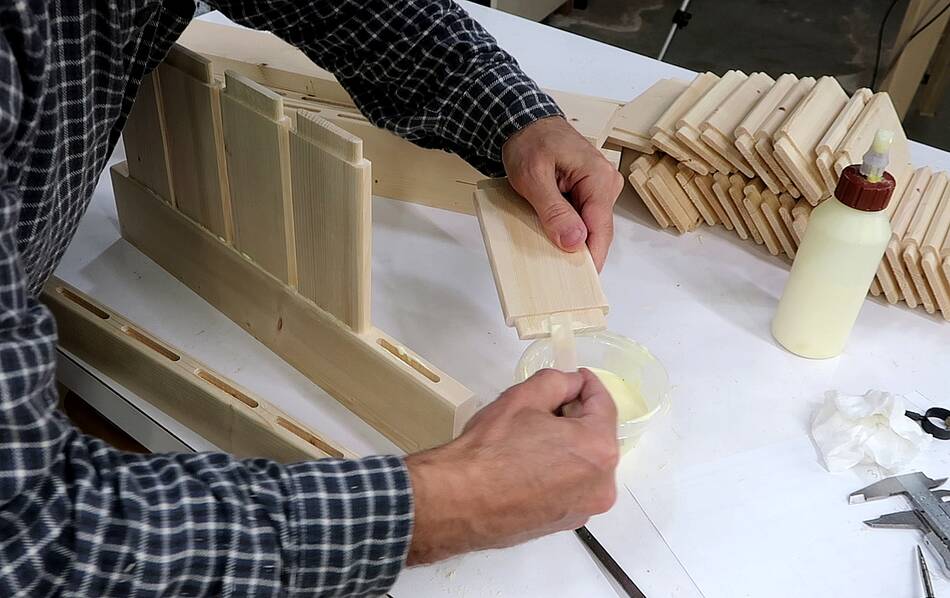
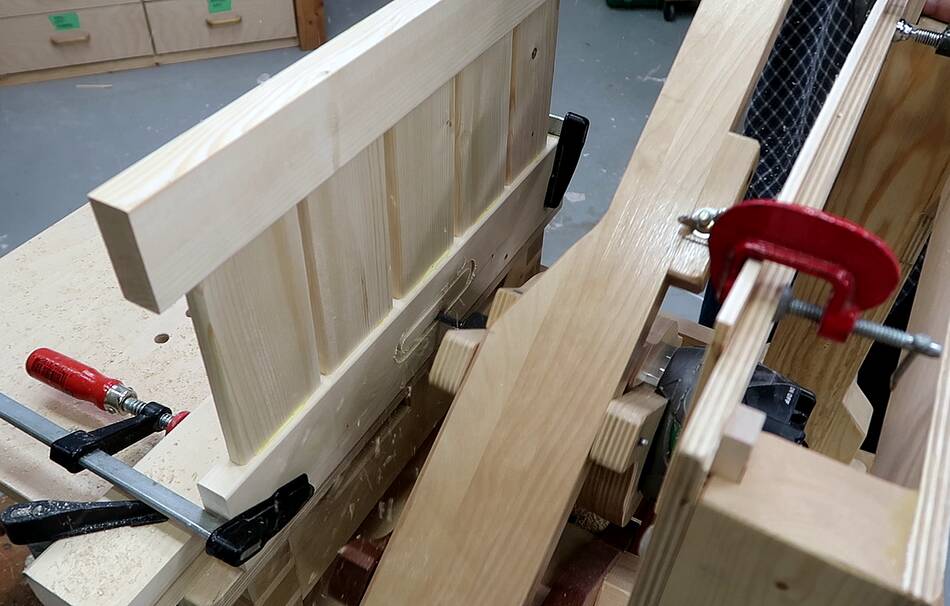
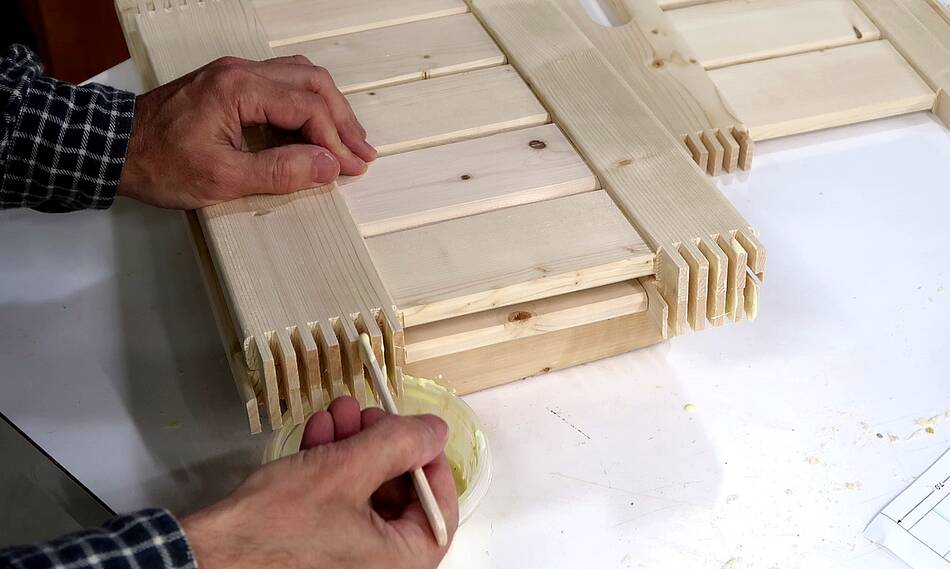
Then gluing the sides together, five or six slats to a side glued into the mortises.
Then glue applied to all the tenon ends and mortises in the mating pieces,
and all pushed together.
Last time I made boxes like that I glued the top and bottom frames together first,
then glued in the 25 slats into one frame, then mated them together. But lining
up 25 mortises and getting them together before the glue sets is stressful,
so I figured this time I'd glue the slats in first, then join the frames together.
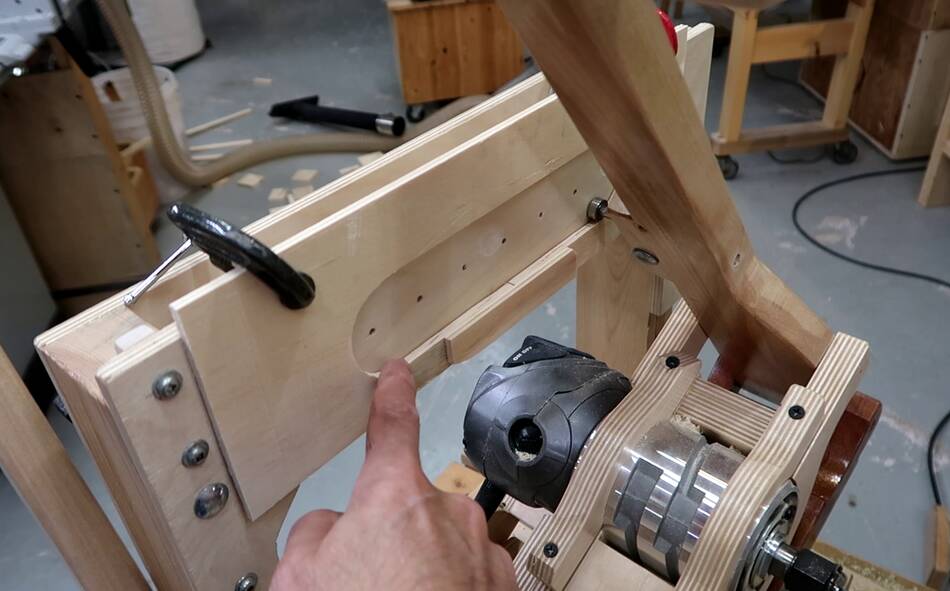
I still needed to cut handle holes in the short sides. Previously I did this
by drilling two large holes and using my slot mortiser to route between them,
but that was before I invented the pantorouter. This time I made a template
for the handles holes...
... then used my wooden pantorouter to
route the handle holes, going round and around
the shape while increasing the depth of cut until I cut all the way through.
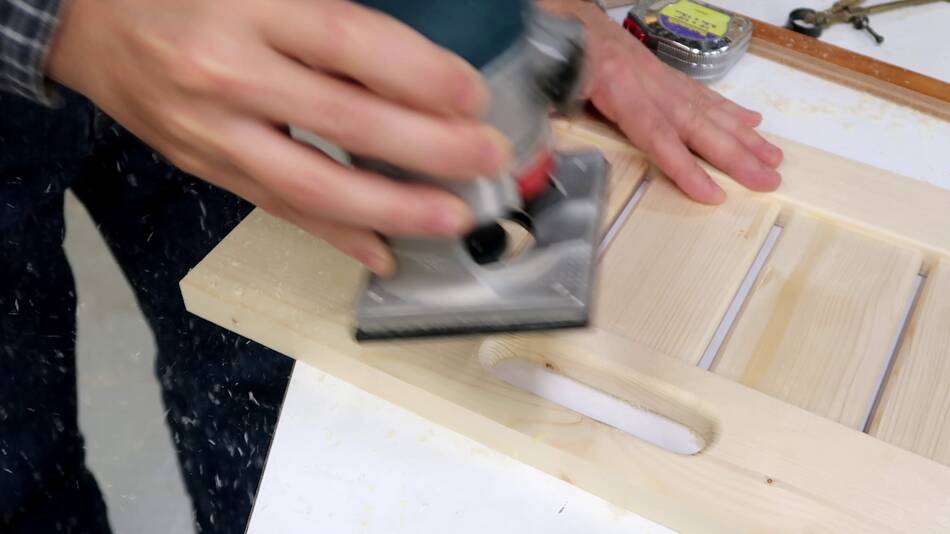
Then adding a 1/4" round over to the handle holes with a small router.
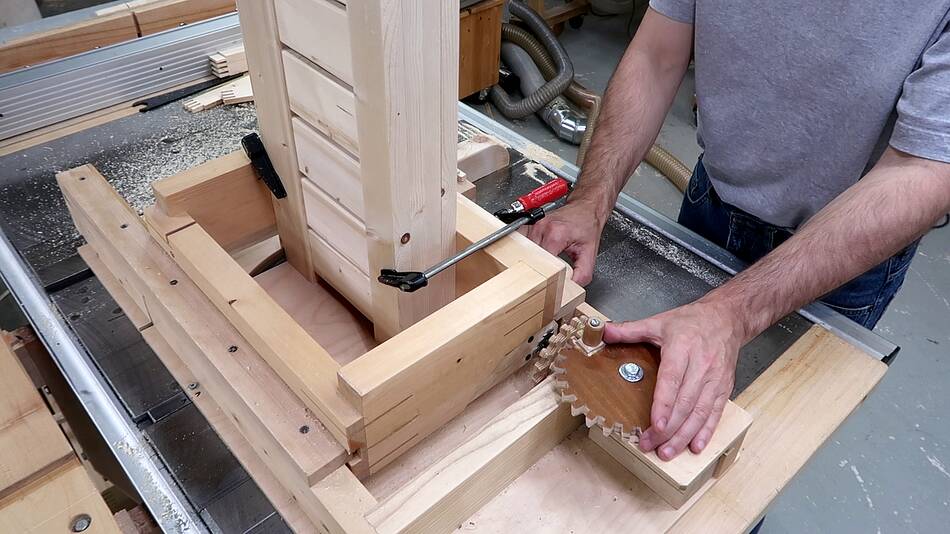
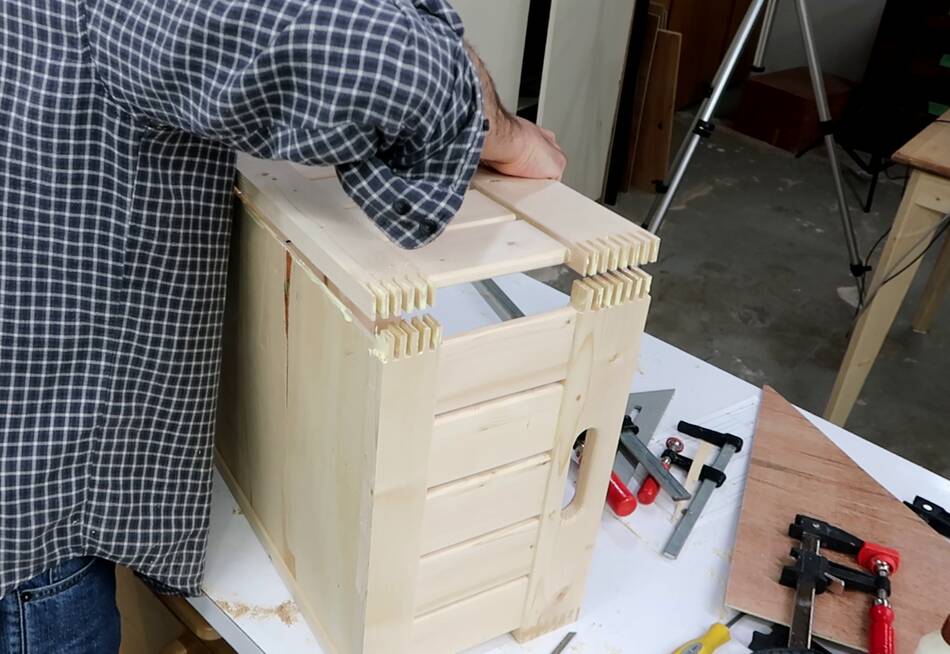
Next I needed to cut box joints
into the ends of the sides of the box for joining
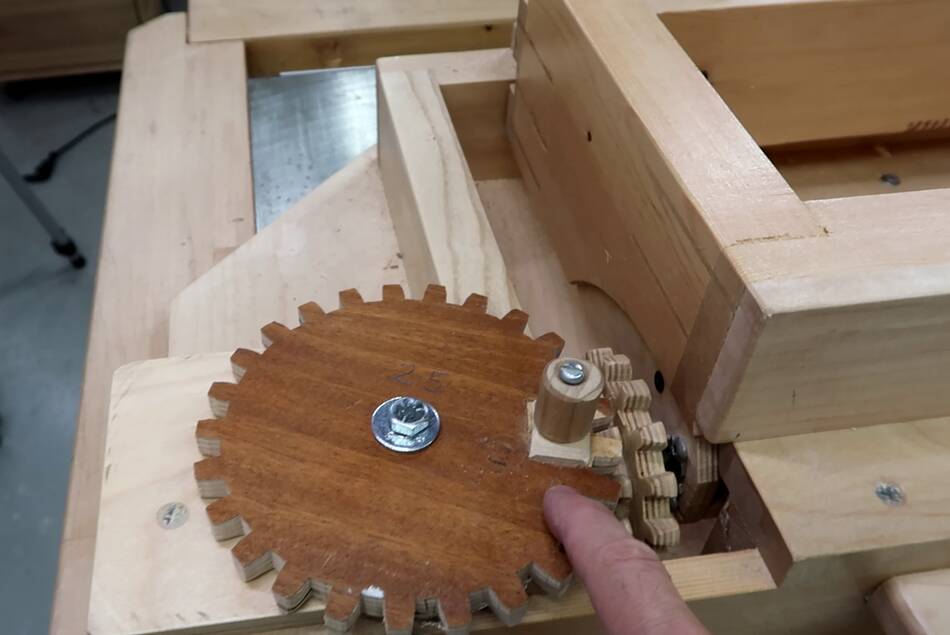
the corners together. I stacked two saw blades in the saw to make for a wider
kerf, then worked out what combination of gears would make the right increment
to move the workpiece between cuts to make well fitting box joints.
The closest I could get was to put the 25 tooth gear against the 12 tooth gear on
my screw advance box joint jig and turn it three turns to advance to the next cut.
A 37 tooth gear turned twice would have made a better fit, but of all the gears
I made for my box joint jig, I haven't made a 37 tooth gear yet.
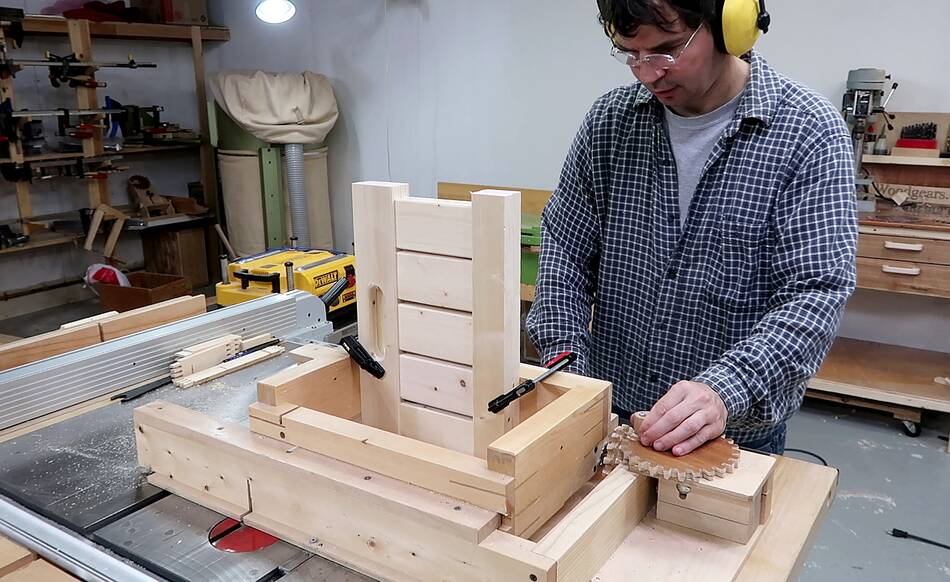
With two of the sides clamped into the jig, I'm cutting the joints in the
top and bottom part of it, but not the middle where the slats are.
Then checking the fit. A satisfying amount of friction for a dry assembly, but
the glue swells the wood, which can make assembly difficult. So I'd ideally
have a looser fit.
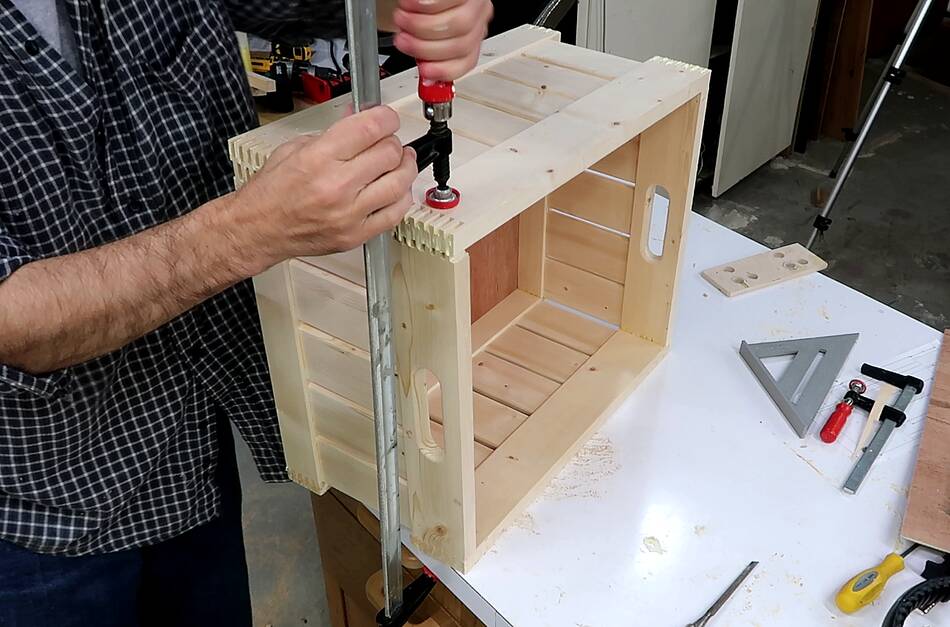
After cutting the rest of the joints on the short pieces, I put all the long pieces
into the jig, moved the cut position over by half an increment, and cut the fingers
in those pieces.
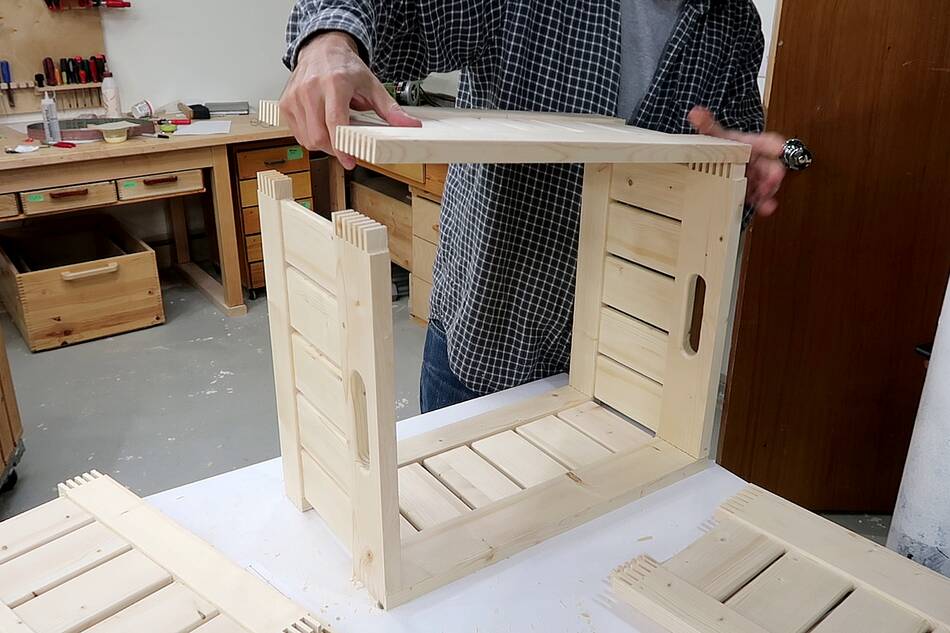
Dry assembling one of the boxes to see how it all looks together.
I still needed a groove for the bottom of the box to go into. Again, with two
regular blades stacked, I'm cutting the slots to accept the 5 mm thick plywood
for the bottom.
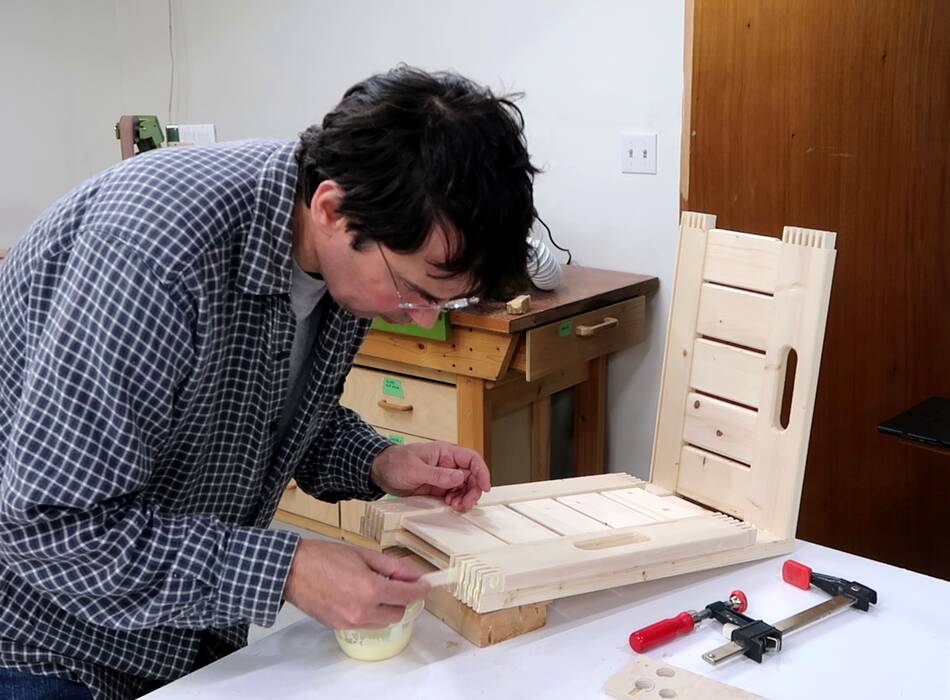
Then starting to assemble with glue. I stacked two of the pieces on top of each
other so I can apply glue to two sets of fingers at the same time.
I used a clamp to help fully push the joints together.
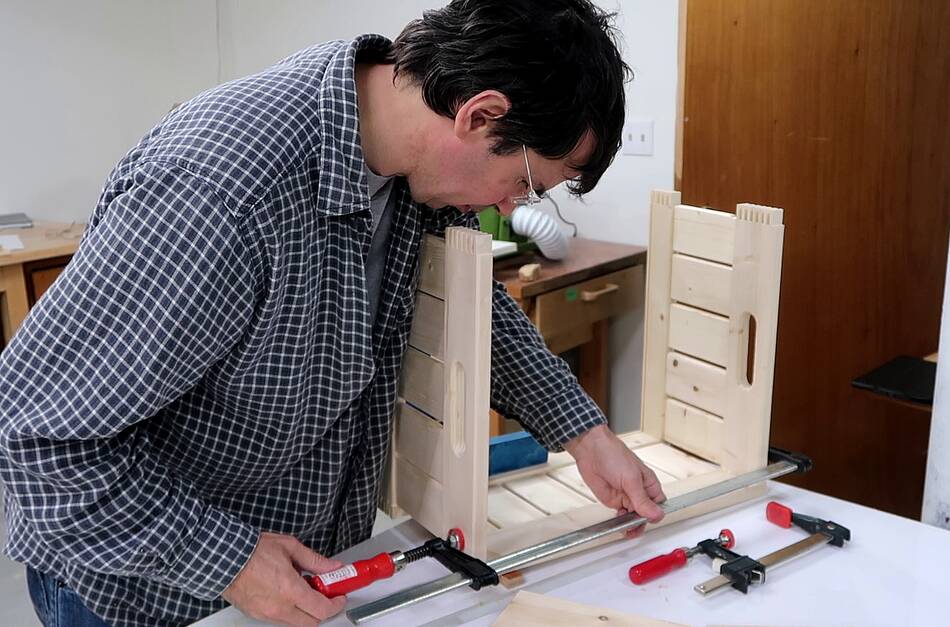
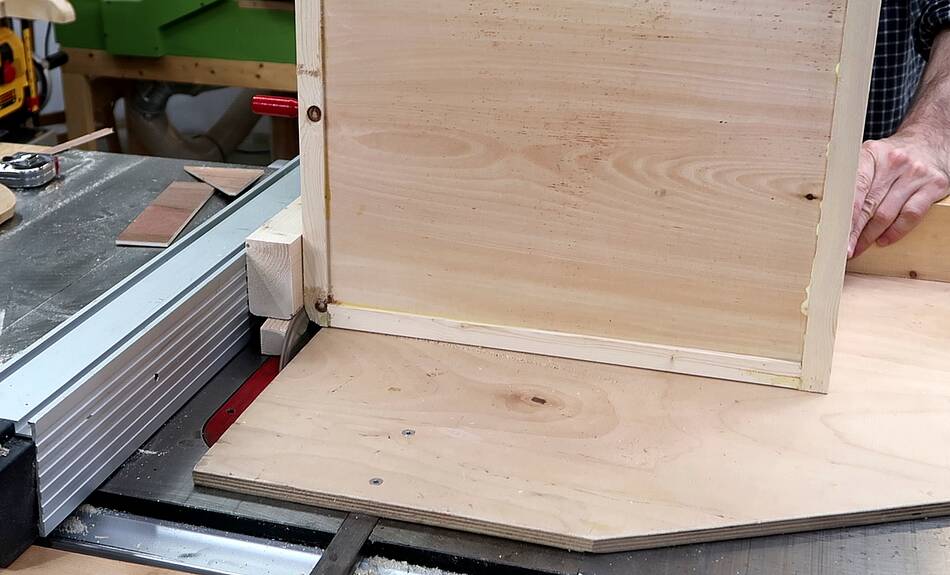
After gluing three sides together, I added the bottom. The bottom
is glued into all the slots for extra strength. Being made out of plywood,
I don't need to worry about giving it room to shrink and expand with
humidity changes.
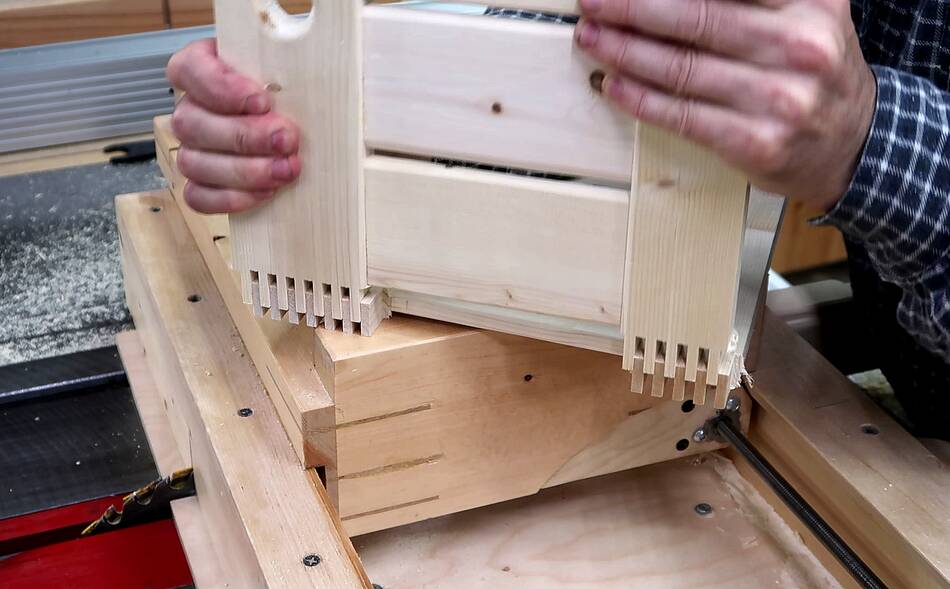
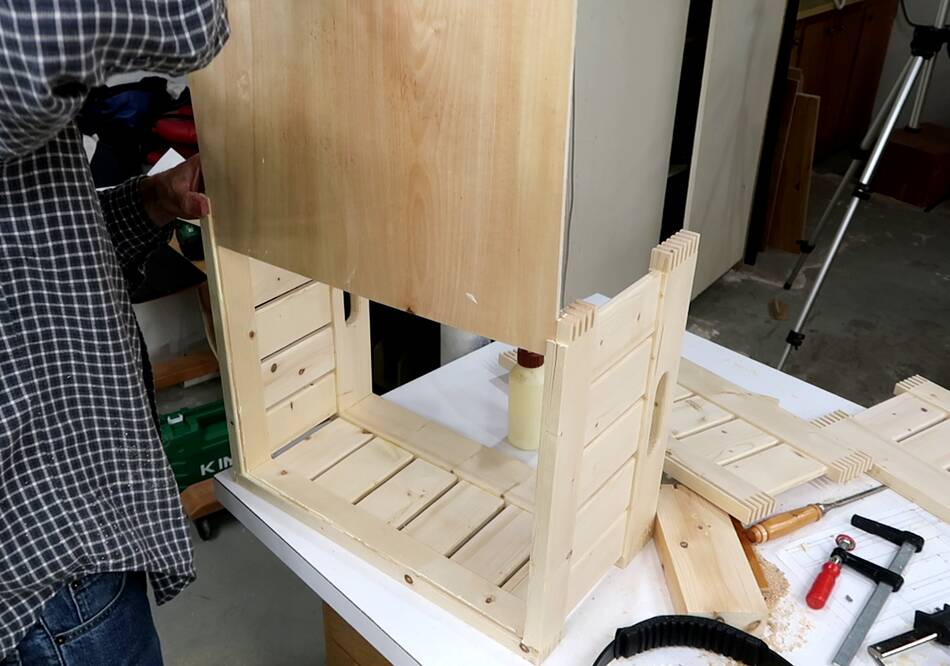
Then gluing the last side on. This requires meshing the top and bottom box joints
on both ends and making sure they are fully seated before the glue gets too stiff.
I used a clamp to push the joints together. The slow and steady force of clamp
works better than a mallet against the resistance of the highly viscous glue.
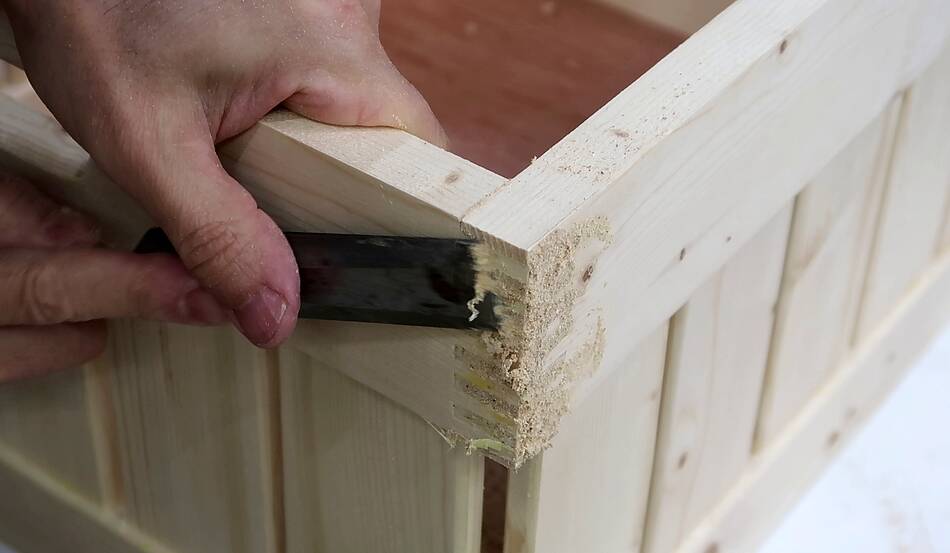
I rubbed sawdust against the excess glue, then scraped the rest off with a chisel.
The idea of the sawdust is not so much to remove the glue but to make it less
gooey. That way I don't end up getting glue all over the place.
At this point I decided that the 5 mm thick plywood bottoms might not be thick
enough for how the kids might play with the boxes, so I glued another 5 mm layer
onto the bottom of the boxes, using scraps I had left over from other projects.
I clamped it down near the edges and used heavy things to push the layers together
near the middle.
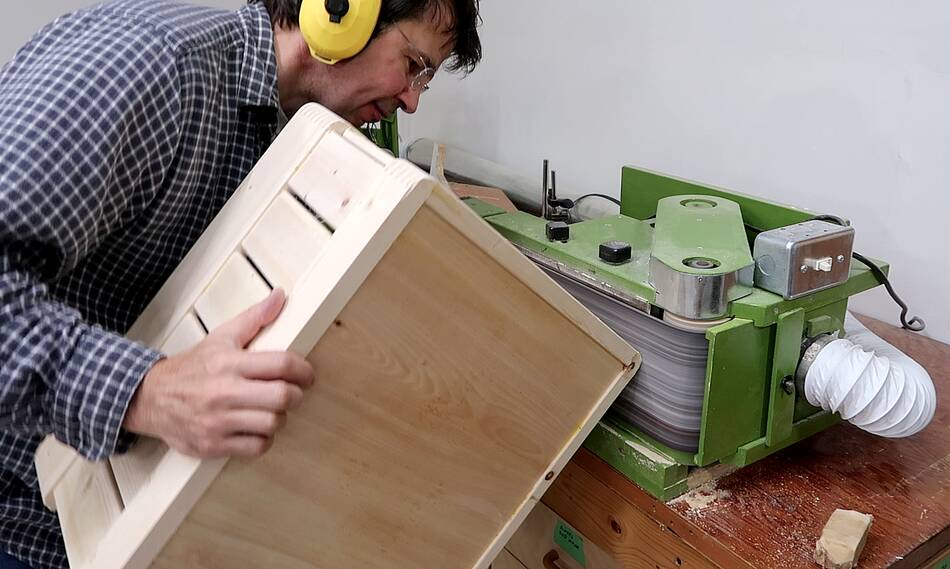
I wanted to round the corners of the box. I didn't want to do this with a router
because I was afraid it could chew up the end grain. So instead, I tilted the saw
to 25 degrees and made two cuts on each corner to approximate a round over.
Then fully rounding that on my edge belt
sander with the table removed.
I did however use a 1/4" round over bit to round the top and bottom edges. I was also
ale to route the inside edges by removing the fence and just putting the box
over the router bit.
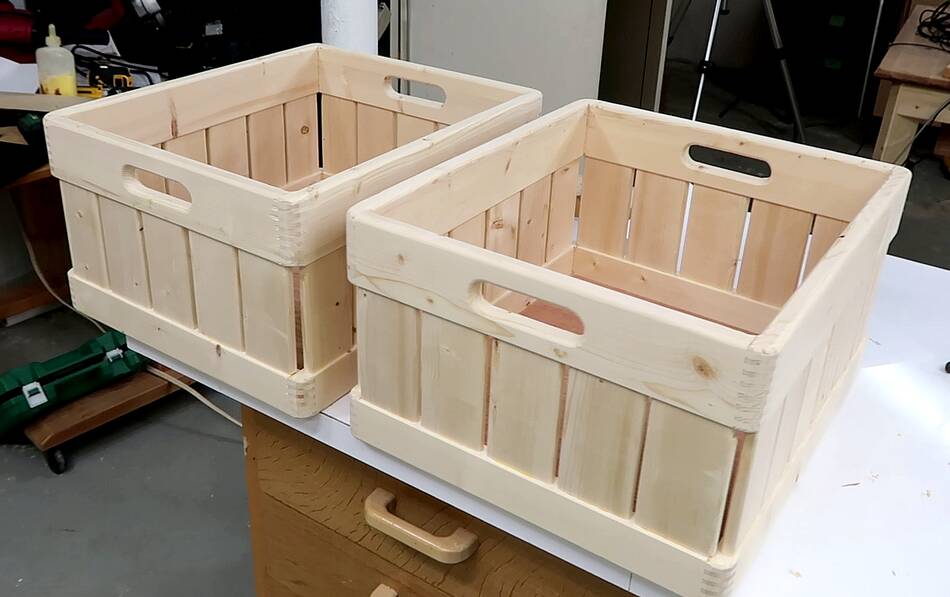
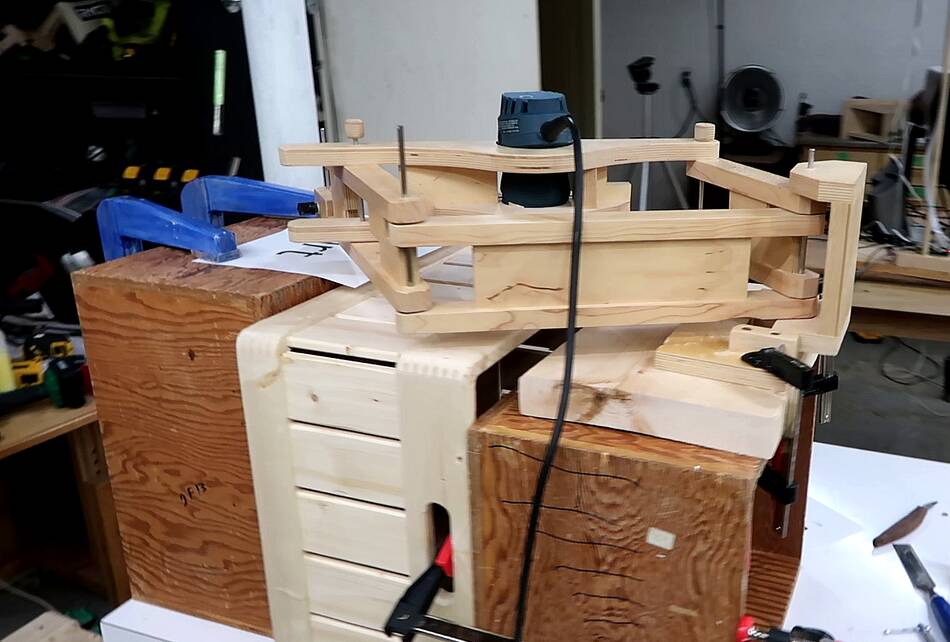
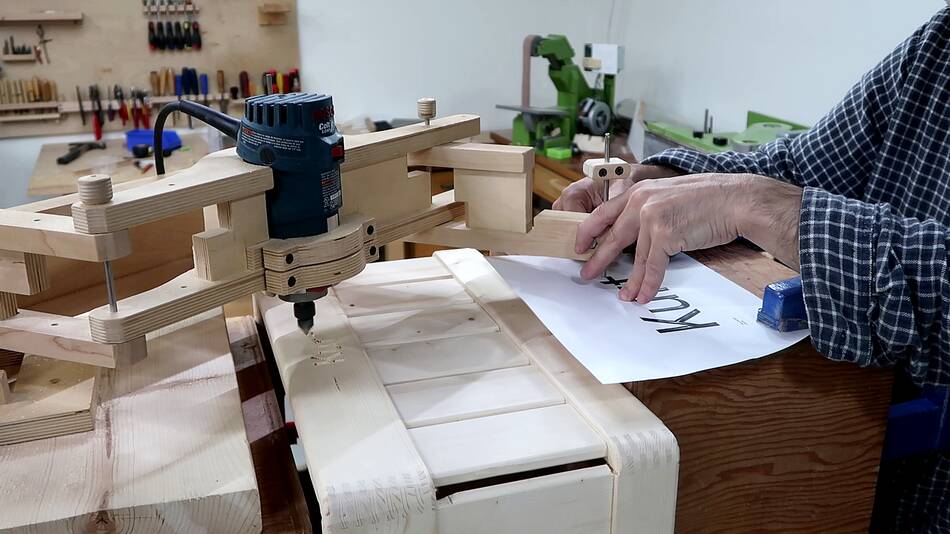
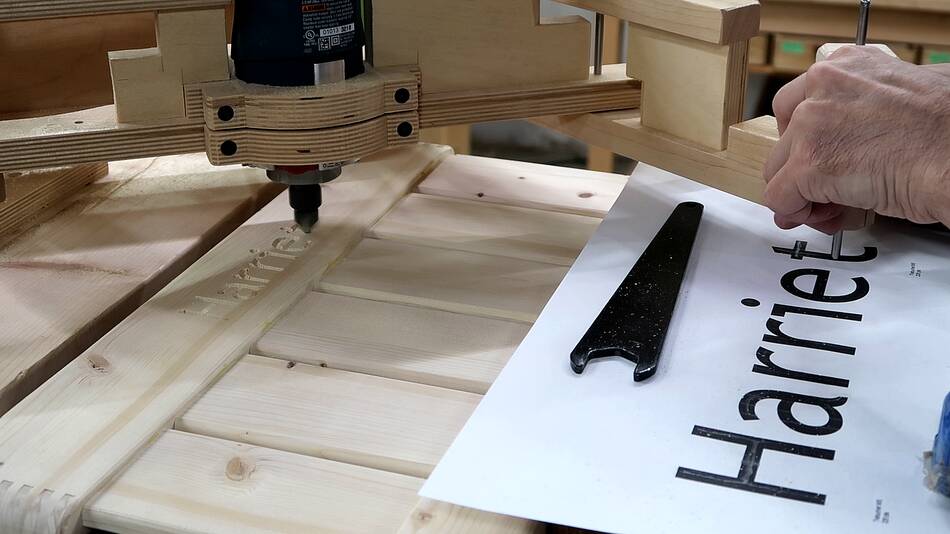
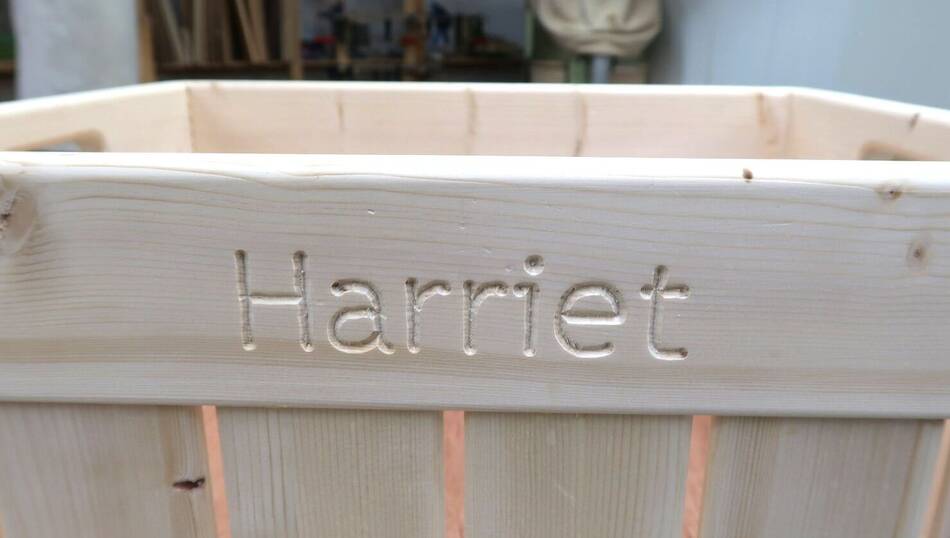
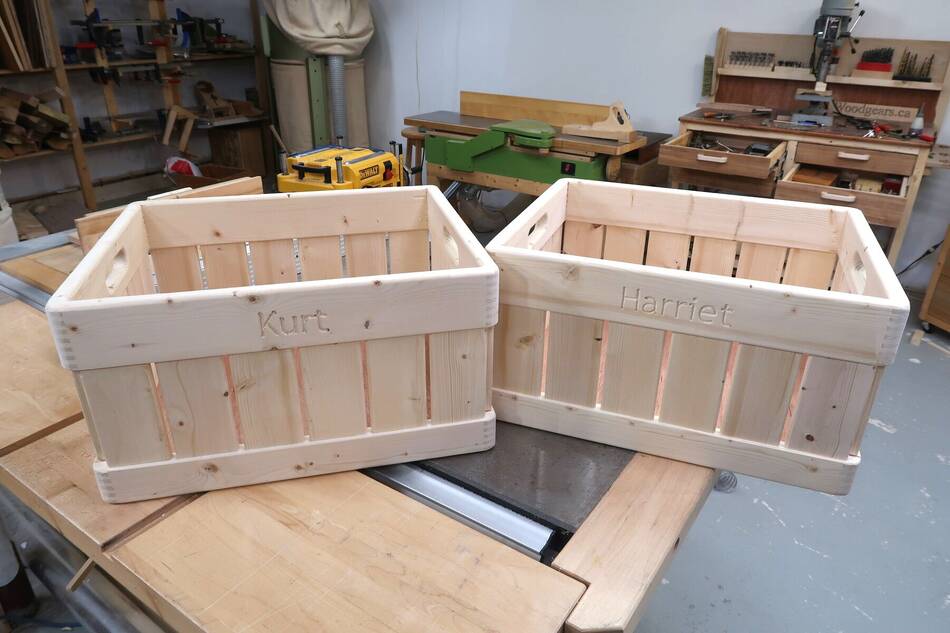
Boxes done. But then I had the idea of carving the kids names into the boxes.
So I set up my pantograph on top of some other boxes to carve into the sides.
I'm just tracing along the middle of the letters lines free hand to carve out the
lines. With the 2:1 reduction of the pantograph, my squiggly hand movements
don't make too much of a mess of the carving.
I'm quite happy with how that came out!
And it was quick.
These are way too much work for just "boxes", but they are very nice boxes
suitable as presents. In fact, last time I built such boxes, I gave away two
of the three as presents, and these will be presents too.
So many mistakes...
After I finished, I checked on my timelapse camera, and
I had spent nearly 16 hours in the workshop making these boxes, but that's including filming
and tidying up, but not including applying varnish.
I also made about 20 minor mistakes while building these boxes. Too many to include in
an already long video about making them, but I decided to make a separate video just about
all the screw ups. Most of these screw-ups don't show on the final product, so these
mostly just cost me extra time. Plus, I didn't want to look like a bumbling idiot
in the main video.
 Back in 2009 I built these milk crate inspired boxes,
partly to show off my box joint jig, slot mortiser and tenon jig.
But I have gotten much better at making videos since then, so when
I wanted to build some similar boxes 11 years later, I documented the process again.
Back in 2009 I built these milk crate inspired boxes,
partly to show off my box joint jig, slot mortiser and tenon jig.
But I have gotten much better at making videos since then, so when
I wanted to build some similar boxes 11 years later, I documented the process again.


 Milk crate boxes
 Sturdy boxes for propping things up
 Keepsake box with pantorouter
 Box from thin recycled plywood
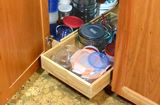 Kitchen cabinet organizer boxes
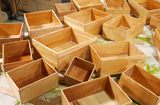 Small box joined boxes
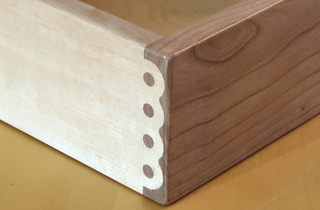 Knapp jointed box
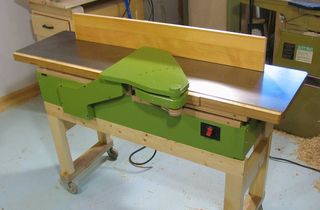 Homemade jointer
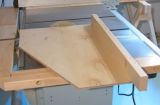 Table saw sled
 slot mortiser
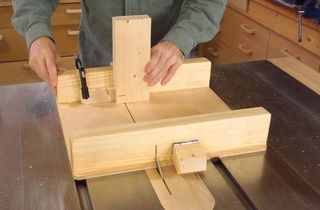 Small table saw sled
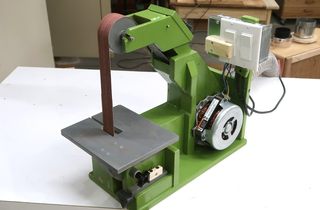 Strip sander XL
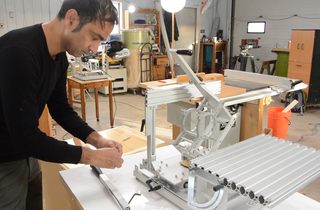 Metal pantorouter
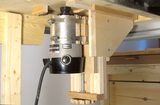 Router lift
 Box joint jig
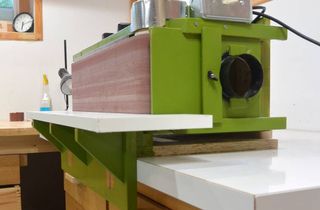 Edge belt sander
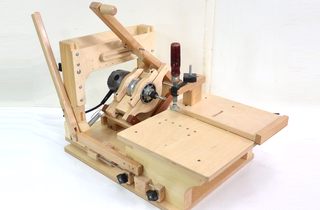 Wooden pantorouter
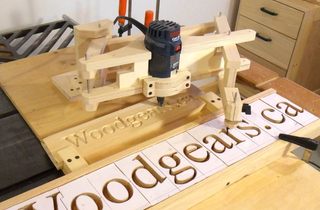 3D router pantograph