Kitchen chairs
|
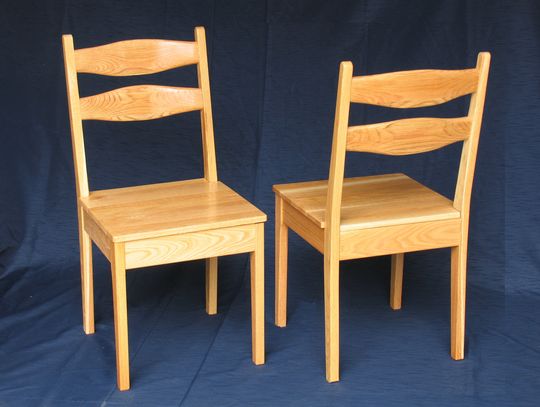
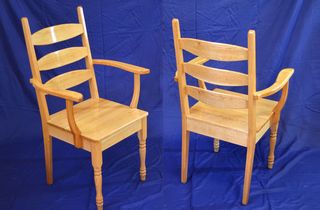
These chairs are of a very basic and sturdy design. The key aspects of the design is that the back and back legs are of the same piece, and the hand-carved chair back rungs.
Chair legs and back
 The back legs and back support are made of one piece of wood, 25 mm thick.
All the joints are mortise and tenon joints, including the rungs for the back.
The part shown at left doesn't show the mortise for the piece that goes front to back.
The back legs and back support are made of one piece of wood, 25 mm thick.
All the joints are mortise and tenon joints, including the rungs for the back.
The part shown at left doesn't show the mortise for the piece that goes front to back.
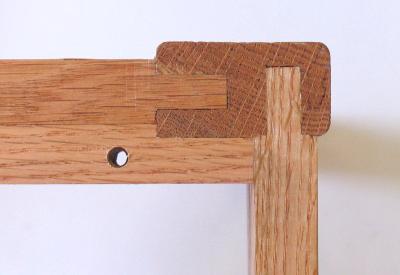
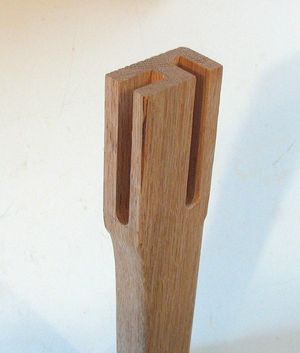 The mortises for the front to back and side to
side pieces are positioned as shown in the picture of one of the front legs as shown at right.
The mortise on the left is for the front to back rail supporting the seat, while the mortise at the
right is for the piece that goes across the front.
The mortises for the front to back and side to
side pieces are positioned as shown in the picture of one of the front legs as shown at right.
The mortise on the left is for the front to back rail supporting the seat, while the mortise at the
right is for the piece that goes across the front.
I made the mortises all 3/8" (9.5 mm) wide, though in retrospect, 5/16" (8 mm) or 1/4" (6 mm) would have been better.
I wouldn't recommend doing this project with dowel joints. I have simply seen too many commercially made chairs with doweled corners start to come apart. Whereas my dad has made hundreds of chairs of this basic design, and I'm not aware of a single one having failed.
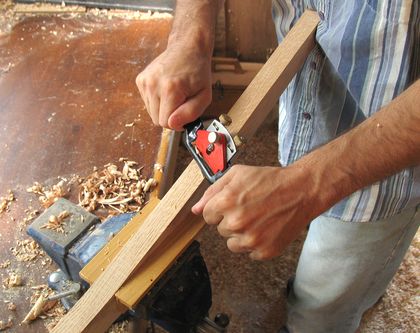 It's best to make a template of the leg of a chair, and cut it out with a bandsaw. The next
challenge is getting the edges smooth. Most of this can be done with a belt sander, although for the
back of the chair, which is more visible, I wanted a smoother finish, so did that with
a spoke shave. Note that I'm actually pushing on the spoke shave in this picture, so that
the direction of cut is towards the middle, and out of the grain.
It's best to make a template of the leg of a chair, and cut it out with a bandsaw. The next
challenge is getting the edges smooth. Most of this can be done with a belt sander, although for the
back of the chair, which is more visible, I wanted a smoother finish, so did that with
a spoke shave. Note that I'm actually pushing on the spoke shave in this picture, so that
the direction of cut is towards the middle, and out of the grain.
 Next round the corners of the rungs. a 1/8" radius round is about right. I didn't have a router bit
with that radius, but this S shaped router bit that came wit ha set has a 1/8" radius round on it.
So with a wooden guide made, I could use just the 1/8" round on the curves, without using the other parts of
the router bit.
Next round the corners of the rungs. a 1/8" radius round is about right. I didn't have a router bit
with that radius, but this S shaped router bit that came wit ha set has a 1/8" radius round on it.
So with a wooden guide made, I could use just the 1/8" round on the curves, without using the other parts of
the router bit.
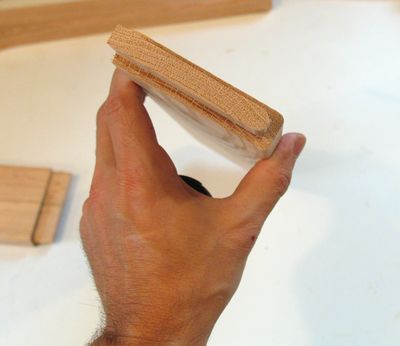 The rails to make the frame below the seat have tenons
cut into the ends of them. I cut the ends of the tenons round with a carving knife - quicker
than squaring out the mortises with a chisel. The piece shown at left joins in with one of the
open mortises on the front corners, so only one side of the tenon needed to be rounded.
The rails to make the frame below the seat have tenons
cut into the ends of them. I cut the ends of the tenons round with a carving knife - quicker
than squaring out the mortises with a chisel. The piece shown at left joins in with one of the
open mortises on the front corners, so only one side of the tenon needed to be rounded.
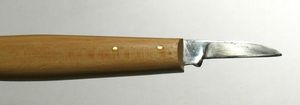 I used a carving knife to do this with.
Utility knifes are too bulky, and any sort of exacto-knife like replaceable blade knives, including carving knife sets, tend to be too fragile to cut hardwood with. A rasp or coarse file can also do a good job of rounding the tenons. Or you can cut the ends of the mortises square with a chisel instead.
Assembling the frame
Before the frame can be put together, we also need to make some chair back rungs for the chair back.
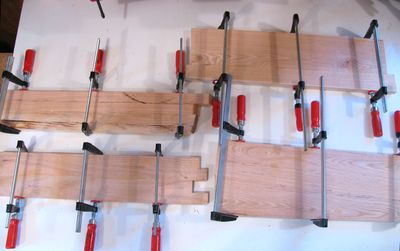
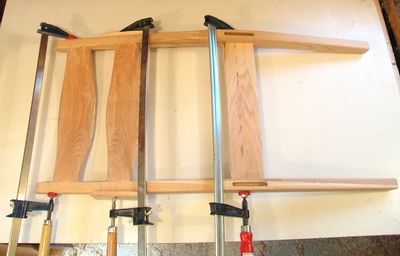 I started by assembling the pack sections. The back is a bit tricky, with the curved rungs, and
the cross piece, all having to align at once. With the curved nature of the back rungs, it's necessary
to go a bit easy on clamping, so as not to excessively bend the curved back rungs of the chairs.
I started by assembling the pack sections. The back is a bit tricky, with the curved rungs, and
the cross piece, all having to align at once. With the curved nature of the back rungs, it's necessary
to go a bit easy on clamping, so as not to excessively bend the curved back rungs of the chairs.
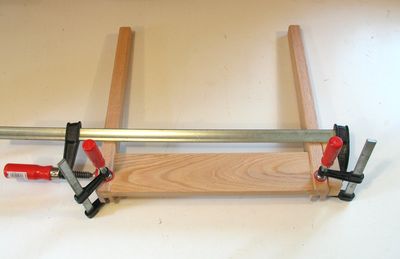 The front legs and crosspiece are much easier to join up. Note the two small clamps I put on
the corners. I like to put clamps across open ended mortises like that, just to make sure everything
makes full contact when it's glued.
The front legs and crosspiece are much easier to join up. Note the two small clamps I put on
the corners. I like to put clamps across open ended mortises like that, just to make sure everything
makes full contact when it's glued.
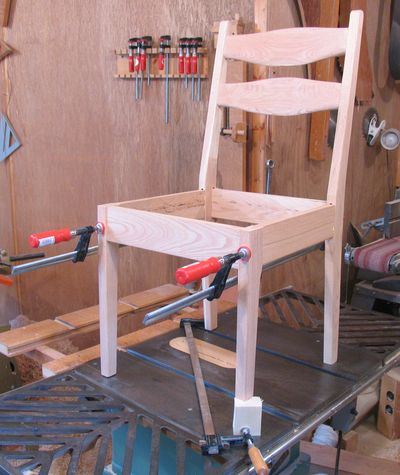 Next the front and back parts are joined. Once the clamps are on, it's a good idea to stand the
chair on a flat surface, like a table saw (hopefully, your table saw is flat). I found this chair
frame had a bit of a wobble to it, so I put a clamp on at a diagonal to over compensate in the
opposite direction, so that with the clamp removed, and the glue dried the chair won't wobble
on a flat surface. The clamp is but between the two legs that are high, or "short", and tightened
until the chair wobbles the other way by about the same amount while the glue is drying.
Next the front and back parts are joined. Once the clamps are on, it's a good idea to stand the
chair on a flat surface, like a table saw (hopefully, your table saw is flat). I found this chair
frame had a bit of a wobble to it, so I put a clamp on at a diagonal to over compensate in the
opposite direction, so that with the clamp removed, and the glue dried the chair won't wobble
on a flat surface. The clamp is but between the two legs that are high, or "short", and tightened
until the chair wobbles the other way by about the same amount while the glue is drying.
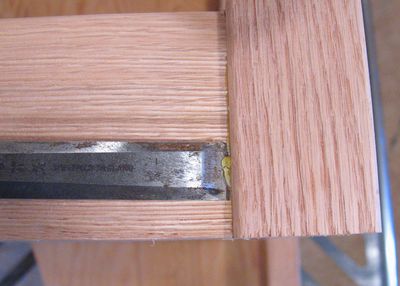 After everything is glued, and the glue fully hardened, remove any excess glue with a chisel as
shown. It's best to leave the glue until it's fully dried, so as not to risk spreading it over
a wider area while wiping it off. It really comes out of the corners with a chisel quite easily
once it's hard.
After everything is glued, and the glue fully hardened, remove any excess glue with a chisel as
shown. It's best to leave the glue until it's fully dried, so as not to risk spreading it over
a wider area while wiping it off. It really comes out of the corners with a chisel quite easily
once it's hard.
Adding the seat
The next part is the seat. The seat is really just a square piece of wood, 42.5 cm along the grain 42 cm across the grain, 16 mm thick, and the back corners cut out.
 The seat is a good opportunity to use all kinds of scraps, so long as they are over 43 cm in length
and over 16 mm in thickness. It's best to glue several scraps together first, then glue those sections
together. That way, there's fewer glue joints to get aligned at once.
The seat is a good opportunity to use all kinds of scraps, so long as they are over 43 cm in length
and over 16 mm in thickness. It's best to glue several scraps together first, then glue those sections
together. That way, there's fewer glue joints to get aligned at once.
The joints of the smaller pieces can be cleaned up with a jointer, but once the chair seat is assembled, unless you have a 20" planer, the joints need to be leveled by hand. I use a cabinet scraper for this job.
 To mount the seat, attach another piece to the front to back rails on either side.
Before mounting it, drill the holes for mounting the seat as large as you can without the screw head going through the
hole, to allow it some movement with changes in humidity. With the seat front to back being cross-grain,
it will shrink and expand with humidity more than the length wise piece it is screwed to, so there will
be some shifting in that direction.
To mount the seat, attach another piece to the front to back rails on either side.
Before mounting it, drill the holes for mounting the seat as large as you can without the screw head going through the
hole, to allow it some movement with changes in humidity. With the seat front to back being cross-grain,
it will shrink and expand with humidity more than the length wise piece it is screwed to, so there will
be some shifting in that direction.
This is also why the seat is screwed on, as opposed to glued on.
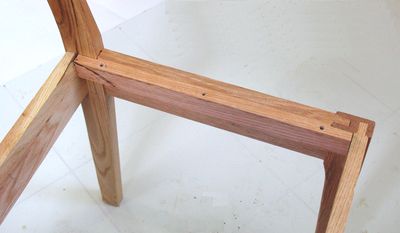
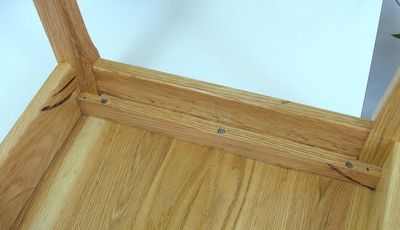
 Another view of the piece for mounting the seat. I cut it in such a way that it also glues
to the front and back legs, so it reinforces the leg joints a little bit while at it.
Another view of the piece for mounting the seat. I cut it in such a way that it also glues
to the front and back legs, so it reinforces the leg joints a little bit while at it.
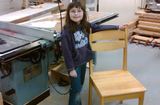
 And the seat mounted on the chair.
An aside note - notice the dark curved marks on parts of the chair. These are from the table saw, which, when stopping, will sometimes burn the wood. I had cut all the boards out of larger pieces of lumber, such as from firewood. I always orient the pieces so any visible damage is where it's less seen, such as the bottom inside. If there's marks on both sides, they need to be sanded off one side, or scraped off with a cabinet scraper.
Oops - if it wobbles
 With all care taken, one of my chairs, on assembly, still wobbled. It turned out that the seat
piece itself had a twist in it. When screwed to the chair frame, it forced the chair into a bit of a twist.
With all care taken, one of my chairs, on assembly, still wobbled. It turned out that the seat
piece itself had a twist in it. When screwed to the chair frame, it forced the chair into a bit of a twist.
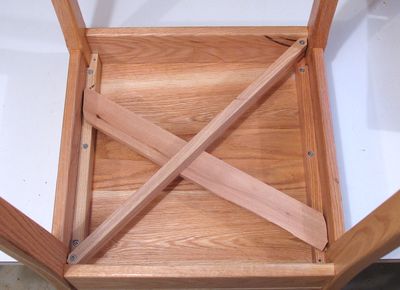
The conventional way to fix this would be to shorten some of the legs, but I didn't want to resort to that. So I put some diagonal bracing in the bottom of the chair, to counteract the twist and get it square. Basically, the piece going from bottom left to top right in the image at left is screwed in to press against the diagonal piece in the opposite direction, so there is pull on the top right and bottom left corners, and push on the other two corners from the other diagonal piece. The screws are tightened until the chair stops wobbling. And the beauty of it is, this is completely out of sight.
Dimensions / Plans
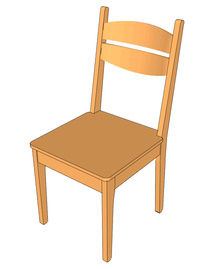 I drew some nice free plans for this chair.
It differs slightly from the ones I built in that the way the top and bottom edges of the
back rungs are curved, but I think it looks better that way.
I drew some nice free plans for this chair.
It differs slightly from the ones I built in that the way the top and bottom edges of the
back rungs are curved, but I think it looks better that way.
See also:
 Making kitchen chairs (2020)
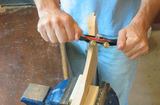 Carving the rungs for
these chairs
 Ken's kitchen chair
based on this one.
 Building stools
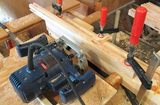 Mortising jig
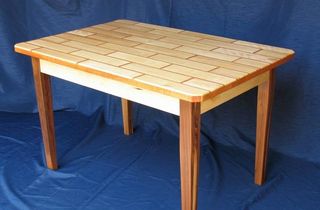 Building wooden tables
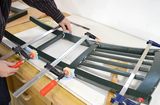 Repairing chairs
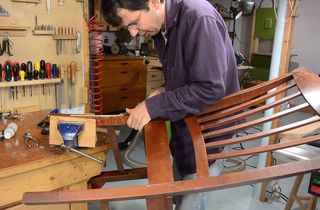
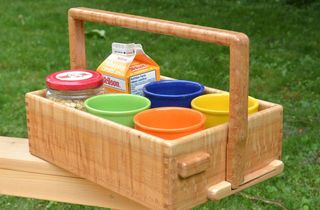 Flip handle ramekin tray
 Paper towel roll holder
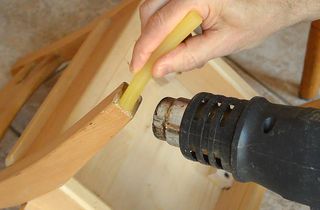 Stick felt pads to chairs with hot glue so they won't come off
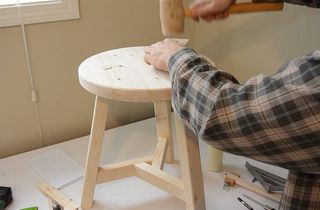 Building a 3-legged stool using the pantorouter
More Woodwork projects on my
Woodworking website
![]()