On going through the junk in my basement, I got annoyed at all the cardboard boxes in bad shape holding various parts and junk, and I figured I should build some wooden boxes to hold the stuff instead. Of course, if I build those boxes, I might as well make something to hold the boxes in an orderly fashion too. And hence this project.
I started by buying some shelving boards, 12" wide by 8' long from the Home Depot. These are unplaned rough lumber, but reasonably cheap. As long as you have your own thickness planer, they are a good deal.
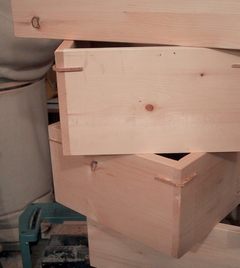 I made eight wooden boxes, each 52 by 35 cm, and 20 cm deep. For the sides, I used the boards,
for the bottoms, I used various pieces of thin plywood I already had. The corners
of the boxes I joined with a rabbet cut in the side, and the front just butting into
the rabbet. This joint is very easy to assemble, because the board just goes
right in the corner cut into the other board. No fingers to mesh, and no alignment issues.
Of course, its not as strong as a dovetail joint or a
box joint, but I don't want to
spend that kind of time.
I made eight wooden boxes, each 52 by 35 cm, and 20 cm deep. For the sides, I used the boards,
for the bottoms, I used various pieces of thin plywood I already had. The corners
of the boxes I joined with a rabbet cut in the side, and the front just butting into
the rabbet. This joint is very easy to assemble, because the board just goes
right in the corner cut into the other board. No fingers to mesh, and no alignment issues.
Of course, its not as strong as a dovetail joint or a
box joint, but I don't want to
spend that kind of time.
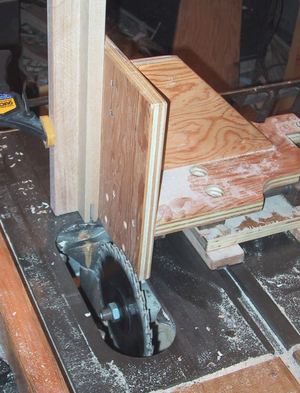
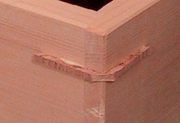 To add to the strength of the corners, I like to
reinforce the corners
by cutting a slot into them at 45 degrees, and then gluing a wood triangle into the slot.
I do this after the main box is assembled, so there is no alignment issues. I
stack three saw blades to do this.
After gluing the corner pieces in, I flush trim them.
To add to the strength of the corners, I like to
reinforce the corners
by cutting a slot into them at 45 degrees, and then gluing a wood triangle into the slot.
I do this after the main box is assembled, so there is no alignment issues. I
stack three saw blades to do this.
After gluing the corner pieces in, I flush trim them.
 Drawer cradle |
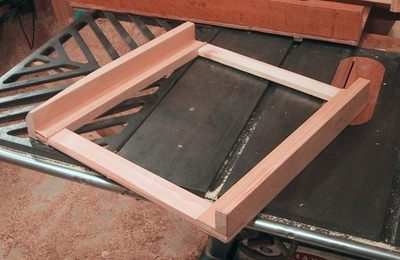
 Cutting lap joints on tenon jig |
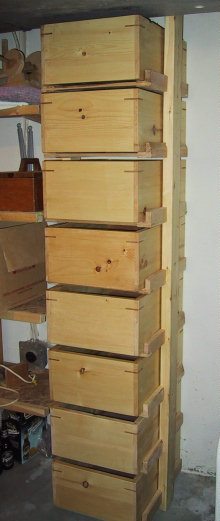
After building the eight boxes, I built eight 'cradles' to hold them - see picture. The sides of these are made of hardwood. I cut these out of pieces of birch firewood The cradles are intentionally shorter than the boxes. This way, I can grab the top front edge of a box as a handle for pulling the boxes out without the next cradle above getting in the way. More practically, the pieces of firewood I made these from were only so long!
The cradles consist of two L shaped rails that the boxes slide into, with cross pieces to make a square cradle (see picture above). The corners are joined with double lap joints. I used my tenon jig to make these.
 Cradle screwed into 2x4 upright |
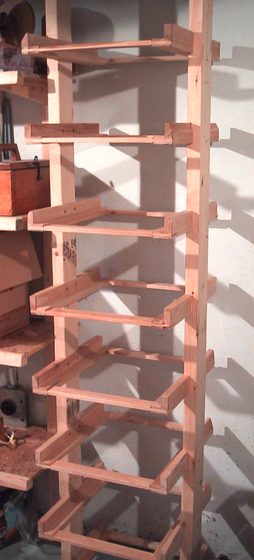 I then used two 8' 2x4 studs as uprights. I cut slots into them so that the sides of the
cradles would go through part of the 2x4s. This partially so that the cradle has something
to rest on, and partially to make the whole thing more compact. I then screwed the cradles in
between the two 2x4 uprights.
I then used two 8' 2x4 studs as uprights. I cut slots into them so that the sides of the
cradles would go through part of the 2x4s. This partially so that the cradle has something
to rest on, and partially to make the whole thing more compact. I then screwed the cradles in
between the two 2x4 uprights.
The whole rack without any boxes in it has kind of a neat look on its own.
Because this is for the basement, I just screwed the uprights onto the floor joists above. On the bottom end of the 2x4's, I screwed in a round headed sheet metal screw, and drilled two shallow holes into the concrete floor. The screw pokes into the hole in the floor and keeps everything aligned. The whole thing is quite sturdy - sturdy enough that I could climb it.
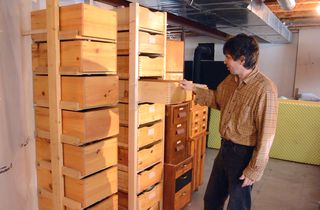
The satisfying part was to subsequently transfer my junk into the boxes and into the rack and do away with the cardboard boxes. Looks so much more organized now. Makes me feel good about having all this junk to put into this rack!
To my Woodworking website
 A similar rack of boxes (with video)
 Basement shelving
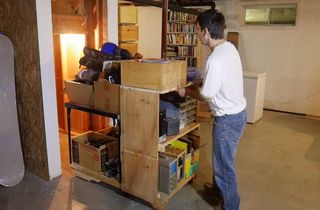 Under stairs storage on wheels
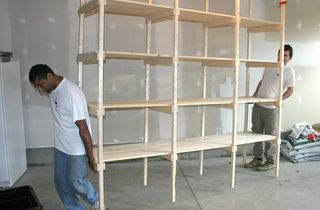 Building storage shelves
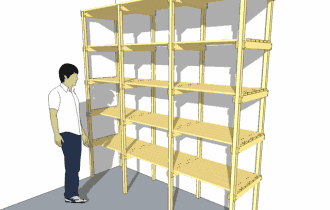 Storage shelf plans
 Building a storage
 Low bookshelf
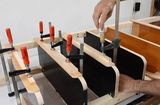 Pantry closet shelves
 Aiden's paddle board rack
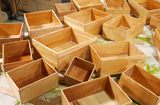 Small box joined boxes
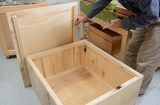 Building a Shipping